The recommended oil for the rear differential of a Can-Am Maverick is SAE 80W-90 synthetic gear oil.
If you own a Can-Am Maverick, it’s important to keep an eye on your rear differential oil. This oil helps keep your vehicle’s rear end functioning properly, and if it gets too low, it can cause some serious problems.
Fortunately, checking your differential oil level is a pretty easy process.
Just pop open the hood and locate the dipstick (it should be clearly labeled). Pull out the dipstick and wipe it clean with a rag. Then reinsert it into the differential and pull it back out again.
The oil level should be somewhere between the “full” and “add” marks on the dipstick. If it’s below the “add” mark, then you’ll need to add some oil until it reaches that level. Be careful not to overfill – stop adding oil when you reach the “full” mark.
What is the Best Oil to Use in a Can-Am Maverick Rear Differential
The best oil to use in a Can-Am Maverick rear differential is AMSOIL Synthetic Polyester UTV Transmission & Differential Fluid. This oil provides superior protection against wear and tear, while also delivering smooth, consistent shifting performance.
How Often Should I Change the Oil in My Can-Am Maverick Rear Differential
The Can-Am Maverick rear differential should be changed every 8,000 miles or 12 months, whichever comes first.
What are the Symptoms of a Bad Or Failing Rear Differential on a Can-Am Maverick
Rear differentials can fail for a number of reasons. The most common cause is lack of maintenance. Differentials need to be lubricated on a regular basis, and the fluid should be changed every few years.
If the differential isn’t properly lubricated, it will eventually seize up and fail.
Other causes of rear differential failure include damaged bearings or gears, excessive heat, and extreme cold. When a differential fails, it will usually make a loud noise (grinding or whining) and the vehicle will feel like it’s “dragging” when you drive it.
In some cases, the vehicle may not be able to move at all.
If you think your rear differential is failing, take it to a mechanic as soon as possible. They will be able to diagnose the problem and recommend the best course of action.
How Do I Check the Oil Level in My Can-Am Maverick Rear Differential
Before checking the oil level in your Can-Am Maverick rear differential, it is important to consult your owner’s manual. The specific process may vary slightly depending on the year and model of your vehicle. However, the general steps are as follows:
1. Park your vehicle on a level surface and set the parking brake.
2. Locate the rear differential dipstick. This is typically located near the rear axle or under the floorboard on the driver’s side of the vehicle.
3. Remove the dipstick and wipe it clean with a lint-free cloth or paper towel.
4. Reinsert the dipstick all the way into the fill opening and then remove it again to check the oil level. The oil should be at or just below the “full” line on the dipstick.
If it is not, add more oil until it reaches this level (be sure not to overfill!).
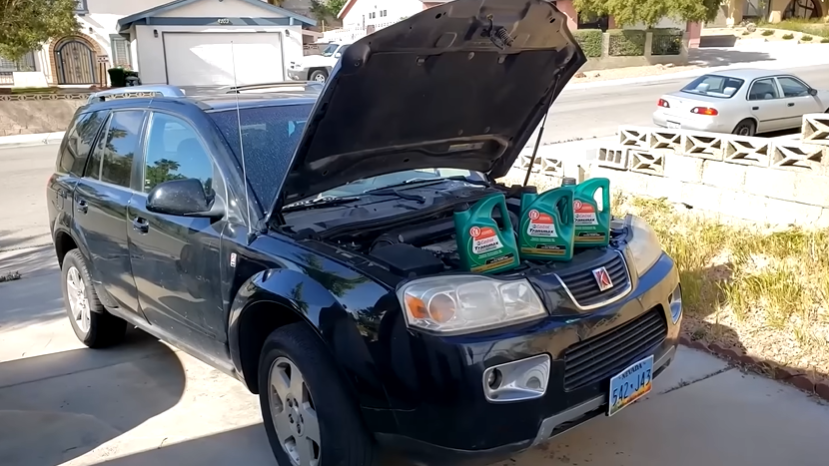
simple and easy rear diff oil change on a can am maverick
Can am Maverick Rear Differential Oil Capacity
The rear differential on the Can Am Maverick is one of the most important parts of the vehicle. It is responsible for providing power to the wheels and helps to keep the vehicle stable while in motion. The oil in the rear differential helps to lubricate the gears and keep them working properly.
It is important to check the oil level in the rear differential regularly and top it off if necessary.
The capacity of the rear differential on the Can Am Maverick is 2 quarts. When changing the oil, it is important to use a high quality synthetic oil that is specifically designed for use in ATVs.
This will help to protect the gears and extend the life of your differential.
Can-Am Maverick Rear Differential Oil Change
The Can-Am Maverick is a popular off-road vehicle that is known for its high performance and durability. However, like all vehicles, it requires regular maintenance to keep it running smoothly. One important maintenance task is changing the oil in the rear differential.
Differential oil helps to lubricate the moving parts in the differential and keeps them cool. Over time, the oil breaks down and becomes less effective. This can lead to increased wear on the components and eventually failure.
For this reason, it’s important to change the differential oil regularly according to the manufacturer’s recommendations.
Changing differential oil is a relatively simple task that can be done at home with basic tools. The first step is to remove the old oil from the differential using a drain pan and an Allen wrench.
Next, clean out any debris from inside the differential using a brush or compressed air. Once everything is clean, add new differential oil until it reaches the full line on the dipstick. Finally, replace the fill plug and tighten it securely before taking your Maverick out for a spin!
Can-Am Maverick 1000R Transmission Oil Capacity
The Can-Am Maverick 1000R is a sport utility UTV that was first introduced in 2013. It has a 999cc, V-twin engine and features four-wheel drive with front and rear locking differentials. The transmission oil capacity for the Maverick 1000R is 2.9 quarts (2.7 liters).
Can-Am X3 Rear Differential Oil
The Can-Am X3 is a versatile and powerful UTV that can take on any terrain. But like any vehicle, it needs regular maintenance to keep it running smoothly. One important task is changing the rear differential oil.
This may seem like a daunting task, but we’re here to walk you through it step by step. First, you’ll need to gather the following supplies:
-Can-Am X3 rear differential oil
-Funnel
-Rags or paper towels
-8mm hex socket wrench
-17mm socket wrench
Once you have everything gathered, park your X3 on level ground and engage the parking brake. Remove the cap from the fill plug (located on the left side of the differential) and drain the old oil into a catch pan.
Once all of the old oil has drained out, replace the fill plug and snug it up with the 8mm hex socket wrench.
Now it’s time to add new oil to the differential. Pour in about 2 quarts of new oil (we recommend using Can-Am branded oil) through the fill hole until it starts dripping out of the vent hole (located on the right side ofthe differential).
Once new oil starts dripping out ofthe vent hole, stop addingoil and replacethe vent plug. Snug up both plugs with atorque wrench setto 20 ft/lbs. That’s it!
You’ve successfully changedyour X3’s rear diffoil!
Conclusion
The Can-Am Maverick is a great machine, but like all machines, it needs maintenance. One of the most important things you can do for your Maverick is to change the oil in the rear differential. This may seem like a daunting task, but it’s actually quite easy.
Here’s a step-by-step guide to changing the oil in your Can-Am Maverick’s rear differential.


Leave a Reply