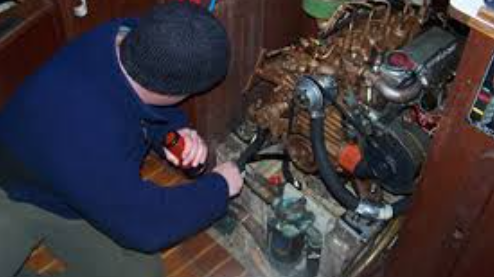
To change the oil on an inboard boat motor, locate the oil drain plug and unscrew it. Then, use a pump to remove the old oil from the reservoir. Once the old oil is removed, screw the drain plug back in and refill the reservoir with new oil.
- Assuming you have the appropriate tools and materials: 1
- Warm up the engine by running it for a few minutes
- This will help loosen the old oil and make it easier to drain
- Place a catch pan under the engine to catch the used oil
- Remove the oil fill cap/dipstick and unscrew the drain plug at the bottom of the engine using an appropriate wrench or socket
- Allow all of the old oil to drain out completely
- Once all of the oil has drained, screw the drain plug back in tight using an appropriate wrench or socket
- 5) Fill up with new oil through the dipstick tube, making sure not to overfill
- Wipe off any spilled oil and replace the fill cap/dipstick snugly
- 6) Start up your engine and check for leaks around the drain plug and fill cap/dipstick area before taking your boat out on the water again
Do Inboard Boat Engines Have Oil Drain Plugs?
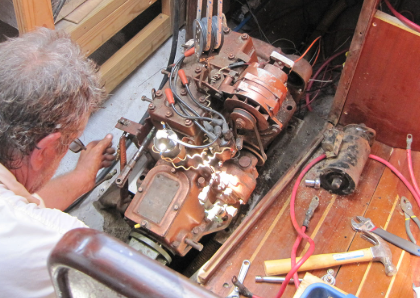
Most inboard boat engines have oil drain plugs. These plugs are located at the bottom of the engine, near the propeller shaft. The purpose of the oil drain plug is to allow the owner to drain the oil from the engine without having to remove the entire engine from the boat.
This can be a helpful feature if you need to change your oil frequently or if you want to be able to do it yourself without having to take your boat to a mechanic.
How Do You Drain Oil from Inboard Outboard?
Assuming you would like a blog post discussing how to drain the oil from an inboard/outboard engine, “How do you drain oil from an inboard outboard?” is a question we receive frequently here at the marina. Many boat owners are unsure of the process, thinking it may be more complicated than it is.
In this post, we’ll guide you through the steps of draining the oil from your inboard or outboard engine. Tools and Materials Needed: -Oil catch pan
-Funnel (optional) -Wrench or socket set (depending on your engine type) Step One: Locate the oil drain plug on your engine.
This is typically located near the bottom of the engine block, close to where the propeller shaft exits the engine. Step Two: Place your catch pan underneath the drain plug and loosen it with your wrench or socket set. Be careful not to over-tighten or strip the threads.
Step Three: Allow all the used oil to drain into your catch pan. If desired, you can place a funnel into the pan to make pouring easier later on. Once finished, retighten your drain plug securely.
And that’s it! You’ve now successfully drained the oil from your inboard/outboard engine.
How Do You Drain an Inboard Motor?
Assuming you need to know how to drain the water from an inboard motor, there are two types of inboard motors: freshwater and saltwater. If your boat is used in both types of water, it’s essential to flush the engine with freshwater after each use in saltwater.
This will prevent corrosion and deposits from building up in the engine. You can buy a flushing kit that attaches to your garden hose, or you can do it yourself with a bucket of freshwater. To drain the water from your engine, start by disconnecting the negative battery terminal.
This will prevent electrical shock while you’re working on the engine. Next, locate the drain plugs on the side of the block. There will be one plug for each cylinder.
Remove each plug and allow the water to drain completely. Once all the plugs have been removed, open the raw water intake valve and let any remaining water drain out. Finally, replace all of the plugs and reconnect the battery terminal.
What Kind of Oil Does an Inboard Outboard Motor Use?
An inboard-outboard motor, also known as a sterndrive, is a type of marine propulsion system that combines features of both an inboard and an outboard engine. In addition to the engine itself, a sterndrive unit typically includes the gearbox, driveshaft, and propeller. As the name suggests, sterndrives are designed to be mounted at the stern (back) of the boat.
One advantage of using an inboard-outboard motor is that it frees up space inside the boat’s hull, as there is no need for an external drive unit. This also makes it easier to install and maintain than traditional inboard engines. Another benefit is that they tend to be lighter and more compact than inboards, making them ideal for smaller boats.
In addition, most models come with integrated steering systems, and some even have reverse gears built in, making them even more convenient to use. The primary drawback of inboard outboards is that they are less efficient than traditional inboards in terms of fuel consumption. They are also generally more expensive than their counterparts.
However, if you’re looking for a versatile and easy-to-use marine propulsion system for your boat, an inboard-outboard motor may be just what you need.
Changing Oil In Inboard or I/O Boat | BoatUS
Boat Oil Change near Me
If you’re like most boat owners, you understand the importance of regularly changing your boat’s oil. But finding a qualified technician to do the job can be a challenge. That’s why we’ve compiled this list of the best boat oil change services near you.
No matter where you are in the country, there’s likely a reputable boat oil change service nearby. And with our handy search tool, finding one is easy. Enter your zip code, and we’ll take care of the rest.
Once you’ve found a few potential providers, be sure to review their feedback before making your final decision. After all, you want to be confident that your boat is in good hands. And that’s it!
With a little bit of research, you should have no trouble finding a qualified technician to change your boat’s oil.
How to Change Oil on 2-Stroke Outboard Boat Motor
If you have a 2-stroke outboard boat motor, it’s essential to change the oil regularly to keep it running correctly. Here’s how to do it: 1. Start by draining the old oil from the engine.
There should be a drain plug located somewhere on the lower part of the engine; consult your owner’s manual to find its exact location. Remove the plug and let all of the oil drain out into a catch pan. 2. Once all the old oil has been drained, replace the drain plug and refill the engine with new oil.
Again, please consult your owner’s manual for specific details on the type and amount of oil to use. 3. Start up the engine and let it run for a few minutes to allow the new oil to circulate throughout the engine. Then, shut down the engine and check that no leaks are coming from any of the seals or gaskets.
That’s all there is to changing the oil in a 2-stroke outboard boat motor! By following these simple steps, you’ll keep your engine running smoothly for years to come.
Boat Oil Change Pump
If you own a boat, sooner or later, you’ll have to change the oil. It’s not a difficult task, but it’s essential to do it correctly. That’s where a boat oil change pump comes in.
A boat oil change pump is a simple device that makes changing your boat’s oil quick and easy. Attach the pump to the oil fill port on your engine, then insert the hose into an empty container. The pump will do the rest, quickly and efficiently transferring the old oil out of your engine and into the container.
When shopping for a boat oil change pump, look for one that is durable and easy to use. You’ll also want to make sure that it is compatible with the type of oil used in your engine. With a good quality pump, changing your boat’s oil will be a breeze!
Change Boat Oil Every Other Year
As a boat owner, you know that routine maintenance is key to keeping your vessel in top shape. One important task that should be on your to-do list is changing the boat’s oil. But how often should this be done?
While some experts recommend changing your boat’s oil annually, others suggest doing it every other year. The primary reason for this is that today’s boats are equipped with more advanced engines and lubricants than in the past. This means that the oil lasts longer and doesn’t break down as quickly.
Of course, there are a few exceptions to this rule. If you use your boat frequently or put a lot of hours on it each season, you may need to change the oil more often. If you notice any issues with your engine, such as increased noise or smoke, it’s best to have it checked by a professional as soon as possible.
Changing your boat’s oil is a straightforward process that doesn’t require much time. However, it’s an essential part of maintaining your vessel, ensuring it continues to run smoothly for years to come.
Conclusion
Assuming you have a basic understanding of how to change your car’s oil, the process for changing oil on an inboard boat motor is very similar. The main difference is that you’ll be working in tight spaces and may need to remove some parts to access the oil filter. 1. Park your boat on a level surface and set the parking brake.
Chock the wheels so the boat doesn’t roll while you’re working. 2. Locate the oil drain plug and place a drain pan underneath it. Remove the plug and let the oil drain into the pan.
3. Once all of the oil has drained, replace the drain plug and tighten it securely. 4. Next, locate the oil filter and unscrew it using an appropriate tool (usually a wrench). Let all of the old oil drain out of the filter before screwing on a new one.
Hand-tighten only – do not over-tighten! 5. Fill your boat’s engine with fresh oil, using the type and amount specified in your owner’s manual.
Start upthe engineand check for leaks . If everything looks good ,you’re finished !

Leave a Reply