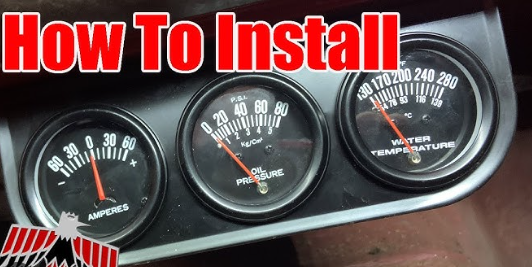
There are several methods for installing an oil temperature gauge in your car. The easiest way is to purchase a pre-made kit that includes everything you need. Another option is to buy the individual parts and assemble the gauge yourself.
Regardless of the method you choose, be sure to follow the instructions carefully to prevent damage to your vehicle.
- Find an appropriate location to install the oil temp gauge
- This will typically be on the dashboard near the driver’s side
- Make sure that the area is clean and free of debris before proceeding
- Use a tape measure to determine the size of the hole that will need to be cut
- Mark the area with a pencil or pen
- Use a drill to create a starter hole for the cutting process
- 6-7 Continue drilling until the hole is big enough to accommodate the oil temperature gauge
- 8-9 Inserting The Oil Temp Gauge And Connecting The Wiring
- 10-11 Securing The Oil Temp Gauge In Place
- 12-13 Testing The Installation
How Do You Hook Up an Oil Temperature Gauge?
If you’re a car enthusiast, you’re aware of the importance of monitoring your engine’s oil temperature. After all, oil is what keeps your engine running smoothly and cool. That’s why having an oil temperature gauge is essential for anyone who wants to keep their car in tip-top shape.
Here’s how to hook up an oil temperature gauge in your vehicle: First, locate the sensor that will be used to measure the oil temperature. This is typically located near the oil filter or at the base of the oil pan.
Once you’ve found it, clean any dirt or debris around it to ensure a good connection between the sensor and the gauge. Next, connect one end of the wire from the gauge to the sensor. Ensure that this connection is secure and free from any corrosion.
Then, route the other end of the wire to wherever you’ll be mounting the gauge itself. Again, ensure that this connection is secure and free from any potential issues. Finally, mount the gauge in a location where you can easily see it while driving.
It’s generally best to mount it near eye level so that you don’t have to take your eyes off the road for too long when checking it. Once everything is in place, turn on your ignition and check to ensure that everything is working correctly. If everything looks good, then you’re all set!
Knowing how to hook up an oil temperature gauge is essential for anyone who wants to keep their car running smoothly. By following these simple steps, you can ensure that your engine stays healthy and happy for years to come!

Where Do You Put an Oil Temperature Sensor?
An oil temperature sensor is usually located near the oil filter, in the engine block, or the oil pan. It is essential to place the sensor in a location that allows it to measure the oil’s temperature accurately.
Do I Need an Oil Temp Gauge?
If you are wondering whether or not you need an oil temperature gauge, the answer is likely no. Unless you frequently drive in extremely hot conditions or tow heavy loads, your engine’s oil will likely stay within a safe temperature range without one. However, suppose you frequently drive in hot conditions or tow heavy loads. In that case, an oil temperature gauge can be a valuable tool for ensuring your engine’s oil stays within its safe operating temperature range.
This can help to prevent damage to your engine and prolong its life.
How Do You Install a Oil Pressure Gauge Line?
Assuming you would like a blog post discussing the installation of an oil pressure gauge line: “How to Install an Oil Pressure Gauge Line.” An oil pressure gauge is a valuable tool that helps you monitor the health of your engine.
By monitoring your engine’s oil pressure, you can take proactive steps to maintain its longevity and performance. Installing an oil pressure gauge line is not a difficult task, but there are some essential things to keep in mind. In this article, we’ll guide you through the process step-by-step, ensuring you can install your new gauge correctly and safely.
Before getting started, it’s important to note that there are two types of oil pressure gauges: mechanical and electrical. If your vehicle has an electrical system, then you’ll need to purchase an electrical gauge (and corresponding sending unit). However, if your car has a mechanical system, then you can use either type of gauge.
Once you’ve determined which type of gauge you need, follow these steps to install it: 1. Mount the Oil Pressure Gauge in Your Desired Location. 2. Connect the Tubing from the Engine Block to the Gauge
GlowShift | How To Install A 7 Color Series Oil Temperature Gauge
Mechanical Oil Temp Gauge Install
If you’re a car lover, then you know the importance of monitoring your engine’s temperature. After all, it’s the heart of your vehicle! That’s why we’re going to show you how to install a mechanical oil temperature gauge.
This will help ensure that your engine is running at its optimal temperature and avoid any potential damage. First, let’s talk about where to place the sensor. It’s crucial to find a spot where the sensor can accurately measure the oil temperature.
We recommend placing it in the oil pan or near the oil filter. Once you’ve found the perfect spot, drill a hole and thread the sensor through it. Now it’s time to wire up the sensor.
The positive lead should be connected to a power source, while the negative lead should be connected to ground. We recommend using 14-gauge wire for this connection. Once everything is wired up, test your new gauge by starting up your engine and letting it idle for a few minutes.
You should see the needle move as the engine warms up. If everything looks good, then congratulations! You’ve successfully installed a mechanical oil temp gauge on your own!
How to Install Oil Temp Gauge Wrx
If you want to monitor your engine’s oil temperature, installing an oil temperature gauge is a great way to do so. Here’s a quick guide on how to install one in your Subaru WRX. 1. Begin by disconnecting the negative battery terminal.
This will help prevent any electrical shorts during the installation process. 2. Next, locate the sender unit for the oil temp gauge. It’s generally located near the oil filter housing or on the side of the engine block.
Once you’ve found it, unscrew the sending unit and screw in the adapter that came with your gauge kit. 3. With the adapter installed, you can now screw in the temp gauge itself. Be sure to route the wiring away from any moving parts or hot surfaces to avoid any potential damage.
4. Finally, reconnect the negative battery terminal and start your engine to test the new gauge.
Temperature Gauge Installation on Pipe
When installing a temperature gauge on a pipe, several factors should be taken into consideration. First, you need to decide on the type of sensor or gauge to be used. There are many different types of temperature sensors and gauges available on the market, so it is essential to select the one that best suits your needs.
Second, you need to determine where on the pipe the sensor or gauge will be installed. The location of the sensor or gauge will depend on the type of sensor or gauge you select. Third, follow the manufacturer’s instructions to install the sensor or gauge.
Failure to properly install the sensor or gauge can result in inaccurate readings or even damage to the equipment.
Oil Temperature Gauge in Aircraft
An oil temperature gauge is a vital component of any aircraft. It helps the pilot monitor the engine oil temperature and ensure it remains within safe operating limits. The oil temperature gauge is usually located on the instrument panel, near the tachometer.
The standard operating range for engine oil temperature is between 160°F and 220°F. If the oil temperature gets too high, it can cause severe damage to the engine. That’s why pilots need to monitor their gauges and take action if necessary.
For example, if the oil temperature starts to climb above 220 degrees, the pilot may need to reduce power or land as soon as possible. Aircraft manufacturers typically include an oil temperature gauge in their airplanes because they recognize the importance of this feature for safety. So, if you’re ever flying in a plane, be sure to check the gauges and ensure everything appears normal.
Conclusion
If you’re looking to monitor your engine’s temperature, installing an oil temperature gauge is a great way to do it. Here’s a step-by-step guide on how to install one: 1. Start by finding a suitable location for the gauge.
It should be within easy view, but not obstructing any controls. 2. Once you’ve found a suitable spot, mark the center of the hole that needs to be drilled. 3. Using a drill bit slightly smaller than the diameter of the mounting bracket, drill a hole at the marked location.
4. Next, take the supplied O-ring and lubricate it with some oil before placing it over the end of the sensor probe. This will help create a seal when installed. 5. Now thread the sensor into place until it’s snug against the O-ring.
Be careful not to overtighten, as this could damage the threads or cause the sensor probe to break. At this point, you can also attach any necessary wiring for power and grounding. Ensure all connections are secure and free from corrosion before proceeding.
If everything looks good, go ahead and reinstall any panels or covers that were removed during installation.


Leave a Reply