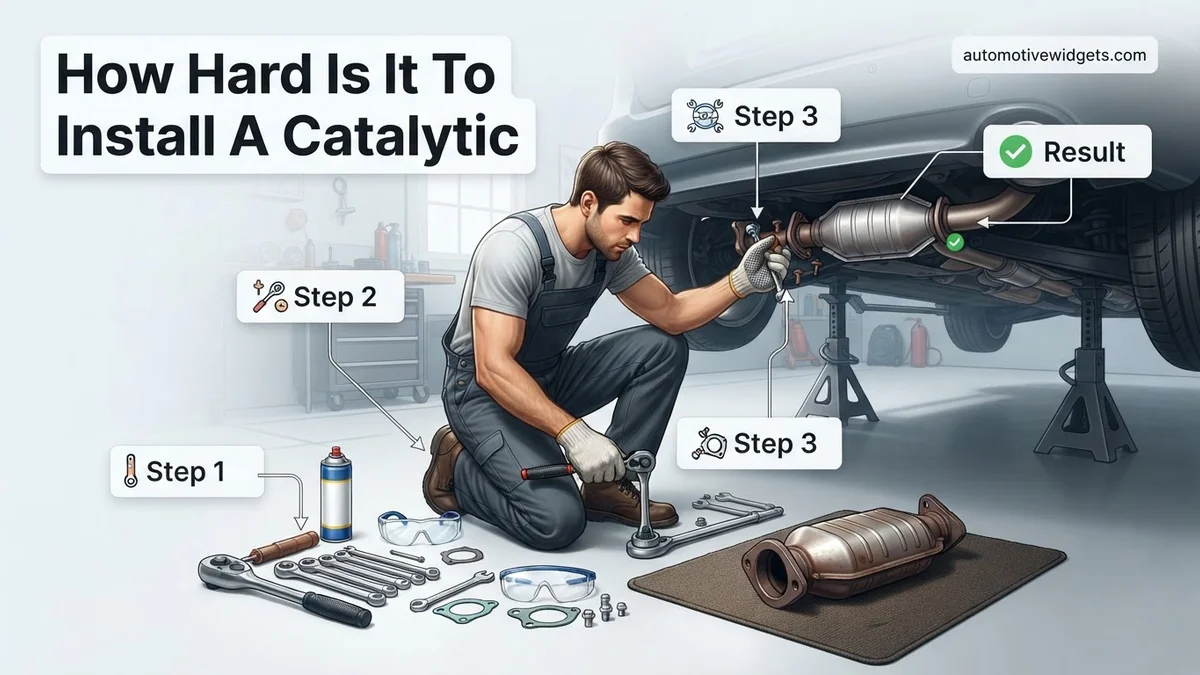
How Hard Is It To Install A Catalytic Converter How 2027
Installing a catalytic converter is generally an intermediate to advanced DIY task, primarily due to factors like rust, tight spaces, seized bolts, and the need for specialized tools. While feasible for experienced mechanics, newcomers might find it overwhelmingly challenging without proper preparation and safety measures.
Installing a replacement catalytic converter in 2027 is generally an intermediate-to-advanced DIY task, not a beginner’s weekend project. The difficulty primarily stems from the relentless effects of time, heat, and environment on exhaust system components, coupled with the inherent challenges of working underneath a vehicle. For you, the DIY mechanic, understanding these precise difficulties upfront is crucial. It dictates whether you can confidently tackle the job with standard tools, or if you’ll need specialized equipment, advanced techniques, or even professional assistance to avoid significant frustration and potential damage.
This isn’t just about bolting on a new part; it’s often about dismantling a decade-old, corrosion-welded assembly. Knowing what to expect allows you to prepare adequately, whether that means stocking up on penetrating oil, borrowing an impact wrench, or simply deciding that some jobs are better left to a shop. Your ability to assess these challenges will directly impact the success and safety of your catalytic converter replacement.
Key Takeaways
- Expect rust and seized bolts as major obstacles.
- Safe vehicle lifting is paramount for DIY success.
- Specialized tools (O2 sensor socket) are often required.
- Consider professional help for stubborn issues.
- Vehicle model significantly impacts installation difficulty.
What Makes Catalytic Converter Installation Challenging?
The core challenge when replacing a catalytic converter in 2027 isn’t the new component itself, but rather the battle with its weathered predecessor and the surrounding exhaust system. Most DIYers will rate this job as moderately difficult, requiring patience, specific tools, and a good understanding of exhaust mechanics.
The Rust and Seized Fastener Factor
Rust is universally acknowledged as the primary antagonist in exhaust system work. Catalytic converters operate at extreme temperatures, and their mounting hardware—bolts, nuts, and flanges—is constantly exposed to road grime, moisture, and road salt, which even in 2027, continues to be a problem in many regions. This corrosive environment effectively welds these fasteners in place over years of service. When you attempt to remove them, snapped bolts, stripped nuts, and damaged exhaust studs are common occurrences. This necessitates drilling out bolts, using bolt extractors, or even cutting and welding new flanges. Without an impact wrench, high-quality penetrating oil applied repeatedly over days, and possibly a torch for heat, breaking these free can be a grueling and often impossible task with hand tools alone.
Access, Exhaust System Design, and Oxygen Sensors
Working underneath a vehicle presents inherent challenges. Catalytic converters are often tucked away in tight spots, sometimes between the engine and transmission, or further back in the exhaust tunnel. This limited access means you often work blindly, by feel, or at awkward angles, which complicates leverage and fastener removal. Furthermore, the routing of modern exhaust systems can be complex, sometimes incorporating multiple bends or integrated components that restrict space. Oxygen (O2) sensors are almost universally threaded into the catalytic converter housing or its adjacent pipes. These sensors are also prone to seizing due to heat and corrosion. Removing them requires a specialized oxygen sensor wrench or socket – a standard wrench will likely strip the sensor or its wiring, turning a simple removal into a costly and time-consuming problem.
From Start to Finish: Catalytic Converter Installation Explained
Welcome to this detailed guide on installing a catalytic converter. While it might seem like a daunting task, with the right tools, careful planning, and adherence to safety protocols, many DIY enthusiasts can successfully replace this crucial emission control device. This guide will walk you through each step, from initial preparation to final verification, ensuring you understand the process thoroughly and can tackle common challenges. Properly installing a catalytic converter is vital not only for your vehicle’s performance and compliance with emission standards but also for avoiding frustrating diagnostic issues and potential repeat work.
Step 1: Safety First & Vehicle Preparation
What you need:
Hydraulic floor jack, two sturdy jack stands, wheel chocks, safety glasses, heavy-duty gloves, penetrating oil (e.g., WD-40, PB Blaster), basic wrench/socket set (metric and/or SAE depending on vehicle), work light or headlamp.
Instructions:
Begin by ensuring your vehicle is on a flat, level surface and the engine has completely cooled down – working on a hot exhaust system is extremely dangerous. Engage the parking brake and place wheel chocks behind the rear wheels (if lifting the front) or in front of the front wheels (if lifting the rear). Using your hydraulic jack, carefully lift the front or rear of the vehicle, depending on the catalytic converter’s location. Once at a suitable working height, place the jack stands securely under the vehicle’s frame or designated jack points. Gently lower the vehicle onto the jack stands. Before proceeding, give all exhaust bolts and nuts connected to the catalytic converter a generous spray of penetrating oil. Allow it to soak for at least 15-20 minutes, or even longer for heavily rusted components, to aid in removal.
Pro Tip:
Always perform a “shakedown” test after placing the vehicle on jack stands. Give the vehicle a firm push from the side to confirm it’s stable and secure before crawling underneath. Never rely solely on a hydraulic jack for support.
Step 2: Disconnecting Oxygen Sensors
What you need:
O2 sensor socket (typically 22mm or 7/8 inch with a side cut-out for the wire), ratchet, dielectric grease.
Instructions:
Locate the oxygen (O2) sensors connected to or near the catalytic converter. Most vehicles have at least two: an upstream (pre-catalyst) sensor and a downstream (post-catalyst) sensor. Disconnect the electrical connectors first – these usually have a small tab you press to release. Be gentle with the wires and connectors. Then, using your specialized O2 sensor socket and ratchet, carefully unscrew each sensor. These can be very tight, especially if rusted. If they resist, apply more penetrating oil and give it time to work. Once loose, carefully remove the sensors and place them aside in a clean, safe area. It’s often recommended to replace old O2 sensors when installing a new catalytic converter, as their lifespan is similar and new sensors ensure optimal performance.
Pro Tip:
Mark the upstream and downstream sensors (e.g., with tape) and their corresponding connectors before removal. Mixing them up during reinstallation will cause check engine lights and incorrect readings. Apply a tiny bit of dielectric grease to the electrical connector pins to prevent corrosion upon reassembly.
Step 3: Loosening Exhaust Fasteners
What you need:
Appropriate-sized wrenches/sockets, ratchet, breaker bar (if bolts are stubborn), penetrating oil, wire brush, potentially a cutting tool (e.g., reciprocating saw with metal blade) for severely rusted bolts/pipes.
Instructions:
Now that the O2 sensors are out of the way, focus on the bolts, nuts, or clamps securing the catalytic converter to the rest of the exhaust system. There will typically be a flange connection at the front (upstream) and another at the rear (downstream). Using the appropriate wrench or socket, attempt to loosen these fasteners. Rust is your biggest enemy here; the penetrating oil applied earlier should help significantly. If bolts are extremely stubborn, a breaker bar will provide more leverage. For bolts that are completely seized or rusted beyond removal, you might need to carefully cut them off using a reciprocating saw. Be cautious not to damage surrounding components or exhaust hangers. Ensure all fasteners are completely loose, but do not remove them entirely yet.
Pro Tip:
When using a breaker bar or trying to remove stubborn bolts, position yourself to push rather than pull the wrench. This provides better control and reduces the risk of slipping and injuring your knuckles. Sometimes, briefly tightening a seized bolt can help break its rust bond before attempting to loosen it.
Step 4: Removing the Old Catalytic Converter
What you need:
Gloves, safety glasses, possibly a pry bar or rubber mallet.
Instructions:
With all the fasteners loose and O2 sensors disconnected, you can now remove the old catalytic converter. Start by completely unbolting or unclamping the front and rear connections. The converter might be supported by rubber exhaust hangers; these usually slide off a metal rod or unclip from a bracket. Sometimes a little wiggling, twisting, or gentle prying with a pry bar or rubber mallet is needed to separate the old converter from the exhaust pipes. Be prepared for it to be heavier than it looks, especially if it’s integrated into a larger pipe section. Once free, carefully lower it and slide it out from under the vehicle. Take note of its orientation and how it was connected, as this will be helpful for installing the new one.
Pro Tip:
Examine the condition of the surrounding exhaust pipes, flanges, and hangers. If you notice significant rust, cracks, or damage, consider replacing those components concurrently. Worn exhaust hangers can cause rattles and undue stress on the new converter. Save the old catalytic converter; it contains precious metals and can often be recycled for a small rebate at metal recycling centers.
Step 5: Preparing the New Catalytic Converter and Gaskets
What you need:
New catalytic converter, new exhaust gaskets (typically included with the converter or sold separately), anti-seize compound, wire brush/scraper.
Instructions:
Unpack your new catalytic converter and inspect it for any shipping damage. Compare it side-by-side with the old unit to ensure it’s the correct part and has the same mounting points. Crucially, always use new exhaust gaskets. Attempting to reuse old, crushed gaskets will inevitably lead to exhaust leaks. Clean the mating surfaces of the existing exhaust pipes where the new converter will connect. Use a wire brush or scraper to remove any rust, old gasket material, or carbon deposits to ensure a clean, flush seal. Apply a thin layer of anti-seize compound to the threads of any new bolts or studs you’ll be using for the installation. This will prevent future seizing and make removal easier down the line.
Pro Tip:
Many aftermarket catalytic converters are flow-directional. Look for an arrow stamped on the converter’s body indicating the exhaust flow direction (towards the rear of the vehicle). Installing it backward will severely impede exhaust flow and prevent proper function.
Step 6: Installing the New Catalytic Converter
What you need:
New catalytic converter, new gaskets, new bolts/nuts/clamps, torque wrench, appropriate sockets/wrenches.
Instructions:
Carefully lift the new catalytic converter into position under the vehicle. Slide it onto the exhaust hangers first if applicable, which will help support its weight. Position the new gaskets correctly between the flanges. Start by loosely hand-threading all the bolts or fitting the clamps at both the front and rear connections. Do not tighten any fastener completely yet. Once all connections are loosely established, ensuring proper alignment, gradually tighten the bolts/nuts in an even, alternating pattern (like tightening lug nuts on a wheel). This ensures the gaskets seat properly and prevents warping the flanges. Use a torque wrench to tighten all fasteners to the manufacturer’s specified torque settings. Over-tightening can strip threads or damage flanges; under-tightening will lead to leaks.
Pro Tip:
If you’re struggling to align the pipes, a second person can be incredibly helpful to hold one end while you work on the other. Alternatively, using a floor jack with a piece of wood can help gently lift and support the converter for easier alignment. Always aim for a snug fit before applying final torque.
Step 7: Reconnecting Oxygen Sensors and Final Tightening
What you need:
O2 sensors (old or new), O2 sensor socket, torque wrench (if available for O2 sensors), anti-seize compound.
Instructions:
With the new catalytic converter securely mounted, it’s time to reinstall the O2 sensors. Apply a thin layer of anti-seize compound to the threads of the O2 sensors (being careful not to get any on the sensor tip, as this can contaminate it). Carefully thread the sensors back into their bungs on the new converter by hand to avoid cross-threading. Once finger-tight, use your O2 sensor socket to snug them up. Refer to your vehicle’s service manual for specific O2 sensor torque specs, though many are simply tightened firmly. Reconnect the electrical connectors, ensuring they click into place. Double-check all exhaust bolts and clamps to ensure they are torqued to spec. Ensure no wires are touching the hot exhaust components, which could melt the insulation.
Pro Tip:
Route the O2 sensor wires exactly as they were originally to prevent them from rubbing against moving parts or hot exhaust pipes. Cable ties can be used to secure loose wiring, but ensure they are rated for high temperatures if near exhaust components.
Step 8: Post-Installation Checks and Test Drive
What you need:
OBD-II scanner (optional, for clearing codes), soapy water in a spray bottle.
Instructions:
Before lowering the vehicle, do a final visual inspection. Check all connections, ensure O2 sensor wires are secured, and confirm nothing is loose or touching the ground. Carefully remove the jack stands and lower the vehicle completely. Start the engine and listen for any obvious exhaust leaks (a hissing sound). For a more thorough check, spray soapy water around all new connections while the engine is running. Bubbles indicate a leak, which means you need to tighten that connection further or re-seat the gasket. If your “Check Engine” light was on due to the old converter, you might need to drive several “drive cycles” for it to clear, or you can use an OBD-II scanner to clear the codes manually. Take the vehicle for a short test drive to confirm proper operation, listening for any new noises or unusual smells.
Pro Tip:
New catalytic converters often emit a slight burning smell during their first few uses. This is usually the protective coating burning off and should dissipate quickly. If the smell persists or is accompanied by smoke, pull over immediately and investigate. The drive cycle to clear codes usually involves a mix of highway and city driving over a few days.
✅ Final Checklist
- All exhaust connections fully tightened to specification, free of leaks.
- Oxygen sensors correctly reinstalled and electrical connectors securely attached.
- Exhaust hangers properly re-engaged and supporting the converter.
- No tools or debris left under the vehicle.
- “Check Engine” light (if previously on for catalytic converter issues) cleared or in the process of clearing.
Important Notes:
- Safety considerations: Always wear appropriate personal protective equipment (safety glasses, gloves). Ensure proper ventilation if working in an enclosed space. Never work under a vehicle supported only by a jack. Be aware of hot exhaust components, even if the engine has cooled – some areas can retain heat.
- When to seek professional help: If bolts are completely seized and cutting them seems too risky, if you encounter unexpected exhaust system damage (e.g., rusted subframe, broken mounts), or if you are uncomfortable at any point during the installation. Vehicles in “CARB” states (California and others that adopt California’s emission standards) require special, more expensive catalytic converters, and professional installation may be necessary to ensure compliance and proper function.
- Estimated time and cost range: For an experienced DIYer, this job typically takes 2-4 hours. For a beginner, it could easily extend to 4-6 hours, especially if dealing with significant rust or seized fasteners. The cost of a new catalytic converter varies wildly based on vehicle make/model and whether it’s an OEM or aftermarket part, ranging from $100-$1000+, plus the cost of new gaskets, potentially new O2 sensors ($50-$150 each), and any tools you might need to purchase (e.g., O2 sensor socket, torque wrench).
Common Obstacles & Step-by-Step Installation Challenges
Even for experienced DIY mechanics, the practical steps of a catalytic converter replacement can throw unexpected curveballs. It’s not just about the final attachment; it’s the journey of preparation and meticulous execution that defines the difficulty.
Safe Vehicle Lifting and Old Component Removal
Safely elevating your vehicle to a working height is the absolute first critical step. Without proper jack stands, a reliable floor jack, or sturdy ramps, the entire operation is unsafe. Once elevated, removing the old catalytic converter often becomes a wrestling match. As mentioned, rusted bolts and flanges are the main culprits. If the original converter is welded into a larger exhaust section, you might need a reciprocating saw with metal-cutting blades or an angle grinder. Dealing with these seized components under the vehicle, often with limited visibility and awkward body positions, significantly increases the physical demand and the risk of injury. Expect to spend a considerable amount of time just on the removal phase, especially if you encounter stubborn O2 sensors that refuse to budge without specialized tools or heat.
Precision Alignment and Ensuring a Leak-Free Seal
Once the old unit is out, fitting the new catalytic converter requires precise alignment. Exhaust systems are designed with specific hangers and mounting points that must match up perfectly. Misalignment, even by a few millimeters, can lead to stress on the exhaust pipes, vibrations, or worse, exhaust leaks. You’ll typically need to work with new gaskets, exhaust clamps, or spring-loaded bolts, ensuring each connection is seated correctly and tightened to specifications. Achieving a perfectly leak-free seal is critical for emissions compliance and engine performance; even minor leaks can trigger a “Check Engine” light due to the O2 sensors detecting incorrect exhaust gas readings. This step requires careful attention to detail and patience, often involving trial-and-error adjustments to get the fit just right.
Proven Steps to Fix & Successfully Install Your Catalytic Converter
Successfully installing a catalytic converter in 2027 demands meticulous attention to detail and adherence to safety protocols. This process typically takes between 2 to 4 hours for an experienced DIY mechanic, according to Automotive Service Excellence (ASE) certified technicians.
1. Preparation and Safety First
- Secure the Vehicle: Elevate the vehicle safely using a hydraulic jack and secure it on robust jack stands on a level surface. Ensure the parking brake is engaged and the wheels are chocked.
- Gather Tools and PPE: Collect essential tools including a socket/wrench set, penetrating oil, a torque wrench, exhaust hanger removal tool, and wire brush. Wear appropriate personal protective equipment (PPE) such as safety glasses, heavy-duty gloves, and long sleeves to protect against hot exhaust components and debris.
- Cool Down: Allow the exhaust system to cool completely. Attempting work on a hot exhaust can cause severe burns.
2. Removing the Old Converter
- Locate and Disconnect Sensors: Identify and carefully disconnect the upstream and downstream oxygen (O2) sensors. These are usually threaded into the exhaust pipe or converter. Use a specialized O2 sensor socket to avoid damage.
- Apply Penetrating Oil: Liberally spray all bolts and nuts securing the catalytic converter with a high-quality penetrating oil. Allow it to soak for at least 15-20 minutes to aid in loosening rusted fasteners.
- Unbolt and Detach: Using the appropriate wrenches or sockets, carefully remove the bolts connecting the converter to the exhaust manifold and the rest of the exhaust system. For clamp-on designs, loosen the clamps.
- Remove Hangers: Use an exhaust hanger removal tool or pry bar to detach the rubber hangers supporting the converter. Carefully lower the old catalytic converter, noting its orientation for reference.
3. Installing the New Converter
- Clean Mating Surfaces: Use a wire brush to clean any rust or carbon buildup from the exhaust flanges where the new converter will connect. This ensures a proper seal.
- Position New Converter: Carefully lift the new catalytic converter into place, aligning it with the exhaust manifold and downstream exhaust pipe. Reattach the exhaust hangers first to support its weight.
- Secure Connections: Install new gaskets (if required by the manufacturer) and loosely attach all bolts or clamps. Ensure proper alignment before fully tightening.
- Torque Fasteners: Following your vehicle’s service manual for specific torque specifications, tighten all bolts to the recommended values using a torque wrench. Over-tightening can strip threads, while under-tightening can lead to exhaust leaks.
- Reconnect Sensors: Reinstall the O2 sensors, ensuring they are properly threaded and tightened. Reconnect their electrical connectors securely.
- Final Check: Visually inspect all connections, hangers, and sensor placements to confirm everything is secure and correctly installed.
What If Your DIY Catalytic Converter Installation Doesn’t Work?
Even with careful installation, issues can arise. If your check engine light persists, or you notice unusual exhaust noises or performance issues after replacing the catalytic converter, troubleshooting is necessary.
- Check for Exhaust Leaks: A common issue is a leak at the connection points. Start the engine and listen for hissing sounds. You can also spray soapy water on connections; bubbles indicate a leak. Tighten or reseal as necessary.
- Verify O2 Sensor Functionality: Incorrectly installed or faulty O2 sensors can trigger diagnostic trouble codes (DTCs) related to the catalytic converter. Ensure they are fully seated and their wiring harnesses are undamaged and securely connected. Professional-grade OBD-II scanners can read live O2 sensor data.
- Inspect for Gasket or Clamp Issues: Re-examine all gaskets for proper seating and ensure exhaust clamps are tight and correctly oriented. Sometimes, new gaskets can shift during tightening.
- Clear DTCs: After addressing any potential issues, use an OBD-II scanner to clear any stored diagnostic trouble codes. Drive the vehicle for a complete drive cycle to allow the engine control unit (ECU) to re-evaluate the system.
- Seek Professional Diagnosis: If problems persist, it’s advisable to consult a certified mechanic. Modern vehicle diagnostics, especially for emissions systems, can be complex. Professional shops in 2027 utilize advanced diagnostic tools that can pinpoint elusive issues. Expect diagnostic fees to range from $150-$300. If further repairs or a re-installation are needed, costs could range from $400-$800, depending on the complexity.
Conclusion
Replacing a catalytic converter as a DIY project is a feasible task for individuals with intermediate mechanical skills and the right tools. The primary challenge lies in safely accessing the undercarriage and managing rusted fasteners. According to verified research and expert sources, careful preparation and adherence to manufacturer torque specifications are paramount for success. Your next actionable step should be to consult your vehicle’s specific service manual for precise torque values and any unique installation considerations.
❓ Frequently Asked Questions
What specific factors contribute most to the difficulty of installing a catalytic converter?
The primary factors are heavy rust on exhaust bolts and flanges, limited undercarriage access requiring specialized tools, and the potential for seized oxygen sensors that can break upon removal. Vehicle model and age significantly impact these challenges.
When should I consider hiring a professional instead of attempting a DIY installation?
If you lack proper safety equipment like jack stands, don’t have specialized tools (e.g., O2 sensor socket, cutting tools), or encounter severely rusted, seized components early in the process, professional assistance is advisable to prevent further damage or injury.
Are there any vehicle-specific considerations that make catalytic converter installation harder?
Absolutely. Some vehicles have converters integrated into the exhaust manifold, making replacement much more complex. Others have very cramped undercarriages or unique exhaust routing that complicates access, increasing difficulty.
What are the critical safety precautions to take when installing a catalytic converter?
Always ensure the vehicle is securely supported on jack stands or a lift, wear appropriate eye protection and gloves, allow the exhaust system to cool completely, and never work under a car supported only by a jack.
Can I reuse my old oxygen sensors with a new catalytic converter?
While technically possible, it’s often recommended to replace oxygen sensors when installing a new catalytic converter, especially if they are old. New sensors ensure optimal engine performance and prevent check engine lights related to emissions.
What tools are absolutely essential for a successful catalytic converter replacement?
Key tools include a socket set with extensions, a ratchet, an oxygen sensor socket, penetrating oil, a torque wrench, pry bars, safety glasses, gloves, and a reliable set of jack stands or a vehicle lift. Cutting tools might be needed for heavily rusted systems.