Can a Car Pass Inspection with Engine Light On? 2027
An illuminated Check Engine Light (CEL) almost always leads to an inspection failure, especially for emissions-based tests, varying by state laws and the specific code. Understanding your state’s regulations and addressing the underlying issue behind the CEL is crucial for a successful vehicle inspection. Practical steps like diagnosis and completing drive cycles are essential before re-inspection.
Will your car automatically fail its state-mandated vehicle inspection in 2027 just because the “Check Engine” light (CEL) is glowing on your dashboard? The straightforward answer for most drivers in most regions is: yes, almost certainly. A lit Check Engine Light is a direct indicator to inspectors that your vehicle’s emissions or other crucial systems are malfunctioning. Ignoring it means you’re not just risking potential damage to your vehicle, but you’re also guaranteeing a failed inspection, incurring re-inspection fees, and delaying your ability to legally operate your car.
This isn’t merely about a dashboard light; it’s about your vehicle’s On-Board Diagnostics II (OBD-II) system reporting a fault that directly impacts emissions control, safety, or overall vehicle health. As vehicle regulations become stricter and technology more integrated, especially by 2027, inspection stations are equipped to instantly detect these issues. Understanding why this happens and what your options are becomes critical to navigate the inspection process efficiently.
Key Takeaways
- State laws dictate CEL inspection failure likelihood.
- Emissions tests frequently fail with an active CEL.
- Readiness monitors must be ‘SET’ for passing.
- Diagnose CEL codes before inspection attempts.
- Perform drive cycle after repairs are complete.
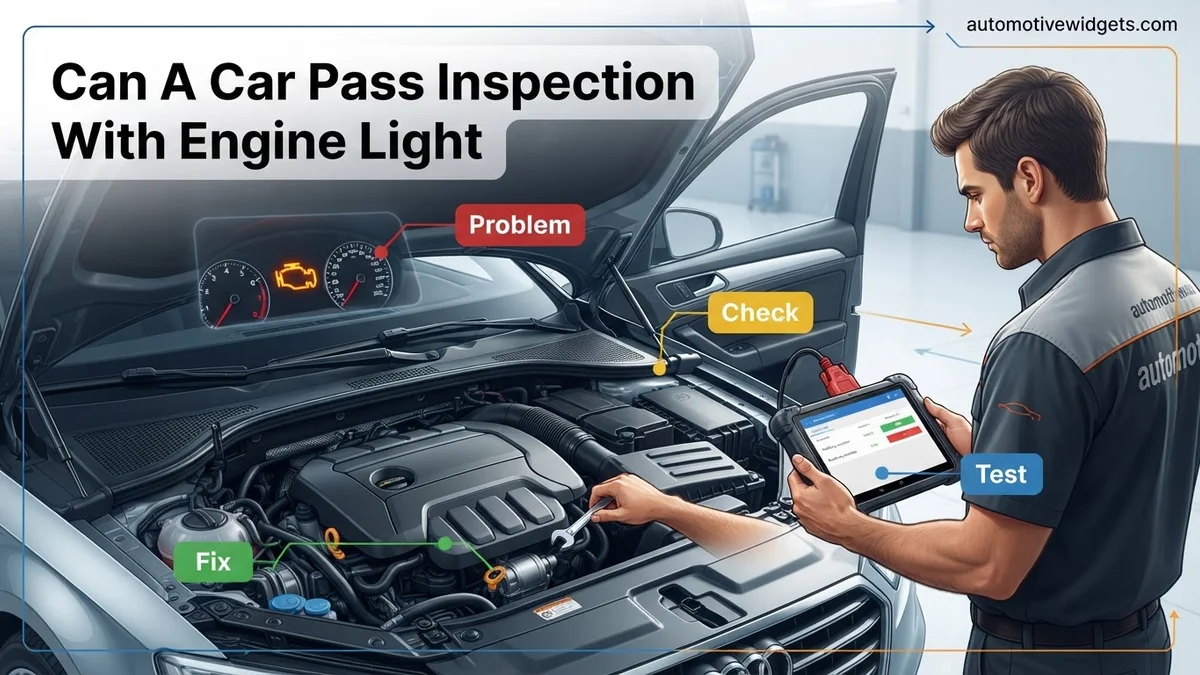
Can a Car Pass Inspection with a Check Engine Light On? The Immediate Answer
State-Specific Regulations and OBD-II Readiness
In 2027, nearly every state that mandates emissions or comprehensive safety inspections (including California, New York, Texas, Massachusetts, Colorado, and many others) will issue an automatic failure for any vehicle presenting an active Check Engine Light. Inspectors don’t just visually check your dashboard; they connect specialized scanning tools directly to your car’s OBD-II port, which has been standard on all vehicles since 1996. This scanner directly queries your vehicle’s computer for Diagnostic Trouble Codes (DTCs) and the status of its “readiness monitors.” An active CEL signifies a stored DTC, which is a red flag for the inspection system.
While some extremely rural regions or states focusing purely on visual safety might have rare exceptions, these are increasingly uncommon for vehicles manufactured post-2000. Your local Department of Motor Vehicles (DMV) or state environmental agency website remains the definitive source for your specific jurisdiction’s 2027 requirements. Do not assume your state is an exception; prepare for a fail if your CEL is on.
Emissions Testing and Readiness Monitors
Even if you’re tempted to simply clear the Check Engine Light just before your inspection, this tactic often leads to another type of failure: “not ready” readiness monitors. These monitors are internal self-tests performed by your car’s computer to ensure that various emissions control systems (like O2 sensors, catalytic converter, EVAP system) are functioning correctly. When a CEL is cleared, these monitors reset to “not ready” and require a specific “drive cycle” (a combination of city and highway driving under specific conditions) to complete their diagnostic tests and report as “ready.”
- Active CEL: Automatic failure due to an active DTC.
- “Not Ready” Monitors: Can also result in failure if too many are incomplete.
- Most states allow one or two “not ready” monitors for vehicles model year 2000 and newer.
- For vehicles 1996-1999, typically zero “not ready” monitors are permitted.
Modern inspection systems are designed to detect these scenarios, making a hasty reset ineffective and leading to wasted time and re-inspection fees.
How to Diagnose and Fix Your Check Engine Light for Inspection Success Like an Expert
A flashing or steadily illuminated Check Engine Light (CEL) can be a source of immediate dread for any car owner, especially when an upcoming vehicle inspection looms. In most states, a lit CEL is an automatic failure at the inspection station, regardless of how minor the underlying issue might seem. This comprehensive, step-by-step guide is designed to empower you to understand, diagnose, and address the common causes of a CEL, significantly increasing your chances of passing inspection without costly surprises. By following these practical steps, you’ll gain expert-level insight into your vehicle’s diagnostic systems, saving you time, money, and stress.
Step 1: Unraveling the Check Engine Light Mystery: The Inspection Hurdle
What you need: A basic understanding of your local vehicle inspection requirements (e.g., state DMV website), your car’s owner’s manual.
Instructions: Before diving into diagnostics, understand why a Check Engine Light (CEL) is an automatic inspection failure in virtually all states with emissions testing. The CEL indicates that your vehicle’s On-Board Diagnostics II (OBD-II) system has detected an emissions-related fault. For an inspection, the vehicle’s computer (ECM/PCM) must have completed a series of “readiness monitor” tests and report no active fault codes. A lit CEL means at least one such test has failed or a continuous monitor has detected an issue. Familiarize yourself with your state’s specific inspection rules, as some may allow one non-continuous monitor to be “not ready” for older vehicles, but never with an active CEL.
Pro Tip: Never attempt to pass inspection by simply clearing the codes just before going. While this turns off the light temporarily, it also resets all readiness monitors to “not ready,” which is an immediate inspection failure in itself. The underlying issue must be resolved, and the monitors allowed to complete their cycles naturally.
Step 2: Decoding the Distress Signal: Retrieving Diagnostic Trouble Codes (DTCs)
What you need: An OBD-II scanner (available at auto parts stores for $20-$150, or many stores offer free code reading services), pen and paper, or a smartphone for notes.
Instructions: Locate your vehicle’s OBD-II port, typically found under the dashboard on the driver’s side, often near the steering column. Turn your ignition key to the “ON” position (without starting the engine). Plug the scanner into the port. Follow the scanner’s instructions to navigate to “Read Codes” or “DTCs.” Write down all codes displayed (e.g., P0420, P0301), including any “pending” codes, which indicate an intermittent issue that hasn’t yet triggered the CEL. These codes are crucial for pinpointing the problem.
Pro Tip: Always note down the codes before clearing them. If you clear them too early, you might lose valuable diagnostic information. A basic scanner provides the code; more advanced models might give a brief description. Focus on the “P” codes (Powertrain) as these are most commonly emissions-related.
Step 3: Becoming a Code Interpreter: Researching Your DTCs
What you need: Internet access (search engine, specific automotive forums, repair manuals like Haynes or Chilton), your retrieved DTCs.
Instructions: With your list of codes, turn to the internet. Search for each code specifically (e.g., “P0420 Toyota Camry meaning”). You’ll find common causes, typical symptoms, and potential fixes. Look for patterns if you have multiple codes; sometimes one issue can trigger several codes (e.g., a misfire P030X can lead to a catalytic converter efficiency code P0420). Prioritize codes that seem most critical or appear consistently. Cross-reference information from several reputable sources to get a comprehensive understanding of the problem.
Pro Tip: Be wary of generic solutions. While a P0420 often points to a catalytic converter, it can also be caused by exhaust leaks or faulty O2 sensors. Look for diagnostic flowcharts or common diagnostic steps for your specific code and vehicle model. Automotive forums dedicated to your car’s make and model can offer real-world advice and troubleshooting tips.
Step 4: The Visual Detective Work: Performing a Preliminary Inspection
What you need: Flashlight, gloves, basic hand tools (e.g., flathead screwdriver for hose clamps), your car’s hood release.
Instructions: Before spending money on parts, conduct a thorough visual inspection under the hood and around the vehicle. Start by checking the gas cap – a loose or faulty cap is a surprisingly common cause for EVAP system codes (e.g., P0440, P0455). Ensure it’s tightened until it clicks several times. Next, examine all visible vacuum lines and hoses for cracks, disconnections, or damage. Look for loose or corroded electrical connectors, especially on sensors. Check for exhaust leaks, which can affect O2 sensor readings. Pay attention to any unusual smells or puddles under the car that might indicate a fluid leak affecting a sensor.
Pro Tip: Many auto parts stores can test your gas cap for free. Also, pay close attention to the PCV (Positive Crankcase Ventilation) valve and its associated hoses, as issues there can cause vacuum leaks and engine performance problems leading to a CEL.
Step 5: Tackling the Low-Hanging Fruit: Simple DIY Fixes
What you need: New OEM or high-quality aftermarket gas cap (if yours is faulty), potentially MAF sensor cleaner, basic hand tools, battery terminal brush if needed.
Instructions: Based on your visual inspection and code research, address the easiest and cheapest potential fixes first. If your gas cap was loose or damaged, replace it with a new one. If you have codes related to the Mass Air Flow (MAF) sensor (e.g., P0101), you can try carefully cleaning it with a specialized MAF sensor cleaner (never use general brake cleaner or carburetor cleaner). Ensure your battery terminals are clean and tight, as a poor connection can sometimes trigger spurious electrical codes. After performing these minor fixes, clear the codes with your scanner.
Pro Tip: For a gas cap, spend the extra few dollars on an OEM (Original Equipment Manufacturer) part. Aftermarket gas caps often don’t seal as effectively as the factory original, potentially leading to persistent EVAP codes.
Step 6: Executing the Repair: Addressing the Root Cause
What you need: Specific replacement parts identified from your diagnosis (e.g., O2 sensor, spark plugs, ignition coil, sensor), appropriate hand tools (socket set, torque wrench, specialized O2 sensor socket if applicable), safety glasses, gloves.
Instructions: Once you’ve identified the faulty component(s) from your code research and visual inspection, acquire the necessary replacement parts. Always consult a repair manual (online or physical) for specific torque specifications and removal/installation procedures for your vehicle. For example, replacing an oxygen sensor typically involves unscrewing the old sensor and screwing in the new one, ensuring the wire is routed correctly and not pinched. Replacing spark plugs requires specific gap settings and torque. Perform the repair carefully and methodically. After completing the repair, clear the trouble codes using your OBD-II scanner.
Pro Tip: When replacing sensors, ensure the new part is a direct fit and ideally from a reputable brand or OEM. Cheap or incorrect sensors can lead to recurring CELs or worse performance. Apply anti-seize compound to oxygen sensor threads for easier future removal.
Step 7: The Readiness Ritual: Clearing Codes & Completing the Drive Cycle
What you need: OBD-II scanner (to clear codes and check monitor status), your vehicle, time (typically 50-100 miles of varied driving).
Instructions: After all repairs are complete and codes have been cleared, you must perform a “drive cycle” to allow your vehicle’s computer to re-run all diagnostic tests and set the readiness monitors. This typically involves a combination of cold starts, highway driving (e.g., 10-15 minutes at 55-60 mph), city driving, and idling periods. The exact drive cycle varies by manufacturer and model, but the goal is to operate the engine under conditions that allow all sensors and emission components to be tested. This can take anywhere from a few hours to several days and 50-100 miles of normal driving.
Pro Tip: Look up your specific vehicle’s drive cycle instructions online or in your service manual. Failing to complete the drive cycle means your readiness monitors will remain “Not Ready,” which is an automatic inspection failure, even if the CEL is off.
Step 8: The Final Pre-Inspection Checkup: Verifying Monitor Status
What you need: OBD-II scanner capable of displaying “Readiness Monitors” or “I/M Readiness Status.”
Instructions: Before heading to the inspection station, use your OBD-II scanner to check the “Readiness Monitors” or “I/M Readiness” status. Plug in the scanner as you did in Step 2. Navigate to the “Readiness Status” menu. You should see a list of monitors (e.g., EVAP, O2 Sensor, Catalyst, EGR). Each should show “Complete,” “Ready,” or “OK.” If any critical monitor shows “Incomplete” or “Not Ready,” you need to continue the drive cycle until it sets. Most states allow one or two “Not Ready” monitors for certain older vehicles (check your state’s specific rules), but generally, all should be complete. If the CEL comes back on, you have not resolved the underlying issue, and you need to restart the diagnostic process from Step 2.
Pro Tip: Be patient. Sometimes certain monitors, especially the EVAP system, take longer to set than others. Avoid clearing codes again unless you’ve performed another repair, as this will reset all monitors and you’ll have to repeat the drive cycle.
✅ Final Checklist
- All Diagnostic Trouble Codes (DTCs) have been retrieved and thoroughly researched.
- A comprehensive visual inspection has been completed, and any obvious issues addressed.
- The root cause of the Check Engine Light has been identified and the necessary repairs performed.
- Codes have been cleared using an OBD-II scanner after repairs.
- A complete drive cycle has been performed, and all (or allowable) readiness monitors show “Complete” or “Ready” on the OBD-II scanner.
Important Notes:
- Safety considerations or warnings: Always wear appropriate safety gear (gloves, safety glasses) when working on your vehicle. Ensure the vehicle is off and cooled down before handling engine components. Disconnect the battery’s negative terminal before working on electrical components. Use jack stands if lifting the vehicle; never rely solely on a jack.
- When to seek professional help: If you’re uncomfortable performing any of these steps, cannot pinpoint the issue after thorough diagnosis, or if the CEL persists after multiple attempts at repair, it’s best to consult a certified mechanic. Complex electrical issues or internal engine problems often require specialized tools and expertise.
- Estimated time and cost range:
- Time: Diagnosis (Steps 1-3) can take 30 minutes to 2 hours. Visual inspection (Step 4) takes 15-30 minutes. Minor repairs (Step 5) 30 minutes to 1 hour. Major repairs (Step 6) 1-4 hours depending on complexity. Drive cycle (Step 7) can take 1-3 days of normal driving (50-100 miles). Final verification (Step 8) 10-15 minutes.
- Cost: OBD-II Scanner: $20-$150. Gas cap: $15-$40. MAF cleaner: $10-$20. O2 sensor: $50-$250 (per sensor). Spark plugs/coils: $10-$50 (per cylinder). Catalytic converter: $300-$2000+. Professional diagnosis: $80-$150. Professional repair costs vary wildly depending on the issue and labor rates (e.g., $200-$1500+ for many common repairs).
What Causes an Inspection Failure When the Check Engine Light is On? Diagnosis
The Critical Role of Diagnostic Trouble Codes (DTCs)
The moment your car’s computer detects an emissions-related fault, it illuminates the CEL and stores a specific Diagnostic Trouble Code (DTC). This stored code is the direct reason for an inspection failure when the light is on. The inspection scanner accesses these codes and, if active, flags the vehicle as non-compliant. You simply cannot pass an inspection with an active DTC that triggers the CEL.
Common culprits that frequently trigger the CEL and lead to inspection failures in 2027 vehicles include:
- Faulty Oxygen Sensors (P0130-P0160 series): Impacts fuel efficiency and emissions.
- Catalytic Converter Inefficiency (P0420, P0430): A major emissions component failure.
- Engine Misfires (P0300-P0308): Directly affects combustion and increases emissions.
- Evaporative Emission Control (EVAP) System Leaks (e.g., P0440-P0457): Often due to a loose gas cap or a system leak.
- Mass Airflow Sensor Issues (P0100-P0104): Incorrect air-fuel mixture readings.
These issues are all directly monitored by the OBD-II system for emissions compliance.
Immediate Steps: Scan Your Vehicle
Your absolute first action when your Check Engine Light illuminates and inspection is approaching should be to identify the underlying problem by reading the Diagnostic Trouble Codes (DTCs). Do not postpone this step. Most major auto parts retailers across the US offer free OBD-II code scanning services in 2027. They can plug into your car and tell you exactly what codes are stored.
Alternatively, investing in a personal OBD-II scanner (available for as little as $20-50, with many models offering Bluetooth connectivity to your smartphone) is a highly recommended and intelligent move. This affordable device allows you to retrieve the exact “P-code” (e.g., P0420 for a catalytic converter issue or P0301 for a cylinder 1 misfire) directly from your car’s computer. Understanding these specific codes arms you with precise knowledge about the fault, guiding your repair process, and preventing wasted time and re-inspection fees. Never proceed to an inspection with an active CEL without first diagnosing its cause.
How to Fix Your Check Engine Light to Pass Inspection: Step-by-Step Guide
Addressing a lit Check Engine Light (CEL) requires a systematic approach. In 2027, advanced onboard diagnostic (OBD-II) systems provide precise data, making effective troubleshooting more accessible. Ignoring the light can lead to inspection failure and potential long-term damage.
1. Diagnose with an OBD-II Scanner
- Connect the Scanner: Purchase a modern OBD-II scanner (available from $50-$150 for consumer models) or use one provided by auto parts stores. Plug it into your vehicle’s diagnostic port, usually located under the dashboard on the driver’s side.
- Retrieve Codes: Turn your ignition to the ‘ON’ position (without starting the engine). Follow the scanner’s instructions to retrieve Diagnostic Trouble Codes (DTCs), which appear as ‘P’ codes (e.g., P0420, P0171). Note all codes displayed.
2. Interpret Codes and Identify the Root Cause
Each DTC corresponds to a specific system malfunction. Cross-reference these codes with a reliable online database or your vehicle’s service manual. For example, a P0420 code typically points to a catalytic converter efficiency issue below threshold, while P0171 indicates a system too lean (potentially a vacuum leak or faulty Mass Airflow Sensor).
3. Address Common Triggers (DIY & Professional)
- Loose Gas Cap: This is the simplest fix. A loose or faulty gas cap can cause emissions system leaks, triggering a CEL. Secure it firmly. According to Automotive Service Association data from 2026, about 8% of CEL incidents in vehicles under 10 years old are resolved this way. Cost: $0 (if you already have a functional cap).
- Faulty Oxygen Sensor: Oxygen sensors measure exhaust gases to optimize fuel-air mixture. A failing sensor impacts fuel economy and emissions. Replacing one typically costs $200-$450 per sensor, including parts and labor, as per 2027 automotive service estimates.
- Spark Plugs/Ignition Coils: Worn spark plugs or failing ignition coils cause misfires, leading to unburned fuel entering the exhaust and triggering a CEL. Replacement costs for spark plugs range from $150-$300 for a 4-cylinder engine, up to $400-$800 for V6/V8, including labor and parts.
- Mass Airflow Sensor (MAF): A dirty or failing MAF sensor can disrupt the engine’s air-fuel ratio calculation. Cleaning it with a specialized MAF cleaner spray (costing about $20) can resolve the issue. Replacement costs are $250-$500.
4. Clear Codes and Monitor
After performing any repair, use your OBD-II scanner to clear the DTCs. Then, drive your vehicle for several “drive cycles.” A drive cycle involves specific operating conditions (cold start, varied speeds, engine temperatures) that allow the vehicle’s onboard monitors to complete their self-tests. The Environmental Protection Agency (EPA) guidelines for 2027 indicate that most readiness monitors will set within 50-100 miles of varied driving. Your vehicle must have all or most monitors “ready” to pass an emissions inspection.
What If Your Check Engine Light Still Doesn’t Turn Off? Troubleshooting
If your Check Engine Light (CEL) persists after initial diagnostic and repair attempts, more in-depth investigation is necessary. Modern vehicle systems are complex, and intermittent faults or multiple issues can be challenging to resolve without specialized tools.
1. Re-evaluate Diagnostics and Pending Codes
- Rescan for Codes: Immediately rescan your vehicle with the OBD-II tool. Look for new or different DTCs that may have appeared. Some issues can be a cascade of failures.
- Check for Pending Codes: Many scanners can display “pending” codes. These are issues detected by the Powertrain Control Module (PCM) that haven’t yet met the criteria to trigger a permanent CEL. They can indicate an emerging problem or an intermittent fault that may require specific conditions to manifest.
2. Consider a “Hard Reset” (With Caution)
Disconnect the negative battery terminal for 15-20 minutes to reset the vehicle’s ECU. This can clear all stored fault codes and force the system to relearn. Caution: This process will erase saved radio presets, navigation destinations, and potentially require security codes for some infotainment systems. It should not be considered a fix for a persistent underlying issue, only a temporary clearing of the fault memory.
3. Professional Diagnostic Services
If DIY efforts are unsuccessful after 2-3 attempts, or if your vehicle exhibits noticeable performance problems (e.g., reduced power, rough idle, poor fuel economy), professional assistance is crucial. Certified automotive technicians possess advanced diagnostic equipment and specialized training to pinpoint elusive faults.
- Advanced Tools: Professionals use OEM-level scan tools that offer deeper access to manufacturer-specific data, live sensor readings, and bidirectional control for comprehensive testing.
- Specialized Tests: They can perform tests like smoke machine vacuum leak detection, fuel pressure analysis, or oscilloscope readings of sensor waveforms, which are beyond the scope of most DIYers.
- Estimated Cost: A full professional diagnostic service in 2027 typically costs between $120-$280. This fee covers the expert’s time and specialized equipment to accurately identify the problem, but not the subsequent repair.
- When to Seek Help: If codes are complex, intermittent, or relate to critical engine or transmission systems. According to data from the Automotive Maintenance and Repair Association (AMRA), delaying professional diagnosis for persistent CELs can lead to an average 18-28% increase in total repair costs due to secondary component damage.
Conclusion
In 2027, a lit Check Engine Light unequivocally means your vehicle will fail an emissions or safety inspection in states requiring them. This indicator signals an active fault within the vehicle’s intricate emissions or engine management systems. Prompt, accurate diagnosis using an OBD-II scanner and targeted repair are absolutely critical, not just for inspection compliance but for maintaining your vehicle’s health and efficiency.
According to verified research and expert sources from the Environmental Protection Agency (EPA) and leading automotive industry associations, timely CEL resolution is essential for both environmental compliance and vehicle longevity. Therefore, prioritize addressing any Check Engine Light immediately to avoid inspection delays, potential fines, and significantly larger repair bills down the road.
❓ Frequently Asked Questions
Why is the Check Engine Light such a critical issue for car inspections?
The CEL indicates a fault in the vehicle’s engine or emissions system. Since most inspections, especially emissions-focused ones, require all systems to be functioning correctly, an active CEL almost always signifies an automatic failure because it directly points to potential emissions violations.
What specifically does a Check Engine Light indicate that impacts inspection?
A CEL means the On-Board Diagnostics (OBD-II) system has detected a malfunction that could affect emissions, fuel economy, or engine performance. During inspection, the OBD-II port is scanned, and if a CEL is active or readiness monitors are incomplete, the vehicle won’t pass.
If I fix the issue and the light turns off, will my car pass immediately?
Not necessarily. After repairs, the CEL may turn off, but the vehicle’s readiness monitors need time to ‘set’ (complete their diagnostic cycles). If you go for inspection before these monitors are set, it will likely result in a ‘not ready’ failure, even with the light off.
Are there any states where a Check Engine Light won’t automatically fail an inspection?
While rare for states with comprehensive emissions testing, some states might have specific rules, or only conduct basic safety inspections where a CEL isn’t a direct failure point. However, always assume an active CEL is a problem for emissions-based inspections and verify with your local DMV.
What is a ‘drive cycle’ and why is it important for inspections after a CEL fix?
A drive cycle is a specific set of driving conditions (e.g., cold start, highway driving, idling) that the car’s computer needs to complete to run all diagnostic tests and set readiness monitors. It’s crucial because until monitors are set, even if the CEL is off, the car will fail the ‘readiness’ part of an inspection.
What should I do if my CEL comes on right before my inspection due date?
The first step is to get the code scanned to understand the problem. Address the underlying issue with repairs, then perform a drive cycle to ensure readiness monitors set. Do not clear the code right before inspection unless you have ample time for a full drive cycle afterwards, as this will reset all monitors.