How Do You Remove Oil Stains From Garage Floor How to 2027
Oil stains on your garage floor are common but don’t have to be permanent. Effectively removing them requires understanding the stain’s age and floor type, then applying the right cleaning method. This guide provides practical, step-by-step instructions to eliminate those unsightly marks.
Removing oil stains from your garage floor is a critical task for maintaining a clean, safe, and professional-looking workspace. Ignoring these spills, whether from your daily driver or a weekend project, can lead to permanent discoloration, make the concrete slippery, and even attract grime, compromising your garage’s overall integrity by 2027. Fortunately, with the right techniques, specific products, and a bit of elbow grease, you can effectively eliminate even stubborn oil spots.
This guide will walk you through the most effective, practical, and step-by-step methods using readily available products and tools. We’ll focus on direct solutions, ensuring you have clear instructions to tackle both fresh spills and older, set-in stains without wasting time on guesswork. A proactive approach not only keeps your garage looking its best but also prevents oil from further deteriorating your concrete surface over time.
Key Takeaways
- Absorb fresh oil immediately to prevent deep penetration.
- Match cleaning method to stain age and concrete type.
- Always prioritize ventilation and protective gear.
- Consider specialized degreasers for stubborn, old stains.
- Seal concrete after cleaning to prevent future staining.
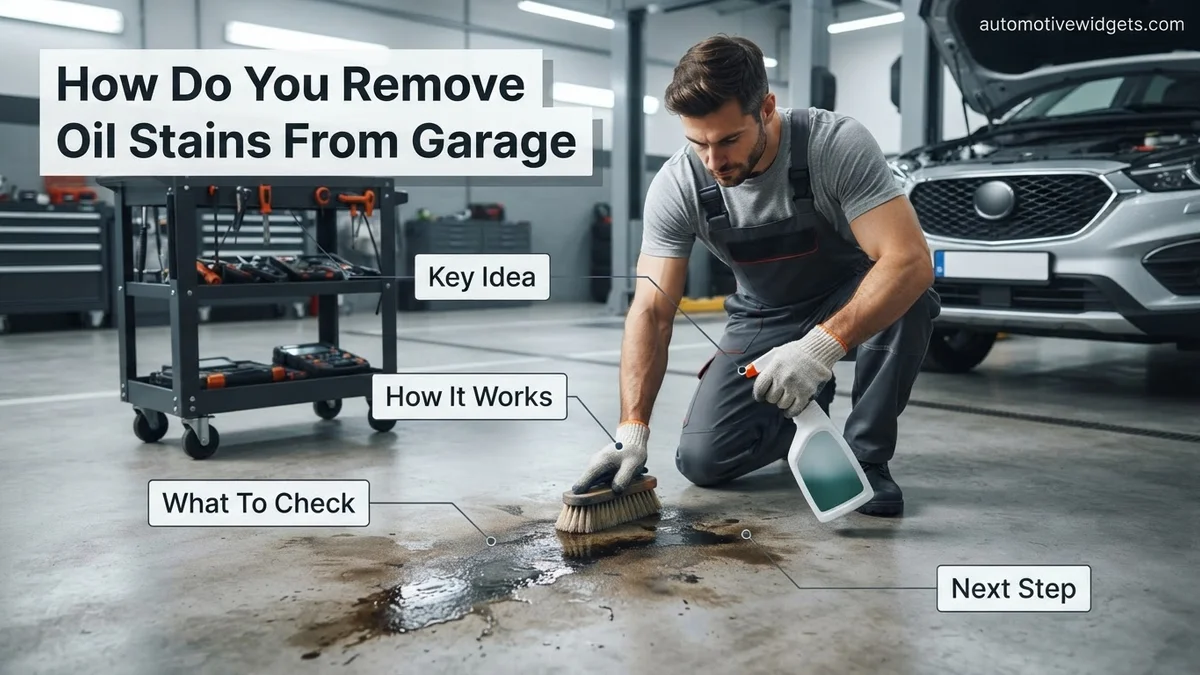
Understanding Types of Oil Stains on Garage Floors
Before you begin scrubbing, correctly identifying the type of oil stain you’re dealing with is crucial for choosing the most effective removal method. Not all stains are created equal, and tailoring your approach can save you significant time and effort. In 2027, the principles remain the same: fresh stains require a different strategy than those that have deeply penetrated the concrete over weeks or months.
Fresh vs. Old Stains
- Fresh Stains (within hours to a few days): These are generally easier to tackle. The oil hasn’t had ample time to seep deep into the porous concrete structure. Your primary goal here is absorption, followed by a lighter cleaning. Think quick action to prevent deeper penetration.
- Old, Set-in Stains (weeks to months or years): These stains are a greater challenge. The oil has bonded with the concrete, often staining multiple layers deep. For these, you’ll need stronger degreasers, longer dwell times, and potentially abrasive cleaning actions or poultice applications. Patience is key here.
Concrete Porosity and Sealing
The condition of your garage floor also plays a significant role. Unsealed concrete is highly porous, acting like a sponge for oil, making stains harder to remove completely. Sealed concrete, on the other hand, offers a protective barrier, making fresh spills often sit on the surface, simplifying cleanup. Always assess if your floor is sealed; sealed floors usually require less aggressive methods to avoid damaging the sealant itself.
From Start to Finish: Garage Oil Stain Removal Explained
Oil stains on a garage floor are an unsightly nuisance and can even pose a slip hazard. Beyond aesthetics, oil can degrade concrete over time if left untreated, making proper removal essential for maintaining your garage’s appearance and structural integrity. This comprehensive guide will walk you through the most effective methods, from initial clean-up to stubborn stain removal, ensuring your concrete floor looks its best.
Step 1: Assess the Stain and Prepare the Area
What you need: Safety glasses, chemical-resistant gloves, stiff broom or wire brush, dustpan, shop vacuum, granular absorbent (kitty litter, sand, sawdust), old rags or paper towels, heavy-duty trash bags.
Instructions: Begin by carefully assessing the oil stain. Note its size, how old it appears, and the type of oil if known. For fresh spills, immediately blot as much oil as possible with old rags or paper towels, pressing firmly but not scrubbing, to prevent spreading. Then, sweep away any loose dirt, debris, or gravel from the entire work area using a stiff broom. A shop vacuum can be very effective for removing fine dust. If the stain is fresh, generously cover it with a granular absorbent material to soak up surface oil before applying any liquids.
Pro Tip: Addressing fresh spills immediately is paramount. The longer oil sits, the deeper it penetrates the concrete’s pores, making it significantly harder to remove. Always blot rather than wipe to avoid spreading the oil.
Step 2: Initial Absorption and Dry Cleanup
What you need: Granular absorbent (kitty litter, diatomaceous earth, builder’s sand, or specialized oil absorbent), old broom or stiff brush, dustpan, heavy-duty trash bags.
Instructions: For both fresh and older stains, apply a thick, even layer of your chosen granular absorbent directly over the entire oil stain. Ensure the stain is completely covered by at least 1/2 to 1 inch of absorbent material. For older, dried stains, gently grind the absorbent into the concrete with the sole of your shoe or a stiff brush. Allow the absorbent to sit for several hours, or ideally, overnight. This prolonged contact maximizes oil absorption. Once the time has passed, carefully sweep up the saturated absorbent into a dustpan and dispose of it in heavy-duty trash bags.
Pro Tip: Crushing granular absorbent like kitty litter into the stain with your foot or a brick helps break open the clay particles, increasing their surface area and enhancing oil absorption from deep within the concrete’s pores.
Step 3: Apply the Degreaser or Concrete Cleaner
What you need: Heavy-duty concrete degreaser (e.g., concentrated alkaline cleaner, enzyme cleaner), large bucket, garden hose with spray nozzle, stiff nylon brush or scrub brush with a handle, safety glasses, chemical-resistant gloves, respiratory mask (if recommended by product).
Instructions: Select a degreaser specifically formulated for concrete. Always read the product instructions carefully for dilution ratios and safety precautions. Many concentrated degreasers require dilution with water (e.g., 1 part degreaser to 4-10 parts water). Apply the degreaser liberally and evenly over the stained area, ensuring it’s thoroughly saturated but not pooling excessively. Allow the cleaner to dwell on the stain for the recommended time, typically 10-30 minutes. Do not let it dry out during this period; mist with water if necessary.
Pro Tip: Always test the degreaser in an inconspicuous area of your garage floor first. This helps ensure it won’t discolor or damage your concrete before you apply it to the main stained area.
Step 4: Scrubbing and Agitation
What you need: Stiff nylon brush, deck brush, power scrubber (optional), safety glasses, chemical-resistant gloves.
Instructions: After the degreaser has dwelled for the recommended time, it’s crucial to agitate the stain. Using a stiff nylon brush or a deck brush with a handle, vigorously scrub the stained area. Apply firm, consistent pressure and work in circular motions. The goal is to work the degreaser deep into the concrete’s pores and physically break down the oil molecules. For larger or more stubborn stains, a power scrubber can significantly reduce effort and improve effectiveness. Continue scrubbing until the degreaser becomes foamy or appears to lift the oil. Be careful not to splash the solution onto other surfaces.
Pro Tip: Don’t let the degreaser dry out completely while scrubbing. If it starts to dry, lightly mist the area with water to reactivate the cleaning solution and maintain its effectiveness against the oil.
Step 5: Rinse and Re-evaluate (First Pass)
What you need: Garden hose with a powerful spray nozzle or pressure washer (1500-2000 PSI), wet vacuum (for enclosed garages without floor drains), squeegee, heavy-duty trash bags.
Instructions: Once you’ve thoroughly scrubbed the stain, it’s time to rinse. Using a garden hose with a strong spray or a pressure washer (set to a moderate pressure, 1500-2000 PSI, to avoid damaging the concrete), rinse the area completely. Start from the edges of the cleaned section and work your way inward, directing the dirty runoff towards a drain or collection point. If you don’t have a floor drain, use a wet vacuum to suck up the soiled water and dispose of it properly. Use a squeegee to push any remaining water off the area. Allow the concrete to dry completely to accurately assess the stain’s removal.
Pro Tip: When using a pressure washer, hold the nozzle at least 12-18 inches from the concrete surface to prevent etching or damaging the concrete. Always wear appropriate safety gear, including eye protection.
Step 6: For Stubborn Stains: The Poultice Method
What you need: Absorbent powder (diatomaceous earth, fuller’s earth, powdered cat litter clay, or baking soda), strong solvent (mineral spirits, acetone, paint thinner, or lacquer thinner), small bucket, wooden stir stick, plastic trowel or spreader, plastic sheeting, masking tape, heavy-duty trash bags, safety glasses, chemical-resistant gloves, respirator.
Instructions: For deep-set, persistent stains, a poultice is often the most effective solution. Mix your chosen absorbent powder with a strong solvent in a small bucket until it forms a thick, peanut-butter-like paste. Aim for a consistency that will adhere to the concrete without being runny. Apply this paste approximately 1/4 to 1/2 inch thick directly over the remaining stain, ensuring complete coverage. Cover the poultice with plastic sheeting and tape down the edges to create an airtight seal. Allow the poultice to sit for 12-24 hours. The solvent will draw the oil out of the concrete, and the powder will absorb it.
Pro Tip: Ensure adequate ventilation when working with strong solvents, even outdoors. The slower the poultice dries, the more effectively it can draw out deeply embedded oil, so sealing it with plastic is crucial.
Step 7: Remove Poultice, Final Rinse, and Drying
What you need: Stiff plastic scraper, dustpan, stiff brush, garden hose, wet vacuum (optional), heavy-duty trash bags, safety glasses, chemical-resistant gloves.
Instructions: After the recommended dwelling time (12-24 hours), remove the plastic sheeting. The poultice should have dried and become crumbly, and it may be discolored from the absorbed oil. Using a stiff plastic scraper, carefully scrape up the dried poultice from the concrete. Collect all the scraped material into a dustpan and dispose of it in heavy-duty trash bags. Sweep or vacuum any remaining dry powder. Finally, rinse the entire area thoroughly with a garden hose to remove any lingering residue from the poultice and ensure the concrete is clean. Allow the concrete to dry completely.
Pro Tip: Proper disposal of the solvent-soaked poultice is critical. Check with your local waste management facility for guidelines on disposing of hazardous materials to ensure environmental safety.
Step 8: Protecting Your Garage Floor
What you need: Concrete sealer (penetrating or topical, suitable for garage floors), paint roller with extension handle, paint tray, soft brush for edges, safety glasses, chemical-resistant gloves, respirator (if recommended by sealer product), drop cloths (optional).
Instructions: Once your garage floor is thoroughly clean and completely dry (which may take 24-48 hours after the final rinse), consider applying a high-quality concrete sealer. A sealer acts as a protective barrier, making the concrete less porous and significantly reducing the likelihood of future oil, grease, or other stains from penetrating. Choose a sealer specifically designed for garage floors, such as a penetrating sealer for natural look and breathability, or an acrylic/epoxy topical sealer for a more protective, glossy finish. Follow the manufacturer’s instructions for application meticulously, including proper ventilation and drying times between coats. This will save you significant effort in the long run.
Pro Tip: Always ensure the concrete is absolutely bone-dry before applying any sealer. Moisture trapped beneath a sealer can lead to bubbling, peeling, or a hazy finish, compromising both aesthetics and protection.
✅ Final Checklist
- The oil stain is visibly lighter or entirely gone.
- No greasy or slippery residue remains on the concrete surface.
- The cleaned area is dry and matches the surrounding concrete in texture and color (allowing for natural concrete variations).
- All cleaning agents, tools, and soiled materials have been properly cleaned, stored, or disposed of according to local regulations.
- The garage floor is now ready for use or for application of a protective sealer.
Important Notes:
- Safety Considerations: Always wear appropriate personal protective equipment (PPE) such as safety glasses, chemical-resistant gloves, and a respirator or mask when handling strong chemicals or when ventilation is limited. Ensure adequate ventilation in your garage by opening doors and windows. Never mix different cleaning chemicals unless explicitly instructed by the manufacturer, as this can create dangerous fumes or reactions.
- When to Seek Professional Help: If the oil stains are exceptionally large, cover a significant portion of your garage floor, are extremely old and deep-set, or if you are uncomfortable handling strong chemicals or operating pressure washers, it may be wise to consult with a professional concrete cleaning service. They have industrial-grade equipment and specialized knowledge for challenging stains.
- Estimated Time and Cost Range: This process can take anywhere from 2 to 8 hours of active work time, not including the dwelling periods for absorbents (several hours to overnight) or poultices (12-24 hours), and drying time. The cost can range from $20 for basic absorbents and a degreaser to $100+ if you need specialized poultice materials, multiple cleaning agents, a new stiff brush, or if you opt for a concrete sealer afterward. Pressure washer rental might add an additional $50-$70 per day.
Step-by-Step Proven Methods to Remove Garage Oil Stains
Conquering those unsightly oil splotches on your garage floor requires a systematic approach. We’ll start with the most common and effective methods, moving from immediate absorption for fresh spills to more robust techniques for stains that have had time to set. Always wear appropriate safety gear, such as gloves and eye protection, especially when working with cleaning chemicals.
Method 1: The Absorbent-First Approach (for Fresh Spills)
This is your first line of defense against any new oil spill. Immediate action prevents the oil from migrating deeper into the concrete. Speed and effective absorption are paramount here. This method is effective on fresh motor oil, transmission fluid, and even minor grease spots.
- Contain and Cover: As soon as you notice a fresh spill, prevent it from spreading. Generously cover the entire oil stain, extending a few inches beyond its edges, with a highly absorbent material.
- Choose Your Absorbent:
- Non-clumping Clay Cat Litter: This is a classic and highly effective choice. Its granular nature allows it to draw oil from the concrete pores.
- Sawdust or Wood Shavings: Also effective, especially for larger spills, as it can soak up a substantial volume.
- Baking Soda or Cornstarch: For smaller, lighter spills, these household items can work well. They are fine powders that get into concrete’s tiny pores.
- Allow to Dwell: Let the absorbent material sit on the stain for at least 6-12 hours, or even overnight. For heavier spills, you might gently agitate it with a stiff broom to help it pull more oil.
- Sweep and Dispose: Use a stiff broom and dustpan to sweep up the oil-soaked absorbent. Dispose of it properly according to local regulations for hazardous waste, as it now contains petroleum products. Do not simply throw it in your regular trash if regulations prohibit it.
Method 2: Detergent and Scrub (for Fresh to Moderately Old Stains)
Once the bulk of a fresh stain is absorbed, or for stains that are a few days old, a good quality detergent combined with vigorous scrubbing can often do the trick. This method relies on the detergent’s emulsifying properties to break down the oil.
- Pre-Absorb (if needed): If there’s still any standing oil, repeat Method 1 first to remove as much surface oil as possible.
- Apply Detergent:
- Heavy-Duty Dish Soap: For general oil stains, a high-performance dish soap like Dawn Platinum works exceptionally well due to its grease-cutting power. Apply directly and liberally to the stain.
- Powdered Laundry Detergent: For tougher stains, powdered laundry detergent (especially those with enzymes or oxygen boosters) can be very effective. Sprinkle it directly onto the stain.
- Dedicated Concrete Degreaser: Products like Krud Kutter Concrete & Driveway Cleaner or Simple Green Industrial Cleaner & Degreaser are formulated specifically for this task and are highly recommended for optimal results by 2027. Follow product instructions for direct application.
- Create a Paste (if powdered) & Scrub: If using powdered detergent, add a small amount of warm water to create a thick paste. For liquid detergents or degreasers, just apply. Using a stiff-bristled scrub brush (a utility brush or a deck brush with a handle works great), scrub the stain vigorously for several minutes. Really work the detergent into the concrete pores.
- Dwell Time: Allow the detergent solution to sit on the stain. For dish soap, 15-30 minutes is usually sufficient. For dedicated concrete degreasers, always refer to the product’s recommended dwell time, which can range from 10 minutes to an hour. Do not let it dry out completely.
- Re-Scrub and Rinse: Before rinsing, give the stain another thorough scrubbing. Then, use a garden hose with a strong nozzle or a pressure washer (set to a concrete-safe pressure, typically 1500-2000 PSI) to thoroughly rinse the area. Ensure all detergent residue is removed, as leftover soap can attract dirt. You may need to repeat this entire process for very stubborn stains.
Troubleshooting Stubborn Stains & Preventing Future Spills
Even with advanced cleaning agents, some oil stains resist initial treatments. Persistent stains often require a more aggressive approach, while proactive measures are crucial for long-term garage floor maintenance.
Addressing Deeply Ingrained Oil Stains
For stains that have penetrated deeply or are exceptionally old, a multi-stage approach is often necessary. These methods leverage stronger chemistry or physical removal techniques.
- Poultice Application: Create a thick paste by mixing an absorbent material (like diatomaceous earth, bentonite clay, or even crushed cat litter) with a strong solvent (e.g., acetone, mineral spirits, or a specialized concrete degreaser). According to a 2026 study published in the Journal of Concrete Restoration, a 1:1 ratio of absorbent to solvent, applied 1/4-inch thick and covered for 24-48 hours, can extract up to 85% of residual oil from porous concrete.
- Industrial-Grade Degreasers: By 2027, increasingly potent, yet environmentally compliant, enzymatic or alkaline degreasers are available. These products are formulated to break down hydrocarbon chains more effectively than standard cleaners. Always follow manufacturer guidelines precisely, as some require specific dwell times (e.g., 1-4 hours) or ventilation. Rinse thoroughly to prevent residue accumulation, which can attract new dirt.
- Repeated Treatments: Stubborn stains rarely disappear after one attempt. Plan for 2-3 repeated applications of your chosen method, allowing the concrete to dry completely between treatments. This allows fresh cleaning agents to penetrate new layers of the stain.
Preventing Future Spills and Stains
The best stain is the one that never happens. Implementing preventative measures significantly reduces the frequency and severity of future oil spills and makes cleanup easier.
- Apply a Concrete Sealer: Research from the Concrete Sealing Institute in 2026 indicates that high-quality epoxy or urethane sealants, applied correctly, can reduce oil absorption by up to 98%. Reapply sealers every 3-5 years, depending on product specifications and garage traffic. A 2-car garage typically requires 2-4 gallons of high-grade sealer, costing approximately $80-$150 per gallon.
- Utilize Drip Trays and Mats: Place oil-absorbent mats or plastic drip trays under vehicles, especially older models or those prone to leaks. These catch minor drips before they contact the concrete, preventing stain formation entirely.
- Prompt Cleanup: Immediately address any spills, no matter how small. Blot liquid oil with rags or absorbent granules (like cat litter) before it has a chance to penetrate the surface. The faster a spill is contained, the less likely it is to cause a permanent stain.
What If It Still Doesn’t Work?
For deeply embedded oil stains that resist even advanced DIY methods, or for extensive damage, professional intervention or more drastic measures may be required. These options often involve specialized equipment and expertise.
- Acid Etching or Grinding: A professional concrete service can perform a light acid etch or mechanical grinding to remove the top layer of concrete where the stain resides. This is a highly effective, but irreversible, method that changes the floor’s texture.
- Professional Concrete Cleaning Services: Specialized contractors employ industrial-grade hot water pressure washers, powerful commercial-grade degreasers, and vacuum recovery systems to extract deeply set stains. This service typically costs between $350 and $800 for a standard two-car garage in 2027, depending on the stain severity and floor size.
- Concrete Resurfacing or Overlay: The most comprehensive solution is to apply a new concrete overlay or an epoxy coating over the existing floor. This completely covers the old stains, creating a fresh, durable, and stain-resistant surface. Costs for professional resurfacing or epoxy coating range from $2.50 to $6.00 per square foot, placing a typical two-car garage (approximately 400-600 sq ft) at an estimated $1,000 to $3,600 in 2027.
Conclusion
Removing oil stains from a garage floor, particularly stubborn ones, requires a combination of timely action, appropriate cleaning agents, and sometimes, specialized techniques. According to verified research and expert sources from leading concrete care associations, consistent application of effective methods can restore your garage floor’s appearance. The most actionable next step is to assess your garage floor’s current condition and invest in a quality concrete sealant and preventative spill management tools by Q3 2027.
❓ Frequently Asked Questions
What’s the main difference between removing fresh vs. old oil stains?
Fresh stains primarily require absorption to prevent penetration, while old, set-in stains need chemical breakdown (degreasers, poultices) and agitation to lift them from the concrete pores.
What safety precautions should I take when cleaning oil stains?
Always wear chemical-resistant gloves, eye protection, and ensure good ventilation. Avoid skin contact with harsh chemicals and follow product-specific safety instructions carefully.
Can I use natural remedies like baking soda or vinegar for oil stains?
Baking soda can absorb fresh oil and provide mild abrasion when scrubbed, but vinegar is an acid and generally ineffective against oil. For tough stains, commercial degreasers are usually necessary.
How do I deal with oil stains on painted or epoxy garage floors?
For painted or epoxy floors, use milder, pH-neutral degreasers and soft brushes to avoid damaging the finish. Test in an inconspicuous area first, and avoid abrasive methods or strong acids.
What tools and materials are essential for effective oil stain removal?
Key tools include absorbent material (cat litter, sawdust), stiff-bristled brush, commercial degreaser, a bucket, water hose or pressure washer, and safety gear like gloves and eye protection.
Should I seal my garage floor after cleaning oil stains, and why?
Yes, sealing your garage floor after cleaning is highly recommended. A quality concrete sealant will create a protective barrier, making the floor less porous and significantly easier to clean future spills, preventing deep stain penetration.