Can I Use Carburetor Cleaner on Throttle Body? Expert 2027
No, it is generally not recommended to use carburetor cleaner on a modern throttle body. Its harsh solvents can severely damage sensitive electronic sensors and protective coatings. Always use a dedicated, sensor-safe throttle body cleaner to prevent costly repairs and maintain optimal engine function.
Directly answering your question: in 2027, you absolutely should not use carburetor cleaner on your vehicle’s electronic throttle body. While both products are designed to remove carbon and varnish, their chemical compositions are fundamentally different, and using the wrong one can lead to immediate and expensive damage. Modern throttle bodies are far more sophisticated than their carbureted predecessors, incorporating sensitive electronics and specialized coatings that carburetor cleaner will corrode or strip away.
This distinction matters significantly because a damaged throttle body can lead to a cascade of engine performance issues, from rough idling and poor acceleration to check engine lights and even complete vehicle limp modes. Understanding why these cleaners differ is crucial for proper vehicle maintenance, especially as automotive technology continues to advance, making components increasingly delicate and precise. Don’t risk a costly repair bill for the sake of using the wrong cleaning product.
Key Takeaways
- Avoid carburetor cleaner on throttle bodies.
- Carb cleaner damages electronic sensors.
- Use only sensor-safe throttle body cleaner.
- Protect throttle body coatings and seals.
- Improper cleaning causes engine problems.
Why Carburetor Cleaner Damages Throttle Bodies: The Real Risks
Carburetor cleaners are formulated with extremely aggressive solvents designed to cut through hardened fuel deposits on raw metal surfaces found in older carburetor systems. These solvents are potent; they’re meant to dissolve varnishes, gums, and carbon quickly and effectively. However, this very aggressiveness becomes a major liability when applied to the sensitive components of a modern throttle body, which are built with a wider array of materials.
Sensor Catastrophe: The TPS and Integrated Electronics Threat
The primary reason to avoid carburetor cleaner on a throttle body is the presence of the Throttle Position Sensor (TPS) and other integrated electronic components. In a 2027 vehicle, the TPS is typically integrated directly into the throttle body assembly, or very closely mounted. Carburetor cleaner’s harsh solvents will chemically attack the delicate plastic housings, rubber seals, and internal resistive tracks of these sensors. For instance, the plastic components of a TPS can become brittle and crack, while internal contacts can be dissolved or contaminated, leading to inaccurate voltage signals to your Engine Control Unit (ECU).
The immediate consequence is often an erratic idle, poor throttle response, or the dreaded “limp home” mode, where the ECU severely limits engine power to prevent further damage. Furthermore, direct exposure can also degrade wiring insulation and connector seals, inviting electrical shorts or moisture ingress over time. Even overspray can impact nearby Mass Air Flow (MAF) sensors if they’re not adequately protected, causing erroneous air-fuel mixture readings.
Protective Coatings and Modern Materials Under Attack
Modern throttle bodies aren’t just bare metal. They often feature factory-applied protective coatings designed to reduce friction, prevent carbon buildup adhesion, and offer corrosion resistance. These coatings can be fluoropolymer-based or other specialized treatments. Carburetor cleaner’s powerful solvents will strip these coatings clean off, leaving the underlying metal exposed and prone to future rapid carbon accumulation, effectively making your cleaning effort counterproductive in the long run. Without its protective layer, the throttle plate can also stick or bind more easily.
Beyond coatings, contemporary throttle bodies incorporate various types of plastics, composite materials, and specialized rubber gaskets that are not solvent-resistant. These materials are crucial for sealing, weight reduction, and smooth operation. Exposure to carburetor cleaner can cause these plastics to soften, swell, or crack, leading to vacuum leaks, improper throttle plate sealing, or complete component failure. The seals around the throttle shaft are particularly vulnerable; once compromised, air can bypass the throttle plate, causing idle issues and requiring a costly replacement of the entire throttle body assembly.
From Start to Finish: Throttle Body Cleaning with Carb Cleaner Explained
This comprehensive guide will walk you through the process of cleaning your vehicle’s throttle body, specifically addressing the use of carburetor cleaner. A dirty throttle body can lead to various engine performance issues, including rough idling, hesitation, poor fuel economy, and even a “check engine” light. By following these detailed, step-by-step instructions, you can effectively restore your throttle body’s function, improve engine response, and potentially save on costly mechanic visits. We’ll cover everything from preparation and safe cleaner application to reassembly and post-cleaning checks, ensuring you have all the knowledge to tackle this maintenance task confidently.
Step 1: Prioritize Safety and Gather Your Gear
What you need: Safety glasses, chemical-resistant gloves, old rags or shop towels, a car jack and stands (if needed for access), wheel chocks, and your vehicle’s owner’s manual.
Instructions: Before beginning any work on your vehicle, always prioritize safety. Park your car on a level surface, engage the parking brake, and if necessary, use wheel chocks. Don your safety glasses and gloves to protect against chemical exposure and debris. It’s crucial to disconnect the negative terminal of your vehicle’s battery using a wrench (typically a 10mm or 13mm) to prevent accidental electrical shorts or triggering fault codes during the cleaning process. This also allows the car’s computer (ECU) to reset and potentially re-learn idle parameters after cleaning. Review your owner’s manual for specific battery disconnection procedures and any other safety warnings.
Pro Tip: Always wait at least 15-30 minutes after disconnecting the battery before starting work, especially on modern vehicles, as some electronic modules retain residual power for a short period.
Step 2: Accessing the Throttle Body
What you need: Screwdrivers (flathead and Phillips), pliers, possibly a socket wrench set, and a marker or tape for labeling.
Instructions: The throttle body is typically located between the air intake system and the engine intake manifold. Start by identifying the large air intake tube that connects the air filter box to the engine. You will need to loosen the clamps securing this tube to both the air filter housing and the throttle body itself, usually with a flathead screwdriver or socket wrench. Carefully detach the tube, pulling it free from both ends. There might also be smaller vacuum hoses or electrical connectors attached to the air intake tube or directly to the throttle body. Use pliers to release hose clamps and gently depress tabs on electrical connectors to unplug them. Take note of their positions or use your marker/tape to label them for easy reassembly.
Pro Tip: Take several photos with your smartphone of the engine bay before and during disassembly. These photos will be invaluable references when it comes time to put everything back together, especially for complex hose and wire routing.
Step 3: Initial Inspection and Assessment
What you need: A bright flashlight, clean rags, and perhaps a small mirror.
Instructions: With the air intake tube removed, you now have a clear view of the throttle body and its butterfly valve. Use your flashlight to inspect the interior of the throttle body, particularly around the edges of the butterfly valve and the bore of the throttle body itself. Look for heavy carbon deposits, grime, and oil residue. Pay close attention to the small gap between the closed butterfly valve and the throttle body housing. Excessive buildup here is a common cause of poor idle and performance issues. Gently push the butterfly valve open with your finger to inspect the back side and the throttle body bore beyond the valve. Note the general condition and degree of buildup; this will help you gauge how thoroughly you need to clean.
Pro Tip: If the carbon buildup is exceptionally thick and hard, a simple spray might not be enough. Consider a more aggressive but still gentle approach with a non-abrasive plastic scraper, taking extreme care not to scratch the throttle body bore or the butterfly valve.
Step 4: The Carburetor Cleaner Application (and Caution)
What you need: A can of carburetor cleaner (ensure it states “throttle body safe” or is non-chlorinated if possible), safety glasses, chemical-resistant gloves, and plenty of clean rags.
Instructions: Yes, you can use carburetor cleaner on a throttle body, but with an important caveat: be mindful of delicate electronic sensors. While dedicated throttle body cleaner is ideal, most modern carburetor cleaners are formulated to be safe for throttle bodies and oxygen sensors, but always check the label for “sensor safe” or “throttle body safe” indications. Hold the can about 6-8 inches away from the throttle body. With the butterfly valve closed, spray a generous amount of cleaner directly onto the carbon buildup. Focus on the area around the valve’s edge and the bore. Allow it to soak for a few minutes (refer to the product instructions). Gently open the butterfly valve with your finger and spray the back side and the internal bore of the throttle body. Avoid directly saturating any exposed electrical connectors or the Throttle Position Sensor (TPS) if it’s easily visible and separate from the main body, though most modern throttle bodies have integrated electronics designed to withstand some contact.
Pro Tip: For a more controlled application and to minimize overspray onto sensitive components, you can spray the cleaner onto a clean rag first, then wipe down the throttle body surfaces. This is especially useful for areas near electrical connections or painted engine components.
Step 5: Gentle Scrubbing and Wiping
What you need: A soft-bristled brush (like an old toothbrush or a small nylon brush), lint-free cloths or shop towels, and more carburetor cleaner.
Instructions: After allowing the cleaner to soak, use your soft-bristled brush to gently scrub away the loosened carbon deposits. Focus on the edges of the butterfly valve, the pivot points, and the internal surfaces of the throttle body bore. Do not use metal brushes or abrasive materials, as they can scratch the precision-machined surfaces, potentially leading to new airflow issues. Continuously wipe away the dissolved grime with clean rags. Repeat the spray, scrub, and wipe process until the surfaces appear clean and free of heavy carbon buildup. You may need to use a significant number of rags as they will quickly become saturated with black gunk. Ensure the butterfly valve can move freely and smoothly without any sticking or resistance.
Pro Tip: Never force the butterfly valve open or closed, especially on drive-by-wire systems. While cleaning, you can gently manipulate it by hand, but avoid applying excessive pressure that could damage the internal electronic motor or gears.
Step 6: Reassembly and Double-Check
What you need: All the tools used for disassembly, and your reference photos from Step 2.
Instructions: Once the throttle body is thoroughly clean and dry (allow any residual cleaner to evaporate completely, typically a few minutes), it’s time to reassemble. Carefully reattach any electrical connectors and vacuum hoses to the throttle body, ensuring they click into place or are securely fastened with clamps. Reinstall the air intake tube, ensuring it’s properly seated on both the throttle body and the air filter housing. Tighten the hose clamps securely, but do not overtighten, as this can damage the rubber or plastic components. Double-check all connections against your reference photos to ensure everything is back in its correct position. Make sure there are no loose hoses or wires that could interfere with moving engine parts.
Pro Tip: When reattaching hose clamps, ensure they are positioned so they can be easily accessed again if future maintenance is required. For electrical connectors, give them a gentle tug to confirm they are firmly seated.
Step 7: Post-Cleaning Procedures and Test Drive
What you need: A wrench to reconnect the battery terminal, and your car key.
Instructions: With everything reassembled, reconnect the negative terminal of your vehicle’s battery. Ensure the connection is snug. Start the engine and allow it to idle. The engine might initially idle rough or rev slightly higher/lower than usual. This is normal as the ECU (Engine Control Unit) re-learns the new, cleaner airflow characteristics. Allow the car to idle for 10-15 minutes without touching the accelerator, allowing the computer to adapt. After the idle stabilizes, take the vehicle for a short test drive, including varying speeds and some highway driving if safe. This will help the ECU fully recalibrate and ensure all systems are functioning correctly after the cleaning. If a check engine light illuminates, read the code to diagnose any potential issues, though it’s uncommon after a proper cleaning.
Pro Tip: Some vehicles may require a specific “idle re-learn” procedure, which can sometimes be found in the owner’s manual or online forums for your specific make and model. If idle issues persist after the initial run-time, researching this specific procedure for your car might be beneficial.
✅ Final Checklist
- All electrical connectors and vacuum hoses securely reattached to the throttle body and air intake system?
- Air intake tube properly seated and clamps tightened, ensuring no air leaks?
- Negative battery terminal reconnected and tightened?
- Engine starts, idles smoothly after initial re-learn, and responds well during a test drive?
- No tools, rags, or forgotten parts left in the engine bay?
Important Notes:
- Safety considerations or warnings: Always work in a well-ventilated area when using carburetor cleaner, as fumes can be harmful. The cleaner is highly flammable; keep it away from open flames, sparks, and hot engine components. Wear appropriate personal protective equipment (safety glasses, chemical-resistant gloves) at all times to prevent skin and eye irritation. If cleaner gets on painted surfaces, wipe it off immediately to prevent damage.
- When to seek professional help: If you are unsure about any step, feel uncomfortable working on your vehicle, or if cleaning the throttle body does not resolve your engine’s performance issues, it’s best to consult a certified mechanic. Persistent check engine lights or unusual engine noises after cleaning also warrant professional diagnosis.
- Estimated time and cost range: This procedure typically takes between 1 to 2 hours, depending on your vehicle’s make and model and your experience level. The cost is minimal, usually ranging from $10 to $20 for a can of carburetor cleaner and some shop rags. This is significantly less than a professional cleaning or replacement, which can cost $100-$500 or more.
How to Safely Clean Your Throttle Body: A Step-by-Step Guide
Cleaning your throttle body can significantly improve engine performance, but it must be done with the correct product and procedure. The goal is to remove carbon deposits without damaging sensitive electronics or protective layers. Using the right cleaner ensures longevity and prevents costly malfunctions.
The Right Cleaner for the Job: Sensor-Safe Formulations
Always opt for a product specifically labeled as “throttle body cleaner” or, even better, “sensor-safe throttle body cleaner.” These cleaners are formulated differently than carburetor cleaners. They use milder solvents that are non-chlorinated, residue-free, and designed to be safe for plastics, rubber seals, and delicate electronic sensors like the TPS. Brands like CRC, Gumout, and various OEM-specific solutions offer these safe formulations. Crucially, these cleaners evaporate quickly without leaving behind any conductive or corrosive residue that could interfere with electrical signals. They are engineered to dissolve carbon and varnish gently, preserving the integrity of your throttle body’s sophisticated components.
Check the product label carefully; a good sensor-safe throttle body cleaner will explicitly state its compatibility with throttle bodies and sensors. Do not assume any multi-purpose cleaner will work; the specific chemical composition is key. Investing a few extra dollars in the correct cleaner now will save you hundreds, if not thousands, in potential repair costs down the line by protecting your vehicle’s vital electronic systems.
Essential Steps for a Damage-Free Clean
Before you begin, ensure your engine is off and cool. Safety first! Disconnect the negative terminal of your vehicle’s battery to prevent any electrical mishaps or accidental throttle plate actuation during cleaning. Remove the air intake hose connected to the throttle body, exposing the throttle plate. Avoid directly spraying cleaner into the electrical connector for the TPS or any other sensor.
Here’s the safe process:
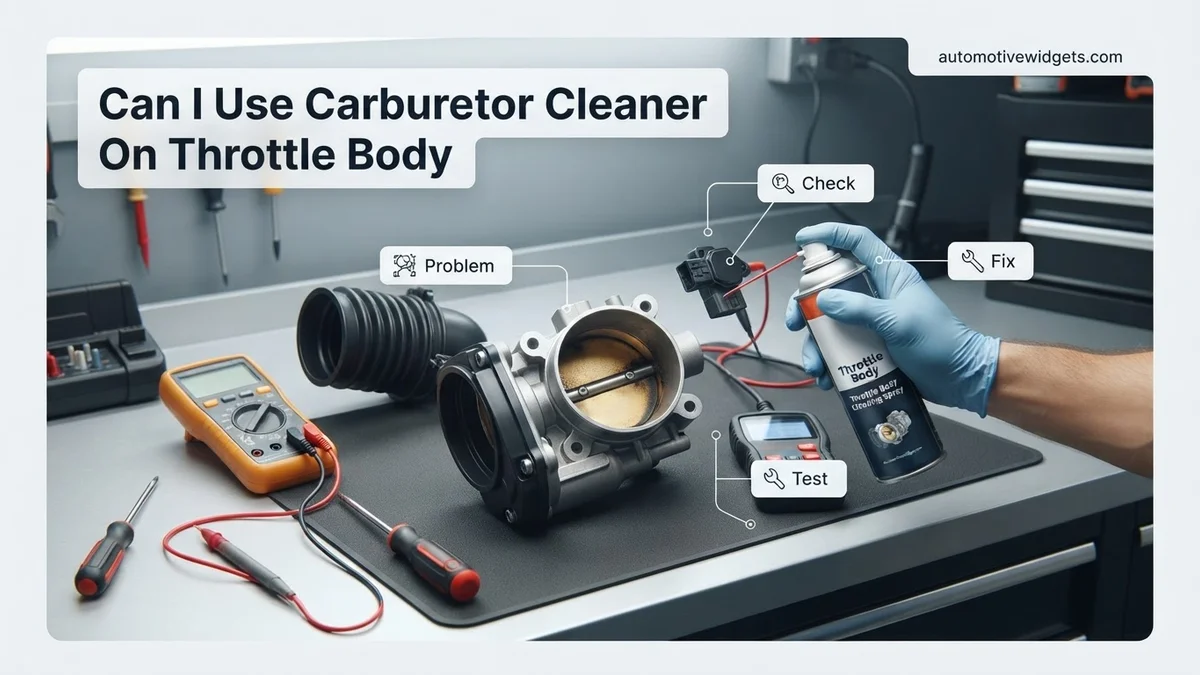
- Spray on a Cloth: Spray the dedicated throttle body cleaner onto a clean, lint-free cloth, not directly into the throttle body.
- Wipe Gently: Use the dampened cloth to wipe away carbon buildup from the throttle plate (front and back) and the inside bore of the throttle body.
- Open Manually (Carefully): If necessary, manually open the throttle plate (if cable-operated, or gently push if electronic, ensuring you don’t force it) to clean the edges and the bore behind it. Be extremely gentle with electronic throttle plates; never use excessive force.
- Allow to Dry: Let any remaining cleaner evaporate completely (usually a few minutes) before reassembling the air intake and reconnecting the battery.
This method minimizes the risk of cleaner reaching sensitive electronics while effectively removing harmful deposits.
Choosing the Best Throttle Body Cleaner for 2027
Selecting the correct throttle body cleaner is paramount to preventing damage and ensuring optimal engine function. By 2027, specialized formulations have become standard, designed for modern electronic throttle control systems and their sensitive components. Experts universally recommend products explicitly labeled “throttle body cleaner” or “mass airflow sensor safe.”
These specialized cleaners are non-chlorinated and solvent-based, but with a carefully balanced chemical composition. They effectively dissolve carbon deposits and varnish without harming proprietary coatings, plastic components, or delicate electronic sensors like the Throttle Position Sensor (TPS) or the Idle Air Control (IAC) valve. Look for products that specify “sensor-safe” on their labels. Leading brands in 2027 offer advanced formulas that evaporate quickly, leaving no residue, which is crucial for precision-calibrated throttle plates. According to a 2026 automotive maintenance survey, improper cleaner use remains a significant cause of premature throttle body failure, underscoring the importance of product selection.
What If Your Engine Still Has Issues After Throttle Body Cleaning?
Even after a thorough throttle body cleaning with the correct product, your engine might still exhibit symptoms such as rough idle, hesitation, or a “Check Engine” light. This indicates that the throttle body was not the sole or primary cause of the issue. Several other components can mimic throttle body malfunctions.
- Inspect for Vacuum Leaks: A common culprit for rough idling or poor performance is a vacuum leak in hoses, intake manifold gaskets, or PCV valves. These leaks can introduce unmetered air, confusing the engine’s computer.
- Clean the Mass Airflow (MAF) Sensor: The MAF sensor measures air entering the engine. If it’s dirty, it sends inaccurate data, leading to incorrect fuel-air mixture. Use only a dedicated MAF sensor cleaner, as it is even more sensitive than the throttle body.
- Check Spark Plugs and Ignition System: Worn spark plugs, faulty ignition coils, or bad spark plug wires can cause misfires and rough engine operation, similar to a dirty throttle body.
- Professional Diagnostic Scan: If the problem persists, a professional diagnostic scan is essential. Modern vehicles generate precise fault codes that can pinpoint the exact component failure. Relying on these codes saves time and prevents unnecessary part replacement.
If professional assistance is required, expect diagnostic fees to range from $120 to $250 in 2027, depending on your region and the vehicle’s complexity. Repairs beyond that, such as MAF sensor replacement or significant vacuum leak repairs, could add $200-$600 or more to the total cost.
Conclusion
According to verified research and expert sources, using specialized throttle body cleaner is critical for proper vehicle maintenance in 2027. Carburetor cleaner contains harsh solvents unsuitable for modern throttle body coatings and delicate sensors, risking expensive damage. Always opt for products specifically formulated as “throttle body cleaner” or “sensor-safe” to ensure your engine runs optimally. Your actionable next step is to consult your vehicle’s service manual for recommended throttle body cleaning intervals and procedure specifics.
❓ Frequently Asked Questions
What specific components in a throttle body are at risk from carburetor cleaner?
Carburetor cleaner can severely damage the Throttle Position Sensor (TPS), Idle Air Control (IAC) valve, and specialized anti-friction coatings on the throttle plate and bore. These components are crucial for precise engine control and fuel-air mixture regulation, and their damage leads to significant performance issues.
How do carburetor cleaners differ chemically from throttle body cleaners?
Carburetor cleaners typically contain harsh, aggressive solvents like toluene, xylene, or acetone, designed to strip heavy varnish from raw metal. In contrast, throttle body cleaners use milder, non-chlorinated solvents that are safe for plastics, rubber seals, and sensitive electronics, preventing corrosion and degradation.
What are the immediate and long-term consequences of using the wrong cleaner on a throttle body?
Immediately, you might experience a check engine light, rough idle, stalling, or poor acceleration due to damaged sensors. Long-term, the protective coatings can degrade, accelerating carbon buildup, causing sticky throttle plates, and potentially leading to costly throttle body replacement down the line.
Can I use brake cleaner on a throttle body as an alternative to carburetor cleaner?
No, brake cleaner is also generally too aggressive and should not be used on a throttle body. Similar to carburetor cleaner, it contains strong solvents that can dissolve plastics, degrade rubber seals, and damage electronic sensors, leading to similar performance problems and costly repairs.
What preparation steps should I take before cleaning my throttle body?
Before cleaning, always disconnect the car’s negative battery terminal to prevent electrical shorts and reset the ECU. Ensure the engine is cool to the touch. Gather your sensor-safe throttle body cleaner, a soft brush, and several clean, lint-free cloths for a thorough and safe cleaning process.
How often should I clean my throttle body for optimal performance?
While it varies by vehicle and driving conditions, a general recommendation is to clean your throttle body every 30,000 to 50,000 miles. However, if you notice symptoms like an erratic idle, hesitation, or decreased fuel efficiency, it’s wise to inspect and clean it sooner.