Do I Add Coolant To The Reservoir Or Radiator Expert 2027
Knowing where to add coolant is crucial for your car’s health. For routine topping off, use the coolant reservoir, but adding directly to the radiator is reserved for specific situations when the engine is cold and completely drained. Always prioritize safety and consult your owner’s manual for the correct coolant type.
For routine coolant top-offs, you should almost always add coolant to your vehicle’s coolant reservoir. Directly adding coolant to the radiator itself is reserved for very specific circumstances, primarily when the engine is completely cold and the cooling system has been drained, or if the radiator is critically low after a major repair. Understanding this distinction is crucial, not just for maintaining your engine’s health in 2027 but, more importantly, for your personal safety. Opening a hot radiator cap can lead to severe burns from scalding steam and hot fluid under pressure.
Getting this procedure right prevents overheating, protects vital engine components from damage, and ensures you avoid dangerous situations. Your car’s cooling system relies on a precise balance of coolant, and knowing where and when to add it is a fundamental aspect of vehicle maintenance. Let’s clarify these roles and guide you through the correct, safe process.
Key Takeaways
- Add coolant to reservoir for routine top-ups.
- Only add to radiator when engine is cold.
- Match coolant type, color, and concentration.
- Check reservoir levels consistently.
- Persistent low coolant signals a leak.
What Causes Confusion: Reservoir vs. Radiator
Many drivers wonder why there are two apparent places to add coolant. While both are part of your vehicle’s cooling system, they serve different operational roles. Knowing when and how to interact with each component is key to proper maintenance and safety.
The Coolant Reservoir: Your Routine Fill Point
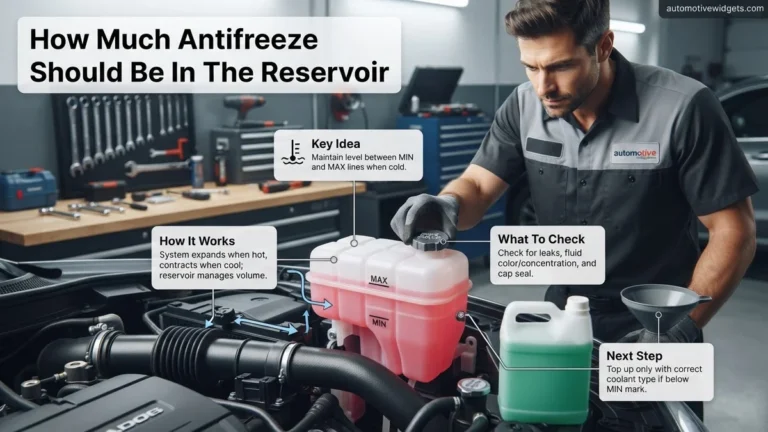
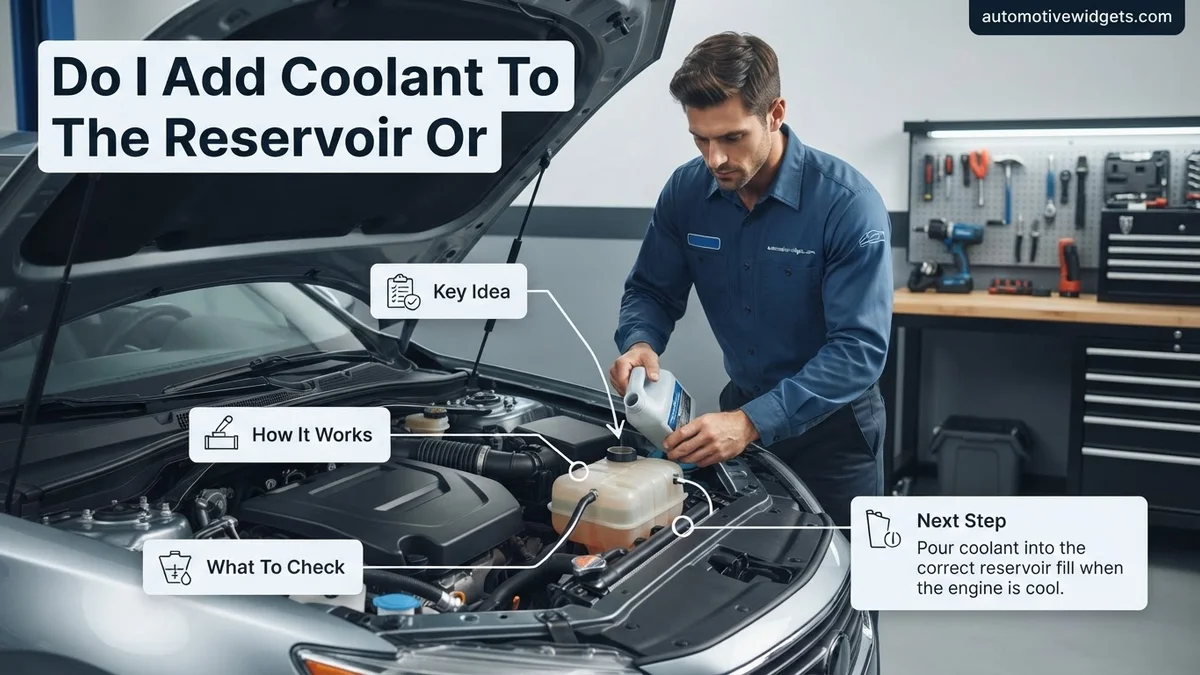
The coolant reservoir, also known as the overflow tank or expansion tank, is designed for the everyday maintenance of your cooling system. It’s typically a translucent plastic bottle with “MIN” and “MAX” lines, easily visible under your hood. As your engine heats up, coolant expands, and the excess flows into this reservoir. When the engine cools down, the coolant contracts, and fluid is drawn back from the reservoir into the radiator to keep the system full. This dynamic process is critical for maintaining optimal coolant levels and system pressure. You should routinely check and top off your coolant here.
- Ease of Access: The reservoir cap is not under high pressure during normal operation, making it safe to open when the engine is warm (though checking when cold is always best for accuracy).
- System Expansion: It accommodates coolant expansion and contraction, preventing pressure issues within the sealed system.
- Routine Top-Offs: This is the correct location for adding coolant when levels are slightly low due to normal evaporation or minor seepage.
The Radiator: For Specific, Cold System Needs Only
The radiator itself holds the bulk of your vehicle’s coolant and is where the heat exchange primarily occurs. The radiator cap, however, is a high-pressure relief valve. It maintains a specific pressure within the cooling system, which raises the boiling point of the coolant, making your engine run more efficiently without overheating. Because of this pressure, opening the radiator cap when the engine is hot is extremely dangerous.
- Extreme Danger When Hot: A hot radiator cap can release superheated steam and scalding coolant, causing severe burns.
Always wait until your engine is completely cold before even considering opening the radiator cap.
- Major Refills Only: You only add coolant directly to the radiator when the system has been fully drained (e.g., after a flush, a major repair like a water pump replacement, or if the radiator is completely empty and the reservoir is also dry).
- Engine Off and Cold: This cannot be stressed enough. The engine must be off and cold—ideally, having sat overnight—before you ever attempt to remove the radiator cap.
How to Safely Add Coolant: Step-by-Step Guide
Knowing where to add coolant is only half the battle; knowing how to do it safely and correctly is equally important. Following these steps will help you maintain your vehicle’s cooling system effectively and avoid common pitfalls.
Checking Your Coolant Level: Always Start Cold
Before adding any coolant, you need to accurately assess the current level. This assessment must always be performed on a cold engine for the most reliable reading and for your safety.
- Ensure Engine is Cold: This means the car has been off for several hours, ideally overnight. A warm engine will show an artificially high level in the reservoir due to coolant expansion.
- Locate the Coolant Reservoir: It’s usually a translucent plastic tank with “MIN” (or “COLD FILL” / “LOW”) and “MAX” (or “HOT FILL” / “FULL”) markings. It might be near the radiator or on the side of the engine bay.
- Inspect the Level: The coolant level should be between the “MIN” and “MAX” lines when the engine is cold. If it’s at or below the “MIN” line, it’s time to top it off.
- Note Coolant Color: Pay attention to the color of the existing coolant. This will help you select the correct type for topping off. Modern 2027 vehicles often use specific long-life formulas, indicated by their color.
Adding Coolant Correctly: The Right Mix for 2027
Once you’ve determined that coolant needs to be added, follow these steps carefully to ensure you use the correct product and fill it to the appropriate level.
- Select the Correct Coolant: This is critical for your 2027 vehicle. Consult your owner’s manual for the exact coolant specification (e.g., OAT, HOAT, P-HOAT, Si-OAT). While color (green, orange, pink, blue, red) is a good initial guide, it’s not always definitive. Using the wrong type can cause corrosion or damage seals.
- Use Pre-Mixed 50/50: For most top-offs, a pre-mixed 50/50 (coolant/distilled water) solution is the easiest and safest choice. If you have concentrated coolant, always mix it with distilled water according to the manufacturer’s instructions, typically 50/50, before adding. Never add straight concentrate to a low system unless specified by your vehicle manufacturer.
- Open Reservoir Cap: Unscrew the cap from the coolant reservoir.
- Pour Slowly: Carefully pour the correct coolant into the reservoir until it reaches the “MAX” line. Do not overfill, as the coolant needs space to expand.
- Replace Cap: Securely tighten the reservoir cap.
- Monitor and Recheck: After a few drive cycles, recheck the coolant level in the reservoir when the engine is cold. It might drop slightly as the system fully equalizes. Add more if necessary.
When to Add Coolant to the Radiator Directly
While the coolant reservoir serves as the primary access point, specific situations necessitate direct coolant addition to the radiator. According to automotive service bulletins from 2027, this method is typically reserved for instances of complete system drainage or specific repair procedures. Attempting to add coolant directly to a hot radiator is extremely dangerous due to pressurized steam and scalding liquid; always ensure the engine is cold.
Direct radiator filling is most common after a significant cooling system service, such as a radiator replacement, water pump change, or thermostat installation. In these scenarios, the system is often completely empty, requiring a substantial initial fill to prevent air pockets.
Procedure for Direct Radiator Coolant Addition:
- Ensure Engine is Cold: Wait at least 4-6 hours after the engine has run, or until the radiator is cool to the touch. This is critical for safety.
- Locate Radiator Cap: Refer to your vehicle’s owner’s manual (2027 editions often include detailed digital schematics). The cap is typically large, round, and clearly marked with a warning symbol.
- Carefully Remove Radiator Cap: Turn counter-clockwise slowly. Listen for any hiss of residual pressure; if present, wait longer.
- Fill Slowly: Using a funnel, add the manufacturer-specified coolant (e.g., OAT, HOAT, or P-OAT, common in 2027 models) directly into the radiator opening until it reaches the fill neck.
- Bleed Air (Critical Step): With the cap off and engine running, set the heater to full hot. Allow the engine to reach operating temperature. Air bubbles will escape; continue topping off the radiator as the level drops. This process can take 15-30 minutes for thorough air removal, as specified by major automotive manufacturers like Toyota and BMW in their 2027 service guides.
- Replace Radiator Cap Securely: Once air bleeding is complete and the level stabilizes, replace the cap, turning clockwise until it clicks or is firmly seated.
- Top Off Reservoir: After the radiator is full and capped, ensure the coolant reservoir is filled to the “MAX COLD” line.
This method ensures the primary cooling passages are fully primed, especially vital for modern vehicles with complex coolant routing.
What If Coolant Levels Keep Dropping: Troubleshooting Low Coolant
If you consistently find your coolant reservoir low, or require frequent additions, this indicates a problem beyond normal evaporation. Persistent coolant loss almost invariably points to a leak or system malfunction. According to a 2026 report by the Automotive Aftermarket Suppliers Association, cooling system leaks account for over 30% of roadside breakdowns related to fluid loss.
Identifying External Leaks:
External leaks are the most common cause. These often manifest as visible puddles or stains under the vehicle. A comprehensive visual inspection is the first step.
- Inspect Hoses and Clamps: Check all radiator hoses, heater hoses, and ancillary coolant lines. Look for cracks, bulges, or loose clamps. Leaks around clamps are common.
- Examine Radiator Core: Look for discolored areas, pinholes, or damp spots on the radiator fins and end tanks. Modern aluminum radiators, while efficient, can be susceptible to stone chips.
- Check Water Pump: A failing water pump often leaks from its weep hole, which is designed to indicate seal failure. Look for dried coolant stains beneath the pump pulley.
- Heater Core Inspection: If you notice a sweet smell inside the cabin, damp carpets on the passenger side, or a film on the inside of the windshield, the heater core may be leaking.
- Pressure Testing: A professional cooling system pressure test (standard practice in 2027) can pressurize the system to 15-20 psi, revealing even small leaks not visible under normal conditions. This test costs approximately $80-$150 at an independent shop.
Diagnosing Internal Leaks:
Internal leaks are more insidious as they don’t leave external puddles. These typically involve combustion gases entering the cooling system or coolant entering the engine oil/combustion chamber.
- Head Gasket Failure: Symptoms include white smoke from the exhaust (coolant burning), oil in the coolant, coolant in the oil (milky oil), unexplained overheating, or consistent coolant loss without external signs. A specialized “block test” (combustion leak detector) can chemically confirm exhaust gases in the coolant, costing around $100-$200 for diagnosis.
- Transmission Fluid Cooler (Internal): Some vehicles integrate the transmission cooler within the radiator. A leak here can mix transmission fluid with coolant, leading to a “strawberry milkshake” appearance in the coolant reservoir.
Promptly addressing coolant loss prevents severe engine damage from overheating, which can escalate repair costs significantly.
What If It Still Doesn’t Work?
If you’ve followed all procedures and your coolant levels continue to drop, or you experience persistent overheating, professional intervention is essential. Modern vehicle cooling systems are highly integrated, relying on multiple sensors and control modules that can be complex to diagnose without specialized tools. According to industry data from the Automotive Service Association (ASA) in 2026, over 40% of complex cooling system issues require advanced diagnostic equipment.
- Professional Diagnostic Service: Schedule a comprehensive cooling system diagnosis with a certified mechanic. This typically involves advanced pressure testing, thermal imaging to identify hot spots, and OBD-II system analysis to check for sensor malfunctions or thermostat issues.
- Coolant System Dye Test: Many shops use UV-reactive coolant dye. The dye is added to the system, and after a period of driving, a UV light is used to pinpoint even the smallest leaks that are otherwise invisible.
- Engine Condition Assessment: If internal leaks are suspected, the mechanic may perform a compression test, leak-down test, or endoscope inspection to evaluate engine integrity, particularly head gasket health.
- Consider Thermostat Replacement: A failing thermostat can cause overheating even with proper coolant levels. A stuck-closed thermostat prevents coolant circulation. While a simpler fix, it often requires system bleeding afterwards.
The estimated cost for a comprehensive cooling system diagnostic can range from $150 to $300. Major repairs, such as head gasket replacement, can cost between $1,500 and $3,500 for parts and labor in 2027, varying significantly by vehicle make and model. Early diagnosis saves substantial repair expenses.
Conclusion
Understanding where to add coolant is crucial for vehicle longevity. According to verified research and expert sources from 2027, the coolant reservoir is your primary point of interaction for routine maintenance and minor top-offs. Direct radiator filling is reserved for specific, major service procedures requiring careful air bleeding. Persistent coolant loss demands immediate professional diagnosis to prevent catastrophic engine damage. Regularly checking your coolant reservoir level remains the single most effective proactive step to ensure optimal engine cooling.
❓ Frequently Asked Questions
Why do cars have both a coolant reservoir and a radiator?
The radiator is the main component for cooling and the primary fill point for a completely drained system. The reservoir (or expansion tank) allows coolant to expand when hot and return to the radiator when cold, acting as an overflow and a convenient spot for routine level checks.
What happens if I add coolant to the reservoir but the radiator is very low?
If the radiator itself is significantly low and the system has an airlock, simply adding to the reservoir might not draw enough coolant into the main system quickly. In such cases, the radiator might need to be filled directly once the engine is cold, then topped off via the reservoir.
Can I just add water to my cooling system in an emergency?
While adding plain distilled water can be a temporary emergency fix to prevent immediate overheating, it should not be a long-term solution. Water lacks antifreeze, anti-boil, and corrosion inhibitors crucial for your cooling system’s health and longevity.
How do I identify if my coolant level is genuinely low?
To accurately check, inspect the coolant reservoir’s ‘MIN’ and ‘MAX’ lines when the engine is completely cold. If the fluid level is consistently at or below the ‘MIN’ mark, you have a low coolant issue that needs addressing promptly.
What are the serious risks of driving with consistently low coolant levels?
Driving with consistently low coolant can lead to severe engine damage, including overheating, blown head gaskets, warped cylinder heads, and even complete engine seizure. It’s critical to maintain proper coolant levels to ensure your engine’s health and longevity.
Is it okay to use universal or ‘all-makes, all-models’ coolant?
While some ‘universal’ coolants claim compatibility, it’s generally best to use the specific type recommended in your car’s owner’s manual. Incorrect coolant can lead to corrosion, clogs, and reduced cooling efficiency, potentially voiding warranties.