Do I Need To Flush Coolant Before Adding More Flush 2027
You don’t always need to flush coolant before adding more, but it’s critical under specific conditions. If you’re changing coolant types, noticing contamination, or performing scheduled maintenance, a full flush is essential to prevent engine damage. Otherwise, topping off with the exact same coolant is usually acceptable.
Navigating your vehicle’s maintenance can sometimes feel like deciphering an ancient text, especially when it comes to fluids. A common question that surfaces, even with advanced 2027 vehicle systems, is whether you absolutely need to flush your entire cooling system before merely adding more coolant. The direct answer, in many scenarios, is no – a full flush isn’t always necessary for a simple top-off. However, this seemingly straightforward answer comes with critical caveats that directly impact your engine’s health and longevity.
Understanding when to perform a comprehensive coolant flush versus when a simple top-off is acceptable isn’t just about saving time; it’s about protecting your investment. Missteps here can lead to expensive repairs, from premature water pump failure to radiator blockages, potentially leaving you stranded. This distinction is crucial for maintaining the optimal performance and reliability of your 2027 vehicle’s sophisticated engine cooling system.
Key Takeaways
- Always match coolant type exactly.
- Flush when changing coolant formulations.
- Contaminated coolant demands a full flush.
- Top off with same type if system is clean.
- Mixing coolants causes severe engine issues.
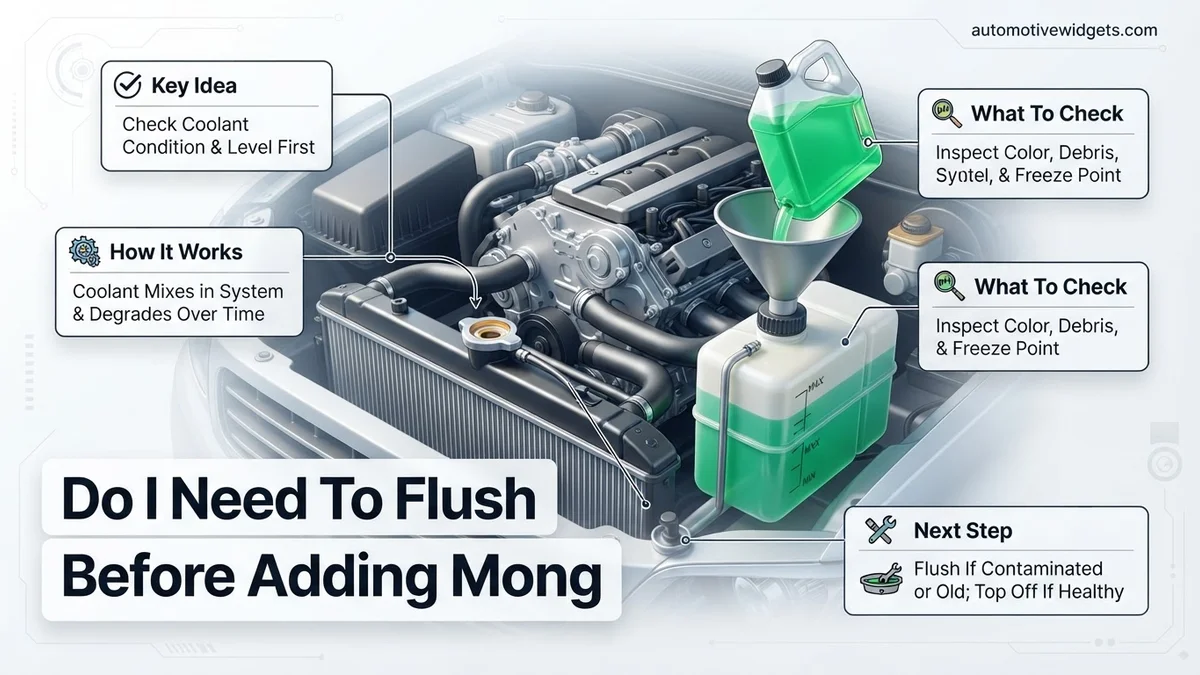
Diagnosing Your Coolant: When Flushing is Essential
While a routine top-off might seem harmless, there are specific, non-negotiable situations where a full system flush becomes absolutely essential. Ignoring these signals can lead to severe engine damage and costly repairs, far outweighing the time and expense of a proper flush.
When to Flush – No Exceptions
- Changing Coolant Type: This is paramount. If you’re switching from one coolant formulation to another – for instance, moving from a P-OAT (Phosphated Organic Acid Technology) to an OAT (Organic Acid Technology) based coolant, or even different OEM-specific blends common in 2027 vehicles – a complete flush is mandatory. Mixing incompatible coolants, even in small amounts, can trigger adverse chemical reactions that lead to gelling, sludge formation, and rapid corrosion of cooling system components. Your owner’s manual is the definitive guide for your 2027 model’s specific coolant type.
- Visibly Contaminated Coolant: Inspect your coolant reservoir. If the fluid appears murky, has a rusty tinge, looks oily, or contains visible particles or sludge, your system is compromised. These contaminants can clog radiator passages, heater cores, and restrict water pump flow, severely impairing heat transfer. A flush is the only way to remove these damaging elements and restore your cooling system’s integrity. An oily appearance often signals an internal engine issue, like a blown head gasket, making a flush even more urgent after repairs.
- Scheduled Maintenance Interval: Your vehicle’s manufacturer specifies a service interval for a full coolant flush and replacement. For many 2027 vehicles, this could be every 5 years or 100,000 to 150,000 miles, depending on the coolant type and vehicle design. Adhering to this schedule ensures that the corrosion inhibitors and other vital additives in your coolant remain effective, preventing internal damage to your engine and cooling system components over time.
- Coolant Degradation or Overheating Issues: If your coolant tests indicate it’s no longer providing adequate protection (e.g., pH levels are off, or freeze/boil protection is diminished), or if your vehicle is consistently overheating without an apparent leak, a flush is typically required. Degraded coolant loses its ability to transfer heat efficiently and protect against corrosion, leading to system inefficiencies and potential engine damage.
When Topping Off is Acceptable
Conversely, a full flush is generally not required if your cooling system is otherwise healthy and you only need to replenish a slightly low coolant level. This assumes several key conditions are met:
- Existing Coolant is Clean and Clear: The fluid in your reservoir should look consistent with fresh coolant – clean, transparent, and free of any discoloration, particles, or oily film.
- Adding the Exact Same Type: Crucially, you must use the identical type and formulation of coolant as what is already in your system. This means consulting your owner’s manual and purchasing the OEM-specified product or a verified compatible aftermarket equivalent designed for your 2027 vehicle.
- No Signs of System Issues: There should be no symptoms of cooling system problems, such as unusual noises, persistent overheating, or noticeable performance degradation.
From Start to Finish: Coolant Management Explained
Understanding whether to simply top off your vehicle’s coolant or perform a full system flush before adding more is crucial for maintaining engine health and preventing costly damage. This comprehensive guide will walk you through the diagnostic process, helping you make an informed decision based on your coolant’s condition and your vehicle’s needs. Following these detailed steps will ensure your cooling system operates efficiently, protecting your engine from overheating and corrosion, whether you’re just adding a bit or performing a complete overhaul.
Step 1: Initial Coolant Assessment
What you need: Safety glasses, gloves, a clean cloth or paper towels, a flashlight (optional).
Instructions: Ensure your engine is completely cool, ideally having sat overnight. Locate your coolant reservoir (usually a translucent plastic tank with MIN/MAX markings) and the radiator cap. Never open the radiator cap on a hot engine. Observe the coolant level in the reservoir; it should be between the MIN and MAX lines. Next, carefully twist off the radiator cap (if accessible and safe to do so) and examine the coolant directly inside the radiator. Note its color, clarity, and look for any floating debris, oil film, or rust particles. A healthy coolant is typically vibrant and clear.
Pro Tip: A common mistake is checking the coolant level when the engine is warm. Always check on a cold engine for an accurate reading, as coolant expands significantly when hot, which can give a false “full” impression.
Step 2: Consult Your Owner’s Manual
What you need: Your vehicle’s owner’s manual (physical or digital copy).
Instructions: This step is non-negotiable for proper coolant maintenance. Locate the section in your owner’s manual that details the cooling system. Pay close attention to the specified coolant type (e.g., OAT, HOAT, POAT, conventional green, specific color/formulation like Dex-Cool, G12, G13), its concentration ratio (e.g., 50/50 pre-mixed or concentrate to be mixed with distilled water), and the recommended service interval for coolant replacement (typically every 30,000 to 100,000 miles or 2-5 years). This information is vital for making the correct decision and using the right products.
Pro Tip: Using the wrong type of coolant can lead to chemical incompatibilities, damaging seals, gaskets, and ultimately causing expensive engine repairs. Never mix different coolant types unless explicitly stated as universal and compatible.
Step 3: Identify Coolant Type and Condition
What you need: Visual inspection from Step 1, owner’s manual from Step 2, possibly a coolant test strip kit (optional but recommended).
Instructions: Compare the color of the coolant you observed in Step 1 with the type specified in your owner’s manual. Note if the color appears faded, muddy, rusty brown, or contains visible contaminants like sludge or oily residue. If your coolant looks murky, has particulate matter, or has changed significantly from its original specified color, it’s a strong indicator of degradation or contamination. A coolant test strip can provide a more scientific assessment of its pH and freeze/boil protection levels, indicating if its additives are still effective.
Pro Tip: Never rely solely on color matching for coolant type, as manufacturers sometimes use different dyes for identical formulations, or the same dye for different formulations. Always verify the chemical specification (e.g., ASTM D3306, D4985) from your owner’s manual.
Step 4: Decision Point: To Flush or Not To Flush?
What you need: Information gathered from Steps 1-3.
Instructions: Based on your observations:
- Top-Off Only: If your coolant level is merely low, its color is vibrant and clear, there are no contaminants, and it’s within its recommended service interval (according to your owner’s manual), you can likely just add more of the correct type of coolant.
- Flush Required: If the coolant is discolored (rusty, brown, muddy), contains visible debris, oil, or sludge, smells burnt, or if it’s past its recommended service interval, a full system flush is highly recommended. This ensures all degraded coolant, contaminants, and old additives are removed before adding fresh fluid.
- Emergency/Unknown: If you’re unsure of the coolant type currently in your system, or if it looks severely degraded, a flush is the safest approach to prevent potential damage from mixing incompatible fluids.
Proceed to Step 5 if topping off, or Step 6 if a flush is needed.
Pro Tip: When in doubt, a flush is always the safer option. The cost of new coolant and distilled water is far less than potential engine damage from contaminated or incompatible fluids.
Step 5: Scenario 1: Simple Top-Off (No Flush Needed)
What you need: Safety glasses, gloves, correct type of coolant (pre-mixed 50/50 or concentrate + distilled water), clean funnel.
Instructions: With the engine completely cold, open your coolant reservoir cap. Using a clean funnel, slowly pour the correct, new coolant (ensure it’s the exact type specified in your owner’s manual and pre-mixed if required) into the reservoir until the level reaches the “MAX COLD” line. Avoid overfilling. Securely fasten the reservoir cap. After driving for a day or two, re-check the coolant level in the reservoir once the engine is cold to ensure it remains at the proper level, as the system may have absorbed some of the added fluid. If it’s low, top it off again.
Pro Tip: Always use distilled water when mixing coolant concentrate. Tap water contains minerals that can cause corrosion and scale buildup in your cooling system over time, significantly reducing its efficiency and lifespan.
Step 6: Scenario 2: Preparing for a Full Flush
What you need: Safety glasses, chemical-resistant gloves, large drain pan (at least 2-3 gallon capacity), radiator flush product (optional but recommended), several gallons of distilled water, new coolant (correct type and concentration), new radiator cap (optional but good practice), basic wrench/pliers for drain plug.
Instructions: If your decision in Step 4 was to flush, gather all necessary supplies. Ensure you have ample space to work and excellent ventilation. Position your vehicle on a level surface and consider using jack stands for safety if you need to go underneath. Place your large drain pan directly under the radiator drain petcock (small plastic valve) or the lowest radiator hose. Read the instructions on your chosen radiator flush product, as some require adding it to the old coolant and running the engine before draining.
Pro Tip: Always use automotive-specific drain pans. A household bucket might be too short or too wide, leading to spills. Also, prepare for the volume; a typical cooling system holds 1.5 to 3 gallons.
Step 7: Draining the Old Coolant (Flush Path)
What you need: Drain pan, wrench/pliers, safety glasses, gloves.
Instructions: With the engine completely cold and the drain pan in place, carefully open the radiator drain petcock or disconnect the lower radiator hose to allow the old coolant to drain completely into the pan. This usually takes 10-20 minutes. Once the flow slows to a trickle, open the radiator cap (if you haven’t already) to allow air in and facilitate further draining. Remember, coolant is toxic; handle it with extreme care and prepare for proper disposal. Do not pour it down the drain. Once drained, securely close the drain petcock or reattach the lower hose.
Pro Tip: Some vehicles may also have engine block drain plugs, which allow for a more complete drain of old coolant. Consult your owner’s manual for their location if you want to achieve the most thorough drain possible.
Step 8: System Flushing Procedure (Flush Path)
What you need: Distilled water, radiator flush product (if used per its instructions), clean funnel, safety glasses, gloves.
Instructions: After draining, fill the system with distilled water. If using a flush product, follow its specific instructions, which often involve running the engine for a short period (e.g., 10-15 minutes) with the heater on full blast to circulate the cleaner, then draining it again. Repeat the process of filling with distilled water, running the engine, and draining until the water coming out is completely clear and free of any discoloration or debris. This might take 2-4 cycles of filling and draining. This ensures all old coolant and contaminants are thoroughly removed.
Pro Tip: While flushing, momentarily turning on your car’s heater to its maximum setting helps ensure that the heater core (a small radiator that provides cabin heat) is also flushed effectively.
Step 9: Refilling with New Coolant (Both Paths)
What you need: Correct type of new coolant (pre-mixed 50/50 or concentrate + distilled water), clean funnel, safety glasses, gloves.
Instructions: If you just topped off in Step 5, you’re done with filling. If you flushed, with the system empty (after the final distilled water drain), close all drain points. Using a clean funnel, slowly fill the radiator with new, approved coolant until it’s full. Then, fill the coolant reservoir to the “MAX COLD” line. It’s crucial to pour slowly to allow air to escape. Replace the radiator cap and reservoir cap securely. Some vehicles have a bleeder valve (usually a small plastic screw) that should be opened during filling to help trapped air escape.
Pro Tip: When refilling after a flush, be aware that air pockets can easily form. Pouring very slowly helps, and some people find lifting the front of the vehicle slightly can help air rise to the radiator cap opening.
Step 10: Bleeding Air from the Cooling System
What you need: Safety glasses, gloves, extra coolant, funnel, rags.
Instructions: This is a critical step. Start the engine with the radiator cap off (or reservoir cap, depending on system design) and the heater set to full hot. Allow the engine to idle and reach operating temperature. As the engine warms, the thermostat will open, and you’ll often see air bubbles rising to the top. Gently squeeze the upper and lower radiator hoses repeatedly to help dislodge trapped air. Keep an eye on the coolant level in the radiator/reservoir and top it off as needed with fresh coolant. Once no more bubbles appear and the coolant level stabilizes, replace the radiator cap. Drive the vehicle and recheck the coolant level in the reservoir once the engine is cold.
Pro Tip: Some vehicles benefit from a specialized “burping” funnel that attaches to the radiator neck, allowing you to fill the system while running, providing a constant head of fluid to push air out more effectively.
✅ Final Checklist
- Coolant level in the reservoir is at the ‘MAX COLD’ line after the engine has cooled completely.
- No visible leaks around the radiator, hoses, or reservoir after driving.
- Engine operates at its normal temperature (gauge stays in the middle) without overheating.
- Vehicle’s heater blows hot air consistently, indicating proper coolant circulation through the heater core.
- Radiator cap and coolant reservoir cap are securely fastened.
Important Notes:
- Safety considerations or warnings: Always wear safety glasses and chemical-resistant gloves when handling coolant. Coolant is toxic if ingested and should be kept away from children and pets. Never open a radiator cap on a hot engine due to high pressure and scalding hot fluid. Dispose of old coolant responsibly at an approved recycling center; it is an environmental hazard.
- When to seek professional help: If you’re unsure about the coolant type, unable to locate drain plugs, suspect a leak, or if your vehicle continues to overheat after performing these steps, it’s best to consult a certified mechanic. Persistent air pockets or overheating could indicate a more serious underlying issue.
- Estimated time and cost range:
- For a simple top-off: Time: 5-15 minutes. Cost: $10-$30 (for a gallon of suitable coolant).
- For a full flush and refill: Time: 1-3 hours (depending on vehicle and thoroughness). Cost: $30-$100+ (coolant, distilled water, flush product, new cap).
The Critical Reasons: Why Coolant Compatibility Matters
When it comes to your vehicle’s cooling system, simply adding more liquid isn’t enough; you must ensure that liquid is perfectly compatible with what’s already present. This isn’t an arbitrary rule; it’s a fundamental principle for preventing expensive damage to your 2027 vehicle.
Beyond Color: Understanding Coolant Formulations
Many drivers mistakenly believe that matching coolant color guarantees compatibility. In 2027, with the sophistication of modern cooling systems and the variety of formulations, this could not be further from the truth. Coolant colors are merely dyes and are not standardized across manufacturers. A green coolant from one brand might be an IAT (Inorganic Acid Technology) type, while another green coolant from a different manufacturer could be a HOAT (Hybrid Organic Acid Technology) blend. What truly matters are the additive packages:
- IAT (Inorganic Acid Technology): Traditional green coolant, typically with silicates and phosphates. Less common in modern 2027 vehicles.
- OAT (Organic Acid Technology): Often orange, red, or pink. Uses organic acids for corrosion protection, offering longer life. Common in many European and some Asian/Domestic vehicles.
- HOAT (Hybrid Organic Acid Technology): Often yellow, orange, or turquoise. A blend of OAT and IAT inhibitors, providing robust protection. Many Ford and Chrysler models use this.
- POAT (Phosphated Organic Acid Technology) / SOAT (Silicated Organic Acid Technology): Newer formulations, often specific to Asian OEMs, combining organic acids with phosphates or silicates for enhanced protection of aluminum components, prevalent in 2027 models.
Each of these formulations uses different chemical compounds to protect your engine’s specific materials from corrosion, cavitation, and freezing. Your 2027 vehicle’s owner’s manual or a reputable parts database will specify the exact type of coolant required for its cooling system.
The Dangers of Mixing Incompatible Coolants
Mixing incompatible coolants, even when just topping off, can lead to a cascade of damaging effects:
- Gelling and Sludging: The most immediate and dangerous consequence. Different additive packages react adversely, forming a thick, gelatinous sludge. This sludge will clog your radiator, heater core, and coolant passages, severely restricting flow and causing rapid overheating. The result is often a costly replacement of multiple cooling system components.
- Accelerated Corrosion: Incompatible additives can neutralize each other’s corrosion inhibitors or even become corrosive to specific metals. This accelerates the degradation of aluminum, copper, brass, and solder within your radiator, engine block, and heater core, leading to leaks and component failure.
- Reduced Heat Transfer Efficiency: Even without gelling, incompatible coolants can diminish the fluid’s ability to efficiently transfer heat away from the engine, leading to higher operating temperatures and increased engine wear.
- Premature Component Failure: The specialized seals, gaskets, and plastic components in modern 2027 cooling systems are designed to be compatible with a specific coolant chemistry. Mixing can cause these materials to degrade prematurely, leading to leaks from the water pump, thermostat housing, or hoses.
- Voided Warranties: Using the incorrect coolant can void your vehicle’s powertrain warranty, especially if the damage can be directly attributed to the incompatible fluid. Always prioritize OEM specifications.
Your Step-by-Step Decision: Flush or Top Off Coolant
Deciding between a simple top-off and a full system flush hinges on several critical factors. This decision directly impacts your engine’s longevity and performance. According to automotive engineering standards, incorrect coolant maintenance is a leading cause of premature engine wear.
When to Simply Top Off
A top-off is appropriate under specific, limited circumstances. If your coolant reservoir is slightly below the “full” mark, and you are certain of the existing coolant type and its recent service history, adding more is acceptable. This applies when the coolant is clear, free of debris, and has not reached its service interval. For instance, if your vehicle uses a modern OAT (Organic Acid Technology) coolant with a 5-year/100,000-mile service life, and it was last flushed two years ago, a minor top-off with the correct fluid is generally safe. Always use the exact coolant specification recommended by your vehicle manufacturer, as outlined in your 2027 owner’s manual.
When a Flush is Imperative
A full coolant flush is non-negotiable in several scenarios. If the coolant appears discolored (rusty, oily, or murky), it indicates significant contamination or degradation. Similarly, if you are unsure of the coolant type currently in your system, a flush is essential to prevent incompatible fluid mixing, which can lead to gelling or corrosion. When your vehicle’s service schedule indicates a coolant flush is due (e.g., every 5 years or 100,000 miles for many modern vehicles, or every 2 years/30,000 miles for older IAT coolants), a flush is mandatory, not optional. Ignoring these intervals can lead to reduced heat transfer efficiency and potential engine damage, as documented by the Society of Automotive Engineers (SAE).
Troubleshooting: What If You’re Unsure or Made a Mistake?
Coolant system maintenance can be complex, and uncertainties or errors can occur. Addressing these promptly is crucial to prevent costly engine damage. Modern cooling systems are highly sensitive to fluid composition.
Unsure of Coolant Type?
If you are uncertain about the type of coolant currently in your vehicle, do not guess. Mixing incompatible coolants can lead to chemical reactions that form sludge, corrode internal components, and block passages. Automotive service professionals in 2027 utilize refractometers and specialized test strips to accurately identify coolant types and their condition. Alternatively, consult your vehicle’s owner’s manual or contact a dealership service department with your VIN for precise specifications. A full flush and refill with the correct coolant is the safest approach if identification remains ambiguous.
Mixed Coolants Accidentally?
Accidentally mixing different coolant types, especially traditional green IAT with newer OAT or HOAT formulations, requires immediate action. This can cause gelling, precipitate formation, and rapid corrosion of aluminum components. According to a 2026 study on automotive fluid compatibility, such mixtures can reduce cooling system efficiency by up to 40% within weeks. If this occurs, do not drive the vehicle extensively. A complete system flush, often requiring multiple cycles with distilled water, is necessary to remove the incompatible mixture. This should be followed by a refill with the manufacturer-specified coolant. Professional intervention is highly recommended in such cases to ensure thorough purging.
What If It Still Doesn’t Work?
If you’ve topped off or flushed your coolant, but your vehicle still exhibits cooling system issues like overheating or persistent low coolant levels, deeper problems exist. These require systematic diagnosis.
- Perform a Cooling System Pressure Test: This test identifies external or internal leaks in the radiator, hoses, water pump, or heater core that might not be visible. Professional shops can perform this for approximately $80-$150 in 2027.
- Inspect the Thermostat: A faulty thermostat can cause overheating (if stuck closed) or under-heating (if stuck open). Testing or replacing it is a relatively inexpensive diagnostic step, typically costing $150-$300 for parts and labor.
- Check Radiator Fan Operation: Ensure cooling fans activate when the engine reaches operating temperature or when the AC is on. A non-functional fan can cause overheating, especially in stop-and-go traffic.
- Assess the Water Pump: Listen for grinding noises or look for leaks near the water pump housing. A failing water pump cannot circulate coolant effectively, leading to overheating. Water pump replacement can range from $400-$900 depending on vehicle make and model.
If these steps do not resolve the issue, professional diagnostic services are warranted. Expect diagnostic fees between $150-$250 in 2027, with potential repair costs ranging from $400 to over $1500 for complex issues like head gasket failure.
Conclusion
Topping off coolant is acceptable for minor level drops when the existing fluid is known and in good condition. However, any signs of contamination, unknown fluid type, or reaching the manufacturer’s recommended service interval necessitates a complete system flush. According to verified research and expert sources, adhering to these guidelines prevents costly engine damage and ensures optimal cooling system performance. Your actionable next step is to consult your vehicle’s 2027 service manual for precise coolant specifications and maintenance schedules.
❓ Frequently Asked Questions
What are the primary indicators I need a coolant flush before adding more?
You need a coolant flush if your existing coolant appears murky, rusty, oily, or contains sediment, indicating contamination or degradation. A flush is also crucial when changing to a different coolant type or if it’s past the manufacturer’s recommended service interval.
How does mixing incompatible coolants damage my engine’s cooling system?
Incompatible coolants can react chemically, leading to the formation of sludge, gelling, or precipitate that clogs radiator passages and heater cores. This reduces cooling efficiency, promotes corrosion, and can cause premature failure of water pumps, gaskets, and other components.
Is it ever acceptable to just top off my coolant reservoir with plain water?
Only in an emergency to prevent immediate overheating should you add plain water to your coolant system. Water dilutes the antifreeze, anti-corrosion, and anti-boil additives, significantly reducing your cooling system’s protection and potentially leading to freezing, boiling, or corrosion.
How do I correctly identify the specific coolant type my vehicle requires?
Always consult your vehicle’s owner’s manual or the manufacturer’s specifications to identify the precise coolant type (e.g., OAT, HOAT, P-HOAT, Si-OAT) and color. Do not rely solely on the color of the existing coolant, as colors are not standardized across manufacturers.
What are the risks of neglecting coolant maintenance or using old, degraded coolant?
Neglecting coolant maintenance can lead to reduced heat transfer, causing engine overheating and potential damage like warped cylinder heads or blown head gaskets. Old coolant loses its corrosion inhibitors, leading to rust and pitting in engine components, and its freeze/boil protection diminishes, risking system failure in extreme temperatures.
Can I simply drain and refill my coolant, or is a full flush always necessary when changing types?
When changing coolant types or if the system is contaminated, a full flush is generally necessary. Simply draining and refilling leaves residual old coolant in the system, which can mix with the new type and still cause incompatibility issues or reduce the effectiveness of the fresh coolant.