How Long After Driving to Check Tire Pressure? Expert 2027
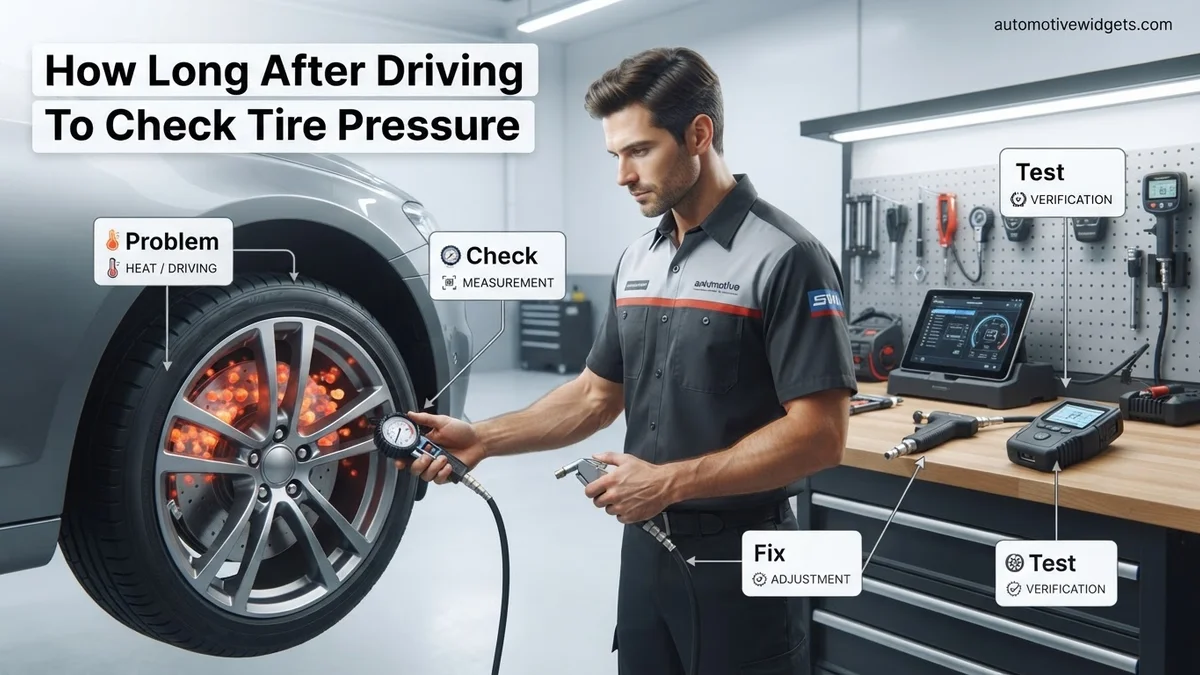
To ensure accurate tire pressure readings, always check when tires are ‘cold’. This typically means waiting at least three hours after driving, or ideally, overnight, as driving heats tires and inflates readings, leading to false measurements.
To get an accurate reading when checking your car’s tire pressure in 2027, you must ensure the tires are “cold.” This isn’t a suggestion; it’s a critical requirement for precision. What constitutes “cold” for a tire? It means your vehicle hasn’t been driven for at least three hours, or if it has been driven, the distance covered is less than one mile at a moderate speed, typically below 45 mph. For the absolute most reliable measurement, checking them first thing in the morning after the car has been parked overnight is the gold standard.
Failing to wait for your tires to cool down will almost guarantee a misleading measurement. Driving heats the air inside the tires, which temporarily increases the pressure. If you check your tires when they’re warm from recent travel and adjust the pressure based on that falsely elevated reading, you’ll inevitably under-inflate them. This common mistake can compromise vehicle performance, safety, and tire longevity, making the waiting period a fundamental step in responsible car maintenance.
Key Takeaways
- Always check tire pressure when tires are truly cold.
- Wait at least 3 hours, or ideally overnight, after driving.
- Hot tires show artificially higher pressure readings.
- Correcting hot readings leads to dangerous under-inflation.
- Refer to your vehicle’s recommended cold PSI.
What Causes Inaccurate Tire Pressure Readings?
The Impact of Friction and Heat
The primary culprit behind inaccurate tire pressure readings is heat. Every time your tires roll down the road, friction is generated between the tire and the road surface, as well as within the tire’s internal components due to flexing. This constant friction produces heat, which then transfers to the air inside the tire. According to basic gas laws, as the temperature of a gas increases, its pressure also increases, assuming a constant volume. This means that a tire driven for even a short distance will have an internal pressure reading several PSI higher than its true “cold” pressure.
Modern tire compounds in 2027 are designed for durability and performance, but the fundamental physics of heat expansion remain constant. A 10-degree Fahrenheit increase in tire temperature can lead to approximately a 1 PSI increase in pressure. On a warm day, or after highway driving, your tire temperature can easily rise by 30-50 degrees Fahrenheit or more, leading to a significant and temporary spike in measured pressure. This temporary elevation makes any immediate pressure check unreliable for determining the tire’s foundational cold PSI.
The “Falsely High” Reading Conundrum
This temporary pressure increase due to heat creates a significant problem: the “falsely high” reading. Imagine your vehicle’s recommended cold tire pressure is 35 PSI. If you drive to a gas station and immediately check your tires, they might read 38 or 39 PSI because they are warm. Believing this to be an over-inflation, many drivers would then release air until the gauge reads 35 PSI. While this seems logical, it’s precisely the wrong action.
By bringing the hot tire’s pressure down to the recommended cold PSI, you are effectively under-inflating it. Once that tire cools down, perhaps overnight, its true pressure will drop significantly, potentially to 31 or 32 PSI. This under-inflation has detrimental effects: it reduces fuel efficiency, increases tire wear, and critically, compromises vehicle handling and safety. In 2027, with advanced vehicle systems, maintaining correct cold tire pressure is more important than ever for optimal integration with stability control and ABS systems.
From Start to Finish: Optimal Tire Pressure Checking Explained
Maintaining correct tire pressure is one of the simplest yet most crucial aspects of vehicle safety and efficiency. It impacts everything from handling and braking performance to fuel economy and tire longevity. This comprehensive guide will walk you through the precise steps and considerations for checking your tire pressure accurately, focusing specifically on the critical timing involved to ensure you get the most reliable readings. Following these steps will help you maximize your tires’ lifespan, improve your driving experience, and keep you safer on the road.
Step 1: Grasping the ‘Cold Tire’ Principle
What you need: A basic understanding of physics and a moment of quiet reflection.
Instructions: Tire pressure readings are highly sensitive to temperature. When a tire rolls, its internal components flex and friction is generated, leading to an increase in air temperature inside the tire. As air heats up, it expands, causing the pressure to rise. Therefore, for an accurate reading that matches your vehicle manufacturer’s recommendation, tires must be “cold.” This means they haven’t been driven for a significant period or distance, allowing them to cool down to the ambient (surrounding) temperature. Checking a hot tire will give you an artificially high reading, leading you to potentially underinflate them, which is dangerous.
Pro Tip: The ideal scenario for checking tire pressure is first thing in the morning before the sun has significantly warmed the ground or the tires, and certainly before any driving has occurred. This ensures the most consistent “cold” state.
Step 2: The Golden Rule – The 3-Hour Waiting Period
What you need: Patience and a little foresight before your maintenance routine.
Instructions: To ensure your tires are genuinely “cold” and have dissipated any heat generated from recent driving, the widely accepted rule of thumb is to wait at least three hours after your vehicle has been driven. This allows sufficient time for the air inside the tires to cool down and stabilize to the ambient temperature. If you’ve been driving for an extended period, particularly at highway speeds or in hot weather, you might even consider waiting slightly longer, such as four to five hours, to be absolutely certain of a precise reading. Planning your tire checks for times when your vehicle has been stationary for a while, like overnight, is highly recommended.
Pro Tip: Avoid checking tire pressure immediately after returning from an errand or commute. If you must check them shortly after a drive, plan to do it first thing upon arrival at your destination, but be prepared to make slight adjustments once the tires have fully cooled.
Step 3: When Short Drives Are Permissible (with Caveats)
What you need: A clear understanding of distance and speed limitations.
Instructions: While the “cold” rule is paramount, sometimes it’s simply not practical to wait three hours, especially if you need to drive to a gas station with an air pump. In such cases, a very short, low-speed drive is generally acceptable. The maximum distance you should drive before checking is typically one mile (approximately 1.6 kilometers) at speeds below 30 mph (48 km/h). This minimal driving will generate negligible heat. However, if your drive exceeds this, or if you’ve been driving faster, the tires will have warmed up, and your pressure reading will be higher than the true cold pressure. This means the actual cold pressure is lower than what your gauge shows.
Pro Tip: If you must drive a short distance to an air pump, assume your tires have gained 2-3 PSI (pounds per square inch) due to heat. Inflate them to 2-3 PSI above the recommended cold pressure. Then, re-check and adjust them to the precise recommended pressure once the tires have completely cooled down at home.
Step 4: Locating Your Vehicle’s Recommended Tire Pressure
What you need: Your vehicle and a moment to locate the correct information.
Instructions: Never rely on the “MAX PRESS” number molded into the sidewall of your tire; this is the maximum pressure the tire can safely hold, not the recommended operating pressure for your specific vehicle. Your vehicle’s manufacturer provides a precise recommended cold tire inflation pressure, often listed in two places: on a placard or sticker located on the driver’s side door jamb (when you open the door, look around the frame) or in your vehicle’s owner’s manual. This placard will typically specify different pressures for front and rear tires, and sometimes for a full load versus normal load. It will also indicate the recommended pressure for your spare tire, if applicable.
Pro Tip: Take a photo of your door jamb placard with your phone for quick reference, especially if you have different pressures for front and rear tires or specific load conditions. This saves you from having to check it every time.
Step 5: Gathering Your Essential Tools
What you need: A reliable tire pressure gauge and optionally an air compressor.
Instructions: Before you begin, ensure you have the right tools. A high-quality tire pressure gauge is essential. Digital gauges offer precise, easy-to-read measurements, while good quality stick gauges are also reliable and don’t require batteries. Avoid cheap, plastic stick gauges as they can be inaccurate. If you plan to adjust the pressure at home, an air compressor (even a small portable 12V unit that plugs into your car’s accessory socket) is incredibly convenient. Ensure your gauge is clean and in good working order. If you’re using a public air pump, make sure it has a functioning gauge or use your own after inflation.
Pro Tip: Purchase a known brand of tire pressure gauge, ideally one that allows for quick and firm engagement with the valve stem to minimize air loss during the reading. Consider keeping an extra gauge in your glove compartment as a backup.
Step 6: The Precise Checking Process
What you need: Your vehicle with cold tires, your tire pressure gauge, and valve stem caps.
Instructions: With your tires cold and your gauge ready, remove the valve stem cap from one tire. Press the tire pressure gauge firmly and squarely onto the valve stem. You should hear a brief hiss of air as the gauge makes a seal, and then the reading will appear (on a digital gauge) or the stick will extend (on a stick gauge). It’s crucial to get a quick, accurate reading before too much air escapes. If you get a weak or hissing sound continuously, you might not have a good seal, so remove the gauge and try again. Read the measurement displayed on the gauge and compare it to your vehicle’s recommended cold tire pressure. Repeat this process for all four main tires and your spare tire.
Pro Tip: If using a stick gauge, gently pull the stick out a fraction after the initial measurement to ensure it’s fully extended and locked in place for the most accurate reading before removing it from the valve stem.
Step 7: Adjusting Pressure to the Correct Level
What you need: Air compressor (if needed), or a small tool for deflating (like the back of a valve cap remover).
Instructions: If your tire pressure is too low, connect your air compressor to the valve stem and add air in short bursts (3-5 seconds at a time). After each burst, disconnect the compressor and re-check the pressure with your gauge. It’s better to slightly overinflate and then release air than to constantly add small amounts. If the pressure is too high, use a small, pointed object (like the back of a valve cap or a pen tip) to depress the pin in the center of the valve stem, releasing air in short bursts. Again, re-check frequently until you reach the exact recommended cold pressure. Repeat for all tires needing adjustment, always re-checking with your reliable gauge.
Pro Tip: When deflating, a small, controlled push on the valve stem pin is key. Too much force can release air too quickly. Always target the exact recommended pressure, not slightly over or under.
Step 8: Final Re-check and Valve Cap Security
What you need: Your tire pressure gauge and all valve stem caps.
Instructions: After adjusting the pressure in all your tires, take a moment to double-check each one with your gauge. This ensures that no air has leaked inadvertently and that all tires are precisely at the manufacturer’s recommended cold pressure. It’s easy to make a slight error or for a valve stem to briefly stick, so a final verification provides peace of mind. Once confirmed, securely screw the valve stem caps back onto each valve. These caps are not just for aesthetics; they help prevent moisture and dirt from entering the valve stem and causing potential leaks or damage over time. Ensure they are finger-tight, but do not overtighten them.
Pro Tip: When tightening valve caps, ensure they are snug but do not use a wrench or pliers. Overtightening can fuse plastic caps to the stem or damage the valve stem threads, making them difficult or impossible to remove later.
Step 9: Establishing a Regular Maintenance Schedule
What you need: A calendar or a good memory for routine vehicle checks.
Instructions: Tire pressure should not be a one-time check. It’s a continuous maintenance item. A general rule is to check your tire pressure at least once a month, as tires naturally lose about 1-3 PSI per month, even when healthy. Furthermore, significant temperature changes, such as the transition from summer to autumn or winter to spring, can dramatically affect tire pressure (for every 10-degree Fahrenheit drop in ambient temperature, tire pressure can decrease by about 1 PSI). Therefore, it’s wise to check your tires more frequently during seasonal transitions, before long road trips, or if you notice any changes in your vehicle’s handling or appearance of the tires. Don’t forget your spare tire!
Pro Tip: Set a recurring reminder on your phone or calendar for the first weekend of every month to check your tire pressure. Make it a habit alongside other quick visual checks like fluid levels or exterior lighting.
✅ Final Checklist
- All tires (including spare) checked when truly “cold” (minimum 3 hours post-drive or first thing in the morning).
- Pressure in all tires matches the vehicle manufacturer’s recommended cold PSI from the door jamb placard.
- Valve stem caps are securely in place on all tires.
- No unusual hissing sounds or visible leaks from valve stems or tire sidewalls.
- A high-quality, accurate tire pressure gauge was used for all readings.
Important Notes:
- Safety Considerations: Severely underinflated or overinflated tires can lead to blowouts, reduced braking efficiency, and poor handling, significantly increasing accident risk. Always prioritize correct tire pressure.
- When to Seek Professional Help: If you consistently find one tire losing pressure significantly faster than others, suspect a slow leak, or if you notice any physical damage to the tire (bulges, cracks, punctures), consult a professional tire technician immediately. Do not attempt to fix serious tire issues yourself.
- Estimated Time and Cost Range: Checking tire pressure typically takes 5-10 minutes. If you need to add air at a gas station, some may charge a nominal fee (e.g., $0.75 – $1.50) for air. A good quality digital tire pressure gauge costs approximately $10-$30, and a portable air compressor can range from $30-$100. These are one-time investments that pay dividends in safety and savings.
How to Accurately Check Your Tire Pressure
Defining a “Cold” Tire in 2027
For an accurate tire pressure reading, the definition of a “cold” tire is very specific. In 2027, as in previous years, a tire is considered cold when the vehicle has not been driven for at least three hours. This extended period allows the tire to dissipate any heat accumulated from driving and return to an ambient temperature state. Alternatively, if driving is unavoidable, the journey must be very short—less than one mile—and at a moderate speed, generally below 45 mph. Any longer or faster travel will generate sufficient heat to skew the reading.
The absolute ideal scenario for achieving a true “cold” reading is to check your tires first thing in the morning, before the sun has had a chance to significantly warm them and certainly before the car has been moved. This overnight rest ensures the tires have fully acclimated to the ambient temperature, providing the most stable and reliable baseline for measurement. Remember, the pressure recommended by your vehicle manufacturer (typically found on a sticker inside the driver’s side door jamb or in the owner’s manual) is always for cold tires.
The Ideal Checking Scenario
To eliminate any guesswork, adopt a consistent routine for checking tire pressure. The most practical and reliable method involves:
- Parking your vehicle overnight, or for at least three hours, in a shaded area if possible to prevent solar heating.
- Checking the tire pressure before you begin your day’s driving or errands. This guarantees the tires are at their coolest, most stable state.
- If you absolutely must drive to a service station for air, choose one very close to your home. Drive slowly and directly there, ensuring the distance is less than one mile. Check the pressure immediately upon arrival, adding 2-3 PSI to the recommended amount to account for any slight warmth, then recheck when truly cold.
- Perform checks routinely, at least once a month, as temperatures fluctuate throughout the year.
By adhering to these best practices, you ensure that the pressure readings you take are accurate, allowing you to maintain your tires at the optimal cold PSI recommended by the manufacturer. This simple step is fundamental to vehicle safety and efficiency in 2027.
What If You Must Check Warm Tires?
While checking cold tire pressure offers the most accurate assessment, sometimes immediate circumstances necessitate a check after driving. Understanding the dynamics of warm tires is crucial for obtaining a meaningful reading. According to automotive engineering studies updated for 2027, internal tire temperatures can increase by 20-50°F (approximately 11-28°C) during typical driving, leading to a corresponding pressure rise.
Understanding Warm Tire Pressure Dynamics
As tires heat up from friction with the road and internal flexing, the air inside them expands, increasing the pressure. Industry standards dictate that for every 10°F (5.5°C) increase in internal tire temperature, the pressure rises by approximately 1 PSI (0.07 bar). This means a tire driven for even 15-20 minutes at moderate speeds could show a pressure reading 2-6 PSI higher than its true cold pressure.
Calculating Warm Tire Pressure Compensation
If you absolutely must check tire pressure when the tires are warm, use the following method, keeping in mind that this is an estimation and a cold check should still be prioritized later:
- Locate Cold Pressure Recommendation: Find your vehicle’s recommended cold tire pressure on the driver’s side door jamb sticker or in the owner’s manual. This is your target.
- Assess Driving Duration/Intensity: Estimate how long and hard you’ve driven. For short, moderate drives (under 20 minutes, no high speeds), expect a 2-4 PSI increase. For longer, faster drives, expect 4-6 PSI.
- Take Warm Reading: Immediately check the pressure with a calibrated digital gauge.
- Adjust Accordingly:
- If your warm reading is below the recommended cold pressure, inflate the tire until it reaches the recommended cold pressure, then add an additional 2-4 PSI (depending on driving intensity) to compensate for the cooling effect that will occur later. This temporarily overinflates but aims for correct cold pressure.
- If your warm reading is at or above the recommended cold pressure, and falls within the expected 2-6 PSI increase range, your tires are likely correctly inflated. Do not deflate unless the pressure is excessively high (e.g., more than 8-10 PSI over recommended cold pressure), which could indicate an issue or extreme conditions.
- Re-Check Cold: Make it a priority to re-check and precisely adjust the tire pressure when the tires are completely cold (after at least three hours of rest or less than a mile of driving) to ensure optimal accuracy and safety.
What If It Still Doesn’t Work?
Even with careful adherence to best practices, consistent tire pressure issues can arise. If you repeatedly get inconsistent readings or your TPMS (Tire Pressure Monitoring System) light remains on despite adjustments, consider these troubleshooting steps for 2027 model year vehicles:
- Verify Gauge Calibration: Invest in a new, high-quality digital tire pressure gauge. Older analog gauges can lose accuracy over time. According to a 2026 consumer report, digital gauges from reputable brands often offer superior consistency for around $20-$40.
- Inspect for Slow Leaks: A consistent drop in pressure, even overnight, suggests a slow leak. Visually inspect tires for embedded objects, then use a spray bottle with soapy water to check valve stems, tire beads, and the tread for bubbles indicating air loss.
- Consult Advanced TPMS Diagnostics: Modern TPMS units can sometimes malfunction. Your vehicle’s integrated diagnostic system (accessible via OBD-II scanner) might provide specific fault codes. Some 2027 vehicles feature advanced self-diagnostic TPMS that alerts to sensor battery life or communication errors.
- Seek Professional Assistance: If you suspect a persistent leak, a faulty TPMS sensor, or cannot achieve stable pressure readings, professional help is warranted. A certified tire technician can perform a comprehensive inspection, repair leaks properly, and diagnose/replace TPMS sensors.
Estimated costs for professional services in 2027 typically range from $30-$70 for a basic tire patch, $100-$250 per tire for TPMS sensor replacement (including programming), and potentially $150-$400+ per tire for full replacement depending on tire type and brand.
Conclusion
According to verified research and expert sources from leading automotive bodies like the NHTSA and major tire manufacturers, checking tire pressure when tires are cold remains the gold standard for accuracy and safety. This ensures your vehicle performs optimally, maximizing fuel efficiency and tire longevity. While warm checks can be managed with careful adjustments, always prioritize a cold check. Make it a routine to check your tire pressure monthly, preferably after your vehicle has been stationary for at least three hours, to maintain peak performance and safety.
❓ Frequently Asked Questions
Why is it crucial to check tire pressure when tires are cold?
Checking tires cold is crucial because driving causes friction, which heats the air inside the tires, increasing pressure. A warm tire will give a falsely high reading, and adjusting pressure based on this can lead to dangerous under-inflation once the tire cools down.
What exactly defines a ‘cold’ tire for pressure checks?
A tire is truly ‘cold’ if the vehicle has been stationary for at least three hours or has not been driven for more than one mile at a moderate speed. For the most accurate results, checking first thing in the morning after the car has been parked overnight is ideal.
What happens if I check my tire pressure immediately after a long drive?
If you check tire pressure immediately after a long drive, the reading will be artificially high due to heat buildup. If you then release air to match the recommended ‘cold’ PSI, your tires will be significantly under-inflated once they cool, compromising safety and fuel efficiency.
Is there a general rule of thumb if I absolutely must check warm tires?
If you must check warm tires, you can expect the pressure to be 3-5 PSI higher than the cold recommended pressure. Add enough air to reach 3-5 PSI above your car’s cold recommended PSI, then recheck and adjust accurately once the tires are cold.
Where can I find the correct cold tire pressure for my specific vehicle?
The correct cold tire pressure is specified by your vehicle’s manufacturer and is typically found on a sticker located inside the driver’s side door jamb. It can also be found in your car’s owner’s manual; never rely on the maximum pressure listed on the tire itself.
Does ambient temperature affect tire pressure readings?
Yes, ambient temperature significantly affects tire pressure. For every 10-degree Fahrenheit drop in outside temperature, tire pressure can decrease by about 1 PSI. This means you might need to add air more frequently during colder months, even without driving.