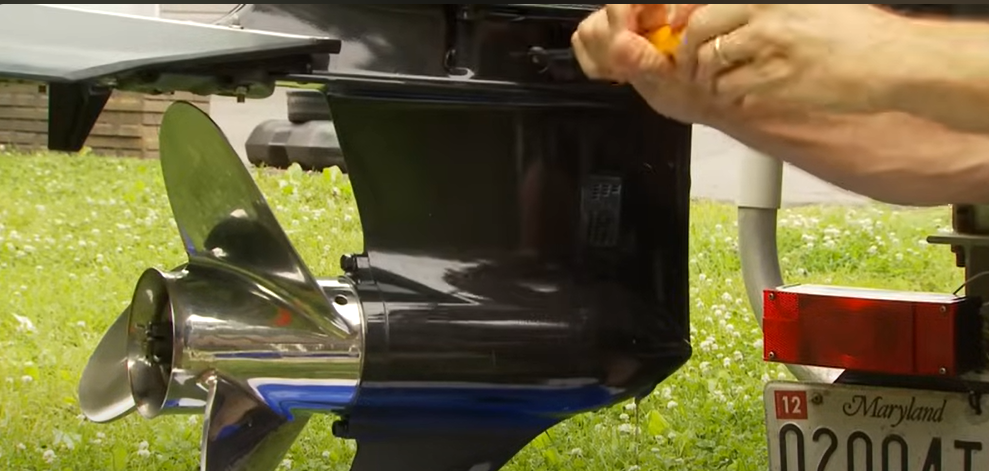
To change the lower unit oil on your outboard, you will need to start by draining the old oil. To do this, locate the drain plug on the lower unit and remove it. Then, allow all of the old oil to drain out into a catch pan.
Once the oil has finished draining, replace the drain plug and fill the lower unit with new oil. Be sure to use the correct type and amount of oil specified in your owner’s manual.
- Park the boat on a level surface and engage the emergency brake
- Remove the drain plug from the lower unit using a wrench and allow the oil to drain into a catch pan
- Remove the filter cover from the side of the lower unit using a Phillips screwdriver and discard the old filter
- Insert a new filter into the housing and reinstall the cover
- Pour fresh oil into the lower unit through the fill hole until it reaches the full line on the dipstick
-
6 Reinstall the drain plug and tighten it securely with a wrench
How Often Do You Change the Lower Unit Oil on an Outboard Motor?
The lower unit oil in an outboard motor should be changed every 50 hours of operation or once a year, whichever comes first. If the motor is used in saltwater, it should be changed more frequently.
How Do You Change the Oil in a Lower Unit Outboard Motor?
Assuming you have the proper tools and materials, changing the oil in a lower unit outboard motor is not difficult. Here are the steps: 1. Remove the propeller.
This will give you better access to the lower unit. 2. Place the outboard motor on a level surface so that it is stable and secure. 3. Locate the oil drain plug on the lower unit and remove it with a wrench or socket.
Allow all of the old oil to drain out into a pan or container. 4. Clean the area around the oil drain plug and reinstall it, making sure it is tight. 5. Fill the lower unit with new oil through the fill hole until it reaches full capacity according to your owner’s manual (usually about 1 quart).
6a) If your model has an external oil filter, locate it and unscrew it, then replace it with a new filter before screwing it back on tightly; OR 6b) If your model does NOT have an external oil filter, simply skip this step entirely. 7a) If your model has an internal water pump, locate its bleed screw(s) and open them slightly to allow any air bubbles in the system to escape; OR
7b) If your model does NOT have an internal water pump, simply skip this step entirely as well.
How Much Oil Does an Outboard Lower Unit Hold?
An outboard lower unit typically holds between 1 and 3 quarts of oil. The amount of oil in the lower unit will depend on the make and model of the outboard. It is important to check the level of oil in the lower unit regularly to ensure that it is full.
Can You Use Regular Gear Oil in an Outboard Lower Unit?
Many boat owners are unsure about what kind of oil to use in their outboard’s lower unit. The owner’s manual is always the best source of information for this sort of question, but some manuals can be vague or confusing. In general, however, it is safe to use regular gear oil in an outboard lower unit.
The main thing to keep in mind is that different outboards require different types and weights of oil. So, even if your manual doesn’t specifically call for regular gear oil, it’s still a good idea to check with your outboard’s manufacturer to see if they approve its use. Regular gear oil is usually a good choice for most outboards.
It offers good protection against wear and tear, and it can help extend the life of your engine. If you’re not sure what type or weight of oil to use, ask your local marine mechanic or dealer – they should be able to recommend the best option for your particular make and model of the outboard.
How Much Lower Unit Oil Do I Need
How Much Lower Unit Oil Do I Need?
You should always check your owner’s manual to see how much oil is recommended for your lower unit. Overfilling the lower unit with oil can cause damage to the seals and bearings, while not enough oil will lead to premature wear.
If you don’t have the owner’s manual handy, a good rule of thumb is to fill the lower unit until the oil level is even with the bottom of the fill hole. Once you’ve added the correct amount of oil, be sure to properly dispose of any excess.
Changing Lower Unit Oil Mercury 2-Stroke
If you have a Mercury 2-stroke outboard, it’s important to change the lower unit oil regularly. This keeps the gears and bearings in good condition and helps prevent corrosion. The recommended interval for changing lower unit oil is every 50 hours or once a year – whichever comes first.
If you use your boat frequently, it’s a good idea to change the oil more often. To change the lower unit oil, you’ll need: – A clean catch pan
– Lower unit oil (Mercury recommends Quicksilver High-Performance Gear Lube) – A funnel Starts by draining the old oil from the lower unit.
Remove the drain plug and let all of the oil drain into your catch pan. Once it’s done draining, replace the drain plug and fill the lower unit with new oil. Use your funnel to pour it in – don’t overfill!
The capacity of a Mercury 2-stroke lower unit is about 16 ounces (0.5 liters). Run the engine for a few minutes to circulate the new oil, then check the level again and add more if necessary.
How to Change Lower Unit Oil on a Mercury Outboard
If you own a Mercury outboard, it’s important to know how to change the lower unit oil. This oil lubricates the gears and bearings in the lower unit and needs to be changed every 50 hours of use or once a year, whichever comes first. Here’s a step-by-step guide on how to do it:
1. Remove the drain plug from the bottom of the lower unit using a wrench. Place a pan underneath to catch the draining oil. 2. Once all of the oil has drained out, remove the fill plug (also located on the bottom of the lower unit) and add fresh gear lube until it starts dripping out of the fill hole.
Replace the fill plug. 3. Start up your engine and let it run for a few minutes so that the new oil can circulate throughout the system. Then shut it off and check for any leaks around the drain or fill plugs – if there are any, tighten them up with a wrench until they stop.
That’s all there is to changing your lower unit oil!
How To Change Your Boat’s Lower Unit Oil
Outboard Lower Unit Oil
If you have an outboard motor, it’s important to know how to change the oil in the lower unit. This is a simple process that anyone can do, and it will help keep your outboard running smoothly. Here’s what you need to know about changing the oil in your outboard’s lower unit.
First, you’ll need to gather some supplies. You’ll need a new bottle of outboard motor oil, a funnel, and a wrench that fits the drain plug on your particular outboard model. Make sure you have plenty of rags or paper towels on hand to catch any spillage.
Once you have everything gathered, locate the drain plug on the lower unit of your outboard. The position of the drain plug will vary depending on the make and model of your motor, so consult your owner’s manual if you’re unsure where it is. Once you’ve found the drain plug, use the wrench to loosen and remove it.
Allow all of the old oil to drain completely from the lower unit into a container for disposal. Next, take your funnel and add fresh oil to the lower unit until it reaches full capacity (consult your owner’s manual for specifics on how much oil is needed). Once you’ve added enough new oil, re-install the drain plug and tighten it securely with the wrench.
Wipe up any spilled oil and dispose of used rags or paper towels properly. That’s all there is to changing the oil in an outboard lower unit! By following these simple steps, you can help keep your motor running smoothly for years to come.
Conclusion
If you have an outboard motor, it’s important to change the lower unit oil regularly. This will help keep your motor running smoothly and extend its life. Here’s a step-by-step guide to changing lower unit oil:
1. Start by removing the drain plug from the lower unit. Place a pan underneath to catch the old oil as it drains out.
2. Once the oil has finished draining, replace the drain plug and fill the lower unit with new oil.
Be sure to use the type of oil recommended by your outboard’s manufacturer.
3. Next, locate the fill plug on the side of the lower unit and remove it. Again, place a pan underneath to catch any spillage.


Leave a Reply