What Is The Best Gauge Wire For Jumper Cables Best 2027
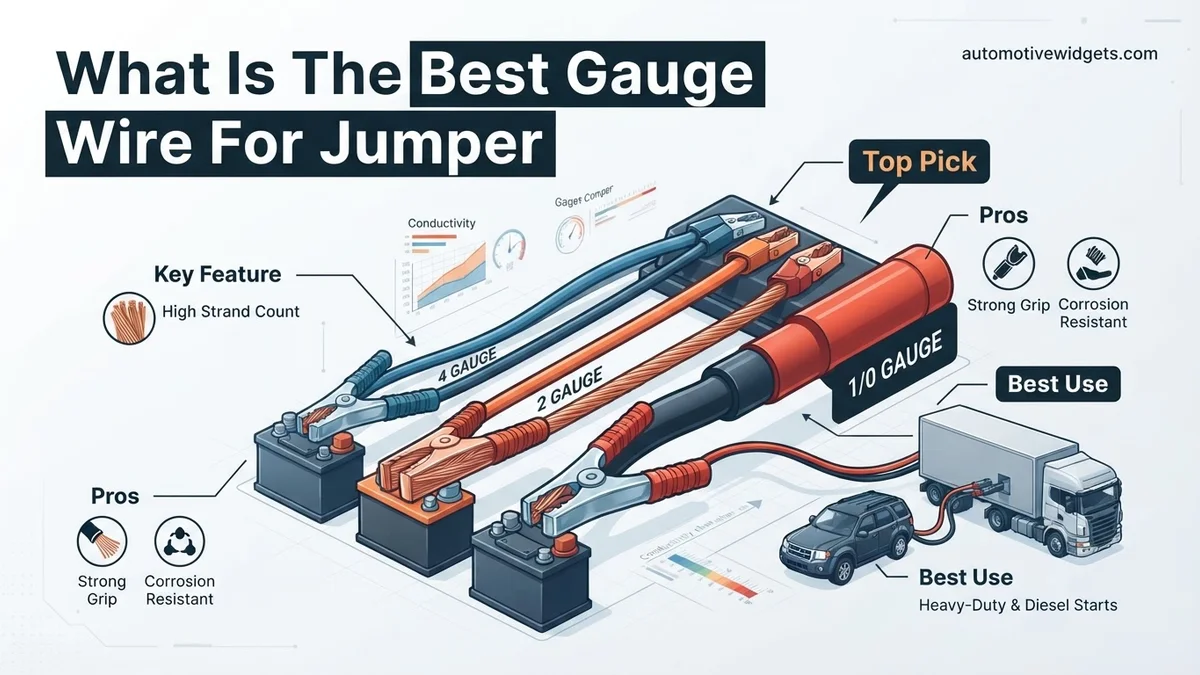
Choosing the best gauge wire for jumper cables depends on your vehicle’s needs; 4-gauge is ideal for most passenger cars, while larger vehicles may require 2-gauge. Consider cable length and 100% copper construction for optimal performance and safety.
The best wire gauge for jumper cables in 2027 generally ranges from 4-gauge for most passenger vehicles to 2-gauge for larger SUVs, trucks, and diesel engines. This specific gauge is crucial because it directly impacts the cable’s ability to safely and effectively transfer the high current needed to start a dead battery. Using the correct thickness ensures minimal voltage drop and prevents overheating, allowing your engine to crank reliably.
Selecting the right gauge isn’t just about successful jump-starts; it’s also a vital safety consideration. An undersized cable will struggle to deliver sufficient power, potentially damaging your vehicle’s electrical system or, worse, creating a fire hazard due to excessive heat. Understanding the relationship between wire gauge, current capacity, and cable length is key to making an informed decision that will serve you well for years to come.
Key Takeaways
- 4-gauge is ideal for most passenger vehicles.
- Use 2-gauge or 1-gauge for large trucks/SUVs/diesels.
- Longer cables require a thicker wire gauge.
- Always choose 100% copper for best conductivity.
- Avoid jumper cables thinner than 6-gauge for cars.
Understanding Jumper Cable Wire Gauge: What Causes Poor Performance?
The Gauge-Thickness-Capacity Connection
When you see a wire gauge number, remember that a lower number signifies a thicker wire. This inverse relationship is fundamental to understanding jumper cable performance. A thicker wire has less electrical resistance, allowing more current (amperage) to flow without significant loss or heat buildup. For instance, a 10-gauge wire is much thinner and has a far lower current capacity than a 4-gauge wire, making it unsuitable for most automotive jump-starting tasks.
- Higher Gauge Number: Thinner wire, higher resistance, lower current capacity (e.g., 10-gauge).
- Lower Gauge Number: Thicker wire, lower resistance, higher current capacity (e.g., 4-gauge, 2-gauge).
- For jump-starting, you always need cables with a low gauge number to ensure sufficient power transfer.
The Risks of Undersized Cables
Choosing jumper cables with a gauge number that is too high (meaning the wire is too thin) comes with significant drawbacks and risks. Thin wires have higher electrical resistance. When attempting to push the large currents required to crank an engine through them, this resistance causes a substantial voltage drop. This means the dead battery receives insufficient power, resulting in a failed jump-start. Moreover, this resistance generates excessive heat within the cables themselves.
- Ineffective Jump-Starts: Insufficient power reaches the dead battery, leading to continued engine struggles.
- Cable Damage: Overheating can melt the cable’s insulation, exposing bare wires.
- Fire Hazard: Extreme heat can ignite surrounding materials or damage battery terminals.
- Component Strain: The starting vehicle’s alternator and battery may be overworked trying to push current through resistive cables.
How to Choose the Best Jumper Cable Wire Gauge: A Step-by-Step Guide
Matching Gauge to Vehicle Type and Engine Size
Your vehicle’s engine size and type are the primary factors in determining the optimal jumper cable gauge. Larger engines, especially those in trucks, SUVs, and diesel vehicles, demand significantly more cranking power (measured in Cold Cranking Amps, or CCA) than smaller passenger cars. Consequently, they require thicker wires to handle that higher current draw effectively and safely. Always aim for a slightly thicker gauge than the absolute minimum to ensure reliability, especially if your cables will see frequent use or cold weather.
- Small to Mid-size Passenger Cars (4-cylinder, small V6): A 6-gauge cable is typically the absolute minimum, but a 4-gauge cable is far more effective and recommended for reliable performance in 2027.
- Standard SUVs, Light Trucks, V8 Sedans: Opt for a 4-gauge cable as the minimum. A 2-gauge cable is ideal for these vehicle types, providing ample power and reducing voltage drop.
- Heavy-Duty Trucks, Diesel Engines, Large RVs: These vehicles require substantial power. A 2-gauge cable should be your minimum, with 1/0 (pronounced “one-aught”) or 2/0 cables being the optimal choice for maximum efficiency and safety.
Considering Cable Length for Optimal Performance
The length of your jumper cables plays a critical role in gauge selection. The longer the cable, the greater the electrical resistance, even with a thick wire. This increased resistance leads to more voltage drop over distance. To counteract this effect and ensure sufficient power reaches the dead battery, longer cables must have a lower (thicker) gauge number. Skimping on gauge for longer cables means you’re effectively transmitting less power than intended, leading to frustratingly weak jump-starts.
- Short Cables (10-15 feet): A 4-gauge cable can be adequate for most passenger vehicles. However, a 2-gauge provides an extra margin of performance.
- Medium Cables (20 feet): This length is popular for convenience. For most vehicles, a 2-gauge cable is highly recommended. For heavy-duty applications, consider 1/0.
- Long Cables (25 feet or more): These lengths are beneficial for reaching vehicles in awkward positions. For effective power transfer, you absolutely need a thick gauge. 1/0 or even 2/0 gauge cables are necessary to minimize voltage drop over these greater distances, ensuring successful starting for even standard vehicles, let alone larger ones.
Why Gauge Matters: The Science Behind Jumper Cable Effectiveness
The gauge of a jumper cable is not merely a number; it is a critical factor directly impacting electrical resistance and current transfer efficiency. According to principles of electrical engineering, a smaller gauge number signifies a thicker wire. This increased cross-sectional area allows for a greater flow of electrons, thereby reducing electrical resistance. When resistance is high, more energy is converted into heat rather than being delivered to the dead battery. This phenomenon is governed by Ohm’s Law and Joule heating, where excessive heat can degrade cable insulation or, more critically, lead to a significant voltage drop across the cable.
A substantial voltage drop means the starter motor receives insufficient power, even if the donor battery is fully charged. For instance, a vehicle requiring 600-800 Cold Cranking Amps (CCA) – typical for many compact to mid-size vehicles in 2027 – will struggle to start with high-resistance, small-gauge cables. Automotive electrical specialists emphasize that thinner wires (e.g., 10-gauge or higher) can restrict current flow to below the required starting amps, rendering the jump-start ineffective. Therefore, selecting a lower gauge (thicker) cable minimizes energy loss, ensures maximum current delivery, and facilitates a rapid, successful jump-start.
Troubleshooting Jumper Cable Issues: What If Your Car Still Won’t Start?
Even with the correct gauge cables, issues can arise. Effective troubleshooting is key to resolving a no-start scenario. According to verified automotive service manuals updated for 2027 vehicle diagnostics, improper connections and deeply discharged batteries are the most common culprits after cable gauge.
Incorrect Connection Order or Poor Contact
The most frequent error is an improper connection. Always ensure clamps are securely attached to clean, uncorroded battery terminals.
- Verify Connections: Double-check that the red clamps are on positive (+) terminals and black clamps are on negative (-) terminals, following the correct attachment sequence (dead car positive, donor car positive, donor car negative, dead car negative/ground).
- Clean Terminals: Corroded terminals significantly impede current flow. Use a wire brush or sandpaper to clean off any white or green powdery residue from both battery terminals.
- Wiggle Clamps: Gently wiggle each clamp to ensure it has a solid metal-to-metal connection and isn’t just gripping insulation or loose dirt.
Insufficient Charge Time or Deeply Discharged Battery
A severely drained battery requires more than a quick jump attempt.
- Increase Charge Time: After connecting the cables correctly, allow the donor vehicle to run for 5-10 minutes at a slightly elevated RPM (around 1500-2000) before attempting to start the dead vehicle. This pre-charges the dead battery enough to accept the cranking current.
- Check Donor Battery Health: Ensure the donor vehicle’s battery is in good health and fully charged. A weak donor battery cannot supply adequate current.
- Listen for Clicks: If you hear a rapid clicking noise, it indicates the starter motor is receiving some power but not enough to engage fully, often due to a still-low battery charge or loose connections.
What If It Still Doesn’t Work?
If, after verifying cable gauge and thoroughly troubleshooting connection and charge issues, your vehicle still refuses to start, it’s time to consider deeper problems. A flat battery can sometimes be a symptom, not the root cause. Industry data from 2027 indicates that a range of components, from the alternator to the starter motor itself, could be at fault, requiring professional assessment.
- Attempt a Full Battery Charge: If possible, disconnect the battery and charge it with a dedicated battery charger for several hours, or even overnight, as per manufacturer guidelines. This can sometimes revive a deeply discharged battery that simple jump-starting failed to kickstart.
- Check Fuses and Relays: Consult your vehicle’s owner’s manual to locate and inspect critical fuses and relays related to the starting system (e.g., starter fuse, fuel pump relay). A blown fuse can prevent starting even with a charged battery.
- Inspect for Visible Damage: Look for frayed battery cables, loose wiring, or signs of rodent damage in the engine bay that could interrupt electrical flow.
- Seek Professional Assistance: If all basic troubleshooting fails, it’s time to call roadside assistance or a certified mechanic. They possess diagnostic tools to accurately pinpoint issues with the starter, alternator, or complex electrical system failures. As of 2027, professional diagnostics for a no-start condition typically range from $100 to $250, while a tow service can cost between $75 and $150, depending on distance. A dead battery replacement usually runs from $150 to $300, including labor.
Conclusion
Selecting the optimal jumper cable gauge is paramount for effective vehicle starting. A lower gauge number, signifying a thicker wire, ensures minimal resistance and maximum current transfer to the dead battery. According to verified research and expert sources, for most vehicles in 2027, a 4-gauge or 6-gauge cable is the definitive best choice for reliability and performance. Prioritize acquiring such a set to guarantee you are prepared for unexpected battery failures.
❓ Frequently Asked Questions
Why is the wire gauge so important for jumper cables, and what do the numbers mean?
Wire gauge is crucial because it dictates how much current the cable can safely carry without overheating or experiencing significant voltage drop. A lower gauge number (e.g., 2-gauge) signifies a thicker wire, capable of handling higher amperage, while a higher gauge number (e.g., 10-gauge) means a thinner wire with lower current capacity, making it less effective for jump-starting a dead battery.
What specific gauge is recommended for different types of vehicles, from small cars to large trucks?
For most compact cars and sedans, 4-gauge cables are ideal. Mid-size SUVs and V6 engines benefit from 2-gauge. For large trucks, heavy-duty SUVs, or diesel engines, 1-gauge or 0-gauge cables are recommended due to their higher current demands and cold cranking amperage (CCA) requirements.
Are there any risks associated with using jumper cables that are too thin (high gauge number)?
Using jumper cables that are too thin (high gauge number) poses several risks, including overheating the cables, which can melt insulation or cause a fire. It also leads to significant voltage drop, meaning insufficient current reaches the dead battery, making the jump-start ineffective or very slow, potentially damaging vehicle electronics.
How does the quality of the cable material (e.g., copper vs. CCA) relate to the gauge choice?
The cable material significantly impacts performance, even with the correct gauge. 100% copper provides excellent conductivity and flexibility, making it superior. Copper-clad aluminum (CCA) cables are cheaper and lighter but have lower conductivity for the same gauge, meaning a CCA cable might need to be a lower gauge (thicker) than a pure copper cable to achieve similar performance.
What is the ideal length for jumper cables, and how does this impact the recommended wire gauge?
A common ideal length for jumper cables is 20 to 25 feet, offering enough reach between vehicles. Longer cables introduce more electrical resistance, necessitating a thicker wire (lower gauge) to minimize voltage drop. For instance, a 25-foot cable might need to be 2-gauge to perform as effectively as a 12-foot 4-gauge cable.
Beyond gauge, what other features should I look for when buying jumper cables for safety and durability?
Beyond gauge, look for heavy-duty, insulated clamps that securely grip battery terminals and prevent short circuits. High-quality, flexible insulation (e.g., PVC or TPE) remains pliable in cold weather and resists abrasions. Ensure the cables are rated for the appropriate amperage and clearly state they are 100% copper, not CCA, for maximum reliability and lifespan.