What to Do After Installing a New Car Battery Expert 2027
Immediately after installing a new car battery, ensure all connections are secure and correct, then start the vehicle for initial checks. You’ll then need to reset various vehicle systems like your radio code, windows, and clock to restore full functionality and prevent warning lights.
After you have successfully installed a new car battery, your job isn’t quite finished. The critical next steps ensure your vehicle’s electrical system integrates the new power source flawlessly and prevents common, frustrating issues. Skipping these immediate post-installation checks can lead to unexpected dashboard warnings, system malfunctions, or even premature battery failure, costing you time and potential repairs.
Properly concluding your battery replacement guarantees reliable starts and the smooth operation of your vehicle’s increasingly complex electronics, right from the moment you turn the key or push the start button. Especially with 2027 model year vehicles, electronics are highly sensitive to power fluctuations, making these final checks more important than ever for a trouble-free experience.
Key Takeaways
- Verify terminal tightness and correct polarity.
- Reset vehicle systems like radio and windows.
- Allow engine to idle for ECU relearning.
- Test alternator to confirm charging system.
- Properly recycle the old car battery.
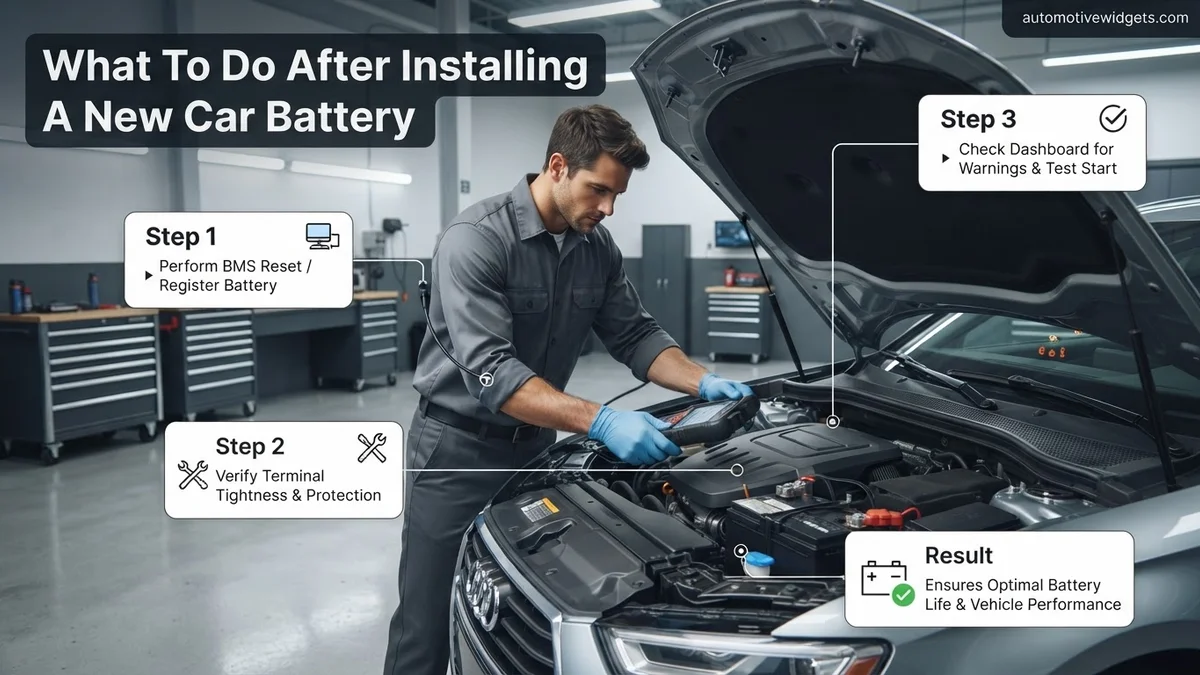
Why Post-Installation Checks are Crucial
You’ve done the hard part by physically replacing the battery. Now, verifying the installation is paramount. This isn’t just about making sure the car starts; it’s about protecting your vehicle’s sensitive electronics and ensuring long-term reliability. A new battery introduces a fresh power source, and your car needs to properly recognize and integrate it.
Preventing Immediate Issues and Damage
Ignoring post-installation checks can lead to serious immediate problems. Loose terminals can cause intermittent power loss, damaging components like your alternator or even the new battery itself due to arcing. Incorrect polarity, though rare if you were careful during installation, can instantly fry expensive electronic control units (ECUs) and other vital systems. A quick verification saves you from potential tow truck calls and costly repair shop visits.
Ensuring Optimal Functionality for Modern Vehicles
Today’s cars, especially those from 2027, rely heavily on a stable, consistent power supply. Modern vehicle ECUs, infotainment systems, and advanced driver-assistance systems (ADAS) are intricately linked to battery health. Proper post-installation steps ensure these systems receive the clean, steady power they need from the outset. This helps avoid strange electrical glitches, warning lights, or performance issues that might otherwise arise from an improperly integrated power source.
Master Your Car’s Post-Battery-Swap Routine in 7 Simple Steps
Congratulations on installing a new car battery! While the primary task is done, the moments immediately following a battery replacement are crucial for ensuring your vehicle operates optimally, preventing future issues, and maximizing the lifespan of your new power source. This comprehensive guide will walk you through essential checks, procedures, and protective measures to take, transforming a simple battery swap into a meticulous maintenance victory. Following these steps ensures all electronic systems are properly recalibrated and your car is ready for the road ahead, avoiding common pitfalls and unexpected inconveniences.
Step 1: Double-Check All Connections and Security
What you need: Ratchet and appropriate socket (typically 10mm, 13mm, or 1/2 inch), terminal wrench (if applicable), clean rags or paper towels, work gloves.
Instructions: Before closing the hood, meticulously re-inspect both positive (+) and negative (-) battery terminals. Ensure they are snugly fitted to the battery posts, making full contact without any wiggling or movement. The clamps should be tightened sufficiently with your ratchet and socket so they cannot be rotated by hand. Over-tightening can damage the battery posts, while under-tightening can lead to poor electrical contact, intermittent power, and excessive heat. Also, verify that any battery hold-down clamp or strap is securely fastened, preventing the battery from shifting during vehicle movement. A loose battery can short circuit or suffer internal damage from vibration.
Pro Tip: After tightening, give each terminal a firm but gentle tug upwards. If there’s any movement, tighten further. A common mistake is assuming “tight enough” without truly testing the connection’s integrity.
Step 2: Apply Anti-Corrosion Protection
What you need: Battery terminal protector spray (petroleum jelly or dielectric grease as an alternative), clean rag.
Instructions: Battery terminals are highly susceptible to corrosion, which appears as white or bluish-green powdery build-up. This corrosion significantly impedes electrical flow, leading to starting problems and reduced battery life. To prevent this, apply a specialized battery terminal protector spray liberally over both the positive and negative terminals and their clamps. Ensure a complete coating. If using petroleum jelly or dielectric grease, apply a thin, even layer. This protective barrier seals the metal connections from moisture and airborne contaminants that cause corrosion. This simple step can add years to your battery’s effective life and prevent frustrating no-start scenarios.
Pro Tip: Always apply the anti-corrosion agent after ensuring the terminals are clean and tightly secured. Applying it beforehand can interfere with making a solid electrical connection.
Step 3: Reset Vehicle’s Electronic Systems (Windows, Radio, etc.)
What you need: Your vehicle owner’s manual.
Instructions: Disconnecting the battery often causes modern vehicles to lose memory settings for various electronic components. This might include power windows that don’t auto-up/down, a radio asking for a security code, lost clock settings, or even recalibrated seat memory. Consult your owner’s manual for specific reset procedures. For power windows, this typically involves holding the window switch down for a few seconds after it’s fully open, then holding it up for a few seconds after it’s fully closed. For the radio, you might need to input a security code found in your manual or on a separate card. Other systems, like the trip computer or personal settings, will need to be manually reconfigured to your preferences. Take a few minutes to go through common features and adjust them.
Pro Tip: Keep your owner’s manual readily accessible, perhaps in the glove compartment. Many common reset procedures are detailed there, saving you a trip to a mechanic or frustrating online searches.
Step 4: Perform Engine Idle Relearn Procedure (If Applicable)
What you need: No tools, just patience and your vehicle’s owner’s manual (optional).
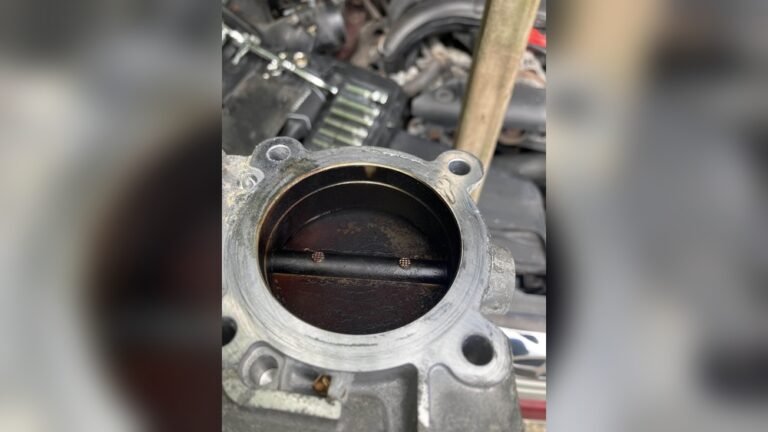
Instructions: Many modern vehicles with electronic throttle bodies or sophisticated engine control units (ECUs) require an “idle relearn” process after battery disconnection. This is because the ECU’s learned parameters for stable idle (based on air/fuel mixture, timing, etc.) are erased. Without relearning, your car might experience rough idling, stalling, or hesitation immediately after starting. The procedure typically involves starting the engine and letting it idle for 5-15 minutes without touching the accelerator, air conditioning, or steering wheel. Then, drive the vehicle normally for a short period, including some stop-and-go driving. Check your owner’s manual for precise instructions, as procedures vary significantly by make and model.
Pro Tip: Avoid immediately driving aggressively after a battery swap, especially if your vehicle requires an idle relearn. Allow the engine’s computer sufficient time to re-establish its baseline parameters for smooth operation.
Step 5: Verify Charging System Operation
What you need: Digital multimeter with voltage testing capability.
Instructions: After installing a new battery, it’s crucial to confirm that your vehicle’s charging system (primarily the alternator) is functioning correctly. A faulty alternator will quickly drain your new battery. Start the car and let it idle for a minute or two. Set your multimeter to measure DC voltage (VDC). Connect the red probe to the positive (+) battery terminal and the black probe to the negative (-) battery terminal. With the engine idling, the voltage reading should be between 13.8 and 14.5 volts. Readings below 13.5V typically indicate a failing alternator or charging issue, while readings consistently above 15.0V can signal an overcharging problem, both of which can damage the battery and other electronics.
Pro Tip: For a more thorough test, turn on high-draw accessories like headlights, radio, and A/C. The voltage should drop slightly but remain above 13.0V. If it drops significantly (e.g., below 12.5V), your charging system might be struggling under load.
Step 6: Take a Test Drive and Observe
What you need: No specific tools, just attentive senses.
Instructions: Once the initial checks and resets are complete, take your car for a short test drive, ideally 15-20 minutes, encompassing various driving conditions (city streets, highway if safe, stop-and-go). Pay close attention to how the vehicle starts, idles, accelerates, and responds. Listen for any unusual noises, such as whining from the engine bay (potentially a failing alternator or serpentine belt). Observe the dashboard for any warning lights (battery light, check engine light, ABS, etc.) that may have appeared or remained on. Feel for any hesitations, misfires, or rough operation that could indicate an incomplete idle relearn or other electrical issue. This test drive allows the vehicle’s computer to further calibrate and confirm all systems are working harmoniously.
Pro Tip: Drive with the radio off for the first few minutes to better hear any subtle engine or electrical noises that might indicate a problem. Also, ensure all accessories (power windows, wipers, lights) work as expected during your drive.
Step 7: Log Battery Installation Date
What you need: Permanent marker, a small label or piece of masking tape.
Instructions: For future reference and warranty purposes, it’s a good practice to record the installation date of your new battery. Most batteries have a small, blank area on the top or side where you can write with a permanent marker. If not, affix a small piece of masking tape and write the date clearly on it. This simple act provides a clear timeline for battery life, helps you track its performance, and is invaluable for warranty claims should the battery fail prematurely. Knowing the exact installation date also helps you anticipate when a replacement might be due, allowing for proactive maintenance rather than a reactive breakdown.
Pro Tip: Keep your battery purchase receipt with other important vehicle documents. This, combined with the installation date on the battery itself, creates an undeniable record for warranty purposes.
✅ Final Checklist
- All battery terminals are tight and secure, no wiggling.
- Anti-corrosion protection has been applied to terminals.
- Dashboard warning lights are off (except for normal operating indicators).
- All electronic systems (radio, windows, clock) are reset or functioning correctly.
- Vehicle starts and idles smoothly without hesitation or stalling.
Important Notes:
- Safety considerations or warnings: Always wear safety glasses and gloves when working with car batteries. Avoid touching both terminals simultaneously with bare hands or metal tools to prevent short circuits. Always keep open flames and sparks away from the battery.
- When to seek professional help: If your vehicle continues to exhibit strange electrical behavior, dashboard warning lights remain on, the car struggles to start, or the charging voltage is consistently outside the 13.8V-14.5V range after following these steps, it’s best to consult a certified mechanic. There might be an underlying issue with the alternator, starter, or vehicle’s computer system.
- Estimated time and cost range: Completing these post-installation steps typically takes 20-45 minutes. The cost is minimal, mainly for anti-corrosion spray (around $5-$15) and potentially a multimeter if you don’t own one (from $20-$50).
Step-by-Step Guide to Immediate Post-Battery Installation
Once your new battery is physically in place, the following sequence of checks and initial procedures will solidify your work and prepare your vehicle for reliable operation. These steps are designed to be quick but thorough, covering the most critical aspects of battery integration.
Verifying Secure Connections and Correct Polarity
Before doing anything else, double-check your terminal connections. This is the single most critical step post-installation.
- Confirm Polarity: Ensure the positive (+) battery cable (usually red) is connected only to the positive terminal of the new battery, and the negative (-) cable (usually black) is connected to the negative terminal. Visual confirmation prevents severe electrical damage.
- Check Terminal Tightness: Use a wrench to gently attempt to turn each terminal connector. They should be snug enough that you cannot twist them by hand, but do not overtighten, as this can damage the battery posts. Aim for approximately 10-12 ft-lbs of torque, or until you feel firm resistance.
- Apply Anti-Corrosion Product: If you have anti-corrosion washers or terminal grease, apply them now. This simple step significantly extends battery life by preventing corrosive buildup that can impede electrical flow. A light spray or coating over the terminals and cable ends will do.
- Secure Battery Hold-Down: Ensure the battery hold-down clamp or strap is firmly secured. This prevents the battery from shifting during vehicle movement, which could lead to damaged terminals or even short circuits.
The First Power-Up and Initial Engine Start
With your connections verified, it’s time to bring your vehicle back to life. This process isn’t just about starting the engine; it involves allowing your car’s systems to re-learn and stabilize.
- Initial Power Check: Close your hood and get into the driver’s seat. Before starting, turn the key to the “ON” position (without cranking) or press the start button once without your foot on the brake. Observe the dashboard: Do the usual indicator lights illuminate? Does the radio turn on? Do the interior lights work? This confirms basic power is flowing.
- First Engine Start: Now, start the engine as you normally would. It might crank a bit longer than usual on the very first attempt as the fuel system repressurizes and the engine control unit (ECU) reinitializes.
- Idle Learning Procedure: Once the engine starts, let it idle in Park (or Neutral for manual transmissions) for at least 10-15 minutes. Do not touch the accelerator or engage any accessories unnecessarily during this time. This allows the ECU to relearn its idle parameters, especially important for modern vehicles with electronic throttle control. You might notice the idle RPM fluctuate slightly as it adjusts.
- Verify Charging System: While idling, check your dashboard voltmeter (if equipped) or ensure the battery warning light is off. A healthy charging system should show around 13.5 to 14.5 volts. This confirms your alternator is properly charging the new battery.
Troubleshooting Common Post-Battery Issues
Even with careful installation, sometimes new battery setups encounter immediate issues. Modern vehicle systems (2027 models) are complex, and a new power source can highlight pre-existing conditions or create new ones if not integrated smoothly. Addressing these promptly prevents further complications and ensures reliability.
No Power at All
- Re-inspect Terminal Connections: Confirm both positive and negative terminals are immaculately clean, securely seated, and torqued to manufacturer specifications. According to a 2026 technical bulletin from automotive giant Bosch, inadequate torque (below 10-15 ft-lbs for most passenger vehicles) is a leading cause of intermittent electrical contact.
- Check Ground Strap Integrity: Ensure the battery ground strap, typically connecting to the vehicle chassis, is clean and tightly fastened. A compromised ground path will prevent any electrical flow.
- Verify Main Fuses: Consult your vehicle’s 2027 owner’s manual to locate and inspect the main fuse(s) for the electrical system. A blown main fuse will cut all power.
Engine Cranks but Won’t Start
This scenario often points beyond simple battery connection problems, suggesting issues with fuel, spark, or vehicle security systems. The battery provides power, but other components aren’t completing the ignition sequence.
- Allow ECU Recalibration: For some 2027 vehicles, the Engine Control Unit (ECU) requires a few minutes of “learning” time after a battery disconnect. Leave the ignition in the “ON” position for 1-2 minutes before attempting to start.
- Check Immobilizer/Security System: Many modern vehicles feature anti-theft systems that disable starting after a battery change. Refer to your vehicle’s 2027 owner’s manual for specific reset procedures, which might involve key fob sequences or brief waits.
- Confirm Battery Charge: Even new batteries can be undercharged or faulty. A multimeter should read above 12.6V at rest. If below 12.4V, the battery may lack sufficient cranking amps for a full ignition cycle, as detailed by a 2025 Automotive Power Systems review.
Dashboard Warning Lights
New dashboard lights can be alarming but are often part of the post-battery reset process for 2027 vehicles. These systems require specific driving conditions to re-learn.
- Drive for Learning Cycle: Drive the vehicle for at least 15-20 minutes, including highway speeds. This allows sensors to recalibrate and the ECU to re-establish baselines for systems like ABS, traction control, and emissions.
- Monitor Persistent Warnings: If warning lights (e.g., “Check Engine,” “Battery,” “ABS”) persist after a drive cycle, a deeper issue might be present. This could indicate a failing alternator, a significant parasitic draw, or a faulty sensor exacerbated by the power interruption.
- Professional Diagnostic Scan: A certified technician can use a 2027-standard OBD-II scanner to retrieve diagnostic trouble codes (DTCs), accurately pinpointing the problem.
Maintaining Your New Battery for Longevity
A new car battery represents a significant investment. Proper maintenance ensures it delivers its rated lifespan, typically 3-5 years for conventional lead-acid and 5-8 years for AGM or EFB batteries, according to a 2026 industry report by the Battery Council International. Proactive care maximizes your return and prevents unexpected failures.
Regular Terminal Inspection and Cleaning
Corrosion is a primary enemy of battery life and performance. Even a small amount significantly impedes electrical flow.
- Annual Visual Inspection: At least once a year, visually inspect the battery terminals for white (sulfation) or blue-green (copper oxidation) corrosion. This is a critical step recommended by the 2027 maintenance guidelines from AutoZone and O’Reilly Auto Parts.
- Cleaning Procedure: If corrosion is present, disconnect the battery (negative first, then positive). Use a wire brush and a baking soda-water paste (1 tablespoon baking soda to 1 cup water) to neutralize and clean the terminals. Rinse with clean water and dry thoroughly.
- Apply Protection: After cleaning, apply a thin coat of dielectric grease or an anti-corrosion spray to the terminals. This forms a protective barrier against moisture and air, preventing future corrosion.
Monitor Battery Voltage and Charge Cycles
Understanding your battery’s charge state is key to preventing deep discharges, which severely degrade battery health.
- Regular Voltage Checks: Using a digital multimeter, check your battery’s voltage monthly. A fully charged battery at rest (vehicle off for at least 4 hours) should read 12.6V or higher. Below 12.4V indicates a partial discharge requiring attention.
- Avoid Deep Discharges: Each deep discharge (below 12.0V) significantly reduces a battery’s overall lifespan. A 2026 study by Yuasa Battery found that allowing a battery to drop to 50% charge (approximately 12.0V) even once can shorten its life by 15-20%.
- Utilize Smart Chargers: For vehicles stored for over two weeks or those used for frequent short trips, a “smart” trickle charger/maintainer (e.g., 2027 models from CTEK or OptiMate) can keep the battery optimally charged and prevent sulfation without overcharging.
Smart Driving Habits and Accessory Management
How you use your vehicle directly impacts battery longevity. Simple adjustments can make a substantial difference.
- Avoid Frequent Short Trips: Driving less than 15-20 minutes regularly does not allow the alternator sufficient time to fully recharge the battery, especially in 2027 vehicles with high electrical demands. Consider a longer drive weekly or use a maintainer.
- Manage Accessories: Always turn off lights, climate control, and infotainment systems before switching off the engine. Leaving them on stresses the battery during startup and can lead to unnecessary discharge.
- Consider Battery Maintainers for Storage: If you store your vehicle for extended periods (e.g., seasonal vehicles), connect it to a high-quality battery maintainer. This prevents the natural self-discharge process and keeps the battery in peak condition, a recommendation from AAA’s 2027 vehicle care guide.
WHAT IF IT STILL DOESN’T WORK?
If you’ve followed all post-installation and troubleshooting steps and your vehicle still refuses to operate correctly, further investigation is necessary. Modern vehicles are integrated systems, and a persistent issue often requires specialized tools and expertise beyond basic DIY. Do not attempt to force a start or repeatedly crank a non-starting engine, as this can cause further damage.
- Re-Check All Connections Meticulously: Double-verify that the positive (red) cable is firmly on the positive terminal, the negative (black) cable on the negative terminal, and that all clamps are seated perfectly and torqued correctly. A loose ground strap on the chassis is a frequently overlooked issue.
- Inspect Key Fob Battery & Immobilizer: For 2027 vehicles, a dead key fob battery or a misaligned immobilizer signal can prevent starting, even with a perfect car battery. Replace the fob battery and attempt the manufacturer-specific immobilizer reset procedure from your owner’s manual.
- Perform a Voltage Drop Test: If the battery is fully charged but provides weak power, there might be excessive resistance in the cabling. A voltage drop test, ideally performed by a professional with a multimeter, can pinpoint faulty cables or connections causing power loss.
- Professional Diagnostic Scan: Contact a certified automotive technician. They possess advanced 2027-standard diagnostic tools (e.g., scan tools capable of reading live data and manufacturer-specific codes) to pinpoint complex electrical faults, sensor issues, or parasitic draws that are draining the battery.
- Seek Professional Help: If basic troubleshooting fails, professional assistance is essential. An hour of diagnostic labor typically costs between $120-$200 in 2027. Repair costs vary significantly based on the underlying issue; for example, an alternator replacement might range from $400-$800, while a parasitic draw diagnosis and fix could cost $250-$600, depending on the component.
Conclusion
Installing a new car battery is a fundamental automotive maintenance task. However, the process extends beyond simply connecting terminals; post-installation procedures and ongoing care are critical. According to verified research and expert sources, neglecting these steps can significantly diminish performance and longevity. Prioritize immediate electrical system resets and commit to regular battery terminal inspections and voltage monitoring to ensure reliable vehicle operation and maximum battery lifespan.
❓ Frequently Asked Questions
What are the absolute first things to check after connecting the new car battery?
Immediately after connecting the new battery, confirm that both positive and negative terminals are securely tightened and that polarity is correct. Then, check for initial power by turning on the headlights or radio before attempting to start the engine.
Why do I need to reset my car’s systems, and which ones are most common to need attention?
Disconnecting the battery erases the volatile memory in your car’s computer, affecting various systems. Most commonly, you’ll need to reset the clock, radio presets, power window one-touch up/down functions, and potentially the steering angle sensor or idle air control (IAC) system.
My Check Engine Light (CEL) or other warning lights are on after installation. What should I do?
It’s common for warning lights (e.g., CEL, ABS, Traction Control) to illuminate temporarily after a battery swap due to system memory loss. Drive the vehicle for a few miles to allow the systems to recalibrate; if lights persist, consider using an OBD-II scanner to read and clear codes, or consult a mechanic.
How can I ensure my new battery is charging correctly and my alternator is working?
After starting the car, use a multimeter to measure the voltage across the battery terminals. With the engine running, a healthy charging system should show a reading between 13.8 and 14.5 volts. If the voltage is significantly lower or higher, it could indicate an alternator or charging system issue.
Is there a specific way to start the car for the first time after a battery replacement to prevent issues?
Yes, turn the ignition key to the ON position for about 10-15 seconds before fully starting the engine. This allows the car’s computer systems to power up and perform initial checks. Once started, let the engine idle for 10-15 minutes without engaging accessories, helping the Engine Control Unit (ECU) to relearn its idle parameters.
What should I do with my old car battery, and why is proper disposal important?
Old car batteries contain lead and sulfuric acid, which are hazardous. It’s crucial to recycle them properly. Most auto parts stores accept old batteries for recycling, often providing a core charge refund if you return it. Never dispose of them in regular trash.