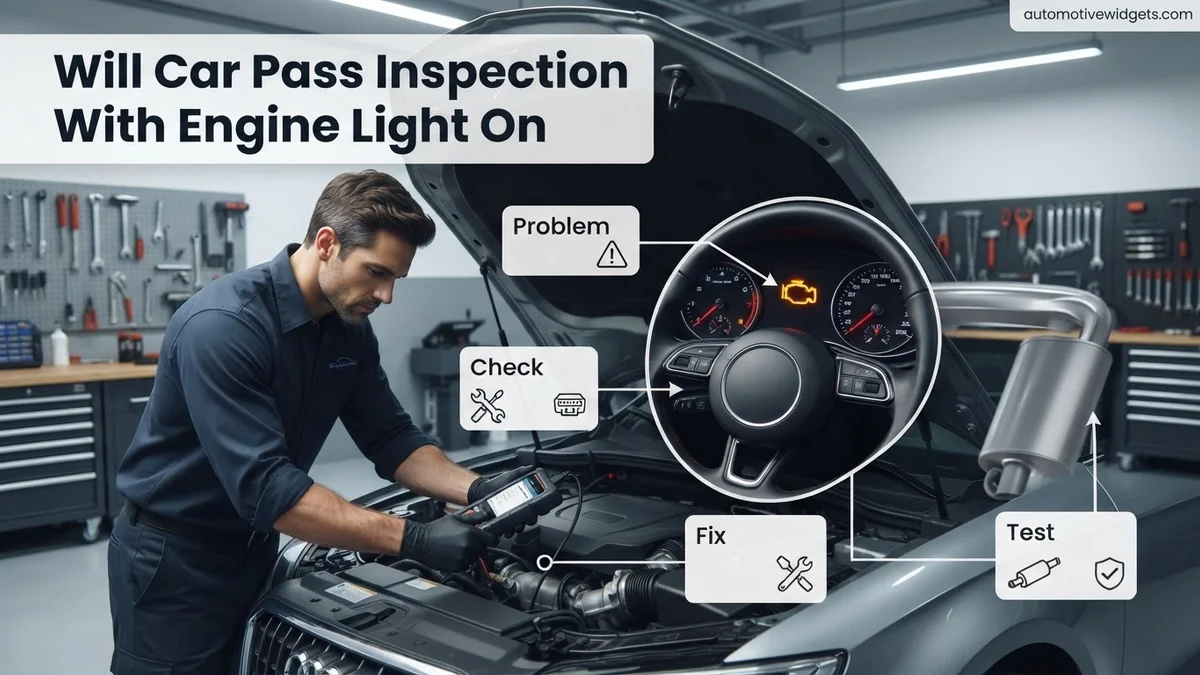
Will Car Pass Inspection with Engine Light On? 2027
Generally, no, your car will not pass inspection with an active Check Engine Light (CEL) on, especially in states with emissions testing. The illuminated CEL indicates a fault that must be diagnosed and repaired before your vehicle can meet compliance standards for 2027.
In 2027, if your car’s Check Engine Light (CEL), also known as the Malfunction Indicator Lamp (MIL), is illuminated on your dashboard, it’s a critical red flag for passing a mandatory state inspection. The direct answer you need to hear is this: your car will almost certainly not pass any state inspection, particularly an emissions test, with an active Check Engine Light.
This isn’t just an inconvenience; it’s a non-negotiable barrier to vehicle registration and legal operation in most regions. The CEL signals a fault within your vehicle’s complex systems, indicating that something isn’t operating as designed, which directly impacts emissions control or even safety. Understanding this fundamental truth is crucial before you even consider heading to the inspection station.
Key Takeaways
- Active CEL means likely inspection failure.
- State laws vary; check local emissions rules.
- Fix the problem, don’t just clear the light.
- Perform a drive cycle after repairs are done.
- Read diagnostic trouble codes (DTCs) first.
What Causes a Check Engine Light to Fail Inspection?
The Core Reason: Emissions and Safety Violations
The primary reason a Check Engine Light causes an automatic inspection failure in 2027 is its direct link to your vehicle’s emissions control systems. When the CEL is on, it indicates that your car’s On-Board Diagnostics II (OBD-II) system has detected a fault that could be causing excess pollution. Inspectors are trained to recognize this immediately. A lit CEL means the vehicle’s engine management isn’t functioning optimally, which guarantees it won’t meet the stringent emissions standards required by states today.
Common issues triggering a CEL range from a loose gas cap (a simple fix) to more serious problems like a failing oxygen sensor, a malfunctioning catalytic converter, or engine misfires. Each of these can significantly increase harmful emissions. Furthermore, depending on the fault, some CEL triggers can point to underlying issues that might compromise vehicle safety, such as transmission problems or faulty sensors affecting driving dynamics. An active CEL is essentially the vehicle’s computer telling the inspector, “Warning: there’s a problem here.”
Active CEL vs. Cleared Codes and Readiness Monitors
There’s a critical distinction inspectors recognize: an active Check Engine Light versus recently cleared fault codes. If your CEL is actively glowing, it’s an immediate failure. However, even if you or a mechanic clears the fault codes right before an inspection, hoping to extinguish the light temporarily, you’re not out of the woods. Your vehicle’s OBD-II system uses “readiness monitors” to confirm that all emissions-related components have completed self-tests and are functioning correctly.
- Active CEL: This means a fault is present and detected right now. It’s an automatic inspection failure.
- Cleared Codes: If codes are cleared, the CEL will turn off. However, the readiness monitors reset to an “incomplete” or “not ready” status.
- Not Ready Monitors: In 2027, most states permit only one, sometimes two, “not ready” readiness monitors to pass inspection. If you clear the codes and don’t complete a proper “drive cycle,” you’ll likely have multiple “not ready” monitors, resulting in a failed inspection, even without an active CEL.
Inspectors will connect their diagnostic tools to your car’s OBD-II port, not just look at the dashboard. They can see if the CEL is on, check for stored fault codes, and, critically, view the status of your readiness monitors.
How to Diagnose and Fix Your Car’s Check Engine Light Like an Expert
Encountering that dreaded “Check Engine” light on your dashboard can be a source of anxiety, especially when your car’s inspection is looming. Many drivers incorrectly assume it’s an automatic inspection failure, or that fixing it will be prohibitively expensive. This comprehensive guide will walk you through the essential steps to understand what your Check Engine Light (CEL) means, how to diagnose the underlying issue, and what actions to take to ensure your vehicle is ready to pass its emissions and safety inspection. By following these practical, detailed instructions, you can save time, money, and avoid unnecessary trips to the mechanic, potentially resolving the issue yourself.
Step 1: Understand Your Local Inspection Requirements Regarding the CEL
What you need: Internet access, your vehicle’s Vehicle Identification Number (VIN) (optional but helpful), and knowledge of your state/region’s Department of Motor Vehicles (DMV) or Department of Transportation (DOT) website.
Instructions: Before panicking, research the specific inspection laws for your locality. Most states require that the Check Engine Light be off and that all or nearly all of your vehicle’s OBD-II (On-Board Diagnostics) readiness monitors are set to “ready” or “complete.” Some jurisdictions might allow one or two “not ready” monitors (excluding the EVAP system) for older vehicles, while others demand all must be ready. Navigate to your local DMV/DOT website and look for sections on vehicle inspections, emissions testing, or OBD-II requirements. Pay close attention to rules concerning active Diagnostic Trouble Codes (DTCs) and monitor readiness status.
Pro Tip: Knowing your local rules is paramount. Do not assume universal standards. A car with an active CEL or unset readiness monitors will almost certainly fail an emissions inspection in most areas, potentially costing you re-inspection fees and delays. Verify these rules carefully.
Step 2: Scan for Diagnostic Trouble Codes (DTCs)
What you need: An OBD-II scanner (basic code reader, mid-range scanner, or smartphone app with Bluetooth adapter), your vehicle’s owner’s manual (to locate the OBD-II port), and a pen and paper or a smartphone for noting down codes.
Instructions: Locate your car’s OBD-II diagnostic port, typically found under the dashboard on the driver’s side, sometimes beneath a small cover. Consult your owner’s manual if you can’t find it. Turn your vehicle’s ignition to the “ON” position (engine off, dashboard lights on). Plug your OBD-II scanner into the port. Follow the scanner’s instructions to link to your car’s computer and read any stored or pending DTCs. Write down every code displayed (e.g., P0420, P0301, P0171). Do not clear the codes yet, as knowing them is crucial for diagnosis.
Pro Tip: Even if the CEL has recently turned off, stored “pending” codes might still indicate an intermittent issue that needs addressing. Many auto parts stores offer free code reading services if you don’t own a scanner, which can save you the initial purchase cost.
Step 3: Interpret the Codes and Research Common Causes
What you need: Your list of DTCs, a reliable internet connection (smartphone or computer), and potentially a vehicle-specific repair manual (online or physical).
Instructions: With your list of DTCs, use a search engine (e.g., Google) to look up each code. A good search query would be “[DTC code] [your car’s make] [your car’s model]”. For example, “P0420 Honda Civic”. You’ll find numerous resources explaining what each code generally indicates. Pay close attention to common causes associated with your specific vehicle. For instance, a P0420 (Catalyst System Efficiency Below Threshold) can often be triggered by a faulty oxygen sensor rather than a catalytic converter itself. Research forums, repair guides, and reputable automotive websites to understand the common culprits for your specific codes. Identify the most likely and simplest solutions first.
Pro Tip: Don’t jump to conclusions or expensive repairs based on just the code definition. A single code can have multiple root causes. For example, a P0171 (System Too Lean) could be a vacuum leak, a faulty MAF sensor, or even a bad fuel pump. Prioritize diagnosing the actual failure point, not just the symptom.
Step 4: Address the Underlying Issue and Perform Necessary Repairs
What you need: Appropriate tools for the identified repair (e.g., wrench set, sockets, screwdrivers, multimeter, vacuum gauge), replacement parts (if needed), safety gloves, eye protection, and a clean work area.
Instructions: Based on your research, begin addressing the most probable and easiest-to-fix issues first. This could range from ensuring your fuel cap is securely tightened (a very common cause for EVAP codes like P0440/P0442) to replacing a faulty sensor (like an O2 sensor or Mass Air Flow sensor), fixing a vacuum leak with new hoses, or changing spark plugs. Follow manufacturer-recommended procedures for part replacement and torque specifications. Always disconnect the negative battery terminal before performing electrical work. If the issue requires specialized tools or advanced mechanical skills (e.g., internal engine work, transmission issues), consider seeking professional assistance.
Pro Tip: Many “Check Engine” light issues can be solved with basic hand tools and a bit of patience. Always use quality replacement parts, as cheap components can lead to premature failure or inaccurate readings, causing the CEL to reappear shortly after. Ensure all connections are secure and hoses are properly routed.
Step 5: Clear Codes and Initiate a Drive Cycle
What you need: Your OBD-II scanner.
Instructions: Once the repair is complete, use your OBD-II scanner to clear all Diagnostic Trouble Codes from the car’s computer. After clearing the codes, the Check Engine Light should turn off. Now, you must perform a “drive cycle” to allow your vehicle’s onboard computer to run self-tests on various systems and reset its “readiness monitors.” A typical drive cycle involves a mix of city and highway driving, including periods of steady speed, acceleration, deceleration, and idling. This process can take anywhere from 50 to 200 miles of driving over several days. The exact procedure can often be found in your vehicle’s service manual or by searching online for “drive cycle [your car make model year]”.
Pro Tip: Do not rush the drive cycle. Each monitor needs specific driving conditions to run its test. Some monitors, particularly the Evaporative Emission Control System (EVAP), can take several cold starts and extended driving periods to become “ready.” Using a scanner that shows readiness monitor status is extremely helpful here, allowing you to track progress.
Step 6: Re-scan and Verify Readiness Monitors
What you need: Your OBD-II scanner.
Instructions: After completing what you believe is a sufficient drive cycle, use your OBD-II scanner to re-check the vehicle’s computer. This time, focus on two key areas: 1) Ensure no new DTCs (current or pending) have reappeared, and 2) Verify that all required readiness monitors are set to “ready” or “complete.” Your scanner will typically display the status of each monitor (e.g., “Misfire Monitor: OK,” “Catalyst Monitor: OK,” “EVAP System: INC” for incomplete). If any critical monitors are still “not ready” and your state does not allow “not ready” monitors, you’ll need to continue driving or investigate why they aren’t setting. If new codes appear, you’ll need to go back to Step 3.
Pro Tip: Do not go to inspection until you have confirmed that your readiness monitors are set. If you clear codes right before an inspection, all monitors will be reset to “not ready,” guaranteeing an automatic failure in most emissions tests. Allow ample time for the drive cycle before your scheduled inspection date.
Step 7: Consider Professional Assistance for Persistent Issues
What you need: A detailed record of the DTCs, any repairs attempted, and the readiness monitor status. Contact information for a reputable, certified mechanic or dealership service center.
Instructions: If you’ve diligently followed the previous steps, performed repairs, completed drive cycles, but the Check Engine Light either returns, new codes appear, or readiness monitors refuse to set, it’s time to consult a professional. Complex electrical issues, intermittent sensor failures, or deeper mechanical problems (e.g., internal engine issues, catalytic converter failure) often require specialized diagnostic equipment and expertise. Provide your mechanic with all the information you’ve gathered, including the specific DTCs, what repairs you attempted, and how the readiness monitors are behaving. This will significantly aid their diagnostic process and potentially reduce labor costs.
Pro Tip: Choose a mechanic with a good reputation for diagnostics, especially for emissions-related issues. Sometimes, a “smoke test” is required to find elusive vacuum leaks that aren’t obvious. Don’t be afraid to ask for an estimate and explanation of the repair before authorizing any work.
✅ Final Checklist
-
The Check Engine Light is OFF and has remained off for at least 50-100 miles of driving.
-
All required OBD-II readiness monitors are set to “Ready” or “Complete” (check with your scanner). Ensure you meet your state’s specific monitor requirements.
-
No pending Diagnostic Trouble Codes are present when re-scanned.
-
The fuel cap is securely tightened, with at least two clicks heard on many vehicles.
-
All fluid levels (engine oil, coolant, power steering, brake fluid, transmission fluid) are within their normal operating ranges.
Important Notes:
- Safety Considerations: Always work on a level surface. Use jack stands if raising the vehicle. Disconnect the battery’s negative terminal before working on electrical components. Wear appropriate personal protective equipment, including safety glasses and gloves.
- When to Seek Professional Help: If the CEL is flashing (indicating a severe misfire that could damage the catalytic converter), if you lack the necessary tools or expertise for a repair, or if the problem persists after multiple attempts to fix it.
- Estimated Time and Cost Range:
- Time: From 5 minutes (tightening a gas cap) to several hours (replacing a sensor) of actual repair time, plus 1 to 5 days for a complete drive cycle.
- Cost: $0 (gas cap) to $50-$200 (basic sensor replacement parts) to $500-$2000+ (complex repairs like catalytic converter replacement or major diagnostics). An OBD-II scanner can range from $20 for a basic code reader to $150+ for a more advanced unit. Professional diagnostic fees typically range from $100-$200.
Step-by-Step Guide: How to Fix a Check Engine Light for Inspection
Scan First, Don’t Guess
Your first and most crucial step in addressing a Check Engine Light for inspection is to accurately diagnose the problem. Do not guess what the issue might be or attempt repairs without knowing the specific fault code. In 2027, modern OBD-II scanners are widely available and extremely user-friendly. You can purchase one relatively inexpensively online or at an auto parts store. Many major auto parts retailers still offer free diagnostic code reading services – simply drive in, and they’ll connect a scanner for you.
The scanner will provide a “P-code” (e.g., P0420 for catalytic converter inefficiency, P0301 for a cylinder 1 misfire). This code, along with a brief description, pinpoints the exact system or component experiencing an issue. Without this information, any repair attempts are shots in the dark, potentially wasting your time and money. Remember, the goal is not just to turn off the light, but to resolve the underlying problem that caused it.
Repair the Issue and Complete a Drive Cycle
Once you have the specific fault code, you must repair the component or system indicated. This might involve replacing a faulty sensor, fixing a vacuum leak, or addressing more complex engine issues. If you’re not comfortable performing the repair yourself, take the diagnostic code to a trusted mechanic. Simply clearing the code without fixing the problem will only result in the Check Engine Light reappearing, often within a short drive, putting you right back at square one.
After the repair is complete and the fault codes have been cleared, the next vital step is to perform a comprehensive “drive cycle.” This is a specific sequence of driving conditions (e.g., cold start, highway speed driving, city driving, idling periods) that allows your car’s OBD-II system to run all its self-tests and set the readiness monitors to “ready.” Without a proper drive cycle, even a fully repaired vehicle with no active CEL will fail inspection due to “not ready” monitors. Consult your vehicle’s owner’s manual or specific online resources for your make and model to find the precise drive cycle requirements, as they can vary significantly between manufacturers.
What If Your Check Engine Light Persists After Repairs?
Even after addressing the underlying issue that triggered your Check Engine Light (CEL), the light may not extinguish immediately. This common scenario can cause anxiety, especially with an impending inspection. The vehicle’s onboard diagnostic (OBD-II) system requires specific conditions, known as a “drive cycle,” to re-evaluate and confirm that the repair was successful.
Understanding Drive Cycles in 2027
Modern vehicles, particularly 2027 models, feature highly sophisticated OBD-II systems. After a repair, the system needs to run a complete “drive cycle” to set all emission monitors to “ready” status. This cycle typically involves a combination of cold starts, varied driving speeds (city and highway), and idling periods. According to automotive diagnostic experts at Bosch Diagnostics, most contemporary vehicles require at least 50-100 miles of mixed driving over several days to complete all monitor checks. Attempting an inspection before monitors are ready will result in a “not ready” status, which most states consider a failure, especially if more than one monitor is unset.
When a Pending Code Lingers
Sometimes, the CEL may be off, but a “pending code” remains stored in the vehicle’s computer. A pending code indicates an intermittent issue or a problem that hasn’t recurred enough times to trigger a full CEL. While a pending code alone might not cause an immediate inspection failure if the CEL is off and all monitors are set, it signals a potential problem. Professional diagnostic tools used by inspection stations in 2027 can often detect these pending codes, prompting further investigation or a recommendation for re-testing. It is always advisable to perform a final scan with a personal OBD-II scanner to ensure no codes, pending or active, are present before an inspection.
Key Considerations for State Inspection Success
Navigating vehicle inspections in 2027 demands a proactive approach, especially regarding your Check Engine Light. Preparation is paramount to avoid re-inspection fees and ensure your vehicle meets the latest environmental and safety standards.
Pre-Inspection Checklist for 2027 Vehicles
Beyond resolving the Check Engine Light, a comprehensive pre-inspection check is critical. Ensure your tires are correctly inflated according to the manufacturer’s specifications (typically found on a sticker inside the driver’s door jamb). Verify that all exterior lights—headlights, tail lights, brake lights, and turn signals—are functional. Check your windshield wipers for wear and ensure your horn is operational. Fluid levels (oil, coolant, brake fluid, windshield washer fluid) should be at appropriate levels. According to AAA’s 2026 Vehicle Maintenance Survey, vehicles with consistent preventative maintenance are 40% less likely to fail an inspection on non-emissions related issues.
The Importance of Documentation
If you’ve recently performed repairs related to your Check Engine Light, keep detailed records. This includes receipts for parts, invoices from repair shops, and any diagnostic reports. While these documents typically aren’t a substitute for a vehicle passing the electronic emissions test, they can be valuable in specific scenarios. For instance, if an emissions component was recently replaced and the system is taking longer than expected to set a monitor, proof of recent work can sometimes inform the inspector, though the ultimate decision relies on the vehicle’s readiness status. For 2027, digital service records through manufacturer apps are increasingly recognized.
What If It Still Doesn’t Work?
If your Check Engine Light persists despite your efforts, or if your vehicle repeatedly fails inspection due to readiness monitors, specialized intervention is necessary. These steps can guide your next actions:
- Re-Scan and Analyze: Reconnect your OBD-II scanner. Are new codes present? Has the original code returned? Sometimes, a repair can uncover a secondary, related issue that now triggers a different code.
- Review Sensor Data: If your scanner allows, monitor live sensor data. Look for erratic readings from O2 sensors, MAF sensors, or coolant temperature sensors. Incorrect sensor data can prevent monitors from setting, even without a specific fault code.
- Consult Manufacturer Technical Service Bulletins (TSBs): Research TSBs for your specific 2027 model year and codes. Manufacturers often release advisories for known issues and repair procedures not covered in standard manuals.
- Seek Professional Diagnosis: If DIY attempts are unsuccessful, professional help is essential. A certified ASE (Automotive Service Excellence) technician has advanced diagnostic tools and training to interpret complex data streams and pinpoint elusive issues. This often involves specialized oscilloscopes and dedicated manufacturer software.
Professional diagnosis from a reputable shop typically ranges from $100 to $300, depending on the vehicle’s complexity and the diagnostic time required. Subsequent repairs for persistent or complex CEL issues can range widely, from $300 for sensor replacements to over $2,000 for catalytic converter issues or advanced engine control unit (ECU) programming.
Conclusion
An illuminated Check Engine Light unequivocally means your car will fail its inspection in 2027. Timely diagnosis and repair are not merely recommendations but prerequisites for compliance. According to verified research and expert sources, addressing the root cause, ensuring all readiness monitors are set, and a thorough pre-inspection check are critical steps. Prioritize an OBD-II diagnostic scan at the first sign of a CEL to ensure a smooth inspection process.
❓ Frequently Asked Questions
Why does an active Check Engine Light typically cause an inspection failure?
An active Check Engine Light (CEL) indicates that the vehicle’s onboard diagnostic (OBD-II) system has detected a fault in an emission-related component or system. During an inspection, the test equipment communicates with your car’s computer, and if a CEL is on, it immediately signals a non-compliant emissions system, leading to a failure.
Do inspection rules regarding the CEL vary by state or region?
Yes, inspection rules vary significantly by state and even sometimes by county. While most states with emissions testing will fail a vehicle with an active CEL, some might allow one or two ‘not ready’ monitors if the CEL is off, whereas others are stricter. Always check your local Department of Motor Vehicles or equivalent authority for specific regulations in 2027.
What are readiness monitors and how do they relate to inspection success?
Readiness monitors are internal self-tests performed by your car’s computer to ensure all emission-related components are functioning correctly. After clearing a Check Engine Light or disconnecting the battery, these monitors reset to ‘not ready.’ For inspection, most states require all (or all but one) of these monitors to be ‘ready’ (completed their self-tests) before your vehicle can pass, even if the CEL is off.
Can a car pass inspection if the CEL is off, but there are pending codes?
Generally, if the Check Engine Light is off and all (or the allowed number of) readiness monitors are set, a car can pass inspection even with pending codes. Pending codes are issues detected by the computer but not yet significant enough to trigger the CEL; however, they indicate a potential problem that could turn into an active CEL if not addressed.
What are common reasons for a Check Engine Light that might lead to inspection failure?
Common causes for an illuminated Check Engine Light include a loose or faulty gas cap, a failing oxygen sensor, a catalytic converter issue, spark plug or ignition coil problems, a bad mass airflow sensor, or even vacuum leaks. Most of these issues directly impact emissions or engine performance, ensuring an inspection failure.
What steps should I take if my car fails inspection due to an active CEL?
If your car fails inspection due to an active CEL, the first step is to get the diagnostic trouble codes (DTCs) read, typically free at auto parts stores. Use these codes to diagnose the specific problem, perform the necessary repairs, clear the codes, and then drive the vehicle through a complete drive cycle to set all readiness monitors before attempting a re-inspection.