Should I Get an Oil Change Before a Smog Check ? 2027
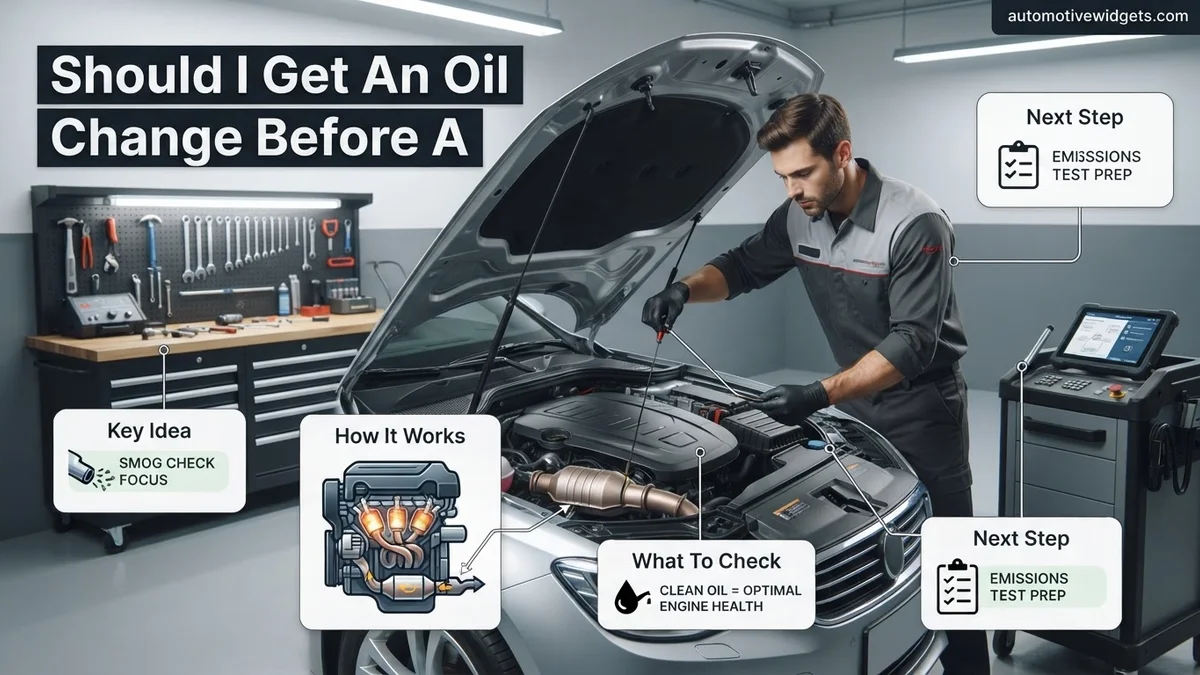
Getting an oil change immediately before a smog check is generally not necessary and typically does not significantly impact emission test results for most modern vehicles. Focus instead on crucial components like your catalytic converter and ensuring no ‘Check Engine’ lights are active for the best chance of passing your 2027 smog test.
Thinking about whether to get an oil change immediately before your vehicle’s smog check in 2027? For the vast majority of modern vehicles, a fresh oil change right before your emissions test is generally not necessary and will not significantly improve your chances of passing. This might surprise some drivers who associate routine maintenance with better performance, but when it comes to emission specifics, your car’s primary emission control systems are far more influential than the age of your engine oil. Understanding this distinction can save you both time and money, ensuring you focus on the factors that truly matter for a successful smog inspection.
Your vehicle’s exhaust emissions are predominantly a result of its combustion process and the efficiency of its catalytic converter, not the lubrication quality of its engine oil. Unless your oil is extremely old, critically low, or your engine is actively burning excessive amounts of oil due to severe mechanical issues, a pre-smog oil change offers little to no direct benefit for the actual emissions test results. Let’s delve into what truly impacts your smog check and the rare instances where oil might play a tangential role.
Key Takeaways
- Fresh oil rarely fixes smog test failures directly.
- Focus on engine health, not just oil, for smog.
- Catalytic converter health is paramount for emissions.
- Clear ‘Check Engine’ lights and fix codes first.
- Ensure full readiness monitor completion before testing.
What Causes Smog Test Failures: Diagnosis
When a vehicle fails a smog check in 2027, the culprits are almost always related to critical components of the emission control system, not merely the condition of the engine oil. These systems are designed to minimize harmful pollutants from leaving your exhaust pipe. If any of these are malfunctioning, your vehicle is highly likely to fail, regardless of how new your oil is.
The True Emission Culprits: Catalytic Converters & Sensors
- Catalytic Converter Failure: This is arguably the most common and expensive reason for failing a smog check. The catalytic converter transforms toxic gases (carbon monoxide, nitrogen oxides, unburnt hydrocarbons) into less harmful ones. A failing or “dead” converter cannot perform this conversion effectively, leading to high emissions readings. Vehicles built after 2000 are especially reliant on their catalytic converters for passing the stringent standards of 2027.
- Oxygen (O2) Sensor Malfunction: These sensors monitor the oxygen content in your exhaust gases, providing vital data to your engine’s computer (ECU) to optimize the air-fuel mixture. Faulty O2 sensors can lead to an incorrect mixture, causing the engine to run too rich or too lean, which directly results in higher emissions.
- Engine Misfires: A misfiring cylinder means fuel isn’t burning completely. This unburnt fuel is then expelled through the exhaust, significantly increasing hydrocarbon emissions. Misfires often trigger the ‘Check Engine’ light.
- Evaporative Emission Control (EVAP) System Issues: This system captures fuel vapors from the fuel tank and sends them to the engine to be burned, preventing their release into the atmosphere. Leaks or malfunctions in the EVAP system, such as a loose gas cap, can cause an emissions failure, particularly for hydrocarbon levels.
Readiness Monitors: Your Vehicle’s Report Card
Modern vehicles use on-board diagnostic (OBD-II) systems to constantly monitor emission-related components. These monitors need to complete self-tests, known as “readiness monitors” or “drive cycles,” before a smog check. If your ‘Check Engine’ light has recently been cleared (e.g., after a repair or battery disconnection), these monitors might not be “set” or “ready.”
- Unset Monitors: A smog technician will check for the status of these monitors. If too many are incomplete, your vehicle will be rejected for the test, not necessarily failed, but you won’t get a result. This is a common issue for vehicles that recently had their battery disconnected or a trouble code cleared.
- Proper Operating Temperature: Your engine and catalytic converter need to be at their optimal operating temperature for the emissions systems to function correctly and for readiness monitors to complete. A cold engine or a short drive before the test can sometimes lead to inflated readings or unset monitors.
From Start to Finish: Smog Check Oil Prep Explained
Welcome to this essential guide on a common pre-smog check dilemma: “Should I get an oil change?” While often overlooked, the condition of your engine oil can subtly impact your vehicle’s emissions and, consequently, its ability to pass a smog check. This guide will walk you through a detailed thought process and actionable steps to help you make an informed decision, optimize your vehicle’s performance, and maximize your chances of a successful smog inspection, saving you time, money, and frustration.
Step 1: Understand the Role of Engine Oil in Emissions
What you need: A basic understanding of internal combustion engines and vehicle emissions.
Instructions: Begin by grasping that engine oil does more than just lubricate; it also cleans, cools, and seals. As oil ages, it accumulates contaminants like soot, unburnt fuel, and metal particles. This dirty, degraded oil can lead to increased friction, higher engine temperatures, and reduced sealing effectiveness, which in turn can cause your engine to burn oil or produce more harmful emissions (hydrocarbons, carbon monoxide, nitrogen oxides). Additionally, heavily contaminated oil can affect the efficiency of your catalytic converter by introducing impurities that hinder its chemical reactions, making it harder for your vehicle to meet emission standards.
Pro Tip: A common misconception is that oil only affects lubrication. Remember its cleaning and sealing properties are equally vital for emissions control. Overly thick or thin oil due to degradation can also throw off sensor readings.
Step 2: Review Your Vehicle’s Maintenance History
What you need: Your vehicle’s service records, owner’s manual, or a reliable memory of your last oil change.
Instructions: Check when your last oil change was performed. Refer to your vehicle’s owner’s manual for the manufacturer’s recommended oil change intervals, which are typically based on mileage (e.g., every 5,000 to 10,000 miles) or time (e.g., every 6-12 months). Compare this to your last service date and current odometer reading. If you’re nearing or have exceeded the recommended interval, this is a strong indicator that an oil change might be beneficial before your smog check. Keep in mind that modern synthetic oils often allow for longer intervals, but extreme driving conditions can shorten them.
Pro Tip: Don’t solely rely on dashboard reminders, as these can sometimes be less accurate than your manual or actual service records. Always use the “severe driving conditions” interval if you frequently drive short distances, in stop-and-go traffic, or in dusty environments.
Step 3: Assess Your Driving Habits and Conditions
What you need: An honest assessment of your typical driving patterns.
Instructions: Consider how you typically drive. Frequent short trips (less than 10-15 miles) don’t allow the engine to reach optimal operating temperature, meaning moisture and unburnt fuel accumulate in the oil, accelerating its degradation. Similarly, consistent heavy towing, driving in extreme temperatures (very hot or very cold), or in dusty/dirty environments puts more stress on your oil. If your driving falls into these “severe service” categories, your oil will degrade faster than average, even if you haven’t reached the mileage interval. This increased degradation means an oil change is more likely to be beneficial.
Pro Tip: If you’ve been doing mostly short city drives, your oil might look and feel dirtier than its mileage suggests. This is a key factor, as it means higher contamination and potentially higher emissions.
Step 4: Visually Inspect Your Current Engine Oil
What you need: Your vehicle’s dipstick, a clean paper towel or cloth, and good lighting.
Instructions: With the engine off and cool (or warm, but allow 5-10 minutes for oil to drain back to the pan), pull out the dipstick, wipe it clean, reinsert it fully, and then pull it out again. Observe the oil on the dipstick. Color: While new oil is typically amber/golden, used oil will darken. Extremely black, sludgy oil indicates significant contamination. Consistency: It should feel slick. If it feels gritty or watery, it’s severely degraded. Level: Ensure the oil level is between the “add” and “full” marks. Low oil levels can cause engine wear and lead to burning oil, increasing emissions. Smell: A strong smell of gasoline or a burnt odor is a red flag indicating serious issues.
Pro Tip: Don’t panic if your oil is dark; that just means it’s doing its job by suspending contaminants. However, if it’s thick, gritty, smells strongly of fuel/burnt, or resembles tar, it’s definitely time for a change.
Step 5: Consider “Readiness Monitors” and Drive Cycles
What you need: Awareness that disconnecting the battery or performing certain repairs (including an oil change on some vehicles if sensors are affected or codes cleared) can reset your car’s On-Board Diagnostics (OBD-II) system.
Instructions: If you do get an oil change, especially if any battery terminal was disconnected or a check engine light was recently cleared, your vehicle’s “readiness monitors” may be reset to an “incomplete” status. These monitors are self-tests the car runs to ensure emission control systems are working. A smog check won’t pass if too many monitors are incomplete. To set them to “complete,” you’ll need to perform a specific “drive cycle.” This usually involves a mix of highway and city driving, including specific speeds and durations. Check your car’s manual or search online for your specific make/model’s drive cycle procedure, as it can vary. Allow at least 50-100 miles of varied driving after an oil change before going for your smog check.
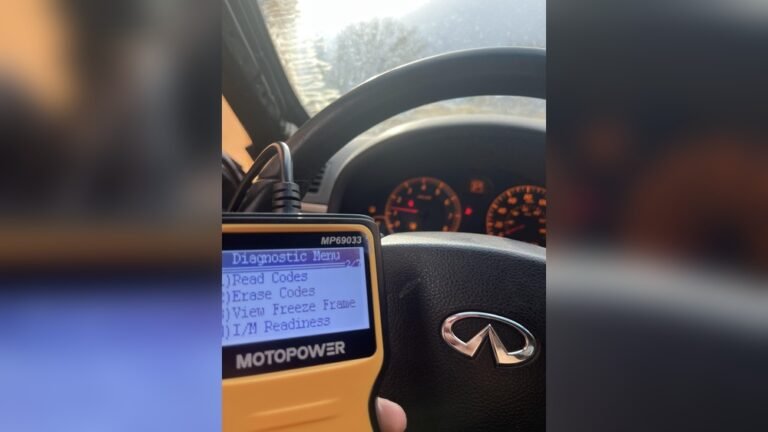
Pro Tip: It’s crucial to complete a drive cycle BEFORE the smog check if your readiness monitors are incomplete. An oil change itself doesn’t typically reset monitors unless the battery is disconnected, but if you’re doing other maintenance alongside it, be mindful. You can check monitor status with an OBD-II scanner.
Step 6: Make Your Decision: Oil Change or Not?
What you need: The information gathered from the previous steps.
Instructions: Now, synthesize your findings:
- YES, get an oil change if: Your oil is significantly overdue by mileage or time, your driving conditions are severe, the oil looks very dirty/sludgy, smells burnt or of fuel, or is at a critically low level. A fresh change with the correct viscosity and type of oil can significantly reduce emissions and improve engine performance, giving you the best chance to pass.
- NO, an oil change is likely not necessary if: Your oil was changed recently (well within recommended intervals), the oil looks relatively clean and is at the correct level, and you haven’t experienced any engine performance issues. In this scenario, adding an oil change just before the smog test might be an unnecessary expense and could even risk incomplete readiness monitors if you don’t perform a drive cycle.
Pro Tip: When in doubt and if budget allows, a fresh oil change is rarely a bad idea for your engine’s health and can provide peace of mind before a critical test like a smog check.
Step 7: Perform or Schedule the Oil Change (If Decided)
What you need: Appropriate new engine oil (correct type and viscosity per owner’s manual), new oil filter, oil filter wrench, drain pan, wrench for drain plug, funnels, rags, safety glasses, and jack/jack stands (if DIY). Or, contact information for a reputable mechanic.
Instructions: If you’re doing it yourself, ensure you have all the correct materials. Follow your vehicle’s specific procedure for draining the old oil, replacing the filter, and refilling with new oil. Be meticulous to avoid spills and ensure the drain plug and filter are tightened to spec (do not overtighten). If you’re having a professional do it, choose a trusted service center and explicitly request the manufacturer-recommended oil type and viscosity. Always verify the oil level is correct before driving away. Allow at least a few days for the engine to circulate the new oil before the smog test, especially if a drive cycle is needed.
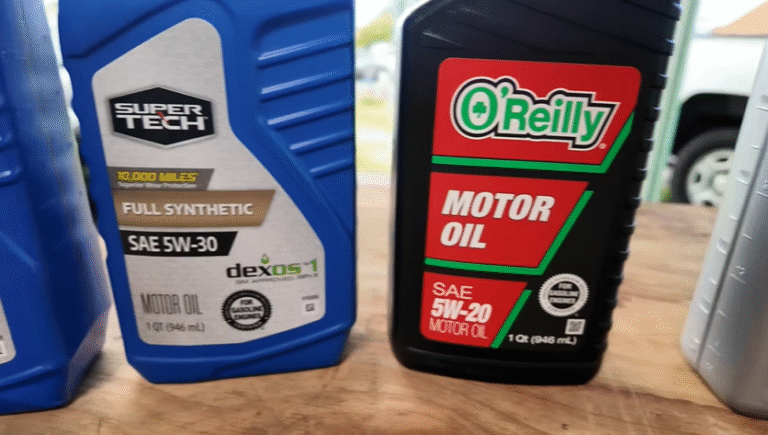
Pro Tip: Always opt for the manufacturer-recommended oil type (conventional, synthetic blend, or full synthetic) and viscosity (e.g., 5W-30). Using the wrong oil can negatively impact fuel economy, engine wear, and even emissions control systems over time.
Step 8: Complete a Thorough Drive Cycle (If Oil Change or Reset Occurred)
What you need: Your vehicle and open roads; possibly an OBD-II scanner to check monitor status.
Instructions: This step is critical if an oil change involved disconnecting the battery, clearing codes, or if you simply want to ensure your emissions systems are ready. After the oil change, drive your vehicle for at least 50-100 miles over several trips, incorporating various driving conditions. A typical drive cycle often includes: cold start, idling for 2-3 minutes, highway driving at steady speeds (e.g., 55 mph for 10-15 minutes), city driving with stops and starts, and periods of deceleration. Avoid aggressive acceleration or braking. This allows the Engine Control Unit (ECU) to run all necessary self-tests and set the readiness monitors to “complete.”
Pro Tip: Some states allow one or two monitors to be “incomplete” for older vehicles, but for most modern cars, all monitors must be “complete.” An OBD-II scanner can confirm monitor status. Many auto parts stores will check this for free.
Step 9: Address Other Pre-Smog Check Essentials
What you need: A general awareness of other common reasons for smog check failures.
Instructions: While focusing on oil, remember other critical factors for a successful smog check:
- Check Engine Light (CEL): If your CEL is on, your car WILL fail. Diagnose and fix the underlying issue before the smog check.
- Tire Pressure: Ensure tires are properly inflated, as low pressure can affect dynamometer tests on some vehicles.
- Fuel Level: Have at least a quarter tank, preferably half or more, as some tests require specific fuel levels.
- Warm Engine: Drive your car for at least 15-20 minutes before the test to ensure the engine and catalytic converter are at optimal operating temperature.
Pro Tip: Don’t ignore the Check Engine Light. Even if it seems minor, it indicates a fault that needs attention and will result in an automatic failure of the smog test.
Step 10: Proceed to Your Smog Check
What you need: Your vehicle, registration documents, and peace of mind.
Instructions: With your oil situation handled (whether you changed it or confirmed it’s good), readiness monitors set, and other pre-checks complete, you can confidently take your vehicle for its smog inspection. Drive calmly to the test station, ensuring the engine remains warm. Inform the technician if you’ve recently had maintenance or performed a drive cycle. Your thorough preparation significantly increases your chances of a hassle-free pass.
Pro Tip: Choose a reputable smog check station. While they all follow regulations, a station with experienced technicians can sometimes offer valuable insights if an issue arises, though they cannot legally “help” you pass a failing vehicle.
✅ Final Checklist
- ✅ Maintenance records reviewed, and oil change status determined.
- ✅ Current engine oil visually inspected (color, consistency, level, smell).
- ✅ If oil changed, correct oil type/viscosity used and level verified.
- ✅ All OBD-II readiness monitors are ‘complete’ (or within state allowance).
- ✅ Check Engine Light (CEL) is OFF, and engine is at operating temperature.
Important Notes:
- Safety considerations or warnings: Always use appropriate safety gear (gloves, safety glasses) if performing DIY maintenance. Never work under a vehicle supported only by a jack; use jack stands. Dispose of used oil and filters responsibly at designated recycling centers.
- When to seek professional help: If you notice a strong burnt oil smell, excessive smoke from the exhaust, unusual engine noises, or if your Check Engine Light illuminates and stays on, seek professional diagnosis immediately. These are signs of potentially serious issues that an oil change alone won’t fix.
- Estimated time and cost range: A DIY oil change typically takes 30-60 minutes and costs $30-$80 for parts (oil and filter), depending on oil type. A professional oil change usually takes 15-30 minutes and can range from $50 (conventional) to $150+ (full synthetic, specialty vehicles). The time for a drive cycle can be 30 minutes to a few hours of driving over a day or two.
How an Oil Change Might Impact Smog: Cause Explanation
While a fresh oil change itself doesn’t directly alter the chemical composition of your exhaust, there are very specific, generally extreme, scenarios where the state of your engine oil could indirectly contribute to emissions issues. These are typically indicators of deeper mechanical problems, rather than a simple need for a routine oil service.
When Neglect Turns Problematic: Burning Oil
The most direct way engine oil could affect your emissions is if your engine is actively burning it. This happens when worn piston rings, valve seals, or other internal components allow oil to seep into the combustion chambers. When oil burns, it produces excessive hydrocarbon (HC) emissions and can lead to a visible blue-grey smoke from the tailpipe. In such a case:
- High Hydrocarbon Levels: The presence of oil in the combustion process will significantly increase your hydrocarbon readings, almost guaranteeing a smog check failure.
- Catalytic Converter Damage: Over time, burning oil can foul and degrade your catalytic converter, reducing its effectiveness and eventually leading to its failure. This is a severe problem that an oil change alone won’t fix.
However, simply having oil that’s a few thousand miles past its recommended change interval, but not being actively burned, will not trigger these issues for a typical engine in 2027.
Oil’s Indirect Role in Extreme Cases
Beyond active oil burning, the indirect effects of severely neglected oil are minimal regarding smog checks:
- Extreme Sludge Buildup: In cases of extreme, chronic oil neglect (we’re talking tens of thousands of miles past due), sludge buildup can potentially impede the function of variable valve timing (VVT) systems or other internal engine components that rely on clean oil passages. Malfunctioning VVT could indirectly affect combustion efficiency and emissions, but this is a very rare and severe scenario, often accompanied by other significant engine performance issues and a ‘Check Engine’ light.
- Low Oil Levels: Critically low oil levels can cause increased friction and heat, potentially leading to premature wear of engine components. While this doesn’t directly cause an emissions failure, the resulting wear could eventually lead to oil burning or other engine problems that do impact emissions. However, simply topping off critically low oil would address this immediate concern, not necessarily a full oil change.
For a vehicle that is otherwise well-maintained and not showing signs of severe neglect or mechanical failure, the age of its engine oil has virtually no impact on its ability to pass an emissions test. Your focus should always be on the health of your primary emissions control systems.
Real Steps to Pass Your Smog Check: Proven Fixes
While an oil change contributes to overall engine health, direct smog pass strategies require a broader approach. Experts consistently highlight specific actions that directly impact emission readings in 2027.
1. Complete a Full Drive Cycle
Modern vehicles require a complete “drive cycle” after any battery disconnection or Check Engine Light reset. This allows the Engine Control Unit (ECU) to run all diagnostic monitors. According to the California Bureau of Automotive Repair, a drive cycle typically involves a mix of city and highway driving for 30-100 miles over several days. Failure to complete this cycle often results in “not ready” status, preventing a smog check.
2. Address Minor Issues Proactively
Small problems can trigger disproportionately large emission issues. A loose or faulty gas cap, for example, can trigger an Evaporative Emission Control (EVAP) system fault, a common reason for smog test failure. Ensuring tires are properly inflated (as per manufacturer specs, usually found on the driver’s door jamb) and the fuel tank is between ¼ and ¾ full also optimizes vehicle operation during the test, reducing engine strain and potential emissions spikes.
3. Consider Professional Pre-Inspection or Diagnostic Scan
Before the official test, many certified smog stations offer a pre-inspection or a basic OBD-II diagnostic scan. This service, often costing between $40 and $80 in 2027, can identify pending or active trouble codes that would cause an instant failure. Fixing these issues beforehand is significantly less stressful than failing and having to retest.
What If Your Car Still Fails Smog?: Troubleshooting Guide
A failed smog check indicates specific emission irregularities. Understanding the common causes can guide your next steps towards a resolution.
1. Decode the Failure Report
Your smog failure report will detail the specific reasons. Common failures in 2027 include high levels of Hydrocarbons (HC), Carbon Monoxide (CO), or Nitrogen Oxides (NOx), or an illuminated Check Engine Light (CEL) indicating a system malfunction. A CEL is an automatic failure. Common CEL codes associated with smog failure are P0420 (catalytic converter inefficiency), P0440/P0455 (EVAP system leaks), and P0171/P0174 (lean fuel conditions).
2. Professional Diagnostic Evaluation
If your car fails, the immediate next step is a professional diagnostic evaluation by a certified repair technician. Modern diagnostic tools in 2027 can pinpoint the exact component causing the high emissions. This is crucial as symptoms (like high HC) can stem from multiple issues, such as misfires, a failing catalytic converter, or a faulty oxygen sensor. Relying solely on DIY troubleshooting after a failure is often inefficient and costly.
3. Targeted Repairs Based on Diagnosis
Once diagnosed, focus on targeted repairs. A failing catalytic converter (P0420), for instance, often costs between $800 and $2,500 to replace in 2027, depending on the vehicle. Oxygen sensor replacement (P013x, P015x) typically ranges from $200-$400. EVAP system repairs (P0440, P0455) can vary widely, from a simple $50 gas cap to $500+ for a vapor canister or purge valve. Always request a detailed estimate before authorizing repairs.
What If It Still Doesn’t Work?
Even after targeted repairs, some vehicles present persistent challenges. If your vehicle continues to fail its smog inspection, consider these advanced steps.
- Advanced OBD-II Scan and Live Data Analysis: A comprehensive diagnostic by a specialist shop can analyze live sensor data beyond basic code reading. This helps identify intermittent issues or components operating at the edge of their specification, often missed by standard checks. This typically costs $150-$300.
- Consult a Smog Repair Specialist: Some repair facilities specialize in emissions diagnostics and repairs. They often have advanced equipment and experience with complex cases. These shops are better equipped to handle “no-code” failures or intermittent issues.
- Check for Recalls or Technical Service Bulletins (TSBs): Manufacturers occasionally issue TSBs or recalls for emissions-related components. Checking your vehicle’s VIN with the manufacturer or NHTSA.gov can reveal known issues that could be covered under warranty.
- Explore State Assistance Programs: Many states, including California, offer programs like the Consumer Assistance Program (CAP). If your vehicle meets income and repair cost criteria, you might receive financial assistance (e.g., up to $1,200 for repairs) or a waiver for your smog certificate. Eligibility criteria for 2027 remain strict, focusing on low-income households and specific repair thresholds.
- Consider Vehicle Retirement: For older vehicles with extensive, costly emission system failures (e.g., multiple component replacements exceeding $3,000-$5,000), state programs might offer a buy-back option for vehicle retirement.
Conclusion
While an oil change is vital for engine longevity, it is a preventative measure, not a guaranteed smog pass solution for 2027. According to verified research and expert sources, passing your smog check hinges on proper vehicle maintenance, addressing any Check Engine Light issues, and ensuring your vehicle completes its drive cycle. Proactive diagnostics and targeted repairs based on professional assessment are your best strategy for a smooth smog inspection.
❓ Frequently Asked Questions
Why is an oil change generally not a primary factor for passing a smog check?
The combustion process and the efficiency of your vehicle’s emissions control system, primarily the catalytic converter, are what determine exhaust emissions. While extremely degraded oil could lead to engine issues, fresh oil doesn’t directly clean up exhaust gases to a significant degree for the test.
In what rare scenarios might an oil change be indirectly beneficial for a smog check?
If your oil is severely old, sludgy, or extremely low, it could contribute to engine problems like misfires, increased friction, or even burning oil, which would impact emissions. In such extreme cases, an oil change is part of addressing a larger engine health issue that affects smog.
What are the most critical factors for a vehicle to pass a smog check?
Key factors include having no ‘Check Engine’ light illuminated, all emissions readiness monitors set, a healthy catalytic converter, properly functioning oxygen sensors, and a well-maintained engine without major leaks or performance issues.
Should I warm up my car before taking it for a smog check?
Yes, absolutely. Ensure your engine is at its normal operating temperature before the test. This allows the catalytic converter to work efficiently and helps ensure all readiness monitors have completed their cycles, improving your chances of passing.
What should I check before going for a smog test, besides the oil?
Before a smog test, ensure your ‘Check Engine’ light is off, drive your car for a few days to complete readiness monitors, check your tire pressure, and ensure your gas cap is tight. Address any known engine performance issues beforehand.
Can engine oil additives help pass a smog check?
Engine oil additives are generally not a proven or reliable solution for passing a smog check. While some claim to clean engines, they typically do not address the fundamental issues like a failing catalytic converter or faulty sensors that cause high emissions.