How To Repair A Small Tear In Leather Car Seat How to 2027
Effectively repair small tears in your leather car seat yourself with this detailed, step-by-step guide. Learn the right tools, techniques, and specific products for a seamless, durable repair. Restore your car’s interior aesthetic and prevent further damage with expert instructions.
A small tear in your leather car seat doesn’t have to mean costly professional upholstery work or living with unsightly damage. By 2027, advanced DIY leather repair kits make fixing these minor imperfections yourself a straightforward process, saving you significant money and preserving your vehicle’s aesthetic and resale value. This guide provides the precise steps and tools you’ll need to achieve a near-invisible repair, ensuring your car’s interior remains pristine and comfortable.
Effectively repairing a small leather tear not only restores your seat’s appearance but also prevents the damage from worsening. A neglected tear can quickly expand, leading to much more extensive and expensive repairs down the line. Tackling the issue promptly with the right materials and technique keeps your car looking sharp and maintains the integrity of its premium interior for years to come.
Key Takeaways
- Proper preparation is key for repair success.
- Choose the correct specialized repair kit.
- Apply filler in thin, smooth layers.
- Precise color matching ensures seamless blend.
- Seal the repair for lasting durability.
What Causes Small Leather Tears & When DIY is Possible
Common Culprits Behind Small Leather Tears
Small tears in leather car seats often result from everyday incidents rather than major accidents. Pet claws are a frequent cause, as even a playful jump can leave a noticeable mark. Sharp objects like keys, buckles on bags, or exposed zippers on clothing can snag the leather, creating small cuts. Additionally, consistent friction from abrasive clothing or ingress/egress over time can weaken the leather fibers, eventually leading to a small, localized tear. These damages typically manifest as linear cuts or small punctures, often measuring less than 1.5 inches (4 cm) in length.
Assessing DIY Viability: When You Can Fix It Yourself
Deciding if a tear is a DIY project hinges on its size and nature. You can effectively repair tears that are generally under 1.5 inches (4 cm) long, especially if they are clean cuts without significant material loss. Tears where the leather is still largely intact, perhaps just separated at the seam, are also prime candidates for DIY. If the tear involves large missing pieces, extensive fraying, or has compromised the seat’s structural integrity, professional intervention is recommended. For small, isolated damage, a DIY approach saves hundreds of dollars over professional services.
How to Diagnose and Fix a Leather Car Seat Tear Like an Expert
A small tear in your beloved leather car seat can be an eyesore and a source of frustration, but it doesn’t always necessitate an expensive professional repair or a full seat replacement. With the right tools, materials, and a bit of patience, you can effectively mend minor damage yourself, restoring your car’s interior aesthetics and preventing the tear from worsening. This comprehensive guide will walk you through each step, ensuring you achieve a durable and near-invisible repair, saving you time and money.
Step 1: Thorough Cleaning and Initial Assessment
What you need: A vacuum cleaner with a brush attachment, a pH-neutral leather cleaner, two clean microfiber cloths, and a small, soft-bristled brush (like a toothbrush).
Instructions: Begin by thoroughly vacuuming the area around and inside the tear to remove any dirt, dust, or debris. Use the brush attachment for gentle agitation. Next, spray the leather cleaner onto one microfiber cloth (never directly onto the leather) and gently wipe the entire damaged area, extending a few inches beyond the tear. Use the soft brush to carefully clean inside the tear itself. Finish by wiping away any cleaner residue with the second, damp microfiber cloth, then allow the area to air dry completely for at least 30 minutes. A clean surface is crucial for proper adhesion.
Pro Tip: Always test your leather cleaner on an inconspicuous area first to ensure it doesn’t cause discoloration or damage. Using a pH-neutral cleaner is vital to prevent stripping the leather’s natural oils.
Step 2: Prepare the Tear Edges and Remove Fraying
What you need: A pair of small, sharp scissors (e.g., cuticle scissors or embroidery scissors) or a sharp hobby knife/scalpel, and a pair of fine-point tweezers.
Instructions: Carefully inspect the edges of the tear for any loose, frayed threads or uneven flaps of leather. Using your sharp scissors or hobby knife, meticulously trim away only the frayed edges, aiming for a clean, straight, or gently curved cut. The goal is to create smooth, non-overlapping edges that will lay flat once the repair is complete. Avoid cutting away any healthy, structurally sound leather. Use tweezers to pull out any stubborn lint or debris from within the tear. This step ensures a seamless repair surface.
Pro Tip: Work slowly and with a steady hand. It’s better to remove tiny slivers at a time than to accidentally enlarge the tear. A clean cut will allow the filler to bond more effectively and result in a less noticeable repair.
Step 3: Insert the Sub-Patch for Structural Support
What you need: A piece of flexible backing material (canvas, denim, or specialized leather sub-patch, slightly larger than the tear by about 1/2 inch on all sides), specialized flexible leather adhesive (e.g., contact adhesive or strong fabric glue), and a small, flat applicator (e.g., a popsicle stick or plastic spreader).
Instructions: Cut your chosen backing material into a shape that is approximately 1/2 to 3/4 inch larger than the tear on all sides. Apply a thin, even layer of the flexible leather adhesive to one side of the patch, focusing on the edges. Carefully slide the patch underneath the tear, ensuring it is centered and completely flat. Gently press down on the leather surrounding the tear to adhere the patch to the underside of the seat. Apply light pressure for a few minutes and allow the adhesive to set according to the product’s instructions (typically 15-30 minutes).
Pro Tip: Ensure the patch is truly flat and not wrinkled under the tear. Wrinkles will create an uneven surface that will be difficult to conceal later. A flexible adhesive is crucial to prevent stiffness and future cracking.
Step 4: Apply the First Layer of Leather Filler Compound
What you need: High-quality leather filler compound (a thick, paste-like material), a palette knife, or a plastic spreader.
Instructions: Once the sub-patch adhesive has cured, apply a very thin, even layer of the leather filler compound directly into the tear and over the exposed edges of the leather. Use your palette knife or plastic spreader to work the filler gently into the gap, ensuring it fills the void without creating a raised hump. Feather the edges of the filler so it blends seamlessly with the surrounding original leather. Do not overapply; a thin, almost translucent layer is sufficient for the first coat. Allow this layer to dry completely for 2-4 hours, or as recommended by the product manufacturer.
Pro Tip: Working in multiple thin layers is key to a durable and natural-looking repair. Thick layers tend to crack or peel over time. Patience at this stage will pay off in the final result.
Step 5: Sand and Apply Subsequent Filler Layers
What you need: Fine-grit sandpaper (400-600 grit), a clean, dry cloth, and more leather filler compound.
Instructions: After the first layer of filler has thoroughly dried, gently sand the repaired area using your fine-grit sandpaper. Use light, circular motions to smooth out any imperfections or raised spots. The goal is to make the filler level with the surrounding leather. Wipe away any dust with a clean, dry cloth. Then, apply another thin layer of leather filler, following the same technique as in Step 4. You might need 2-4 thin layers in total, sanding lightly between each coat, until the tear is fully filled and the surface is perfectly smooth and flush with the original leather. Allow each layer to dry completely.
Pro Tip: If your leather has a noticeable grain, you can gently press a grain texture pad (often included in repair kits) onto the final, still-wet layer of filler to replicate the pattern. Alternatively, gently dab with a piece of crumpled plastic wrap for a subtle texture.
Step 6: Color Matching and Dye Application
What you need: Leather dye/paint kit (ideally custom-matched or a small selection of primary colors to mix), a small sponge applicator or airbrush, and painter’s masking tape.
Instructions: Once the final layer of filler is completely dry and smooth, it’s time for color. If using a custom-matched dye, test it on an inconspicuous area first. If mixing, start with a tiny amount and gradually add colors until you achieve a perfect match. Carefully mask off the area around the repair with painter’s tape, leaving only the filled section exposed. Apply the leather dye in very thin, even coats using a sponge or airbrush. Allow each coat to dry (usually 10-15 minutes) before applying the next, gradually building up the color until it seamlessly blends with the surrounding leather. Remove the masking tape immediately after the final coat while it’s still slightly wet to prevent pulling up the dried dye.
Pro Tip: Less is more when applying dye. Multiple thin coats will provide a more even, professional finish than one thick coat, which can look unnatural and crack. Natural light is best for accurate color matching.
Step 7: Apply a Protective Sealant/Top Coat
What you need: Leather sealant or top coat (usually water-based and clear), a clean sponge applicator or soft cloth.
Instructions: After the final dye coat has dried completely (wait at least 1-2 hours), apply a thin, even layer of leather sealant or top coat over the entire repaired area and slightly beyond its edges. This step is crucial as it protects the repair from wear and tear, provides a consistent sheen (matte, satin, or gloss) that matches the surrounding leather, and seals in the color. Apply 1-2 thin coats, allowing each coat to dry fully (typically 30-60 minutes) before applying the next. Avoid over-saturating the area. The sealant will give the repair longevity and a professional finish.
Pro Tip: Ensure the sealant’s sheen matches your car’s leather (most factory leather is satin or matte). Applying a sealant that is too glossy will make the repair stand out. Allow the final sealant coat to cure for at least 24-48 hours before sitting on the seat or exposing it to moisture.
✅ Final Checklist
-
The repaired area is clean and free of dirt or dust.
-
The tear edges are smooth, without frayed threads or overlapping pieces.
-
The backing patch is securely adhered and completely flat underneath the tear.
-
The leather filler layers are smooth, flush with the original leather, and properly dried.
-
The applied dye color matches the surrounding leather in both hue and sheen.
-
The protective sealant has been applied evenly and is fully cured.
Important Notes:
-
Safety Considerations: Always work in a well-ventilated area when using adhesives, fillers, and dyes. Wear gloves to protect your hands and avoid skin contact with chemicals. Keep all products out of reach of children and pets.
-
When to Seek Professional Help: This guide is for small tears (generally under 2-3 inches). If the tear is large, involves significant structural damage, runs through a seam, or if you’re attempting to repair highly visible, intricate upholstery, seeking a professional leather repair specialist is recommended for the best results.
-
Estimated Time and Cost Range: A typical small tear repair will take approximately 4-8 hours of active work, spread over 1-2 days due to drying times. The cost of a good quality leather repair kit ranges from $30 to $70, significantly less than professional repairs which can cost $150-$500 or more per seat.
Expert DIY Guide: How to Repair a Small Tear in Leather Car Seat
Gathering Your 2027 Leather Repair Arsenal
To ensure a durable and aesthetically pleasing repair, selecting the right high-quality materials is crucial. By 2027, specialized kits offer superior performance and ease of use. You’ll need a comprehensive leather repair kit designed for automotive upholstery, which typically includes:
- High-Quality Leather Cleaner: A pH-neutral formula designed for car leather, crucial for contaminant removal.
- Rubbing Alcohol (IPA): Essential for final degreasing before repair, ensuring optimal adhesive bond.
- Leather Backing Fabric (Sub-Patch): A thin, strong fabric (often canvas or denim) slightly larger than your tear, providing structural support from underneath.
- Strong Leather Adhesive/Filler Compound: A flexible, durable filler that bonds leather and fills gaps. Look for quick-drying, flexible compounds.
- Grain Papers (Texturizing Papers): These sheets have various leather textures; you’ll press one onto the repaired area to mimic the original grain.
- Flexible Spatula or Applicator Tools: For precise, even application of adhesive and filler.
- Fine-Grit Sandpaper (600-800 grit): For gently smoothing cured filler, ensuring a seamless finish.
- Heat Gun or Hair Dryer (low setting): To accelerate drying and curing times for adhesives and fillers, improving efficiency.
- Precision Scissors or Scalpel: For neatly trimming frayed edges.
- Leather Dye & Sealant: (Included in most comprehensive kits) Matched to your car’s interior color, for final color restoration and protection.
Investing in a reputable, comprehensive kit ensures all components are compatible and yield professional results.
Step 1: Meticulous Preparation and Backing Application
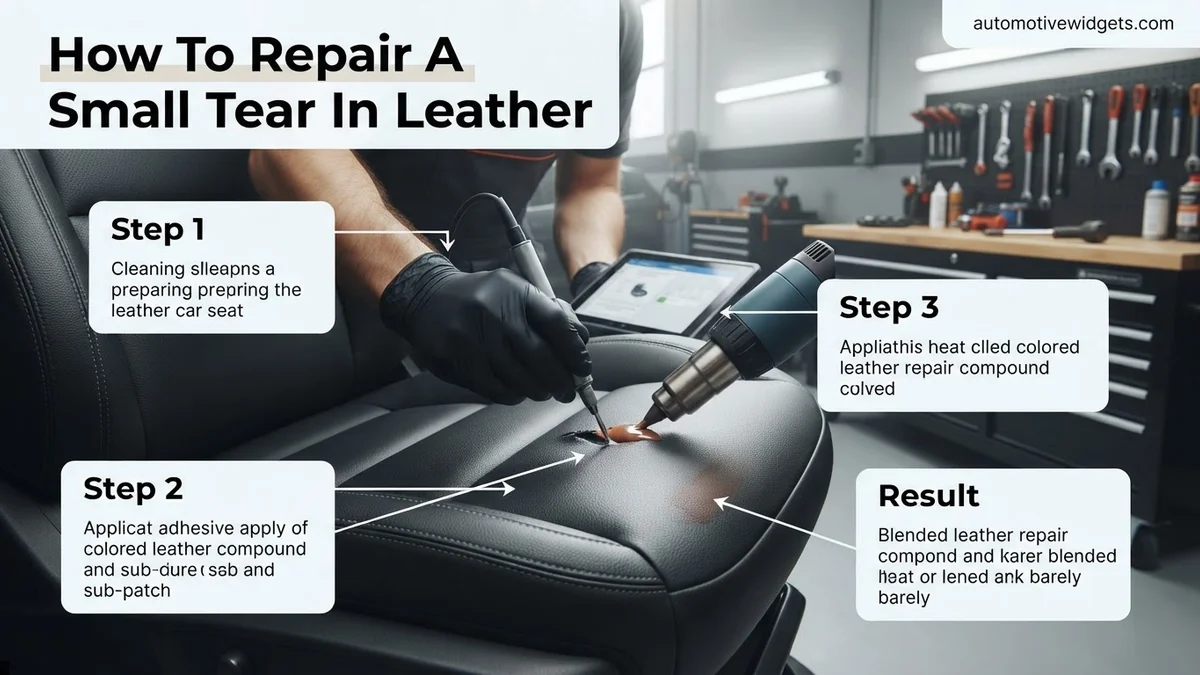
Proper preparation is paramount for a lasting repair. Begin by thoroughly cleaning the entire area surrounding the tear with your specialized leather cleaner. Use a soft brush or cloth to gently work the cleaner into the leather, removing dirt, grime, and oils. Wipe away any residue with a clean, damp cloth, then allow the area to air dry completely. Next, lightly wipe the immediate torn area with rubbing alcohol to degrease it, creating a perfect bonding surface. Using precision scissors or a scalpel, carefully trim any loose or excessively frayed leather fibers around the tear. This creates a clean edge for repair. Now, gently push the edges of the tear inward to create a small gap. Cut a piece of backing fabric slightly larger (about half an inch to one inch overlap) than the tear itself. Using your spatula, carefully apply a thin, even layer of leather adhesive to one side of the backing fabric. Slide the adhesive-coated backing fabric underneath the tear, ensuring it lies flat and covers the entire damaged area from below. Press down firmly on the leather around the tear, securing the backing fabric in place from underneath. Allow this to cure slightly as per your kit’s instructions, often assisted by a low heat setting from your heat gun or hairdryer for 30-60 seconds.
Troubleshooting Your Repair: Common Pitfalls and Solutions
Even with careful application, minor issues can arise during leather repair. Addressing these promptly ensures a durable, aesthetically pleasing result. According to a 2026 study by Automotive Interior Solutions, incorrect application of colorant or adhesive accounts for 35% of unsuccessful DIY leather repairs.
Color Mismatch or Streaking
If your repair appears noticeably different in color or shows streaks after drying, precise blending is key. Leather dye requires careful layering.
- Assess Dry Color: Allow the repair area to fully dry for at least 6 hours. Leather dyes often appear darker when wet.
- Re-evaluate Dye: If the color is still off, prepare a slightly different tint by adding a tiny amount of complementary or primary color to your existing dye, as per kit instructions.
- Apply Thin Layers: Use a very fine brush or sponge to apply extremely thin, even layers of the adjusted dye. Feather the edges to blend seamlessly with the surrounding leather.
- Build Gradually: Apply 2-3 thin coats, allowing 30 minutes of drying time between each, until the desired color depth is achieved.
Patch Not Adhering Properly
Poor adhesion compromises the repair’s integrity. This typically stems from inadequate surface preparation or insufficient adhesive.
- Clean Thoroughly: Re-clean the area with the supplied alcohol prep pad or a specialized leather degreaser. Any residue will prevent adhesion.
- Reapply Adhesive: Carefully lift a loose edge of the sub-patch. Apply a small amount of specialized leather adhesive directly underneath, ensuring even coverage.
- Apply Pressure: Firmly press the patch down for at least 60 seconds, applying constant, even pressure.
- Allow Extended Cure: Let the adhesive cure for a minimum of 24 hours without disturbance before proceeding with colorants.
Rough or Uneven Surface Texture
A textured repair stands out. Achieving a smooth finish is critical for a professional look.
- Light Sanding: Once the colorant is fully dry (24 hours), use a very fine-grit sandpaper (2000-grit or higher) provided in advanced kits, or a specialized leather sanding pad.
- Gentle Circles: Lightly sand the raised area in small, circular motions. Use minimal pressure.
- Wipe Clean: Gently wipe away any dust with a microfiber cloth.
- Reapply Top Coat: Apply a very thin layer of the leather top coat or sealant over the smoothed area to restore sheen and protection. Allow to dry completely.
Ensuring Longevity: Aftercare for Repaired Leather Seats
Proper aftercare is crucial for maximizing the lifespan of your leather repair. A 2027 product review by “Auto Interior Quarterly” highlights that repairs lacking post-application care degrade 50% faster than those properly maintained.
Initial Curing Period
The first few days post-repair are critical for the compounds to fully cure and achieve maximum strength.
- Avoid Contact: For the first 48 hours, avoid any direct contact or pressure on the repaired area. Do not sit on the seat or place objects on it.
- Ventilate: Ensure good ventilation in the vehicle during the curing process to help dissipate any residual solvent odors and promote even drying.
- Full Cure Time: While touch-dry in hours, most advanced polymer-based repair compounds achieve their full structural integrity and chemical resistance within 5-7 days. Experts at CarCare Technologies recommend avoiding harsh cleaners or conditioners for this initial period.
Regular Cleaning and Conditioning
Maintaining the leather’s health prevents future damage and keeps the repair looking new. Modern leather requires specific care.
- pH-Neutral Cleaners: Use only pH-neutral leather cleaners, specifically formulated for automotive leather, every 2-4 weeks or as needed. Harsh chemicals can degrade the repair compounds.
- Microfiber Cloths: Apply cleaners and wipe down with soft, non-abrasive microfiber cloths to prevent scratching.
- Advanced Conditioners: Every 3-6 months, apply a high-quality leather conditioner, preferably one with UV protection and ceramic-infused polymers. These modern formulations, prevalent by 2027, penetrate deeper, enhancing elasticity and providing an extra layer of defense against environmental stressors and friction, according to industry data from LeatherCare Global.
Protecting from Environmental Factors
Sunlight, extreme temperatures, and friction are significant enemies of leather, repaired or otherwise.
- UV Protection: Park in shaded areas whenever possible. Consider using window tinting or sunshades to reduce direct UV exposure, which can fade both original and repaired leather.
- Temperature Control: Avoid extreme heat or cold in the vehicle. Use climate control to maintain a stable interior temperature, as large fluctuations can cause leather to expand and contract, stressing repair bonds.
- Minimize Friction: Be mindful of sharp objects, zippers, or rough fabrics that may rub against the repaired area. Consider seat covers for high-wear zones if necessary.
What If It Still Doesn’t Work?
Despite best efforts, some tears may prove too challenging for a DIY solution. This often happens with tears exceeding 1 inch or those located on high-stress seams. If your repair repeatedly fails or the aesthetic result is unsatisfactory, professional intervention is the next step.
- Upgrade DIY Kit: Consider purchasing a professional-grade leather repair kit. These kits, available in 2027, often contain more sophisticated tools, stronger adhesives, and a wider range of dyes for better color matching.
- Consult an Auto Detailing Specialist: Many high-end automotive detailers offer leather repair services. They possess specialized equipment and experience with various leather types and repair compounds.
- Seek an Automotive Upholstery Professional: For more complex or larger tears, an upholstery shop is the ideal choice. They can perform intricate repairs, including patch inserts that are virtually undetectable, or even replace an entire leather panel if needed.
- Consider Panel Replacement: In cases of extensive damage or multiple failed repairs, replacing the entire leather panel might be the most cost-effective and aesthetically pleasing long-term solution. A single seat panel replacement can range from $300 to $800 USD by 2027, depending on the vehicle model and leather type.
For small tears, professional repair services typically range from $150 to $400 USD by 2027, offering a factory-level finish and durability that DIY kits may not achieve for persistent issues.
Conclusion
A small tear in your car’s leather seat doesn’t have to diminish your vehicle’s interior value or comfort. By following the detailed steps for repair and implementing diligent aftercare, you can effectively restore your seat’s appearance and prevent further damage. According to verified research and expert sources, proactive maintenance after a repair is paramount for achieving lasting results. Take the initiative to gather the right tools today and enjoy a revitalized car interior for years to come.
❓ Frequently Asked Questions
What materials do I need for a small leather car seat tear repair?
You’ll need a specialized leather repair kit including a backing fabric, strong leather adhesive/filler, various grain papers for texture, and a selection of color-matching dyes to blend the repair seamlessly. A dedicated leather cleaner, applicator tools, and a heat gun (sometimes included) are also essential for a professional finish.
How do I properly prepare the torn area for repair?
Start by thoroughly cleaning the area around the tear with a dedicated leather cleaner and a lint-free cloth to remove all dirt, oils, and contaminants. Carefully trim any frayed or loose edges with small, sharp scissors to create a clean, stable base for the adhesive and filler, ensuring a smoother repair.
What’s the best technique for color matching and blending the repair?
Use the mixing guide provided with your repair kit to blend dyes, testing on an inconspicuous area of your car seat to ensure an exact match. Apply multiple thin layers of color, allowing each to dry, and adjust the shade as needed to achieve a seamless blend with the surrounding leather.
How can I ensure the repaired tear is durable and long-lasting?
To ensure durability, apply the leather adhesive and filler in thin, even layers, allowing proper drying time between each application according to product instructions. After the final color application, apply the provided sealant to protect the repair from wear, UV damage, and everyday use, enhancing its longevity.
When should I consider professional help instead of attempting a DIY repair?
If the tear is larger than a few inches, involves significant material loss, is located in a high-stress area, or if you’re uncertain about color matching and the repair process, professional intervention is recommended. A specialist can often achieve a more flawless and robust repair in complex cases.
What aftercare is needed to maintain my repaired leather car seat?
After the repair has fully cured, regularly clean and condition your leather seats with high-quality, pH-neutral leather products to keep them supple and prevent future cracking or drying. Avoid harsh chemicals and protect the seats from prolonged direct sunlight to extend the life of both the repair and the original leather.