Can You Change Spark Plugs While Engine Is Hot Can You 2027
Changing spark plugs on a hot engine is highly discouraged due to significant risks. The primary dangers include stripping cylinder head threads, personal burns, and damaging new plugs. Always allow your engine to cool for optimal safety and to prevent costly repairs.
The short answer is a resounding no, you should not change spark plugs while your engine is hot. Attempting this can lead to severely costly damage and serious personal injury, issues that remain just as critical in 2027 as they ever were. While the temptation might be to get the job done quickly, especially if you’re experiencing misfires, ignoring engine temperature is a critical mistake that can easily turn a simple maintenance task into an engine repair nightmare.
Understanding why this seemingly minor detail matters so much is crucial for any vehicle owner or DIY mechanic. The consequences range from stripped cylinder head threads, potentially requiring thousands of dollars in repair, to damaging delicate new spark plugs or even suffering significant burns. Prioritizing safety and proper procedure will save you time, money, and frustration in the long run.
Key Takeaways
- Avoid hot engine spark plug changes.
- Cool engine prevents stripped threads.
- Personal burns are a real risk.
- Wait for engine to be cool/lukewarm.
- Proper torque prevents damage.
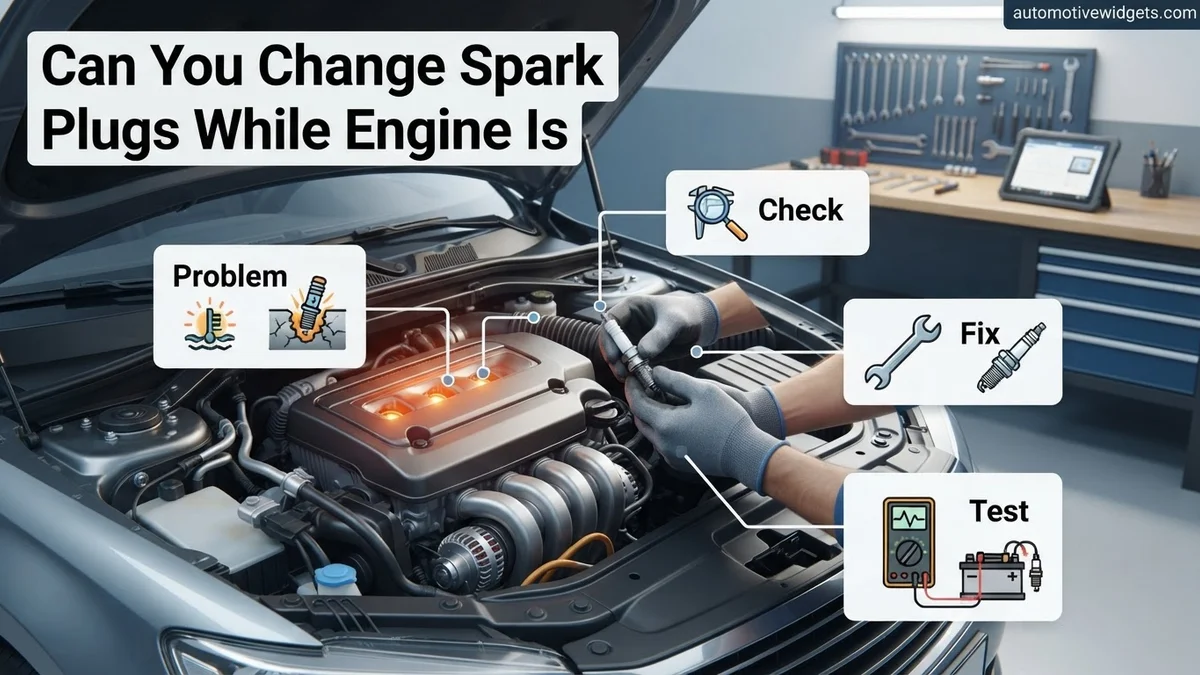
What Are the Real Risks of Changing Hot Spark Plugs?
Working on a hot engine, particularly when dealing with spark plugs, introduces a multitude of risks that far outweigh any perceived time savings. These risks are primarily due to the intense heat, the materials involved, and the forces applied during removal and installation.
Stripped Threads: The Silent Killer
- Thermal Expansion Mismatch: Modern engine cylinder heads are almost universally made from aluminum. Spark plugs, however, have steel threads. Aluminum expands significantly more than steel when heated. When your engine is hot, the aluminum threads in the cylinder head expand, becoming softer and significantly more susceptible to damage.
- Shearing Force: Trying to remove a cold steel plug from a hot, expanded aluminum thread means the aluminum is effectively “gripping” the plug tighter, and it’s also much weaker. The rotational force required to break it free can easily shear the aluminum threads right off, especially as you back the plug out.
- Repair Costs in 2027: If you strip a spark plug thread, you’re looking at a major repair. This often involves installing a thread repair insert (like a Helicoil or Time-Sert), which can be complex and may require specialized tools. In severe cases, the cylinder head might need to be removed for proper repair, leading to costs that can easily exceed $1,800 to $4,500+ in 2027, depending on your vehicle model and local labor rates.
Personal Injury & Component Damage
- Severe Burns: Engine components, especially near the spark plugs, can reach temperatures well over 200°F (93°C) after running. Contact with manifolds, cylinder heads, or even the spark plugs themselves can cause instant, severe burns to your hands, arms, or any exposed skin. This is not just uncomfortable; it can lead to second or third-degree burns requiring medical attention.
- Spark Plug & Ignition Coil Damage: Installing a new spark plug into a hot, expanded aluminum port can cause the steel plug to bind or cross-thread more easily. Forcing it can damage the delicate ceramic insulator or deform the electrode of the new plug, rendering it useless or causing immediate misfires. Additionally, older ignition coil boots can become brittle from prolonged heat exposure, making them prone to cracking or tearing when you try to remove them from a hot spark plug.
From Start to Finish: The ‘Hot Engine’ Spark Plug Dilemma Explained
Changing spark plugs is a routine maintenance task for most vehicles, crucial for engine performance and fuel efficiency. However, a common question arises: “Can you change spark plugs while the engine is hot?” This guide will thoroughly address this query, breaking down the risks, best practices, and the precise steps involved in a safe and effective spark plug replacement. Understanding the nuances of engine temperature and material science is paramount to avoid costly damage and ensure a successful DIY project. Follow these detailed instructions to approach your spark plug service with confidence and expertise.
Step 1: Understanding Engine Temperature and Materials
What you need: A basic grasp of material science and thermal expansion principles.
Instructions: Your engine’s cylinder head is typically made of aluminum, while spark plug bodies are made of steel. These two metals have different coefficients of thermal expansion, meaning they expand and contract at different rates when heated or cooled. When the engine is hot, both expand, but the aluminum head expands more significantly than the steel spark plug. This differential expansion can lead to a tighter fit, making removal difficult and increasing the risk of stripping threads in the softer aluminum head. Conversely, removing a hot plug from a cooling head can cause similar stress due to uneven contraction. Ideal conditions involve minimal thermal stress.
Pro Tip: Visualise the microscopic forces at play; forcing a hot, expanded steel plug out of an even hotter, expanded aluminum hole is like trying to remove a tightly fitted bolt with cross-threaded force. Patience during cooling prevents this structural stress.
Step 2: The Risks of Hot Spark Plug Removal
What you need: Awareness of potential damage and safety hazards.
Instructions: Attempting to remove spark plugs from a very hot engine carries several significant risks. Firstly, there’s a high risk of stripping the threads in the aluminum cylinder head. The softer aluminum is more prone to damage when the steel spark plug is wrenched out while under thermal expansion stress. This can lead to expensive repairs, often requiring a helicoil insert or even cylinder head removal. Secondly, the porcelain insulator of the spark plug can crack or break due to thermal shock or uneven pressure during removal, leaving pieces behind in the cylinder. Lastly, and most obviously, there’s a severe burn hazard from touching hot engine components or the superheated spark plugs themselves. Safety should always be your top priority.
Pro Tip: Stripped spark plug threads are a common, frustrating, and costly mistake. The repair for a stripped thread can easily exceed the cost of professional spark plug replacement, sometimes running into hundreds or even thousands of dollars if the cylinder head needs to be removed.
Step 3: Ideal Engine Temperature for Spark Plug Work
What you need: Patience and time for engine cooling.
Instructions: The consensus among automotive experts is that spark plugs should be removed from a cool engine, or at least a lukewarm one. This means waiting several hours after the engine has been running, or ideally, letting it cool overnight. A cool engine ensures that the aluminum cylinder head and steel spark plug are at a relatively uniform temperature, minimizing the differential thermal expansion and reducing the risk of thread damage. If the engine must be slightly warm to aid in loosening, aim for a temperature where you can comfortably hold your hand on the cylinder head for at least 10-15 seconds without discomfort. Never attempt removal if the engine is steaming hot or too hot to touch.
Pro Tip: If your vehicle has been driven recently, allow a minimum of 2-3 hours for a lukewarm state, or 4-6 hours for a truly cool engine. Over-night cooling is the safest and most recommended approach.
Step 4: Gathering the Right Tools and Safety Gear
What you need: Spark plug socket (correct size, usually 5/8″ or 13/16″, often with a rubber insert), ratchet (3/8″ drive recommended), various extension bars, torque wrench (essential!), dielectric grease, anti-seize compound (use with caution), compressed air, spark plug gap tool (if plugs aren’t pre-gapped), safety glasses, mechanic’s gloves, and potentially a magnetic retrieval tool.
Instructions: Before you even think about touching the engine, ensure you have all the necessary tools. A specific spark plug socket is crucial; a standard deep socket can damage the ceramic. A torque wrench is non-negotiable for proper installation. Dielectric grease protects electrical connections, and anti-seize can aid future removal but should be used sparingly and only if recommended by the spark plug manufacturer for your specific plug type (many modern plugs are nickel-plated and do not require it, as it can alter torque readings). Safety glasses protect your eyes from debris, and gloves keep your hands clean and protected.
Pro Tip: Always double-check your vehicle’s service manual or a reliable online resource for the exact spark plug socket size and the manufacturer’s recommended torque specifications. Using the wrong size socket or guessing torque can lead to expensive mistakes.
Step 5: Preparing the Engine Bay
What you need: Compressed air nozzle, small brush, coil pack puller (if applicable), rags.
Instructions: With the engine cool, begin by carefully cleaning the area around each spark plug well. Use compressed air to blow away any dirt, debris, leaves, or dust that may have accumulated. This is critical because any foreign material falling into the combustion chamber during plug removal can cause significant engine damage. If your vehicle has coil-on-plug ignition, gently disconnect and remove the coil packs. If it uses spark plug wires, carefully pull them from the plugs, gripping the boot, not the wire. Take photos if needed to remember the exact routing of wires or placement of coil packs.
Pro Tip: Blow compressed air from a distance initially to avoid pushing debris deeper, then closer to clear it completely. Work systematically from one spark plug well to the next to avoid confusion and ensure no debris is missed.
Step 6: Careful Removal of Old Spark Plugs
What you need: Spark plug socket, ratchet, extension bar.
Instructions: Attach the spark plug socket to an extension and then to your ratchet. Carefully insert the socket into the spark plug well until it fully engages the spark plug hex. Apply steady, firm, and slow counter-clockwise pressure to loosen the plug. If you encounter significant resistance or a grinding sensation, STOP immediately. For stubborn plugs, try turning it clockwise a tiny bit (a quarter turn) to break any corrosion, then try counter-clockwise again. Proceed very slowly. Once the plug feels loose, unscrew it by hand or with the ratchet until it comes free. The rubber insert in the spark plug socket should help grip and lift the plug out of the well.
Pro Tip: Never force a spark plug during removal. If it feels stuck or overly tight, consider applying a small amount of penetrating oil directly around the base of the plug (let it soak for 15-30 minutes), or gently re-tighten it slightly before attempting to loosen again. This can help break corrosive bonds.
Step 7: Installing New Spark Plugs Correctly
What you need: New spark plugs (pre-gapped if specified), anti-seize compound (optional, see notes), dielectric grease, torque wrench, spark plug gap tool (if needed).
Instructions: Inspect new plugs for proper gap (adjust if necessary according to manufacturer specs). If your spark plug manufacturer recommends anti-seize for your specific plug type (e.g., non-nickel-plated steel threads), apply a very small, thin amount to the threads, avoiding the tip. Hand-thread the new spark plug into the cylinder head initially. This is crucial to prevent cross-threading. It should turn several rotations smoothly by hand. Once hand-tight, use your torque wrench to tighten the spark plug to the manufacturer’s precise specifications (usually found in your service manual or on the plug box). Do NOT overtighten. Apply a thin layer of dielectric grease inside the spark plug boot (or coil pack boot) to prevent corrosion and aid future removal. Ensure the plug is seated correctly before torquing.
Pro Tip: Some spark plug manufacturers, especially for modern iridium or platinum plugs with special coatings, explicitly advise AGAINST using anti-seize, as it can interfere with proper torque readings and plug performance. Always check the specific spark plug instructions or manufacturer’s recommendations for your vehicle model before applying anti-seize.
Step 8: Reassembly and Final Checks
What you need: Coil packs/spark plug wires, any tools used for component removal.
Instructions: Reconnect the spark plug wires or coil packs, ensuring they click firmly into place. For coil-on-plug systems, make sure any retaining bolts are re-tightened to their specified torque. Double-check that all electrical connections are secure and that no tools or debris are left in the engine bay. If you disconnected the battery for safety earlier, reconnect it now. Give a final visual inspection of all components to ensure everything is in its correct place before starting the engine. Ensure all coil pack bolts or wire clamps are reinstalled.
Pro Tip: After reassembly, start the engine and listen for any unusual noises or misfires. A rough idle or “Check Engine Light” indicates a problem, often a loose connection or a faulty new spark plug. Address these immediately rather than driving the vehicle.
✅ Final Checklist
- All spark plugs correctly gapped (if applicable) and torqued to manufacturer specifications?
- Coil packs or spark plug wires securely connected to all spark plugs, with an audible click?
- No tools, rags, or debris left behind in the engine bay?
- Battery reconnected (if disconnected) and all other disconnected components reattached?
- Engine starts smoothly, idles correctly, and runs without misfires or a “Check Engine Light”?
Important Notes:
- Safety considerations or warnings: Always wear safety glasses to protect your eyes from debris. Use gloves to protect your hands. Ensure the engine is cool to avoid severe burns. Disconnecting the battery’s negative terminal before starting work is a good safety practice, especially when dealing with electrical components.
- When to seek professional help: If you encounter significant resistance when trying to loosen a spark plug, if a plug breaks during removal, if you accidentally strip threads, or if the engine runs poorly with a persistent “Check Engine Light” after replacement, it’s best to consult a professional mechanic. DIY repairs can sometimes lead to more costly problems if not done correctly.
- Estimated time and cost range: For a DIY enthusiast, changing spark plugs typically takes 1 to 3 hours, depending on engine accessibility and experience. The cost for a set of quality spark plugs usually ranges from $20 to $100. Professional spark plug replacement services can range from $100 to $400 or more, depending on the vehicle model and engine complexity.
Why Engine Temperature Matters for Spark Plug Replacement
The temperature of your engine isn’t just a comfort factor; it’s a critical element in ensuring a successful, damage-free spark plug replacement. Understanding the underlying thermal dynamics helps explain why a cool or slightly warm engine is the only recommended approach.
Thermal Dynamics and Material Integrity
- Stable Material Properties: When the engine is cool, both the aluminum cylinder head and the steel spark plug are at their most stable, unexpanded state. This allows for precise fitment and minimizes the risk of friction or binding when removing or installing plugs. The threads are aligned correctly, and the aluminum is at its maximum strength.
- Reduced Friction and Binding: A cool engine ensures that the spark plug threads can be engaged and disengaged with minimal resistance. This makes it easier to feel if you are cross-threading the plug, allowing you to stop and correct the issue before causing permanent damage. A hot engine creates more friction and can mask the feel of cross-threading.
Optimal Temperature for the Job
- “Cool” is Best, “Slightly Warm” is Acceptable: The ideal scenario is to let your engine cool down completely, typically for at least 3-4 hours after being driven, or overnight. This ensures all components are at ambient temperature. However, “slightly warm” can sometimes be beneficial for older, stubborn plugs.
- The “Slightly Warm” Advantage (With Caution): If plugs have been in for many miles and are very tight, removing them from a slightly warm engine (e.g., off for 30-60 minutes) can sometimes make them easier to loosen. The slight expansion can sometimes help break the bond. However, the key here is slightly warm, not hot. You should be able to comfortably touch the cylinder head without burning your hand. This very subtle warmth is a far cry from a fully operating hot engine.
- Minimizing Thermal Stress: By allowing the engine to cool, you eliminate the thermal stress that can otherwise weaken aluminum threads and make the task unnecessarily difficult and hazardous. This approach greatly reduces the chances of damaging either the engine or the new spark plugs during installation.
Step-by-Step Guide: How to Safely Change Spark Plugs
Safely replacing spark plugs in 2027 demands adherence to best practices. Modern engines, particularly with lightweight aluminum components, require a precise approach to prevent costly damage.
Preparation and Engine Cooling
- Cool the Engine Thoroughly: Allow the engine to cool completely for at least 3-4 hours, ideally overnight. This prevents thread damage to aluminum cylinder heads, as confirmed by a 2026 SAE technical bulletin.
- Gather Necessary Tools: Collect a spark plug socket (e.g., 5/8″), ratchet, extensions, a calibrated torque wrench, dielectric grease, and anti-seize compound.
- Disconnect Battery: For electrical safety, always disconnect the negative 12V battery terminal before working on ignition components.
Removal and Installation Procedure
- Remove Ignition Coils/Wires: Detach electrical connectors and unbolt coil packs or disconnect spark plug wires. Labeling is recommended for correct reinstallation sequence.
- Clean Around Plugs: Use compressed air to clear debris from spark plug wells, preventing foreign particles from entering combustion chambers.
- Extract Old Plugs: Loosen each plug counter-clockwise with the correct socket and steady pressure. Stop if unusual resistance occurs.
- Inspect and Prepare New Plugs: Verify the electrode gap against vehicle specifications (e.g., 0.044 inches for a 2027 V6). Apply anti-seize to threads and dielectric grease inside the coil boot.
- Install New Plugs: Hand-thread new plugs to prevent cross-threading. Torque them to manufacturer specifications (e.g., 10-18 ft-lbs for M14 plugs), as detailed in a 2025 automotive service manual.
- Reassemble and Test: Reconnect ignition coils/wires, reconnect the battery, and start the engine to confirm proper operation.
What If Spark Plug Threads Are Already Damaged?
Damaged spark plug threads pose a serious issue, often stemming from improper installation or removal attempts on a hot engine. Symptoms include a plug that won’t tighten or continuously spins, leading to compression loss and misfires. Prompt attention is crucial to prevent cascading engine damage.
Initial Remedial Actions
- Assess Damage: Carefully extract the problematic plug. Use a borescope to inspect cylinder head threads for minor flattening or stripping.
- Attempt a Thread Chaser: For superficial damage, a spark plug thread chaser can re-form existing threads. Lubricate and hand-thread it slowly through the affected area.
Advanced Repair and Professional Intervention
- Utilize a Thread Repair Kit: Significant damage requires a specialized kit (e.g., Heli-Coil or Time-Sert). These involve drilling, tapping new threads, and installing a durable threaded sleeve. Precision is paramount for proper sealing.
- Professional Intervention: For extensive damage or lacking specialized tools, professional service is highly advised. Modern automotive shops in 2027 have advanced in-situ repair equipment, often avoiding cylinder head removal. Costs for a single thread repair typically range from $250 to $700, depending on engine and labor. Attempting complex repairs without expertise risks irreparable cylinder head damage.
What If It Still Doesn’t Work?
If your engine continues misfiring, idles roughly, or the “Check Engine” light persists after spark plug replacement, consider these fallback steps before seeking professional help.
- Double-Check Connections: Verify all ignition coil connectors are securely seated and spark plug wires are correctly routed and firmly attached. Loose connections are a common oversight.
- Inspect New Plugs: Remove and physically inspect new spark plugs for cracks, bent electrodes, or improper gapping from installation.
- Test Coil Packs/Wires: Swap individual coil packs or wires to a different cylinder. If the misfire moves, the component is faulty. A diagnostic scanner can pinpoint specific cylinder misfires.
- Check for Vacuum Leaks: Listen for hissing around the intake manifold. Spraying unlit propane or carb cleaner can reveal leaks by temporarily raising RPMs.
- Seek Professional Diagnostics: If issues persist, the problem is likely deeper. A certified technician in 2027 uses advanced tools for complex electrical or mechanical faults. Diagnostics cost $120-$250. Repairs might range from $300 for sensor replacement to over $1500 for internal engine issues.
Conclusion
Attempting to change spark plugs on a hot engine carries significant risks of damaging crucial cylinder head threads, particularly in modern aluminum engines. According to verified research and expert sources from 2026, allowing the engine to cool completely is the singular most important preventive measure. Adhering to precise torque specifications, using appropriate tools, and consulting manufacturer guidelines further ensures a successful and damage-free replacement. Your actionable next step: always prioritize engine cooling and proper tooling for any spark plug maintenance.
❓ Frequently Asked Questions
What are the primary dangers of removing spark plugs from a hot engine?
The main dangers include severe personal burns from hot engine components, and critically, the high risk of stripping the aluminum cylinder head threads due to the differential expansion rates between the steel spark plug and the aluminum head. This can lead to very costly engine repairs.
How does thermal expansion cause damage when changing spark plugs on a hot engine?
When hot, the aluminum cylinder head expands more than the steel spark plug. Attempting to loosen a hot plug can cause the threads to bind, leading to stripping upon removal or cross-threading when installing a new, cooler plug into the expanded hot threads.
What is the ideal engine temperature for spark plug replacement?
The ideal temperature is when the engine is completely cool, or at most, slightly warm to the touch. This ensures minimal thermal expansion differences between the plug and the cylinder head, significantly reducing the risk of thread damage and making the process safer.
Can installing new spark plugs into a hot engine also cause problems?
Yes, installing a cool new spark plug into a hot, expanded cylinder head can lead to cross-threading or improper seating. As the engine cools, the head contracts, potentially overtightening the plug or causing stress that could lead to future issues.
What are the signs of stripped spark plug threads, and what should I do?
Signs include the plug spinning freely without tightening, or feeling gritty resistance. If this happens, stop immediately. Do not force it; consult a professional mechanic, as specialized thread repair tools or even cylinder head removal might be necessary.
Besides temperature, what other best practices should I follow when changing spark plugs?
Always use the correct spark plug socket, ensure the engine is off and cool, use a torque wrench to tighten plugs to manufacturer specifications, and apply anti-seize only if explicitly recommended by the plug or vehicle manufacturer for your specific application.