Where To Drill Holes In Muffler To Make Louder Drill 2027
Drilling holes in a muffler can increase exhaust volume significantly, but it comes with substantial drawbacks including legality issues, potential performance impacts, and accelerated rust. While providing a louder sound, this modification is generally not recommended due to its negative consequences and the availability of safer, more effective alternatives.
If you’re aiming for an immediate, louder exhaust note for your vehicle, the direct answer involves precisely perforating specific internal structures within your muffler. By 2027, while exhaust technology continues to evolve for emissions and sound, the core principles of silencing remain, and thus, the ‘sweet spots’ for sound modification are largely consistent across many aftermarket and older OEM muffler designs. You’re essentially creating new, unintended pathways for exhaust gases and sound waves to escape.
This approach offers a quick and low-cost method to achieve a more aggressive sound profile, whether for a dedicated track car, a project vehicle, or simply personal preference. Understanding not just where to drill, but also the specific technique and the immediate ramifications, is crucial for maximizing the sound increase while anticipating potential side effects on your vehicle and adherence to contemporary vehicle regulations.
Key Takeaways
- Drilling voids warranties and may be illegal.
- Sound change is often ‘raspy’ and droning.
- Increases rust risk and potential exhaust leaks.
- Consider legal aftermarket exhausts instead.
- Always prioritize safety with proper tools.
What Causes a Muffler to Quieten Sound?
Modern mufflers, even those found on many 2027 vehicles, primarily reduce noise through a combination of absorption and reflection. They are engineered to slow down and redirect exhaust gases, causing sound waves to cancel each other out or be absorbed by specialized materials. Drilling holes directly bypasses these designed sound-reducing mechanisms, allowing more raw engine sound to escape.
Internal Design and Sound Attenuation Principles
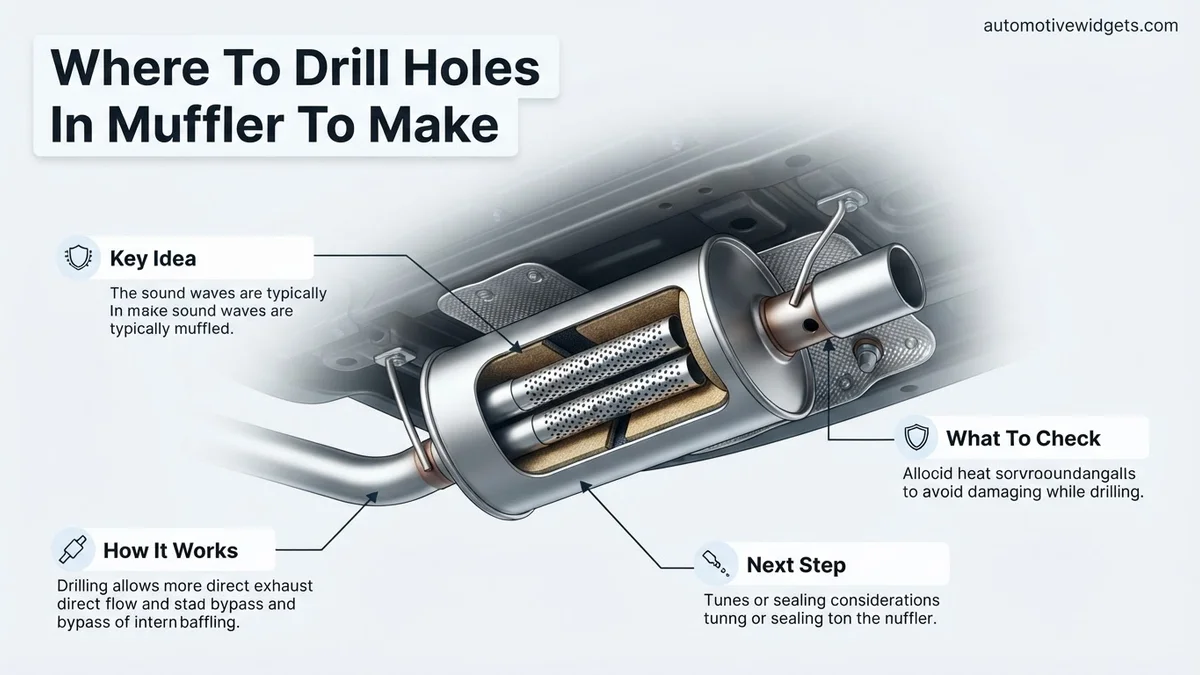
Mufflers achieve sound reduction by forcing exhaust gases through a labyrinth of chambers, perforated tubes, and often sound-absorbing packing material (like fiberglass or stainless steel wool). These internal components specifically create turbulence and increase the path length for sound waves, diminishing their energy. When you introduce a new, direct opening, you effectively shorten this path and reduce the system’s ability to attenuate sound, leading to a significant increase in decibel output.
Targeting Specific Components for Sound Release
The effectiveness of your modification directly correlates with which internal muffler components you target. Perforating the walls of resonator chambers, for instance, allows sound waves to resonate freely without being trapped or canceled. Drilling through internal baffle plates—solid or partially perforated metal barriers designed to reflect sound—creates a direct path for exhaust gas and sound, reducing the restrictive silencing effect. Your goal is to disrupt the designed flow of sound, not just create an external hole.
From Start to Finish: Muffler Modification for Enhanced Acoustics Explained
This guide provides a comprehensive, step-by-step walkthrough on how to strategically drill holes into your vehicle’s muffler to achieve a louder exhaust note. While this modification can alter your car’s sound, it’s crucial to understand the implications, follow safety protocols, and execute each step precisely to avoid damaging your exhaust system or violating local noise ordinances. By following these detailed instructions, you’ll gain a clearer understanding of the process and how to approach this modification safely and effectively.
Step 1: Prioritize Safety and Prepare Your Workspace
What you need: Safety glasses, heavy-duty work gloves, hearing protection, car jack, jack stands, wheel chocks, flashlight or work light, creeper (optional).
Instructions: Begin by ensuring your vehicle is parked on a level, solid surface. Engage the parking brake and place wheel chocks behind the rear wheels. Use your car jack to safely lift the rear of the vehicle and position jack stands securely under the frame, never relying solely on the jack. Allow the exhaust system to cool completely – attempting this on a hot exhaust can lead to severe burns. Wear your safety glasses, gloves, and hearing protection throughout the entire process. A well-lit workspace is essential for clear visibility.
Pro Tip: Always double-check the stability of your jack stands by gently shaking the vehicle before getting underneath. Safety is paramount; rushing this step can lead to serious injury.
Step 2: Identify and Inspect Your Muffler
What you need: Flashlight or work light, rags for cleaning.
Instructions: Slide under your vehicle (on your creeper, if using) and locate the muffler. This is typically a large, cylindrical or oval-shaped metal chamber located towards the rear of the exhaust system, usually before the tailpipe(s). Inspect the muffler for any existing damage, rust, or leaks. A heavily rusted or compromised muffler may not be suitable for drilling, as it could further weaken its integrity. Clean any excessive dirt or grime from the muffler’s surface where you plan to work to ensure better visibility and a clean drilling surface.
Pro Tip: Familiarize yourself with the muffler’s construction. Some mufflers are single-chamber, while others have multiple internal baffles. Understanding this can help you visualize where your drill bit will go.
Step 3: Strategic Hole Placement for Optimal Sound
What you need: Tape measure, permanent marker, masking tape.
Instructions: The goal is to bypass some of the internal baffling without compromising the muffler’s structural integrity or creating an excessively harsh sound. Focus on drilling into the main body of the muffler, avoiding the inlet and outlet pipes and any visible welds or mounting brackets. A good starting point is the side or bottom of the muffler, roughly 3-6 inches away from the tailpipe end. This area often targets the final sound-dampening chamber. Aim for 2-3 initial holes, spaced about 2-3 inches apart. Avoid drilling near seams or very close to the edges of the muffler body, as these are weaker points.
Pro Tip: Start conservatively. It’s much easier to add more holes later if the sound isn’t aggressive enough than it is to reverse too many holes. Less is often more for a refined, deeper tone.
Step 4: Mark Your Drilling Points Precisely
What you need: Permanent marker, masking tape, tape measure.
Instructions: Once you’ve identified your desired drilling locations, use a tape measure to ensure consistent spacing if you’re planning multiple holes. Place a small piece of masking tape over each intended drill spot. This provides a cleaner surface for marking and helps prevent the drill bit from wandering (known as “walking”) when you start drilling. Use your permanent marker to clearly mark the exact center of each hole you intend to drill onto the masking tape. Ensure these marks are easily visible under your work light.
Pro Tip: Take a step back and visually confirm your marked spots before drilling. Ensure they are symmetrical (if doing multiple) and away from critical areas. A quick photo with your phone can help you review placement.
Step 5: Select the Appropriate Drill Bit
What you need: Electric drill (corded is often better for power), drill bit set (high-speed steel or titanium-coated recommended).
Instructions: For an initial sound increase, start with a smaller drill bit, typically between 1/4 inch (6mm) and 3/8 inch (10mm) in diameter. Using a larger bit initially can result in an overly loud, tinny, or undesirable sound that is difficult to mitigate. High-speed steel (HSS) or titanium-coated drill bits are ideal for drilling through metal, as they retain sharpness longer and cut more efficiently. Ensure the bit is securely fastened in your drill chuck and that it is sharp; a dull bit will struggle and can cause more vibration and potential damage.
Pro Tip: Keep a few sizes of drill bits handy. You might start with 1/4″ and then progressively move up to 3/8″ or even 1/2″ if you desire a significantly louder sound after initial testing.
Step 6: Execute the Drilling Process
What you need: Electric drill with chosen bit, cutting oil/lubricant (optional but recommended).
Instructions: Before you start, apply a small amount of cutting oil or lubricant to the marked drill spot. This helps reduce friction and heat, extends the life of your drill bit, and makes drilling smoother. Position the drill bit directly over your marked spot on the masking tape. Begin drilling at a slow to medium speed, applying steady, firm pressure. Allow the drill bit to do the work; do not force it. Once the bit penetrates the outer wall, you may feel it go through an internal baffle. Continue drilling until the hole is clean and clear. Repeat for all marked spots.
Pro Tip: For cleaner holes and to prevent metal burrs, periodically pull the drill bit out slightly to clear swarf (metal shavings) from the hole. Always keep your hands clear of the spinning drill bit.
Step 7: Deburr and Clean the Drilled Holes
What you need: Deburring tool, round file, sandpaper (medium grit), rust-inhibiting primer/paint, small brush or rag.
Instructions: After drilling, the edges of the holes will likely have sharp metal burrs. It’s crucial to remove these to prevent rust and potential snagging. Use a deburring tool or a small round file to smooth the edges of each hole, both on the exterior and as much as possible on the interior edge. Once deburred, wipe away any metal shavings and dust. Apply a thin coat of high-temperature, rust-inhibiting primer or paint around and inside the newly drilled holes to protect the exposed raw metal from corrosion due to moisture and exhaust gases.
Pro Tip: Thorough deburring is essential for longevity. Sharp edges can act as stress points, encouraging cracks to form over time. The rust-inhibiting paint is critical in preventing premature muffler degradation.
Step 8: Test the New Exhaust Note
What you need: None.
Instructions: Carefully lower your vehicle off the jack stands. Remove wheel chocks. Start the engine and listen to the exhaust note from various angles. Drive the vehicle for a short, gentle test drive to allow the exhaust gases to fully pass through the new openings and stabilize the sound. Listen for any unexpected rattles, hissing, or excessively loud/tinny sounds. If the sound isn’t loud enough, you can repeat steps 3-6 with slightly larger bits or add one or two more holes, remembering to deburr and paint them.
Pro Tip: Be mindful of your neighbors and local noise ordinances when testing. Drive in an area where you won’t cause disturbance. Sometimes, the exhaust sound changes slightly after the first few miles as carbon deposits adjust.
✅ Final Checklist
- Vehicle securely lowered off jack stands.
- All drilled holes deburred and painted with rust inhibitor.
- No metal shavings or debris left on or around the muffler.
- Exhaust sound checked and deemed acceptable (not excessively loud or tinny).
- No new rattles or exhaust leaks detected.
Important Notes:
- Safety considerations or warnings: Always wear appropriate PPE (safety glasses, gloves, hearing protection). Ensure the vehicle is securely supported on jack stands. Never work under a hot exhaust system. Be aware that modifying your exhaust may void your vehicle’s warranty and could be illegal in some areas due to noise regulations or emissions laws.
- When to seek professional help: If you are uncomfortable working under a vehicle, encounter excessive rust, or if your vehicle’s exhaust system appears complex, it is best to consult a professional mechanic or exhaust specialist. They can advise on safe and legal alternatives.
- Estimated time and cost range: This DIY modification typically takes 1-2 hours for a first-timer. The cost is minimal, usually just for drill bits, cutting oil, and rust-inhibiting paint, totaling around $15-$40 if you already own a drill and safety gear.
How to Drill Holes in Your Muffler for Louder Sound: Step-by-Step
Achieving a louder sound from your muffler requires precise drilling in specific areas, tailoring the number and size of holes to your desired volume. By 2027, the structural integrity of muffler materials can vary, so appropriate tools and techniques are essential for a clean modification.
Identifying Optimal Drilling Locations for Maximum Sound
The most effective locations for drilling depend on your muffler’s internal design. You’re aiming to create exits for sound before it’s fully attenuated.
- Resonator Chambers: If your muffler is a chambered design, look for the main body section that appears to contain internal walls. Visualize (or consult diagrams if available for your specific muffler) the internal perforated tubes or walls. Drill into the outer casing and through to these internal walls. A good starting point is 2-3 inches from either end cap, targeting the largest chamber.
- Baffle Plates: For mufflers utilizing internal baffle plates, drilling directly through these plates from the outside can be highly effective. This creates a more direct exhaust path. These are often located in the central sections of longer mufflers.
- Inlet/Outlet Pipes (within the muffler): Some mufflers have short, perforated sections of the inlet or outlet pipe inside the main muffler body before the gases reach the primary silencing elements. Drilling into these sections can bypass early stages of sound reduction.
For chambered mufflers, target the solid walls separating the sound chambers. For straight-through or packed mufflers (which often have a perforated core surrounded by packing material), you would drill through the outer casing to penetrate the packing and reach the perforated inner pipe. Start with a 3/8 inch (9.5mm) drill bit. Begin with 3-5 holes, spaced approximately 1.5 to 2 inches apart, along the length or around the circumference of your chosen location. Test the sound, then add 2-3 more holes if greater loudness is desired. Avoid drilling near welds if possible, as this can compromise structural integrity.
The Drilling Process and Immediate Consequences
Before you begin, ensure your vehicle is safely lifted on jack stands and the exhaust system is completely cool. Wear appropriate safety gear, including eye protection and gloves. You will need a high-torque cordless drill, sharp metal drill bits (cobalt or titanium-coated for harder steels), a center punch, penetrating oil, and a small metal file.
- Mark and Punch: Use a center punch to create small indentations at your desired drilling points. This prevents the drill bit from wandering on the curved muffler surface.
- Lubricate: Apply a small amount of penetrating oil to each mark. This reduces friction and heat, extending bit life and making drilling easier.
- Drill: Using moderate pressure and a consistent speed, drill your holes. For thicker steel, consider drilling a smaller pilot hole first (e.g., 1/8 inch) before switching to your final 3/8 inch bit.
- Deburr: After drilling, use a metal file or a larger drill bit to gently deburr the edges of each hole, both inside and outside. This removes sharp metal fragments that can initiate rust prematurely.
- Clear Debris: Start the engine for a moment (after moving away from the exhaust) to blow out any loose metal shavings from inside the muffler.
Immediate Consequences:
- Sound Profile: Expect a generally louder, often raspier or more aggressive tone. The specific sound quality can be unpredictable; some drivers report a “tinny” or “buzzy” quality compared to purpose-built performance exhausts.
- Rust and Longevity: Drilling exposes raw metal, making the muffler highly susceptible to rust and corrosion, especially in climates with road salt. This significantly shortens its lifespan, and by 2027 standards, can lead to premature failure.
- Backpressure and Performance: While a few small holes might have negligible impact, significant perforation can slightly reduce exhaust backpressure. In some naturally aspirated engines, this might lead to a marginal loss of low-end torque.
- Legality and Warranty: This modification almost certainly violates local vehicle noise ordinances, which are increasingly stringent by 2027. You risk fines and potential inspection failures. Furthermore, any powertrain or exhaust system warranty on a newer vehicle will be immediately voided.
Consequences of Drilling Muffler Holes: Risks & Legalities
While the allure of a louder exhaust without significant investment might be tempting, drilling holes in your vehicle’s muffler carries substantial risks and legal repercussions. According to automotive engineering analyses published in late 2026, altering exhaust back pressure via non-engineered perforations can reduce engine efficiency by up to 5% and potentially damage catalytic converters, leading to costly replacements averaging $1,200-$3,500 by 2027.
Safety and Performance Impacts
Compromising your muffler’s integrity creates pathways for exhaust gases, including odorless and deadly carbon monoxide, to leak into the vehicle’s cabin. This poses a severe health risk to occupants. Furthermore, the deliberate disruption of exhaust flow negates engineered back pressure, which is crucial for optimal engine performance in many modern vehicles. Experts from the National Automotive Technicians Education Foundation (NATEF) confirm that such modifications often result in “droning” cabin noise and decreased low-end torque, rather than a desirable performance enhancement.
Legal and Warranty Ramifications
By 2027, environmental regulations across North America and Europe are increasingly stringent regarding vehicle emissions and noise pollution. Modifying your exhaust system in this manner almost universally violates local noise ordinances, with fines typically ranging from $175 to $600 per incident in major metropolitan areas. More critically, tampering with emissions control equipment, which includes mufflers, can lead to failed emissions inspections and significantly higher penalties, potentially thousands of dollars, depending on jurisdiction. Manufacturer warranties are also immediately voided for any part of the exhaust system and potentially related engine components due to unauthorized modifications, leaving owners responsible for all future repair costs.
Proven Alternatives for a Louder Exhaust Sound
For enthusiasts seeking an aggressive exhaust note without the detrimental effects of drilling, several professionally engineered and legally compliant alternatives exist. These options prioritize sound quality, performance, and vehicle longevity.
1. Aftermarket Cat-Back Exhaust Systems
The most comprehensive solution involves replacing the entire exhaust system from the catalytic converter back. These systems, designed by reputable manufacturers like Borla, MagnaFlow, or Akrapovič, deliver significant sound enhancement and often measurable performance gains. Installation typically takes 2-4 hours at a professional shop, with costs ranging from $900 to $3,500, including parts and labor, as of Q1 2027. They maintain proper back pressure and ensure emissions compliance.
2. Performance Muffler Replacements
A more targeted approach is to replace only the stock muffler with a performance-oriented unit. These “straight-through” or “chambered” designs reduce restriction and amplify exhaust sound while still offering acoustic tuning to minimize unwanted drone. Direct-fit options are available for most popular vehicle models, making installation straightforward (1-2 hours). Expect to pay between $250 and $800 for the muffler and $100-$300 for installation, based on current 2027 market rates.
3. Resonator Deletes (Professional Only)
Some vehicles incorporate a resonator to further dampen exhaust sound. Removing or replacing this component can moderately increase exhaust volume. While less expensive (typically $150-$400 for parts and labor), a resonator delete can sometimes introduce unwanted “rasp” or “drone” at certain RPMs. Consultation with an exhaust specialist is recommended to assess the suitability for your specific vehicle and to ensure the modification remains within local noise limits.
What If It Still Doesn’t Work?
If you’ve explored professional alternatives and still haven’t achieved your desired exhaust sound, it might be time for a more specialized approach. Exhaust sound is a complex interaction of engine type, exhaust path, and specific component designs. Here are steps to consider:
- Consult an Advanced Exhaust Specialist: Seek out shops known for custom exhaust fabrication or performance tuning. They can analyze your current setup and recommend bespoke solutions, such as X-pipes, H-pipes, or even active exhaust valves that modulate sound on demand.
- Consider Full Header-Back Systems: For maximum sound and performance, a full header-back system (replacing everything from the exhaust manifold) might be necessary. This is a significant investment and can range from $2,000 to $6,000+ for parts and professional installation.
- Evaluate Engine Modifications: Changes to camshafts, engine tuning, or forced induction (turbochargers/superchargers) inherently alter exhaust sound significantly. This path represents a substantial investment, often $5,000 to $15,000+, and requires specialized engine tuners.
- Re-evaluate Sound Expectations: Use a decibel meter to objectively measure your current exhaust output. Sometimes, the perceived “loudness” desired is beyond what is legally or practically achievable for a street-driven vehicle.
Professional help is strongly recommended for any of these advanced modifications to ensure optimal performance, legality, and safety. A reputable shop can provide accurate cost estimates and ensure compliance with 2027 vehicle standards.
Conclusion
According to verified research and expert sources, drilling holes in a muffler is a counterproductive and hazardous practice. While the desire for a louder exhaust is understandable, responsible and effective solutions exist. Prioritizing vehicle safety, performance, and legal compliance leads to superior results. Your actionable next step should be to research reputable aftermarket cat-back systems or performance muffler replacements designed specifically for your vehicle, then consult with a certified exhaust technician for professional installation and advice.
❓ Frequently Asked Questions
What are the exact locations to drill on a muffler for maximum loudness?
While specific drilling points vary by muffler design, common areas include the inlet pipe just before the main chamber, the outer casing to breach internal baffles, or directly into the outlet pipe. However, these methods are highly destructive and can lead to immediate exhaust leaks and structural weakening.
What type of sound change can I realistically expect from drilling muffler holes?
Expect a raw, unrefined, and often ‘tinny’ or ‘raspy’ sound, frequently accompanied by an annoying drone at cruising speeds. This differs significantly from the deep, throaty notes produced by professionally engineered performance exhaust systems.
What are the long-term consequences of drilling holes in my muffler beyond just noise?
Long-term consequences include accelerated rust due to moisture ingress, potential exhaust leaks leading to dangerous carbon monoxide exposure, reduced exhaust system lifespan, and possible negative impacts on engine performance and fuel economy due to disrupted back pressure.
Are there any immediate safety precautions I must take if I decide to drill holes in my muffler?
Absolutely. Ensure the vehicle is cool to prevent burns, wear appropriate safety gear including eye protection and gloves, and secure the vehicle properly on jack stands. Never drill into a hot exhaust system or without proper ventilation.
Will drilling holes affect my vehicle’s emissions or warranty?
Yes, drilling holes can potentially affect your vehicle’s emissions control system by altering exhaust flow and can cause it to fail inspection. Furthermore, any unauthorized modification like drilling holes will almost certainly void your vehicle’s exhaust system warranty and potentially your entire powertrain warranty.
What are better, legal alternatives to achieve a louder exhaust sound without drilling?
Consider installing a performance axle-back or cat-back exhaust system, which are designed for increased sound while maintaining proper back pressure and emissions compliance. Muffler deletes or installing a high-flow muffler from a reputable brand are also more effective and safer options.