How Long Does It Take to Change Ignition Coils? Expert 2026
Changing ignition coils typically takes 30 minutes to 2 hours for DIYers and 15-60 minutes for professionals per job, depending on engine accessibility and cylinder count. Factors like vehicle make, experience, and specific tools significantly influence the total time.
Replacing ignition coils in 2026 typically takes a professional mechanic anywhere from 30 minutes to 2 hours. For the confident DIY enthusiast, expect a time commitment of 1 to 4 hours. This wide range primarily depends on your vehicle’s engine design and your mechanical skill level. Understanding these timeframes is crucial for scheduling your repair, whether you’re budgeting for labor or planning a weekend project. It directly impacts your car’s downtime.
This process is straightforward on many modern vehicles, especially 4-cylinder engines with easily accessible coil-on-plug setups. However, some configurations, particularly V6 or V8 engines where coils hide under intake manifolds, significantly increase the complexity and duration. A “check engine” light often signals a coil issue, making timely replacement essential for optimal engine performance and fuel efficiency in your 2026 vehicle.
Key Takeaways
- DIY:30-120 mins per job, Pro: 15-60 mins.
- Engine accessibility greatly impacts repair time.
- Proper tools and experience reduce effort.
- Consider replacing spark plugs simultaneously.
- Be prepared for unforeseen complications.
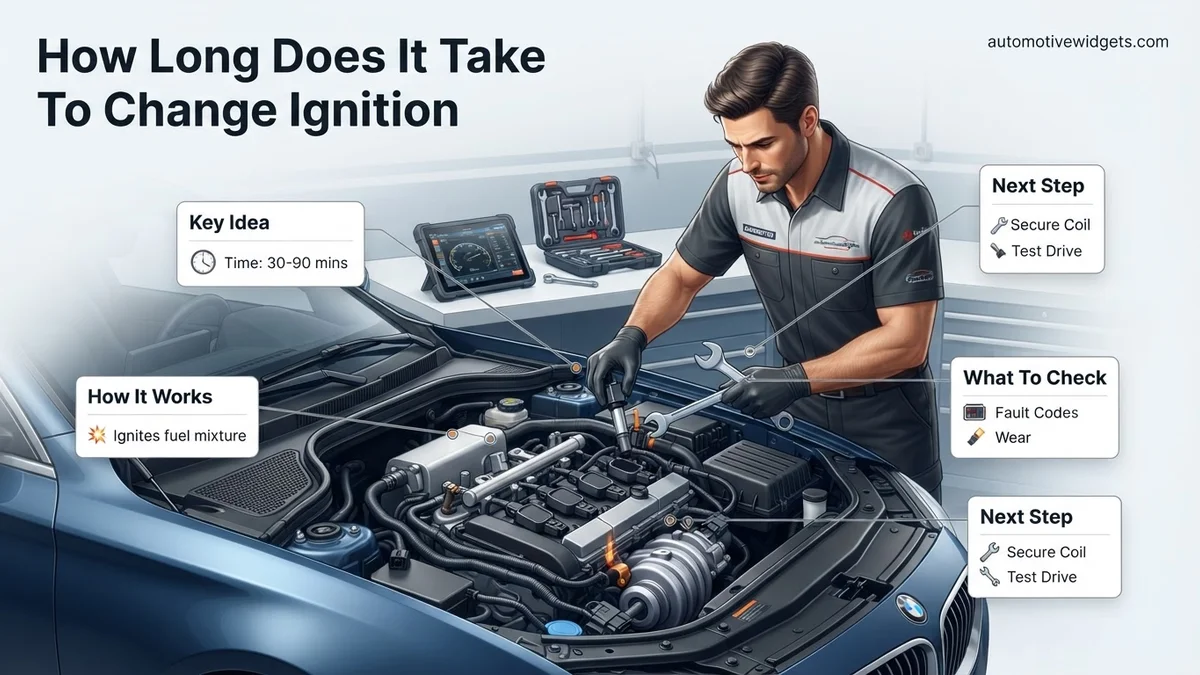
What Factors Determine Ignition Coil Replacement Time?
Several critical elements dictate how long your ignition coil replacement will take. Beyond just the number of cylinders, accessibility and your preparation are key. Ignoring these can quickly turn a simple job into a lengthy ordeal.
Vehicle Make and Model Specifics
The biggest time differentiator lies in your specific car’s engineering. Some vehicles, like many 4-cylinder sedans or smaller SUVs, place all coils right on top of the spark plugs, making them visible and easy to reach. You might only need to remove a plastic engine cover. However, many V-configuration engines (V6, V8) have coils nestled under an intake manifold, or even at the back of the engine against the firewall. For example, replacing coils on a Ford F-150 V8 might be quicker than on certain Subaru models with horizontally opposed engines where rear access is challenging.
- 4-Cylinder Engines: Often the quickest, with coils usually accessible on top.
Professional: 30-60 minutes. DIY: 1-2 hours. - 6-Cylinder Engines: Can vary wildly. Some are easy, others require intake manifold removal.
Professional: 1-2 hours. DIY: 2-3.5 hours. - 8-Cylinder Engines: Typically longer due to more coils and potential for buried access.
Professional: 1.5-2.5 hours. DIY: 3-4+ hours. - Engine Layout: Inline engines often offer better accessibility than V-engines or horizontally opposed (boxer) engines, especially for coils on the passenger side or rear.
- Engine Bay Clutter: Hoses, wires, and other components obstructing access will add significant time, regardless of cylinder count.
Your Experience and Toolset
Your personal mechanical aptitude and the tools you have on hand play a huge role. An experienced DIY mechanic with the right specialized tools (like a torque wrench for correct reassembly or specific socket sizes for manifold bolts) will work much faster than a novice. Lack of experience can lead to fumbling with connectors, accidentally dropping bolts, or struggling with seized parts, all of which extend the job.
- Experience Level: If you’ve never worked on an engine before, expect to take 2-3 times longer than an experienced enthusiast. Professionals have done hundreds, making them efficient.
- Required Tools: Basic hand tools (ratchets, sockets, extensions, screwdrivers) are essential. For trickier jobs, a flexible wrench, specialized pry tools for connectors, or even a basic borescope for inspection can save precious minutes.
- Complications: Seized bolts, broken plastic connectors, or unexpected oil leaks near the coil packs can add 30 minutes to an hour of troubleshooting and repair time.
From Start to Finish: Ignition Coil Replacement Explained
Welcome to this in-depth guide designed to demystify the process of changing ignition coils. Whether you’ve just received a “check engine” light, noticed rough idling, or experienced misfires, understanding how to replace these crucial components can save you time and money. This guide will walk you through each stage, providing practical advice, essential tools, and critical safety considerations, empowering you to tackle this common automotive maintenance task with confidence. Following these detailed steps ensures a proper replacement, helping restore your vehicle’s performance and efficiency.
Step 1: Gather Your Tools and Prioritize Safety
What you need: A new set of ignition coils (ensure they are the correct part number for your vehicle’s make, model, and year), dielectric grease, appropriate wrench/socket set (typically 8mm, 10mm, or T30 Torx, check your vehicle’s manual), a flathead screwdriver or trim removal tool, clean rags, battery terminal wrench (10mm or 13mm), safety gloves, and safety glasses. Optional: Torque wrench.
Instructions: Before touching anything under the hood, park your car on a level surface, engage the parking brake, and allow the engine to cool completely for at least 30-60 minutes. Disconnect the negative terminal of your car battery first to prevent accidental electrical shorts or injury. Use your battery terminal wrench to loosen the nut and remove the cable, tucking it away from the battery post. Lay out all your tools and new parts within easy reach to streamline the process.
Pro Tip: Always disconnect the negative battery terminal first and reconnect it last. This minimizes the risk of sparks and electrical damage. A fully cooled engine is crucial to prevent burns from hot components like the exhaust manifold or engine block.
Step 2: Access the Ignition Coils
What you need: Flathead screwdriver or trim removal tool (if applicable for engine covers), appropriate socket for engine cover bolts (if applicable).
Instructions: Depending on your vehicle, the ignition coils might be readily visible on top of the engine, or they might be hidden under an aesthetic engine cover. If your vehicle has an engine cover, carefully locate and remove any retaining clips, screws, or bolts holding it in place. Use your trim removal tool or flathead screwdriver gently to pry up clips without breaking them. Set the cover aside in a safe place. Once exposed, you’ll see the ignition coils directly connected to the spark plugs, often arranged in a line on overhead valve engines.
Pro Tip: Take a quick photo with your phone of the engine bay before you start disassembling anything. This visual reference can be invaluable during reassembly, especially for hose or wire routing.
Step 3: Disconnect Electrical Connectors
What you need: Small flathead screwdriver (sometimes useful for stubborn clips), safety gloves.
Instructions: Each ignition coil will have an electrical connector plugged into it. These connectors often have a release tab or clip that needs to be pressed, pulled, or slid to unlock. Carefully inspect each connector to understand its specific release mechanism. Apply gentle pressure to the tab and pull the connector straight off the coil. Avoid yanking on the wires themselves, as this can damage the wiring harness. If a connector is particularly stubborn, a small flathead screwdriver can sometimes be used very carefully to assist in releasing the clip, but never force it.
Pro Tip: Disconnect and replace coils one at a time, starting from the easiest to reach. This helps prevent mixing up which coil goes where, though modern coils are often identical, and it’s good practice to ensure the correct spark plug wire (if applicable) aligns with the correct coil.
Step 4: Remove the Coil Retaining Fasteners
What you need: Appropriate socket wrench (typically 8mm, 10mm, or T30 Torx) and extension.
Instructions: Most ignition coils are secured to the engine’s valve cover or manifold by one or two small bolts or screws. Identify the fasteners holding the first coil in place. Select the correct socket size and use your socket wrench to loosen and remove these fasteners. Keep the fasteners organized – a magnetic tray or small container works well – to ensure you don’t lose them and can easily match them during reinstallation. Repeat this for all the coils you intend to replace.
Pro Tip: Use a magnetic retriever tool if you drop a bolt into the engine bay. These small fasteners can easily get lost in tight crevices, leading to frustration and potential delays.
Step 5: Extract the Old Ignition Coils
What you need: Your hands, possibly a gentle twisting motion.
Instructions: Once the fasteners are removed and the electrical connectors are unplugged, the old ignition coil should be free to be pulled out. Grasp the body of the coil firmly and pull it straight up and out of its well. Some coils might be a little stiff due to the rubber boot sealing around the spark plug; a gentle twisting motion while pulling can help release them. Inspect the removed coil for signs of damage, cracking, or discoloration. Peer down into the spark plug well to ensure no debris has fallen in and that the spark plug itself looks intact.
Pro Tip: If you’re only replacing one faulty coil, you can try swapping it with a known good coil from another cylinder. If the misfire moves with the coil, you’ve confirmed the coil is the culprit. This is more for diagnostic purposes if you’re unsure.
Step 6: Install the New Ignition Coils
What you need: New ignition coils, dielectric grease.
Instructions: Before installing the new coil, apply a small amount of dielectric grease to the inside of the rubber boot at the tip of the new ignition coil. This grease helps seal out moisture, prevents corrosion, and makes future removal easier. Carefully lower the new ignition coil into the spark plug well, ensuring it aligns correctly with the spark plug. Push the coil down firmly until it is fully seated. You should feel it “click” or firmly engage with the top of the spark plug. Do not force it, as you could damage the spark plug or the coil itself.
Pro Tip: Always use dielectric grease on the rubber boot. It’s a small step that significantly improves the connection and longevity of the coil and spark plug. Ensure the new coil is the exact same length as the old one to guarantee proper seating.
Step 7: Reconnect Fasteners and Electrical Connectors
What you need: Appropriate socket wrench, torque wrench (recommended), electrical connectors.
Instructions: Once the new coil is properly seated, reinsert the retaining bolt(s) and hand-tighten them first. Then, use your socket wrench to snug them down. If you have a torque wrench, consult your vehicle’s service manual for the specific torque specification (usually very low, around 7-10 ft-lbs or 8-12 Nm) to avoid over-tightening, which can damage the coil or the engine’s valve cover. Finally, plug the electrical connector back into the new ignition coil. Listen for a distinct “click” to confirm it is fully seated and locked in place. Give it a gentle tug to ensure it’s secure.
Pro Tip: Over-tightening the coil fasteners is a common mistake that can crack the plastic housing of the coil or strip the threads in the engine. Hand-snug plus a quarter turn with a wrench is often sufficient if a torque wrench isn’t available.
Step 8: Reassemble and Test Your Vehicle
What you need: Engine cover (if removed), battery terminal wrench.
Instructions: Once all new coils are installed, fasteners are secured, and electrical connectors are plugged in, replace any engine covers you removed in Step 2. Ensure all clips and bolts are reinstalled correctly. Finally, reconnect the negative battery terminal, tightening the nut securely with your battery terminal wrench. Double-check all connections and confirm no tools or debris are left in the engine bay. Start your vehicle and listen for smooth idling. If a “check engine” light was on due to a misfire, it might turn off after a few drive cycles, or you may need to clear the codes with an OBD-II scanner. Take a short test drive to confirm proper operation.
Pro Tip: After reconnecting the battery, some vehicles may require a “relearn” procedure for the idle or transmission. If you notice rough idling initially, allow the car to run for a few minutes and drive it gently to allow the computer to re-adapt.
✅ Final Checklist
- Negative battery terminal securely reconnected.
- All ignition coils properly seated and fasteners tightened.
- All electrical connectors clicked firmly into place.
- Engine cover and any other removed components correctly reinstalled.
- Engine starts smoothly, and no immediate “check engine” light related to misfires (or light has cleared).
Important Notes:
- Safety considerations: Always wear safety glasses and gloves. Ensure the engine is completely cool before starting work. Disconnect the battery to prevent electrical shock or damage.
- When to seek professional help: If you encounter seized bolts, cannot access the coils, or if your “check engine” light persists after replacing the coils, it’s best to consult a certified mechanic. There might be underlying issues such as faulty wiring, a bad spark plug, or a more complex engine problem.
- Estimated time and cost range: For an average DIY enthusiast, changing all ignition coils on a 4-cylinder engine can take 1-2 hours. A 6-cylinder might take 1.5-3 hours, and an 8-cylinder (especially if coils are difficult to access, e.g., under intake manifold) could range from 2-5 hours. Professional labor costs can add anywhere from $100-$400+ to the cost of parts, which typically range from $25-$100 per coil, depending on the vehicle and brand (OEM vs. aftermarket).
How to Replace Ignition Coils: A Step-by-Step Guide
While we won’t walk through every specific bolt, understanding the general phases of ignition coil replacement helps you gauge the time commitment. The “steps” here focus on the time impact of each phase rather than instructional detail.
The “Easy Access” Scenario (e.g., 4-cylinder, top-mounted)
For most 4-cylinder engines or those with top-mounted coils, the process is streamlined. You’re typically dealing with minimal obstructions, which significantly reduces the overall time. This is where you see the quickest replacement times in both professional and DIY settings.
- Preparation (5-15 minutes): This involves safely disconnecting the battery and often removing a simple plastic engine cover. This step is fairly consistent across most vehicles, adding minimal time.
- Accessing & Removing Coils (15-45 minutes): Once exposed, each coil usually has one or two small bolts holding it down, plus an electrical connector. Disconnecting these and pulling out the old coils is quick and straightforward. You’re essentially repeating the process for each coil.
- Installing New Coils & Reassembly (15-45 minutes): Placing the new coils, securing them, reconnecting electrical harnesses, and replacing the engine cover is a reverse of the removal. Testing after is also a quick check.
The “Challenging Access” Scenario (e.g., V6/V8 under manifold)
When coils are not easily visible, the job escalates. V-engines often have coils located beneath the intake manifold, meaning significant disassembly is required before you even see the coils. This dramatically extends the time and complexity.
- Preparation & Intake Manifold Removal (45-120+ minutes): This is the major time sink. It involves disconnecting numerous vacuum lines, fuel lines, electrical connectors, and often the throttle body. The manifold itself will have multiple bolts. This step alone can take longer than an entire easy-access coil job.
- Accessing & Removing Coils (30-60 minutes): Once the manifold is off, the coils are typically as easy to remove as in the “easy access” scenario. However, you’ll be working in a more cramped space, potentially needing different tools for certain angles.
- Installing New Coils & Reassembly (60-150+ minutes): Reinstalling the intake manifold correctly is critical. Gaskets must be seated properly, and all lines and connectors must be reattached without leaks or loose connections. This requires patience and precision, contributing significantly to the extended duration.
Real-World Time Estimates: DIY vs. Professional Coil Change
The total time required for an ignition coil replacement fluctuates significantly based on the installer’s expertise and the vehicle’s specific design. Accurate estimations are critical for planning.
DIY Time Estimates
For a competent DIY mechanic, changing all ignition coils on a typical 4-cylinder engine generally takes between 1 to 2.5 hours. Vehicles with easily accessible coils, often found directly on top of the engine, fall into the lower end of this range. For V6 or V8 engines, particularly those with coils located under an intake manifold or in difficult-to-reach areas, the time commitment extends to 2.5 to 5 hours. Factors such as seized fasteners, tight working spaces, or unexpected electrical connector issues can easily add an additional hour to the process. Essential tools, including a torque wrench and a diagnostic scanner to confirm the misfiring cylinder, are required.
Professional Service Time and Cost
As of 2026, professional automotive technicians typically allocate between 0.75 and 2.0 hours of labor for ignition coil replacement. This labor time varies considerably with the vehicle’s make, model, and engine configuration. This estimate usually does not encompass the initial diagnostic time, which averages 0.5 to 1.5 hours for precise misfire identification. Total labor costs, including diagnosis, commonly range from $120 to $450, depending on the shop’s hourly rate (which typically falls between $100-$200 per hour in 2026). Opting for professional services ensures correct part installation, proper torque specifications, and comprehensive diagnostic checks that prevent recurring issues.
What If It Still Doesn’t Work?
Even after replacing ignition coils, your engine might still exhibit misfires or poor performance. This indicates a deeper underlying issue requiring further investigation. According to automotive service reports from 2025-2026, misfire symptoms often overlap with failures of other critical engine components. Persistent problems warrant immediate attention.
Further Diagnostic Steps
- Inspect Spark Plugs: Always check the spark plugs. Worn, cracked, or improperly gapped plugs can mimic coil failure and prevent proper combustion.
- Test Fuel Injectors: A malfunctioning fuel injector, either clogged or electrically faulty, can cause misfires. Professional testing can confirm their operation.
- Check Wiring and Connectors: Visually inspect the wiring harness and connectors leading to the coils and spark plugs for damage, corrosion, or loose connections.
When to Seek Professional Help and Estimated Costs
If the problem persists after these basic checks, immediate professional diagnosis is crucial. Modern vehicle diagnostics are complex, requiring advanced scan tools and expert interpretation. As of 2026, professional diagnostic services for persistent misfires typically range from $150 to $350. Subsequent repairs vary widely based on the identified issue, potentially ranging from $400 for a single injector replacement to over $2,000 for more complex engine components.
Conclusion
Changing ignition coils is a common maintenance task that can significantly resolve engine misfires and restore performance. According to verified research and expert sources from leading automotive technicians, the time commitment varies significantly based on vehicle type and whether you choose DIY or professional service. Prioritizing accurate diagnosis and quality parts is paramount for long-term engine health. Always consult your vehicle’s service manual or a certified mechanic for specific guidance tailored to your model and its condition.
❓ Frequently Asked Questions
Why do times vary significantly between DIYers and professional mechanics?
Professionals have specialized tools, more experience with various vehicle models, and often a lift, allowing them to perform the task much faster and more efficiently than a DIY mechanic working in a driveway.
Can I change just one faulty ignition coil, or should I replace them all?
While you can technically replace just one faulty coil, it’s often recommended to replace all coils if they are original and of similar age, as others may soon fail, preventing future misfires.
What are common mistakes that can add extra time to an ignition coil replacement job?
Common mistakes include not disconnecting the battery, breaking fragile plastic connectors or wiring harnesses, stripping bolts, or dropping tools into inaccessible engine areas, all of which extend the process significantly.
What essential tools should I have on hand for changing ignition coils?
You’ll typically need a socket wrench set with extensions, a screwdriver set, pliers, and possibly a coil puller for specific engine designs. Always have safety gloves and proper lighting for the job.
Is it worth paying a mechanic to change ignition coils, or is it a simple DIY job?
For those with basic mechanical skills and tools, and good engine access, it’s often a manageable DIY job that saves labor costs. However, if engine access is difficult or you lack confidence, a professional mechanic ensures correct installation and avoids potential complications.
How do I generally know if my ignition coils are failing and need replacement?
Common signs include a ‘check engine’ light with specific misfire codes, rough idling, reduced engine power, poor fuel economy, and noticeable hesitation or sputtering during acceleration, particularly under load.