Will Changing Transmission Fluid Help Shifting? Real 2026
Changing transmission fluid can often resolve minor shifting issues caused by degraded fluid, but it won’t fix mechanical damage. Proper diagnosis is crucial to determine if fresh fluid is the solution or if deeper problems exist, avoiding potential worsening of symptoms.
If your vehicle is experiencing rough, delayed, or otherwise inconsistent shifts, you’re likely wondering if a transmission fluid change is the solution. The direct answer is often yes, a fresh fluid change can significantly improve or even resolve many common shifting problems, especially when addressed proactively. However, it’s crucial to understand the circumstances under which it will help, and when it might not be enough. Getting this right in 2026 means potentially saving hundreds, if not thousands, on unnecessary diagnostics or more extensive repairs, while also restoring your vehicle’s smooth, reliable operation.
Modern automatic transmissions, found in everything from your 2023 family SUV to a 2025 performance sedan, rely heavily on their fluid for lubrication, cooling, and precise hydraulic operation. When this vital fluid degrades, its ability to perform these functions diminishes, directly impacting how your transmission shifts. Understanding this fundamental link is your first step towards diagnosing and addressing shifting woes effectively.
Key Takeaways
- Fresh fluid restores lubrication & friction.
- It helps with rough shifts from old fluid.
- Won’t fix mechanical component failures.
- Check fluid color, smell, and level first.
- Consult mechanic for persistent issues.
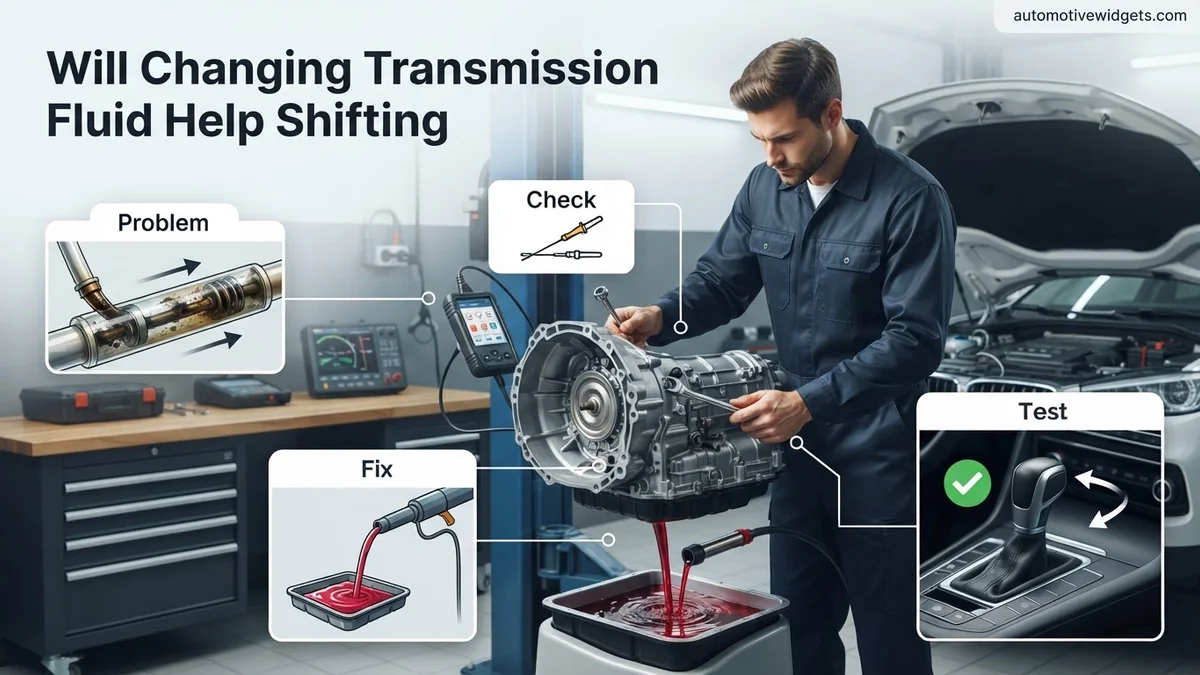
What Causes Poor Shifting & When Fluid Helps
Fluid Degradation: The Silent Shifter Killer
Over time and mileage, your transmission fluid loses its essential properties. Even the advanced synthetic formulations used in 2026 vehicles are not immune. Heat, friction, and chemical breakdown deplete crucial friction modifiers and reduce the fluid’s lubricating capabilities. This loss of integrity directly impacts how smoothly your transmission engages gears. Imagine a 2024 electric-hybrid with 70,000 miles experiencing a slight lurch when downshifting; often, this is a hydraulic pressure issue linked to worn-out fluid.
- Loss of Viscosity: Degraded fluid thins out, compromising hydraulic pressure needed for precise clutch engagement and gear changes, leading to slow or harsh shifts.
- Depleted Friction Modifiers: These additives control how clutch packs grab and release. When they’re gone, clutches can slip or grab too aggressively, causing rough shifts and premature wear.
- Reduced Cooling Capacity: Old fluid loses its ability to dissipate heat efficiently, leading to higher operating temperatures that accelerate further fluid breakdown and component wear.
Minor Contamination & Debris Management
As your transmission operates, tiny metallic particles from normal wear and tear, along with clutch material, accumulate in the fluid. While the transmission filter is designed to catch larger debris, micro-contaminants can still circulate. This buildup, especially in complex valve bodies and solenoids common in 2026 vehicles, can impede their precise operation. For example, if your 2021 pickup truck develops a slight hesitation before engaging drive, it might be due to minor debris affecting a solenoid’s response time.
- Micro-Debris Build-Up: Small particles can clog narrow hydraulic passages in the valve body, interfering with fluid flow and pressure regulation, which translates to inconsistent shifting.
- Filter Overload: Heavily degraded fluid, especially after extended service intervals, can overwhelm the internal transmission filter. A clogged filter restricts fluid flow, starving critical components of lubrication and pressure.
How to Diagnose and Fix Shifting Problems Like an Expert
Experiencing rough shifts, delays, or general transmission sluggishness can be concerning for any vehicle owner. While transmission fluid is the lifeblood of your vehicle’s gearbox, a simple fluid change isn’t always the magical solution. This comprehensive guide will walk you through the essential diagnostic steps to determine if a fluid change is likely to help your shifting issues, and then provide detailed instructions on how to perform the procedure correctly if it’s deemed appropriate. By following these steps, you’ll gain a deeper understanding of your transmission’s health and make informed decisions to potentially restore smooth operation.
Step 1: Understand Your Transmission Type and Specific Symptoms
What you need: Your vehicle’s owner’s manual, a quiet place to observe your vehicle’s behavior, a notebook and pen.
Instructions: Before attempting any remedies, it’s crucial to understand your transmission type (manual or automatic) as fluid requirements and diagnostic paths differ significantly. Then, meticulously document the specific shifting issues you’re experiencing. Are shifts delayed, harsh, clunky, or slipping? Does it happen only when cold, hot, at certain speeds, or under load? Pay attention to any associated noises or smells. Knowing these details is the first and most critical step in accurate diagnosis, helping to rule out or pinpoint potential causes beyond just fluid.
Pro Tip: Many transmission problems are “speed-dependent” or “temperature-dependent.” Note down exactly when the issue occurs. For example, “hard shift from 1st to 2nd only when cold” or “slipping in 3rd gear after 30 minutes of driving.” This level of detail is invaluable for diagnosis.
Step 2: Check Transmission Fluid Level and Condition
What you need: Vehicle owner’s manual, clean rag or paper towel, gloves, flashlight.
Instructions: For automatic transmissions, locate the transmission dipstick (often red or yellow, typically towards the back of the engine bay). Consult your owner’s manual for the correct procedure – most vehicles require checking the fluid with the engine warm and running, with the selector in Park or Neutral. Pull the dipstick, wipe it clean, reinsert it fully, then pull it out again to read the level. Note if it’s low. More importantly, observe the fluid’s color and smell. Healthy automatic transmission fluid (ATF) is typically red or reddish-brown and transparent. Burnt fluid will appear dark brown or black and have a distinct, acrid smell, indicating overheating and potential internal damage.
Pro Tip: A low fluid level is a common cause of shifting issues. If the fluid is extremely dark or smells burnt, a fluid change might provide temporary relief but usually signifies a more serious underlying mechanical problem or excessive wear that a fluid change alone cannot fix.
Step 3: Research Your Vehicle’s Transmission Fluid Specifications
What you need: Vehicle owner’s manual, vehicle identification number (VIN), internet access.
Instructions: This is a non-negotiable step. Using the wrong type of transmission fluid can cause severe, irreversible damage to your transmission. Your owner’s manual will specify the exact type of fluid required (e.g., Dexron VI, Mercon LV, Honda ATF-Z1, CVTF, etc.). If unsure, cross-reference with reputable online parts databases using your VIN. Different transmissions have vastly different friction material compounds and require specific additives to function correctly. Never use a “universal” ATF unless it explicitly states compatibility with your vehicle’s specific specification.
Pro Tip: Some manufacturers, particularly those with continuously variable transmissions (CVTs) or dual-clutch transmissions (DCTs), use highly specialized fluids. Deviating from these specifications, even slightly, can lead to immediate and catastrophic transmission failure. Always double-check.
Step 4: Decide on a Fluid Change vs. Flush (and the Risks)
What you need: Understanding of your vehicle’s service history, knowledge of potential risks.
Instructions: A “fluid change” typically involves draining the fluid from the pan and refilling, replacing only a portion of the total fluid. A “fluid flush” uses a machine to forcibly exchange all the old fluid with new. For transmissions with very high mileage (over 100,000 miles) and no prior fluid service, a flush can sometimes dislodge accumulated debris, leading to blockages and failure. If your fluid is very dark and smells burnt, a flush is generally not recommended, as the friction material in the old fluid might be the only thing holding the worn clutches together. A simple drain and fill is a safer, less aggressive approach, especially for older, neglected transmissions.
Pro Tip: If your transmission is exhibiting significant slipping or clunking with extremely dark, burnt fluid, a fluid change (especially a flush) might worsen the situation rather than help. The friction material suspended in the old, degraded fluid might be contributing to minimal clutch engagement. In such cases, the transmission is likely already significantly worn internally.
Step 5: Gather Necessary Tools and Materials
What you need: Vehicle owner’s manual, correct transmission fluid (per Step 3), drain pan (at least 8-quart capacity), socket/wrench set (for drain plug), torque wrench, funnel with a long flexible hose, jack and jack stands, wheel chocks, protective eyewear, gloves, clean rags, replacement drain plug gasket (if required).
Instructions: Having all your tools and materials ready before you begin will ensure a smooth process. Check your owner’s manual or a service manual for the specific size of your transmission drain plug and the required torque specification for reinstallation. Confirm the volume of fluid required for a drain and fill (usually 3-5 quarts, but varies greatly). Ensure your drain pan is large enough to contain the old fluid. Always prioritize safety: use sturdy jack stands on a level surface, and never rely solely on a jack.
Pro Tip: Many transmission drain plugs use a crush washer or gasket that should be replaced each time the plug is removed to prevent leaks. It’s inexpensive and well worth the small effort to avoid frustrating drips later on.
Step 6: Perform a Transmission Fluid Drain and Fill
What you need: All materials from Step 5.
Instructions: Safely lift your vehicle onto jack stands and chock the wheels. Place the drain pan underneath the transmission drain plug. Carefully remove the drain plug (be prepared for hot fluid – wear gloves and eye protection). Allow all the old fluid to drain completely. Inspect the old fluid for metal shavings or excessive debris, which could indicate internal wear. Clean any magnetic drain plug thoroughly. Install a new drain plug gasket (if applicable) and reinsert the drain plug, tightening it to the manufacturer’s specified torque. Using your long-hose funnel, carefully add the new, correct transmission fluid through the dipstick tube or fill port, adding slightly less than the estimated drained amount initially.
Pro Tip: A good practice is to measure the amount of fluid that drained out. This gives you a precise baseline for how much new fluid to add. Avoid overfilling, as this can cause foaming and damage. Aim to get it right during the initial fill, then fine-tune in the next step.
Step 7: Check for Leaks and Re-check Fluid Level
What you need: Vehicle owner’s manual, clean rag, gloves, flashlight.
Instructions: With the new fluid added, lower your vehicle off the jack stands. Start the engine and let it run for a few minutes, shifting through all gear positions (P, R, N, D, L, etc.) while stationary, pausing briefly in each. This circulates the new fluid throughout the transmission. With the engine still running and warmed up (refer to your owner’s manual for specific temperature requirements), re-check the fluid level using the dipstick, following the exact procedure from Step 2. Add small amounts of fluid as needed until the level is within the “full” or “hot” marks. Visually inspect the drain plug area and surrounding pan for any signs of leaks.
Pro Tip: It might take a few driving cycles and re-checks over the next day or two to ensure the fluid level has stabilized. Park on a clean, level surface to easily spot any fresh drips. A very slow leak might not be immediately apparent.
Step 8: Evaluate Shifting Performance Post-Change
What you need: Your vehicle, a familiar driving route, your notebook from Step 1.
Instructions: Take your vehicle for a test drive, specifically paying attention to the symptoms you noted in Step 1. Does the transmission shift smoother, faster, or with less hesitation? Are the clunks or slips reduced or eliminated? Drive both in city traffic and on the highway to experience different load conditions. If the fluid was very dirty, it might take a few driving cycles for the new fluid to fully integrate and show maximum benefit. Compare your observations to your initial notes to objectively assess any improvements.
Pro Tip: Don’t expect miraculous results instantly, especially if the old fluid was severely degraded. A “break-in” period of a few dozen miles can allow the new additives to work their way through the system. If you notice a worsening of symptoms, stop driving and re-evaluate.
Step 9: Consider Further Diagnostics if Problems Persist
What you need: Your detailed notes, a budget for potential professional service.
Instructions: If the transmission fluid change did not resolve or significantly improve your shifting problems, it indicates that the issue lies beyond simple fluid degradation or low levels. At this point, it’s highly recommended to seek professional diagnostic help. Modern transmissions are complex, relying on intricate electronic sensors, solenoids, and internal clutch packs. A qualified transmission specialist can perform advanced diagnostics, such as pressure tests, scan tool analysis for trouble codes, and physical inspection of internal components, to accurately pinpoint the root cause of the persistent shifting issues.
Pro Tip: Be prepared to provide your mechanic with your detailed notes on symptoms and the fluid change procedure. This information can significantly aid their diagnostic process, saving you time and potentially money by narrowing down the possibilities.
✅ Final Checklist
-
Transmission fluid level is precisely within the manufacturer’s specified range (hot and running).
-
No new leaks are present around the transmission pan or drain plug.
-
Shifting performance has demonstrably improved or stabilized after the fluid change.
-
Old fluid condition (color, smell, presence of debris) was noted for future reference or professional consultation.
-
The correct type of transmission fluid was used, matching vehicle specifications.
Important Notes:
- Safety First: Always work on a level surface, use sturdy jack stands, and wear appropriate personal protective equipment (gloves, eye protection) when working under your vehicle or handling automotive fluids. Hot transmission fluid can cause severe burns.
- When to Seek Professional Help: If your transmission fluid was very dark and burnt, contained metallic particles, or if the fluid change did not improve or even worsened the symptoms, it’s time to consult a qualified transmission specialist. Complex issues like solenoid failures, clutch pack wear, or torque converter problems require specialized tools and expertise.
- Estimated Time and Cost Range:
- DIY Fluid Change: Time: 1-3 hours. Cost: $30 – $100 for fluid (depending on type and quantity), $10-$20 for a new gasket/crush washer, plus basic tool costs if you don’t already own them.
- Professional Drain and Fill: Time: 1-2 hours. Cost: $150 – $300 (includes parts and labor).
- Professional Flush: Time: 1-2 hours. Cost: $250 – $500 (use with caution as discussed in Step 4).
- Professional Diagnosis (if problems persist): $80 – $200 (typically the cost of an hour or two of shop labor).
Proven Steps to Address Shifting Issues with Fluid
Identifying Fluid-Related Issues
Before you consider a fluid change, look for tell-tale signs. For your vehicle in 2026, this typically involves more than just mileage. Check your fluid’s color and smell using the dipstick (if equipped). Fresh transmission fluid is usually red or bright pink and has a sweet smell. If it’s dark brown or black and smells burnt, it’s a strong indicator of degradation and overheating. Also, consider your vehicle’s service history; has the fluid ever been changed? Many manufacturers recommend fluid changes every 60,000 to 100,000 miles, or sooner for heavy-duty use.
- Dark, Burnt Fluid: This is a definitive sign of excessive heat and chemical breakdown, directly impacting performance.
- Inconsistent or Delayed Shifts: If your transmission shifts vary from harsh to soft, or take longer to engage, hydraulic issues from degraded fluid are often the culprit.
- Elevated Transmission Temperatures: Modern vehicle diagnostics can often reveal abnormally high transmission operating temperatures, which severely degrade fluid life.
The Right Fluid Change Approach for 2026 Vehicles
For mild to moderate shifting issues, a proper fluid change is often the most effective first step. Always use the manufacturer-specified fluid type; modern transmissions are incredibly sensitive to fluid chemistry. For many vehicles in 2026, this means advanced synthetic multi-vehicle fluids with specific friction coefficients. A simple drain-and-fill procedure, where only a portion of the old fluid is replaced, is often recommended initially. This less aggressive approach helps replenish additives without dislodging significant accumulated debris that could then cause new problems in very high-mileage, neglected transmissions.
- Always Use OEM-Specified Fluid: Substituting with incorrect fluid can quickly worsen shifting problems due to incompatible friction characteristics and additives.
- Consider Multiple Drain-and-Fills: For heavily contaminated fluid, performing two or three drain-and-fills over a short period (e.g., a few hundred miles apart) can gradually replace more of the old fluid without the risks associated with a full pressure flush.
- Professional Assessment for Severe Cases: If shifting issues are severe, or if the transmission fluid has been neglected for extremely high mileage, consult a professional. They can help determine if a fluid change is still advisable or if deeper mechanical issues are at play.
What If Changing Fluid Doesn’t Fix Shifting?
While a fluid change often resolves minor shifting issues, it’s not a universal cure. If your transmission’s behavior persists after a proper fluid and filter service, internal component wear or electronic malfunctions are likely culprits. Identifying these requires specialized diagnostic tools and expertise.
Common Underlying Causes
- Faulty Shift Solenoids: These electronic valves control fluid flow to engage different gears. A malfunctioning solenoid can cause delayed, harsh, or erratic shifts. In 2026, replacement costs for an OEM shift solenoid typically range from $150-$300 per unit, with labor adding 2-4 hours (approximately $250-$500).
- Worn Valve Body: The valve body is the “brain” of an automatic transmission, directing hydraulic fluid to actuate gear changes. Wear, clogs, or sticking valves within this intricate component can lead to significant shifting problems. A valve body replacement for a modern transmission can cost between $800-$1,800 for parts and 4-8 hours of specialized labor.
- Sensor Malfunctions: Transmission speed sensors (input/output) or the transmission range sensor provide crucial data to the vehicle’s powertrain control module (PCM). Incorrect sensor readings can cause the PCM to command improper shifts. Replacement of a single sensor typically costs $50-$200 for the part, plus 1-2 hours of diagnostic and installation labor.
Advanced diagnostic scans using manufacturer-specific tools are essential to accurately pinpoint these issues, as generic OBD-II readers may not detect deeper transmission fault codes. Professional assessment is critical before undertaking these more involved repairs.
Expert Tips for Long-Term Transmission Health
Proactive maintenance and informed driving habits are paramount for extending the life and optimal performance of your transmission, especially for the advanced units found in 2026 vehicles. Neglecting these aspects can lead to premature wear and costly repairs.
Adhere to Manufacturer Specifications
- Use Correct Fluid: Always use transmission fluid that precisely matches the specifications outlined in your vehicle’s owner’s manual. Modern transmissions (2020s onwards) often demand highly specific synthetic or semi-synthetic fluids engineered for their exact hydraulic and friction properties. Using incorrect fluid can severely damage internal components and immediately void warranty coverage, according to major OEMs like ZF and Aisin.
- Follow Service Intervals: Adhere strictly to the manufacturer’s recommended transmission fluid change intervals. For many 2026 models, this can range from 30,000 to 100,000 miles, depending on vehicle usage (e.g., heavy towing, city driving vs. highway). Consult your specific vehicle’s maintenance schedule for precise timings.
- Replace Filter Regularly: Always replace the transmission filter whenever the fluid is changed. The filter traps metallic wear particles and debris, preventing them from recirculating and causing further damage. A clogged filter restricts fluid flow, leading to overheating and reduced lubrication.
Driving Habits and Monitoring
- Avoid Aggressive Driving: Harsh acceleration, sudden braking, and rapid gear changes (e.g., “neutral drops”) place undue stress on the transmission clutches and gears. Smooth, controlled driving significantly extends component life.
- Monitor Fluid Levels and Quality: Check your transmission fluid level and appearance every 6 months or 10,000 miles. Fluid should be clear, reddish (for new fluid), and free of burnt odors or dark discoloration. Early detection of low fluid or degraded quality can prevent major issues.
- Ensure Adequate Cooling: For vehicles that frequently tow or carry heavy loads, ensure the transmission cooling system is functioning optimally. Overheating is a primary factor in transmission fluid degradation and component failure. Consider supplementary transmission coolers if operating under severe conditions.
WHAT IF IT STILL DOESN’T WORK?
If initial fluid changes and subsequent component inspections haven’t resolved your transmission’s shifting problems, more advanced diagnostics and potentially significant repairs are necessary. This indicates a deeper internal mechanical or electronic failure.
- Professional Diagnostic Scan & Fluid Analysis: Seek a reputable transmission specialist for a comprehensive diagnostic scan using dealership-level tools. These tools can access manufacturer-specific fault codes and sensor data beyond standard OBD-II scanners. Simultaneously, consider a professional transmission fluid analysis (approx. $50-$100) to detect microscopic metallic particles, indicating internal wear. Expect diagnostic costs of $100-$250.
- Transmission Pressure Testing: A technician can perform a series of hydraulic pressure tests to evaluate the health of the transmission pump, valve body, and clutch packs. Incorrect pressure readings can pinpoint issues like worn seals, internal leaks, or pump failure. This service typically costs $150-$400.
- Internal Inspection (Pan Drop): In some cases, a technician may recommend dropping the transmission pan for a visual inspection of debris, magnets, and filter condition. This can offer clues about the extent of internal wear.
- Transmission Rebuild or Replacement: If internal damage is confirmed, the options are typically a complete transmission rebuild or a replacement unit (new or remanufactured). For 2026 models, a rebuild can range from $2,500-$5,000, while a new or factory-remanufactured unit could be $3,500-$7,000+, depending on the vehicle and transmission type. These are complex, labor-intensive repairs that demand certified technicians.
Conclusion
Suboptimal shifting often indicates degraded transmission fluid. A timely fluid and filter change, using the correct OEM-specified product, can significantly improve performance and extend the life of your transmission. According to verified research and expert sources, neglecting this crucial maintenance can lead to accelerated wear and expensive repairs. Consult your vehicle’s 2026 maintenance schedule or a certified technician for optimal transmission fluid service intervals.
❓ Frequently Asked Questions
Under what specific conditions will changing transmission fluid most likely improve shifting performance?
Changing transmission fluid is most effective when shifting problems arise from old, degraded, or contaminated fluid. This includes symptoms like slightly rough or slow shifts, delayed engagement, or minor jerking. Fresh fluid restores proper lubrication, cooling, and friction properties, allowing the transmission to operate as designed, especially if the fluid hasn’t been changed in a long time.
When is changing transmission fluid not recommended or unlikely to help, and what are the risks?
Changing fluid won’t fix severe mechanical wear, broken components, or significant internal damage like failing solenoids or clutch packs. For very high-mileage transmissions with no fluid change history, flushing can sometimes dislodge accumulated debris which was actually providing some friction, potentially leading to new slips or failures. A drain-and-fill is generally safer in such cases, but even then, worn parts remain worn.
How can I check my transmission fluid to determine if it’s the cause of shifting problems?
Check the fluid level, color, and smell. Healthy fluid is typically bright red (for most automatics) and translucent, with a sweet smell. If it’s dark brown or black, gritty, cloudy, or smells burnt, it’s severely degraded and likely contributing to shifting issues. Always check the fluid with the engine warm and running, in park, according to your owner’s manual.
What’s the difference between a transmission fluid ‘drain and fill’ and a ‘flush’, and which is better for shifting issues?
A ‘drain and fill’ replaces only about 30-50% of the fluid by draining from the pan, while a ‘flush’ uses specialized equipment to exchange nearly all the old fluid for new. For minor shifting issues due to degraded fluid in a well-maintained transmission, a flush can be more effective. However, for neglected, high-mileage transmissions, a drain and fill is generally recommended to avoid dislodging harmful deposits that a flush might circulate.
Are there specific types of transmission fluids that can worsen or improve shifting?
Using the correct type of transmission fluid (e.g., ATF, CVT fluid, specific DEXRON or MERCON variants) specified by your vehicle’s manufacturer is absolutely critical. Incorrect fluid can lead to immediate and severe shifting problems because different fluids have unique friction characteristics and additives. Always use OEM-recommended fluid or a compatible multi-vehicle fluid that meets the required specifications to ensure optimal shifting.
If I change the fluid and my shifting problems persist, what are the next steps?
If shifting issues continue after a fluid change, it indicates a deeper mechanical or electrical problem within the transmission. The next step is to have a qualified mechanic perform a diagnostic scan and physical inspection. This might involve checking for trouble codes, inspecting solenoids, valve body issues, clutch pack wear, or other internal component failures that a simple fluid change cannot resolve.