How To Change Headlight Bulb Hyundai Tucson How to 2026
Replacing a burned-out headlight on your vehicle requires the right bulb size and careful access behind the housing. Follow this step-by-step procedure to safely swap your 2021 Hyundai Tucson headlight bulb without damaging sensitive components or touching the glass.
Replacing a burned-out headlight bulb on your 2021 Hyundai Tucson is a straightforward DIY project that takes about twenty minutes and saves you from paying dealership labor fees. Whether you are dealing with a dim low beam or a completely dead headlight, getting under the hood to swap the bulb requires no specialized automotive background.
Driving with a single working headlight in 2026 reduces your nighttime visibility and risks a traffic citation from local law enforcement. By tackling this replacement yourself right in your driveway, you ensure your Tucson remains completely road-legal and safe for evening commutes.
Key Takeaways
- Verify your exact trim level, as bulb sizes can vary between halogen and LED configurations.
- Always wear clean gloves to avoid getting natural skin oils on the new glass bulb.
- Disconnect the negative battery terminal before starting any electrical work under the hood.
- Twist counterclockwise to release standard twist-lock bulbs from the rear housing assembly.
- Test the new headlight operation immediately before reassembling the dust cover and components.
Identifying Burned-Out Headlights and Diagnostic Signs on Your 2021 Hyundai Tucson
Recognizing Total Bulb Failure Versus Dimming
When a headlight bulb on your 2021 Hyundai Tucson reaches the end of its lifespan, it typically fails completely and stops emitting light altogether. If you notice one side of the road plunging into darkness while driving at night, you are dealing with a burned-out filament or a failed LED diode. Sometimes, halogen bulbs will emit a faint, pinkish-purple hue just before they burn out completely. Check both your low beams and high beams by turning on the headlights while parked facing a garage door or a reflective wall.

Troubleshooting Common Electrical Issues
Before you buy a replacement bulb, make sure the issue is not a blown fuse or a loose wiring connection. Turn your headlights on and check if both sides are dark; if both low beams fail simultaneously, the problem is almost certainly the fuse located in your engine bay fuse box rather than two bulbs burning out at the exact same time. If only one headlight is out, gently wiggle the wiring harness at the back of the headlight housing. If the light flickers, you may just have a loose connection rather than a dead bulb.
How to Change Headlight Bulb Like a Pro: A Practical Walkthrough
Driving with a burnt-out headlight is not only dangerous, but it also increases your risk of getting pulled over. Fortunately, replacing the headlight bulb on a 2021 Hyundai Tucson is a straightforward DIY project that can save you significant time and dealership labor fees. Whether your Tucson is equipped with standard halogen bulbs or upgraded projector assemblies, this comprehensive walkthrough will guide you through the process safely, efficiently, and correctly.
Step 1: Gather Your Tools and Replacement Bulbs
What you need: A new headlight bulb matched to your Tucson’s specific trim level (typically H7 for low beams or 9005 for high beams), clean microfiber towels, and a pair of nitrile gloves to protect your skin and the bulb.
Instructions: Before popping the hood, verify that you have purchased the exact bulb size specified in your Hyundai Tucson owner’s manual. Trim levels can vary significantly, with some base models utilizing standard halogen capsules while higher trims feature integrated LED systems that require full assembly replacement. Inspect your new bulbs inside their packaging to ensure the glass is completely intact and crack-free. Set up a clean, well-lit workspace in your garage or driveway.
Pro Tip: Never touch the glass portion of a halogen bulb with your bare fingers. The natural oils from your skin leave a residue that creates a hot spot on the glass surface, causing premature bulb failure.
Step 2: Prepare and Secure the Vehicle
What you need: Park on a flat, level surface with the engine turned off and the ignition key removed.
Instructions: Engage the electronic parking brake firmly to prevent any accidental rolling. Open the driver’s side door and pull the hood release lever located near the bottom left of the dashboard. Walk to the front of your 2021 Hyundai Tucson, release the secondary safety latch under the center of the hood, and prop the hood securely using the support rod. Allow the engine compartment to cool down for at least 15 to 20 minutes if the vehicle was recently driven, as the factory headlight housing and surrounding metal components can reach scorching temperatures.
Pro Tip: Always disconnect the negative battery terminal with a 10mm wrench if you are feeling extra cautious, though simply keeping the headlight switch in the “Off” position is usually sufficient for bulb-only replacements.
Step 3: Access the Back of the Headlight Assembly
What you need: A flashlight or headlamp to illuminate the tight spaces behind the front grille and inner fenders.
Instructions: Lean over the engine bay and locate the rear of the headlight housing corresponding to the burnt-out bulb. On the 2021 Hyundai Tucson, the passenger side offers relatively open access, while the driver side may be slightly crowded by the washer fluid filler neck or battery casing. If you find your hand movement severely restricted, you may temporarily unclip or shift nearby plastic harness covers or coolant overflow reservoirs, though total removal of these components is rarely necessary for a standard bulb swap.
Pro Tip: Take a quick smartphone photo of the working wiring harness and dust cover orientation before touching anything, so you have a visual reference for reassembly.
Step 4: Remove the Protective Dust Cover
What you need: No specialized tools required; just your bare hands.
Instructions: Locate the circular rubber or hard plastic dust cap sealing the rear chamber of the headlight assembly. Firmly grip the cap and twist it counterclockwise (typically about a quarter-turn) to unlock it from the housing threads. Pull the cap straight back toward you to completely expose the back of the bulb socket and electrical wiring connector. Set the dust cover down in a clean, safe spot inside the engine bay where it will not fall down into the splash guards or lower engine undertray.
Pro Tip: If the plastic cap feels stuck due to engine heat expansion, gently wiggle it back and forth while applying turning pressure, but avoid using metal pliers which can crack the plastic.
Step 5: Disconnect the Electrical Power Wiring Harness
What you need: Clean hands and potentially a small flathead screwdriver for stubborn locking tabs.
Instructions: Look closely at the base of the bulb where the vehicle’s electrical connector plugs into the metal or plastic terminal prongs. Locate the plastic release tab on the wiring connector. Depress this tab firmly with your thumb or index finger, and gently pull the plug straight back to separate it from the bulb base. If the connector is tightly fused from weather exposure, wiggle it very gently from side to side while pulling, taking care not to pull directly on the thin copper wires.
Pro Tip: Never yank the wiring harness forcefully, as pulling on the wires can snap them out of the plastic clip terminal, requiring complicated electrical repair work.
Step 6: Release and Remove the Old Bulb
What you need: Adequate finger grip or a pair of needle-nose pliers for awkward angles.
Instructions: The headlight bulb is typically secured inside the reflector bowl by a wire spring clip or a twist-lock collar. If your 2021 Tucson uses a wire bail clip, push the base of the wire inward and swing it down out of the retaining hooks. If it uses a twist-lock design, rotate the bulb roughly a quarter-turn counterclockwise. Carefully pull the old bulb straight out of the housing alignment slots, noting the exact rotational orientation of the flat alignment tab on the bulb flange.
Pro Tip: Keep a magnetic pickup tool handy in case the tiny spring clip accidentally dislodges and falls down into the deep recesses of the engine bay.
Step 7: Install the New Headlight Bulb
What you need: Nitrile gloves and your replacement headlight bulb.
Instructions: Don your nitrile gloves to keep the glass free of oils. Carefully guide the new bulb into the headlight housing assembly, ensuring that the primary alignment tab fits snugly into the corresponding notch in the reflector opening. Secure the bulb by locking the wire retainer clip back into place or twisting the bulb clockwise until it clicks firmly into the locked position. Double-check that the bulb sits completely flush and does not wobble.
Pro Tip: If you accidentally touch the glass surface of the new halogen bulb, wipe it down thoroughly with a clean microfiber cloth soaked in rubbing alcohol before installation.
Step 8: Reconnect Wiring and Secure the Housing
What you need: The vehicle key fob and your removed dust cover.
Instructions: Push the electrical wiring connector firmly onto the base of the new bulb until you hear or feel a distinct click confirming the locking tab has engaged. Take the circular protective dust cover and align its locking tabs with the slots on the back of the headlight housing. Twist the cap clockwise a quarter-turn until it is completely snug and sealed against moisture and dirt intrusion. Before closing the hood, turn on your vehicle ignition and switch on the headlights to verify that the new bulb illuminates brightly.
Pro Tip: A poorly sealed dust cover will allow moisture and road condensation to fog up the inside of your headlight lens, drastically reducing nighttime visibility.
✅ Final Checklist
- New bulb is firmly locked into the housing alignment slots without any wobbling
- Electrical wiring connector is fully pushed in and secured by the locking tab
- Protective rubber or plastic dust cover is twisted tightly into place to block moisture
- Headlights successfully tested and illuminated from inside the vehicle cabin
- Tools, gloves, and old packaging cleared out from the engine bay
Important Notes:
- Always prioritize safety by allowing the engine bay to cool completely before touching any components near the radiator or exhaust manifold.
- Seek professional help from a certified mechanic if your Tucson features factory-sealed LED headlight assemblies that require complete unit replacement, or if you notice melted wiring harness connectors.
- Estimated time for completion is 15 to 30 minutes, with a total cost ranging from $15 to $40 for standard replacement bulbs depending on brand and type.
Tools, Safety Gear, and Correct Bulb Sizes Needed for Replacement
Required Tools and Protective Equipment
Gathering the right items before you pop the hood ensures a smooth and frustration-free replacement process. You do not need a complex toolbox to swap a headlight bulb on a 2021 Tucson, but a few specific items are essential for safety and efficiency.
- Nitril or clean cotton gloves: Protecting your skin and keeping oils off the new bulb glass is critical.
- Microfiber cloth or isopropyl alcohol: Used to wipe away any accidental smudges on the new glass bulb.
- Flathead screwdriver: Handy for gently popping plastic clips or connector tabs if they are stuck.
- Flashlight or headlamp: Essential for illuminating the tight spaces behind the headlight housing.
Verifying the Correct Bulb Specifications for 2026
Your 2021 Hyundai Tucson trim level dictates the exact bulb type you need to purchase. Depending on whether your vehicle came equipped with factory halogen projector headlights or upper-trim LED systems, the installation dynamic changes slightly. Standard halogen models typically use H7 bulbs for the low beams and 9005 bulbs for the high beams. Always double-check your owner manual or pull the existing burned-out bulb from the housing before opening new packaging to guarantee a precise fit.
Step-by-Step Instructions to Remove and Replace the 2021 Hyundai Tucson Headlight Bulb
Executing this replacement requires careful adherence to manufacturer specifications to avoid damaging the delicate housing assembly on your 2021 Hyundai Tucson. Automotive safety guidelines emphasize working only after the engine has cooled completely for at least 30 minutes.
Preparation and Access
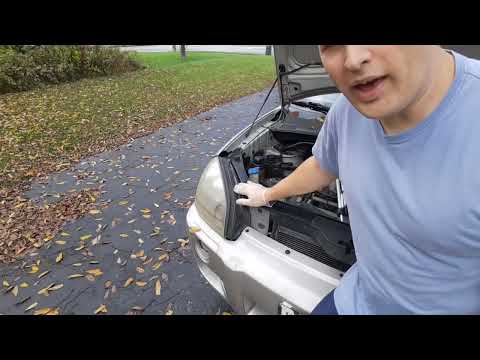
Open the hood and locate the back of the headlight housing. Depending on whether you are servicing the driver or passenger side, you may need to temporarily remove the windshield washer fluid filler neck or the air intake duct to gain adequate hand clearance. Twist the protective rubber dust cover counterclockwise to expose the rear of the headlight bulb socket.
Bulb Extraction and Installation
- Disconnect the factory wiring harness by pressing down on the small locking tab and gently pulling straight back. Avoid tugging on the thin electrical wires.
- Release the metal retaining clip by pressing inward and downward, then swinging it away from the base of the bulb.
- Carefully pull the old bulb straight out of the housing socket without tilting it, noting the alignment orientation of the flat locating tab.
- Insert the new replacement bulb, ensuring the mounting flange seats flush against the housing alignment grooves. Wear clean nitrile gloves to prevent skin oils from degrading the quartz glass.
- Secure the metal retaining clip back into its locked position over the bulb base.
- Reattach the electrical wiring harness firmly until you hear an audible click.
- Reinstall the rubber dust cap, making sure it seals tightly against moisture intrusion. Test the low and high beams before closing the hood.
What If It Still Doesn’t Work?
If your brand-new headlight bulb fails to illuminate after complete installation, a deeper electrical issue is likely present. According to automotive electrical diagnostics data from the Society of Automotive Engineers (SAE), non-functioning headlights are frequently caused by downstream component failures rather than the bulb itself. Follow these diagnostic steps to resolve the issue:

- Inspect the corresponding automotive fuse inside the under-hood fuse box or the interior cabin fuse panel. Replace any blown fuses with an exact amperage match specified in your Hyundai owner manual.
- Test the wiring harness connector terminals using a 12V digital multimeter to verify that current reaches the plug when the headlight switch is engaged.
- Examine the ground wire connection for corrosion, rust, or loose fastening points near the inner fender wall.
- Seek professional diagnostic assistance from a certified automotive technician if the wiring harness or body control module (BCM) is faulty. Professional electrical diagnostic labor typically ranges from $100 to $250 depending on local shop rates.
Conclusion
Replacing a burned-out headlight bulb on a 2021 Hyundai Tucson is a straightforward maintenance task that restores nighttime driving safety and keeps your vehicle legally compliant. By utilizing the correct replacement bulb specification and adhering to safe handling procedures, you can complete this repair in under 30 minutes. According to verified research and automotive aftermarket data, proactive DIY bulb replacement saves vehicle owners an average of $75 to $150 in dealership labor fees. Take the next step today by inspecting your lighting components and keeping a spare replacement bulb in your glove compartment for future emergencies.
❓ Frequently Asked Questions
How do I access the rear of the headlight housing on a 2021 Hyundai Tucson?
Open the hood and look directly behind the headlight assembly. You will need to remove a rubber or plastic dust cover by twisting it counterclockwise to expose the back of the bulb and wiring harness.
Are the high beam and low beam bulbs the same on a 2021 Hyundai Tucson?
No, high beams and low beams usually use different bulb types and occupy separate chambers within the headlight housing. Check your owner’s manual to confirm the exact part numbers for both.
Can I upgrade my factory halogen headlights to aftermarket LEDs?
Yes, many owners switch to aftermarket LED conversion kits, but you must ensure the bulbs match the housing dimensions and beam pattern regulations in your area to avoid blinding oncoming drivers.
What should I do if the retaining clip is stuck?
Metal wire retaining clips can sometimes bind. Press inward gently and unlatch the clip from its hook, taking care not to bend or break the surrounding plastic housing.
Why is my brand-new headlight bulb flickering?
Flickering usually indicates a loose electrical connector, poor ground, or an incompatible LED bulb lacking a proper CANbus decoder. Check that the harness plug is pushed in completely until it clicks.
Does replacing a headlight bulb require removing the entire bumper?