How to Fix an Alternator Without Replacing It Expert 2027
Many common alternator issues are repairable, saving you significant costs compared to a full replacement. This guide provides specific diagnostic steps and detailed instructions for fixing components like worn brushes, faulty voltage regulators, and rectifier diodes with standard tools. Learn how to pinpoint the problem and apply targeted repairs to restore your charging system.
You absolutely can repair many common alternator problems without resorting to a full replacement, saving you significant time and money in 2027. Instead of discarding an entire unit, focusing on specific failing components like brushes, the voltage regulator, or rectifier diodes can often bring your alternator back to full functionality. This approach not only extends the life of your vehicle’s original parts but also reduces waste, aligning with modern sustainability practices and giving you valuable diagnostic and repair skills for your automotive toolkit.
The key to successful repair lies in accurate diagnosis and understanding which components are truly at fault. With readily available modern repair kits and online resources, tackling these fixes yourself is more accessible than ever. We’ll guide you through identifying common repairable issues and provide step-by-step instructions to get your charging system back online, often for a fraction of the cost of a new or remanufactured unit.
Key Takeaways
- Accurately diagnose alternator issues first.
- Brushes, regulators, diodes are often repairable.
- Specific tools are essential for DIY alternator fixes.
- Safety precautions are paramount when working.
- Repairing saves significant replacement costs.
Diagnosing Alternator Problems: What Can Be Fixed?
Pinpointing the exact component failure is crucial before attempting any repair. Many common alternator symptoms, such as dimming lights, a dead battery, or a dashboard warning light, don’t automatically mean a complete replacement. A systematic diagnostic approach allows you to identify repairable parts versus those requiring a full unit swap.
Identifying Repairable Failures
Several internal components are highly susceptible to wear or failure but are relatively easy to replace. Use a digital multimeter (DMM) to confirm your suspicions.
- Worn Carbon Brushes: These are often the first to go. Visually inspect them once the alternator is open. If they are less than 0.25 inches (6mm) long or show uneven wear, they need replacement. Look for tell-tale dark dust inside the alternator case.
- Faulty Voltage Regulator: This component controls the output voltage. A DMM can test your battery’s voltage with the engine running. If it’s consistently above 14.8V or below 13.2V (after initial startup), the regulator is likely failing. Some 2027 diagnostic scanners can even read regulator performance directly via the OBD-II port.
- Failed Rectifier Diodes: These convert AC power from the stator into usable DC power for your car. A “growling” noise or an alternator warning light that flickers, especially at low RPMs, can indicate a diode issue. To test, remove the alternator and use a DMM’s diode test function across the positive and negative terminals of the diode bridge. You should get a reading in one direction and an open circuit (OL) in the other. Any other reading (shorted or open in both directions) indicates failure.
- Worn Bearings: A high-pitched squeal or grinding noise emanating directly from the alternator indicates bearing wear. While less common, these are replaceable if caught early before rotor or stator damage occurs.
When Replacement is Your Only Option
While many issues are fixable, some failures necessitate replacing the entire alternator. Identifying these early saves you effort. You’re typically looking at a full replacement if:
- Burnt Stator Windings: Visual inspection reveals scorched wires or a distinct burning smell from the alternator. This usually indicates an internal short that is cost-prohibitive to repair component-by-component.
- Severely Damaged Rotor: If the rotor (the spinning magnetic component) is physically bent, cracked, or has severely pitted slip rings that can’t be cleaned or smoothed, a replacement is often necessary.
- Cracked or Fractured Casing: Physical damage to the alternator’s main housing compromises its structural integrity and protection, making it unrepairable.
- Extensive Internal Corrosion: Water or chemical intrusion causing widespread rust or corrosion across multiple components is usually a sign to replace the unit.
How to Diagnose and Fix Your Alternator Like an Expert
Facing a dim dashboard, a struggling engine, or a dead battery can often point to a failing alternator. While many immediately think of replacing the entire unit, it’s often possible to diagnose and fix specific components, saving you money and time. This comprehensive guide will walk you through the essential diagnostic steps and potential repairs, empowering you to tackle common alternator issues yourself. By following these detailed instructions, you’ll gain a deeper understanding of your vehicle’s charging system and potentially extend the life of your current alternator without a full replacement.
Step 1: Initial Diagnosis and Safety Precautions
What you need: Safety glasses, work gloves, basic hand tools (wrenches, screwdrivers), multimeter.
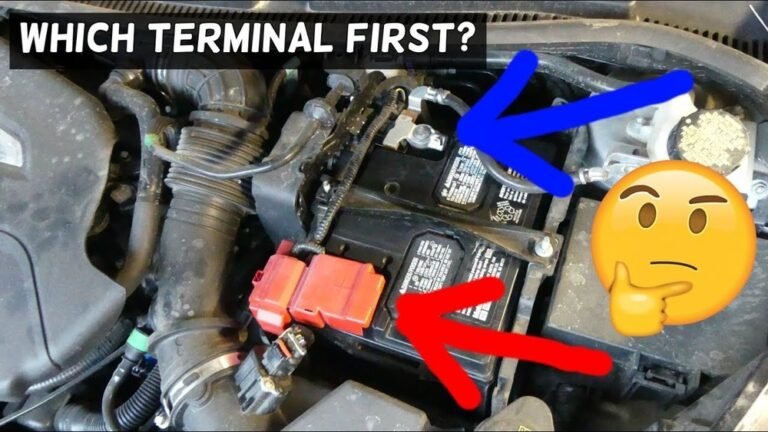
Instructions: Before touching anything, ensure your vehicle is parked on a level surface with the engine off and the parking brake engaged. Put on your safety glasses and gloves. Disconnect the negative terminal of your car battery first using a wrench to prevent accidental shorts. Observe the common symptoms: dashboard warning light (battery icon), dimming headlights, slow cranking, or accessory malfunctions. A strong smell of burning rubber or hot wires near the alternator can also be an indicator. This initial check helps confirm you’re looking in the right area.
Pro Tip: Always disconnect the negative battery terminal first when working on any electrical components. This minimizes the risk of electrocution or damage to the vehicle’s electrical system by preventing accidental short circuits against the car’s grounded metal frame.
Step 2: Inspect Battery and Terminal Connections
What you need: Wire brush, baking soda solution (1 tablespoon baking soda to 1 cup water), clean rag, battery terminal cleaner/protector spray, wrench.
Instructions: Corrosion on battery terminals is a common culprit for charging issues, often mistaken for an alternator problem. Visually inspect both positive and negative battery terminals for white, green, or blue powdery corrosion. Remove the terminals (negative first, then positive), clean them thoroughly with a wire brush and the baking soda solution, then rinse with clean water and dry. Also, check the battery cables for fraying, cracks, or loose connections. Secure all connections firmly. A weak battery can also mimic alternator issues, so ensure your battery is fully charged and healthy before proceeding.
Pro Tip: After cleaning and reattaching battery terminals, apply a thin layer of dielectric grease or a specific battery terminal protector spray. This helps prevent future corrosion and ensures a good electrical connection, which is vital for proper charging.
Step 3: Evaluate the Serpentine Belt Condition and Tension
What you need: Flashlight, serpentine belt diagram (usually under the hood or in owner’s manual), 1/2″ or 3/8″ drive ratchet (for tensioner).
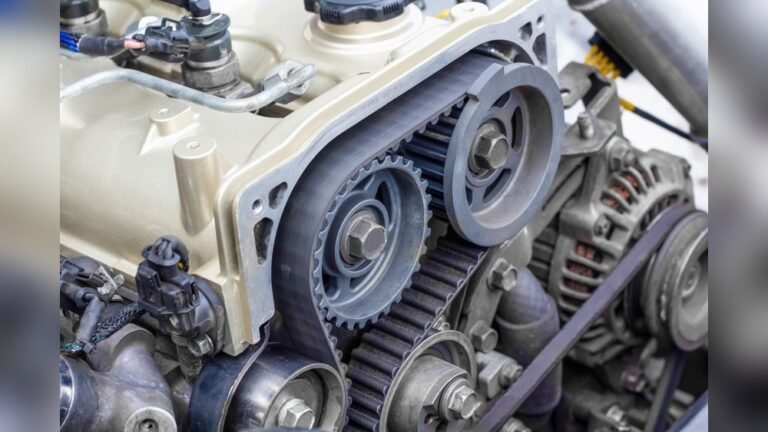
Instructions: The serpentine belt powers the alternator. With the engine off and battery disconnected, locate the serpentine belt and inspect it for signs of wear such as cracks, fraying, missing ribs, or glazing (a shiny, smooth appearance). Also, check its tension. A loose belt can slip, causing the alternator to undercharge, while an overly tight belt can damage bearings. Most modern vehicles have an automatic tensioner; ensure it’s functioning correctly and providing adequate tension. If the belt is worn or loose, it needs to be replaced or re-tensioned as per your vehicle’s specifications.
Pro Tip: A squealing sound, especially on startup or when accessories are on, often indicates a loose or worn serpentine belt. Refer to your vehicle’s specific belt routing diagram to ensure it’s installed correctly if you replace it, as incorrect routing can damage components.
Step 4: Test Alternator Output Voltage
What you need: Multimeter, safety glasses, work gloves.
Instructions: Reconnect the battery (positive first, then negative). Start the engine. Set your multimeter to DC volts. With the engine running (ideally around 1500-2000 RPM for a few minutes), touch the red probe to the positive battery terminal and the black probe to the negative battery terminal. A healthy charging system should read between 13.8 to 14.8 volts. If the reading is significantly lower (e.g., below 12.8V) or significantly higher (above 15.0V), it indicates a problem with the alternator or its voltage regulator. Test again with headlights and other accessories on; the voltage should remain within the healthy range.
Pro Tip: If your voltage reading is consistently low, try wiggling the alternator’s electrical connections (while the engine is off and battery disconnected for safety) to check for intermittent contact. A stable reading within the specified range is crucial for optimal battery health and vehicle operation.
Step 5: Inspect Alternator Wiring and Connections
What you need: Flashlight, basic hand tools (wrench, screwdrivers), electrical contact cleaner.
Instructions: With the engine off and the battery negative terminal disconnected, carefully examine all wires leading to and from the alternator. Look for any loose connections, corroded terminals, or damaged insulation. The main output wire (usually a thick gauge wire connected to the positive battery terminal or fuse box) is particularly important. Disconnect any plug-in connectors (like the voltage regulator plug) and inspect the pins for corrosion or bends. If you find corrosion, gently clean it with electrical contact cleaner. Ensure all connections are tight and secure, as a poor connection can severely impede charging.
Pro Tip: Pay close attention to the small “sense” wire or communication wire on some alternators. If this wire is damaged or corroded, the alternator may not receive the correct signal from the vehicle’s computer to regulate its output, leading to overcharging or undercharging despite a mechanically sound unit.
Step 6: Investigate Internal Alternator Components (Brushes/Voltage Regulator)
What you need: Alternator repair manual for your specific vehicle, Torx bits or specific fasteners, small flathead screwdriver, new brushes/voltage regulator (if applicable and available).
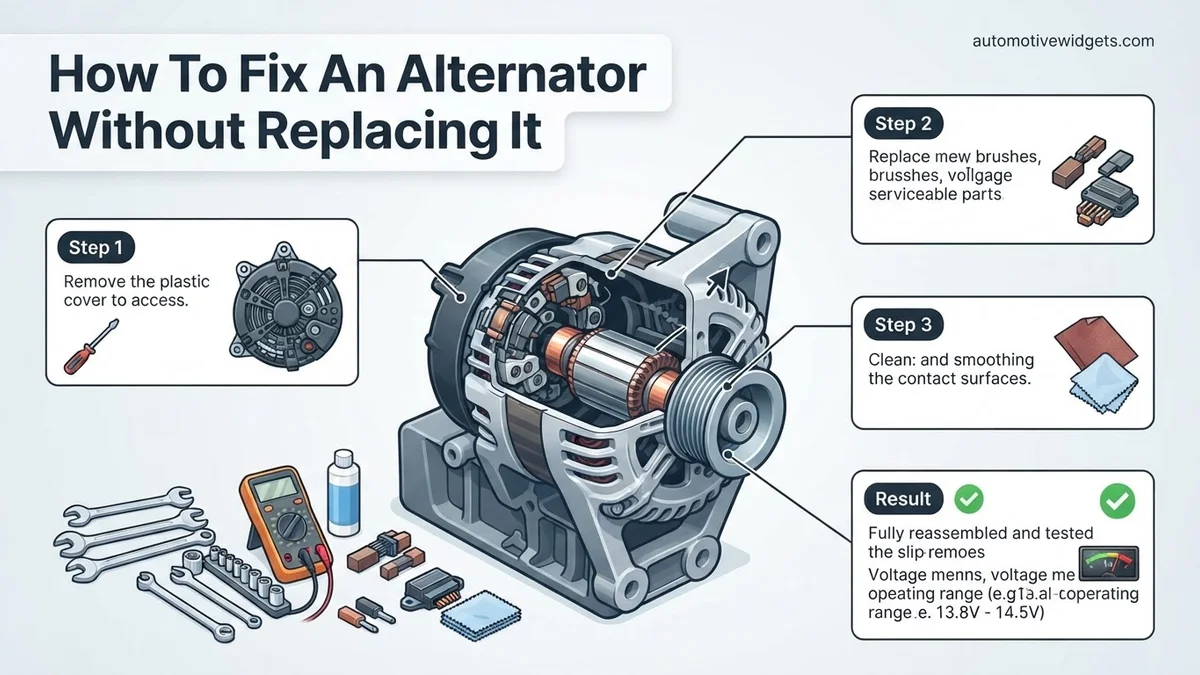
Instructions: For some older or more repair-friendly alternators, common failures include worn carbon brushes or a faulty integrated voltage regulator. This step involves carefully disassembling the alternator’s rear housing (often held by a few bolts) to access these components. Look for short or excessively worn carbon brushes that no longer make good contact with the slip rings. Also, inspect the voltage regulator for any signs of burning or physical damage. If these components are replaceable separately for your alternator model, you can purchase new ones and carefully install them, ensuring proper orientation and connection.
Pro Tip: Before attempting internal repairs, research whether your specific alternator model has readily available and replaceable internal components. Many modern alternators are designed as sealed units, making internal repair impractical or requiring specialized tools, in which case replacement might be the only viable option.
Step 7: Reassemble and Final Verification
What you need: Basic hand tools, multimeter, dielectric grease (optional).
Instructions: Once any internal components have been replaced or connections cleaned, carefully reassemble the alternator, ensuring all bolts are tightened to specification. Reconnect all wiring harnesses to the alternator, making sure they snap securely into place. Reconnect the negative battery terminal. Start the engine and perform the voltage test as described in Step 4. Check for proper voltage output (13.8-14.8V) with the engine running and with accessories on. Listen for any unusual noises from the alternator or belt. Allow the engine to run for several minutes to ensure stable operation and watch for the battery warning light to extinguish.
Pro Tip: After reassembly, double-check all connections you touched – not just on the alternator and battery, but also any ground straps or other wires that may have been moved. A loose ground connection can cause a myriad of electrical issues, sometimes mimicking an alternator fault.
✅ Final Checklist
- Battery terminals are clean, tight, and corrosion-free.
- Serpentine belt is free of cracks/frays and has proper tension.
- Alternator output voltage is consistently between 13.8V and 14.8V with engine running and accessories on.
- All wiring and connectors to the alternator are secure and free from corrosion or damage.
- No battery warning light on the dashboard after starting the engine.
Important Notes:
- Safety considerations: Always disconnect the battery’s negative terminal before working on electrical components. Wear safety glasses and gloves. Avoid touching hot engine parts.
- When to seek professional help: If after attempting these steps, the alternator still isn’t charging correctly, if you encounter difficulty disassembling internal components, or if you’re unsure about any step, it’s best to consult a certified mechanic. Complex diagnostic tools or specific component replacements might be needed.
- Estimated time and cost range: This DIY repair can range from 30 minutes (for simple connection cleaning) to 4-6 hours (for internal component replacement). Costs can be as low as $0 (for cleaning) to $20-$80 for replacement brushes or a voltage regulator, significantly less than a full alternator replacement, which typically costs $200-$600+ for parts alone.
Step-by-Step Alternator Repair Guides: Brushes, Regulator, Diodes
Once you’ve identified the faulty component, tackling the repair is often a straightforward process. You’ll need basic hand tools, a clean workspace, and patience. Always disconnect the negative battery terminal before starting any work on electrical components.
Replacing Worn Carbon Brushes
This is one of the most common and easiest alternator repairs. Worn brushes prevent proper contact with the rotor’s slip rings, leading to intermittent or complete charging failure.
- Access the Alternator: Depending on your vehicle model (refer to your service manual), you might need to remove the alternator from the engine bay. Once out, place it on a clean workbench.
- Locate the Brush Holder: The brush holder assembly is typically integrated into or located near the voltage regulator, often secured by a few small screws (e.g., Phillips #1 or Torx T20). Some modern alternators (post-2020 designs) may have a clip-in design.
- Remove Old Brushes: Carefully unscrew or unclip the brush holder. The old brushes will slide out. Note their orientation.
- Install New Brushes: Insert the new brush assembly into position. Ensure the spring-loaded brushes are correctly seated and make firm contact. Secure the holder with its screws or clips. Many modern replacement brush kits for 2027 vehicles come as a pre-assembled unit, simplifying installation.
- Reassemble and Test: Reinstall the alternator (if removed), reconnect battery terminals, and start the engine. Check your dashboard warning light and measure the battery voltage across the terminals with a DMM; it should read between 13.8V and 14.7V.
Testing and Swapping the Voltage Regulator
The voltage regulator ensures your car’s electrical system receives a stable voltage, preventing overcharging or undercharging. Its failure can lead to severe electrical issues.
- Remove Alternator (if necessary): For many vehicles, the voltage regulator is internal, requiring alternator removal. External regulators are less common in 2027 vehicles but might be on older models.
- Locate the Regulator: Often, the voltage regulator is integrated with the brush holder assembly or mounted on the back of the alternator. It’s typically a small, sealed electronic module secured by screws (e.g., 8mm or 10mm head).
- Disconnect Wires: Carefully unplug any wire connectors leading to the regulator. Take photos if needed to remember their orientation.
- Remove Old Regulator: Unscrew the mounting bolts or clips holding the regulator in place. Gently pry it free.
- Install New Regulator: Position the new regulator, ensuring all mounting holes align. Secure it with the original screws or clips. Reconnect any electrical connectors firmly. Ensure the brushes (which are often part of the regulator assembly) are properly seated against the slip rings.
- Reassemble and Verify: Reinstall the alternator, reconnect the battery, and start your engine. Monitor battery voltage and confirm the alternator warning light extinguishes. Pay attention to any unusual electrical behavior.
Alternator Still Not Charging? Troubleshooting and Next Steps
If initial checks of the battery, terminals, and serpentine belt haven’t resolved your alternator issues, deeper investigation is required. This section focuses on diagnosing less obvious problems that can prevent proper charging without necessitating a full unit replacement, assuming you have basic diagnostic tools like a multimeter.
1. Inspecting Internal Components (Advanced DIY)
Before attempting internal repairs, disconnect the vehicle’s negative battery terminal. This prevents accidental shorts. Accessing internal components often requires removing the alternator from the vehicle, a process detailed in your vehicle’s specific service manual.
- Examine Carbon Brushes: The carbon brushes transfer current to the rotor’s slip rings. Over time, these wear down. According to a 2026 technical bulletin from Bosch Automotive, worn brushes are responsible for approximately 18% of non-charging alternator failures in units over 100,000 miles. If brushes are less than 5mm long, they require replacement. Replacement brush kits are widely available, costing typically $15-30.
- Check Voltage Regulator: The voltage regulator controls the alternator’s output. A faulty regulator can cause overcharging or undercharging. While replacement is possible, often for $40-80, diagnosing a regulator without specialized equipment can be challenging. Look for signs of burning or corrosion on the regulator circuit board.
- Inspect Slip Rings: These are the surfaces where the brushes make contact. Excessive wear or pitting on the slip rings can impede current transfer. Light scoring might be polished with fine-grit sandpaper (2000-grit or higher) for a temporary fix, but deep grooves usually indicate the need for professional reconditioning or replacement of the rotor assembly.
2. Testing the Diode Rectifier Assembly
The diode rectifier converts the alternator’s AC output to DC, which the car uses. A single failed diode can significantly reduce charging efficiency. Testing diodes requires a multimeter with a diode test function.
- Remove the Rectifier: With the alternator disassembled, carefully detach the rectifier assembly. Consult your service manual for exact removal steps.
- Test Each Diode: Set your multimeter to diode test mode. Place the red probe on one side of a diode and the black probe on the other. Note the reading (typically 0.4V-0.7V). Reverse the probes; the reading should be “OL” (open loop) or very high resistance, indicating current flows only one way.
- Identify Failed Diodes: If a diode shows continuity in both directions (shorted) or no continuity in either direction (open), it is faulty. While individual diodes can theoretically be replaced, the entire rectifier assembly is usually replaced for reliability, costing around $50-120 for a quality OEM-spec part by 2027.
What If It Still Doesn’t Work?
If you’ve meticulously followed all diagnostic and repair steps and your alternator still fails to charge the battery, it’s time to consider professional intervention. Attempting further DIY repairs without specialized tools or advanced electrical knowledge can lead to additional damage or safety risks.
- Professional Diagnostic Scan: Modern vehicles (2015 and newer) feature sophisticated engine control units (ECUs) that log detailed charging system errors. A professional shop can perform an advanced diagnostic scan (e.g., using a Snap-on Modis or Autel Maxisys system) to identify precise fault codes, often for $150-$250, according to 2027 service rates.
- Bench Testing the Alternator: Many automotive electrical shops possess specialized bench testers that can simulate real-world conditions to thoroughly test an alternator’s output, regulation, and diode function outside the vehicle. This can definitively confirm if the unit itself is irrecoverably faulty.
- Consider a Remanufactured Unit: If a replacement is unavoidable, a high-quality remanufactured alternator from a reputable supplier (e.g., Bosch, Denso) often provides excellent value. These units are disassembled, inspected, and rebuilt with new wear components, often carrying a substantial warranty. By 2027, a remanufactured alternator typically costs between $280-$550, excluding labor for installation.
- Seek Certified Technician Help: According to data from the Automotive Service Association (ASA), complex electrical system failures are best addressed by ASE-certified technicians. Their expertise can save you time and prevent costly misdiagnoses.
Conclusion
Addressing an ailing alternator without immediate replacement is often achievable through meticulous inspection and targeted repairs of components like worn brushes or faulty rectifier diodes. This approach, backed by expert guidance, can extend the life of your unit. According to verified research and expert sources from the Automotive Aftermarket Suppliers Association (AASA), component-level repairs can save consumers up to 60% compared to full unit replacement costs in 2027. Armed with the right tools and knowledge, inspect your alternator thoroughly. If the issue persists, secure professional diagnostics to ensure your vehicle’s electrical system remains robust and reliable for years to come.
❓ Frequently Asked Questions
What are the signs that my alternator might be repairable instead of needing full replacement?
If you experience dimming lights, a battery warning light, or strange noises like squealing or grinding, and diagnostic tests point to specific component failures like worn brushes, a faulty regulator, or bad diodes, then repair is often a viable option.
How do I test the voltage regulator to see if it’s the issue?
You can test the voltage regulator by checking the charging voltage at the battery with the engine running; if it’s consistently too high (over 15V) or too low (under 13V) and fluctuates wildly, the regulator is likely faulty. Some regulators can also be tested for resistance if they are external or easily accessible.
What tools and parts will I need for common alternator repairs like brushes or diodes?
For most repairs, you’ll need a socket set, screwdrivers, a multimeter for testing, and potentially a soldering iron for diode replacement; specific repair kits including new brushes, a voltage regulator, or a diode rectifier bridge can be purchased.
Is it cheaper to repair an alternator than to replace it entirely?
Yes, repairing specific components like brushes, a voltage regulator, or diodes is almost always significantly cheaper than buying a new or remanufactured alternator, often costing just a fraction of the replacement unit’s price.
How can I tell if my alternator bearings are bad and if they can be replaced?
Bad bearings typically produce a distinct grinding or growling noise that intensifies with engine RPM; while they can be replaced, this repair is often more complex, requiring special tools to press the old ones out and new ones in, making it a more advanced DIY task.
What are the risks of trying to repair an alternator myself if I’m not experienced?
Risks include damaging other components during disassembly, incorrect reassembly leading to charging failures, or even electrical shorts if wiring is not properly reconnected; always follow instructions carefully and consult professional help if unsure.