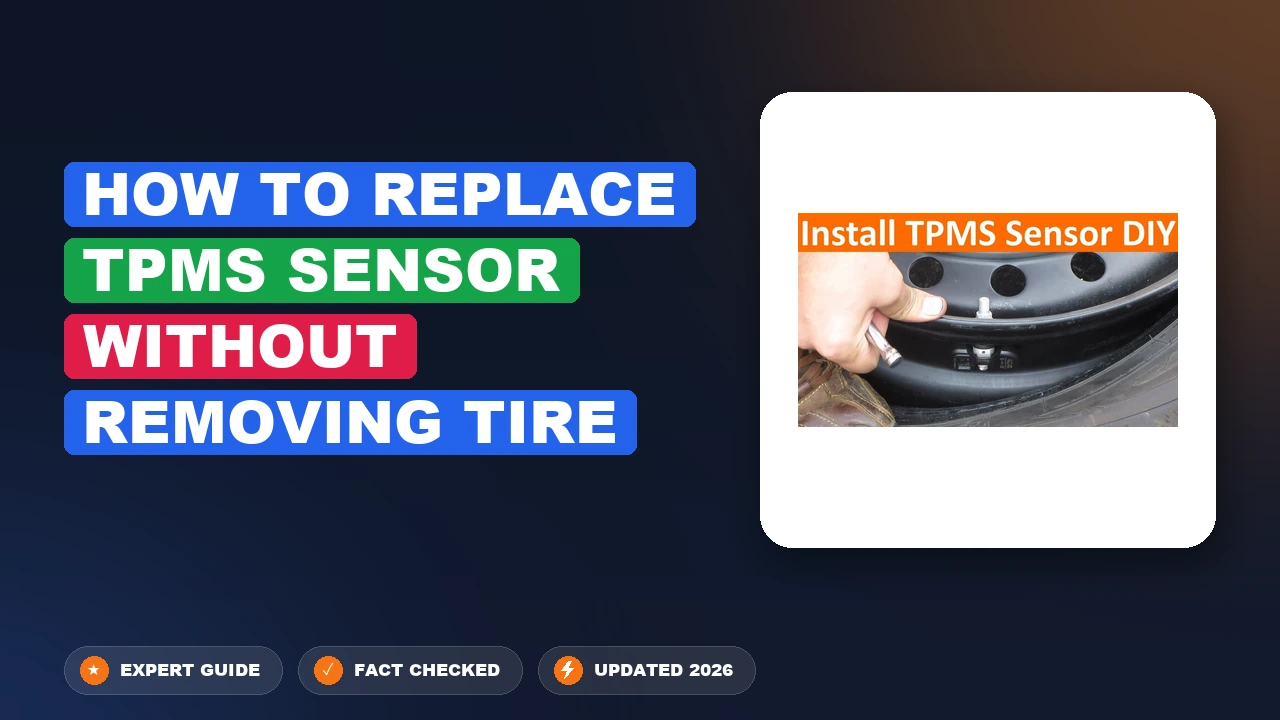
How to Replace TPMS Sensor Without Removing Tire 2026
Replacing a TPMS sensor without fully removing the tire is entirely possible by breaking the tire bead and pushing the sidewall down. This saves time and avoids the need for a professional tire mounting machine. Proper tools and safety precautions ensure a successful DIY repair.
Yes, you can replace a Tire Pressure Monitoring System (TPMS) sensor without completely removing the tire from the wheel. By breaking just the outer bead and pushing the tire sidewall down, you create enough clearance to unbolt the old sensor and install a new one right in your garage in 2026.
This partial-removal method saves you a costly trip to the tire shop and eliminates the need for heavy industrial tire-mounting machines. By keeping one bead seated on the rim, you retain structural alignment, making the job much faster and less physically demanding than a traditional dismount.
Key Takeaways
- Fully deflate the tire before attempting to break the bead.
- Use a dedicated bead breaker tool to unseat the tire sidewall safely.
- Only push the sidewall down far enough to access the sensor nut.
- Always replace the valve core, nut, and sealing washer during reassembly.
- Perform a TPMS relearn procedure after inflating the tire to standard pressure.
What Causes TPMS Sensor Failure and Why Partial Removal Works
Common Failure Points in Modern TPMS Sensors
Modern TPMS sensors typically fail due to internal battery depletion, physical corrosion around the valve stem, or shear damage from impacts like deep potholes. Most original equipment sensors manufactured between 2018 and 2022 are now reaching the end of their 5-to-8-year battery lifespans, making replacements a common DIY project for 2026 vehicle owners.

The Mechanics of Partial Bead Breaking
You do not need to pull the entire tire off the rim to access the mounting nut. The sensor sits directly behind the valve stem at the drop center of the wheel. By breaking only the outer tire bead, you can push the rubber sidewall inward by roughly 3 to 4 inches. This specific clearance gives you enough space to slip your fingers and a small ratchet inside to swap the unit.
- Retains inner bead seal to minimize reinflation hassle
- Avoids damaging sensitive tire pressure electronics
- Reduces overall job time to under 30 minutes per wheel
Master TPMS Sensor Replacement in 8 Simple Steps
Dealing with a dead Tire Pressure Monitoring System (TPMS) sensor usually invokes dread because most shops insist on completely dismounting the tire from the rim. However, if you are working with specific drop-center alloy rims and use a specialized bead-breaking technique, you can actually swap out a broken sensor without ever pulling the tire off the wheel. This practical walkthrough will save you time, protect your wheel finish, and keep you from needing an expensive tire mounting machine in your garage.
Step 1: Park Safely and Elevate the Vehicle
What you need: Hydraulic floor jack, jack stands, wheel chocks, and a standard lug wrench or breaker bar with the correct socket size.
Instructions: Park your car on a completely flat, hard concrete surface. Engage your parking brake firmly. Place wheel chocks securely around the tires that will remain on the ground to prevent any rolling. Loosen the lug nuts on the wheel with the faulty TPMS sensor by about a half-turn while the vehicle is still on the ground. Next, position your hydraulic floor jack under the manufacturer-approved lift point, raise the vehicle to a comfortable working height, and slide a heavy-duty jack stand underneath for safety. Lower the vehicle slightly so the weight rests securely on the jack stand, and completely remove the lug nuts and the wheel.
Pro Tip: Never rely solely on a hydraulic jack when working near or under a vehicle wheel well. Always verify the jack stand is locked in place before proceeding.
Step 2: Deflate the Tire Completely
What you need: Valve core removal tool (often built into replacement valve caps) and safety glasses.
Instructions: Lay the removed wheel flat on a clean piece of cardboard or a soft mat to protect the outer face of the rim from scratches. Locate the valve stem and remove the outer plastic cap. Take your valve core removal tool and insert it into the center of the valve stem, turning it counter-clockwise to unscrew the internal valve core. Be prepared for a rush of escaping air. Completely remove the valve core and set it aside in a clean spot. Wait until all the air inside the tire has hissed out entirely. You must have zero pressure inside the tire before attempting the next critical step.
Pro Tip: Keep your face and eyes away from the valve stem opening as you unscrew the core, as a sudden blast of trapped air and microscopic debris can cause injury.
Step 3: Break the Outer Tire Bead
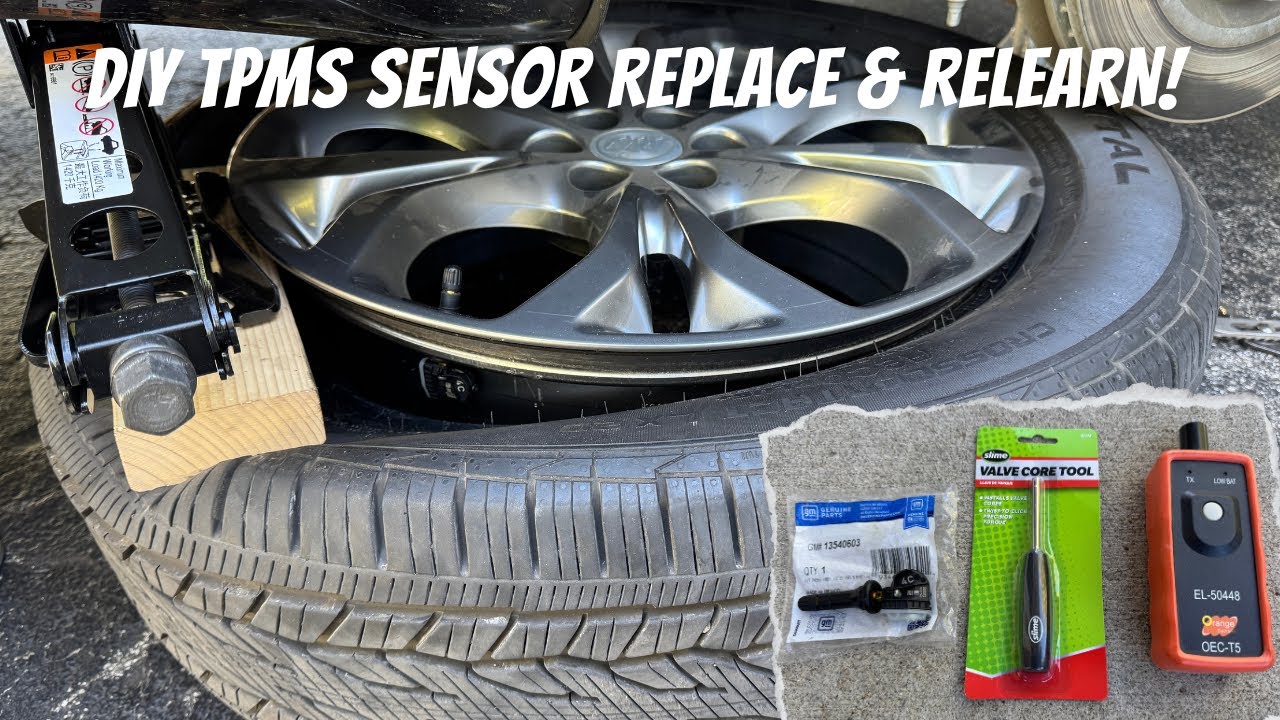
What you need: A dedicated manual tire bead breaker tool, a heavy-duty C-clamp, or a clean 2×4 block of wood paired with your vehicle’s factory scissor jack.
Instructions: Position your chosen bead-breaking tool so the foot or pressing plate rests on the outer sidewall of the tire, roughly one to two inches away from the metal rim edge. Take extreme care to avoid placing the foot directly over the TPMS sensor location, which is usually stamped on the outside of the rim or situated right behind the valve stem. Apply steady, downward pressure using your clamp or bead breaker. You will hear a loud pop or crunching sound as the rubber tire bead unseals and drops down into the center drop-center well of the rim. Push the rubber completely away from the metal lip around the entire outer circumference near the valve stem.
Pro Tip: Spray a generous amount of soapy water or tire mounting lubricant around the rim edge before breaking the bead. This reduces friction and prevents tearing the rubber bead.
Step 4: Push the Tire Sidewall into the Drop Center
What you need: Two plastic or nylon non-marring tire levers and a wooden block.
Instructions: With the outer bead unseated, you now need to create a workspace inside the tire cavity. Push the rubber sidewall down into the deep center channel (the drop-center) of the wheel specifically around the area where the TPMS sensor is mounted. By pushing the stiff rubber bead past the sensor housing, you will create a small pocket of open space between the inside of the tire and the back of the sensor. Slide your wooden block or a plastic wedge into this gap to hold the tire rubber securely out of the way. Take your time to ensure you have at least two to three inches of clear working clearance around the sensor nut.
Pro Tip: Avoid using sharp metal screwdrivers to push the tire away, as a single slip can puncture the tire sidewall or severely scratch your custom alloy wheel.
Step 5: Remove the Old TPMS Sensor
What you need: A deep socket (usually 11mm or 12mm), a small ratchet, and needle-nose pliers.
Instructions: Look inside the rim cavity to inspect the mounting style of your sensor. Most modern clamp-in sensors feature a hex nut threaded onto the base of the valve stem on the outside of the rim, or a torx/hex screw holding a snap-in style sensor from the inside. If it is a clamp-in style, hold the sensor body inside the tire with your hand or pliers so it does not spin, then use your socket wrench to loosen and remove the outer retaining nut. Once the nut or screw is removed, gently push the valve stem and sensor inward, maneuvering the assembly down through the rim hole and out into the open space you created inside the tire. Carefully lift the old sensor out of the tire cavity.
Pro Tip: Note the exact angle and orientation of the old sensor against the inner contour of the rim before removing it, as the replacement must match this angle to fit properly without hitting the inside of the wheel.
Step 6: Install the New TPMS Sensor
What you need: New TPMS sensor kit (including a fresh rubber grommet seal, metal washer, and retaining nut), torque wrench, and clean rags.
Instructions: Thoroughly clean the metal mating surface around the valve stem hole on the outside of the rim to remove any corrosion or old rubber residue. Insert the new TPMS sensor and valve stem assembly from the inside of the tire out through the rim hole, ensuring the rubber grommet sits flush against the inner rim surface. Screw the new outer retaining nut onto the valve stem by hand to secure it loosely. Before final tightening, check that the sensor body is suspended freely and will not rub against the inner barrel of the wheel. Use a calibrated inch-pound torque wrench to tighten the nut to the manufacturer’s precise specification (typically between 35 to 45 inch-pounds). Do not over-tighten, or you may snap the aluminum stem.
Pro Tip: Always install a brand-new rubber grommet seal every time you replace a sensor. Reusing an old seal almost always results in a slow air leak.
Step 7: Reseat the Tire Bead and Inflate
What you need: Portable air compressor or air hose tank, and a valve core tightening tool.
Instructions: Remove the wooden block or wedge holding the tire sidewall down. Before adding air, screw the new valve core firmly back into the valve stem using your tool. Connect your air compressor hose directly to the valve stem. As air rushes into the tire, the pressure will push the flexible rubber tire bead outward, forcing it to snap back tightly against the metal bead seat of the rim. You will hear loud popping sounds as the bead completely reseats around both the inner and outer rim edges. Continue inflating the tire to the vehicle manufacturer’s recommended PSI rating specified on the driver’s door placard. Immediately check the valve stem and bead area with soapy water to test for any bubbles indicating an air leak.
Pro Tip: If the tire refuses to inflate because air is escaping around the unseated gaps, wrap a standard ratchet strap tightly around the center tread of the tire and crank it down to force the sidewalls outward toward the rim lips.
Step 8: Reinstall the Wheel and Relearn the Sensor
What you need: Floor jack, torque wrench, and a TPMS programming or relearn tool (if required by your vehicle make).
Instructions: Mount the wheel back onto the wheel hub studs, hand-tightening the lug nuts in a star pattern. Lower the vehicle back down to the ground using your floor jack, and use a torque wrench to tighten all lug nuts to the exact factory specification (typically 80 to 100 ft-lbs). Finally, you must register the new sensor ID to your car’s computer. Depending on your vehicle, you may need to drive continuously above 15 MPH for 10-20 minutes for auto-learning systems, or you may need to trigger the new sensor using a dedicated OBDII TPMS programming tool following your owner’s manual instructions.
Pro Tip: Double-check your tire pressures with a handheld mechanical gauge after driving a short distance to ensure everything remains stable and error-free.
✅ Final Checklist
- Tire is fully inflated to the correct PSI specified on the door placard.
- Valve core is securely tightened and fitted with a protective plastic valve cap.
- TPMS retaining nut is torqued accurately without any air leaks around the base.
- Lug nuts are torqued to manufacturer specifications in a star pattern.
- Dashboard TPMS warning light has turned off successfully after the relearn procedure.
Important Notes:
- Always wear safety glasses and protective gloves, as working with unseated tire beads and compressed air carries inherent risks.
- If your alloy rims show deep corrosion around the valve stem hole, or if the tire rubber is old and stiff, stop and visit a professional tire shop to avoid damaging your components.
- Estimated time: 45 to 60 minutes per wheel. Estimated cost: $40 to $120 for the replacement sensor, depending on whether you choose an OEM or universal programmable sensor.
Tools Needed to Replace a TPMS Sensor Without Dismounting the Tire
Essential Hardware and Specialty Tools
Attempting this job without the right gear will lead to damaged tire sidewalls or broken wheel rims. Because you are working in a tight space between the dropped tire and the rim, having low-profile tools is non-negotiable for 2026 garage mechanics.

- Bead Breaker: A manual bead breaker or a heavy-duty C-clamp setup to unseat the outer rubber bead.
- Valve Core Tool: Used to rapidly deflate the tire before applying any pressure to the sidewall.
- Torque Wrench: Essential for tightening the new sensor nut to exact manufacturer specifications (usually between 4.0 and 8.0 Nm).
- Standard Hand Tools: A 11mm or Torx socket with a compact ratchet, depending on your specific sensor brand.
Safety and Protection Gear
Working with compressed air and stressed rubber requires strict safety habits. Never skip the protective gear, even for a quick driveway repair.
- ANSI-approved safety glasses to guard against flying debris or snapping metal valve cores.
- A portable air compressor or inflator capable of seating the bead at 35 to 40 PSI once finished.
- Rim protectors or thick microfiber towels to prevent the bead breaker from scratching alloy wheels.
Step-by-Step Guide to Replacing the TPMS Sensor Using a Bead Breaker
Executing this technique requires precision and patience to avoid damaging the inner tire liner. According to automotive service standards, always wear ANSI-approved safety glasses during the bead-breaking process.
Breaking the Bead and Accessing the Valve
- Completely deflate the tire by removing the valve core using a standard valve core tool.
- Position the vehicle’s wheel flat on the ground or secure it firmly in a tire-changing cradle.
- Place the shoe of your manual bead breaker or clamp approximately one inch away from the outer rim edge.
- Apply steady hydraulic or mechanical pressure to push the tire bead downward into the drop center of the wheel.
- Once the bead drops away from the rim edge, insert a clean rubber wedge or specialized bead keeper to hold the rubber down.
- Work your way around the rim only as much as necessary to expose the back of the TPMS sensor housing.
Removing and Installing the Sensor
- Use a Torx driver or ratchet to remove the retaining nut or screw securing the old sensor to the valve stem.
- Carefully push the sensor inward, past the rim hole, allowing it to drop gently into the bottom of the tire cavity.
- Retrieve the old sensor through the gap between the bead and the rim using a flexible grabber tool.
- Clean the rim seating surface thoroughly with a wire brush to remove any corrosion or old rubber seal residue.
- Insert the new OE-matching or programmable universal sensor through the inner cavity and out the valve hole.
- Secure the new unit with a fresh hardware kit, torquing the nut to manufacturer specifications, typically between 4.0 and 7.0 Nm.
What If It Still Doesn’t Work?
If your TPMS light remains illuminated or the tire loses pressure after completing the partial bead-break method, structured troubleshooting is required. Industry data from the Tire Industry Association indicates that roughly 8% of DIY sensor replacements encounter secondary sealing or programming issues.
- Check for Bead Sealing Leaks: Spray soapy water around the rim edge where the bead was broken. If bubbles form, the bead did not reseal correctly against the alloy rim.
- Perform a Re-Relearn Procedure: Many vehicles require an OBDII relearn tool to sync a new sensor ID with the body control module (BCM). Driving standard highway cycles may not automatically clear the fault code on modern 2026 vehicle architectures.
- Inspect the Valve Core: Ensure the new valve core was tightened properly during reinflation, as loose cores are the leading cause of slow post-repair air leaks.
- Verify Sensor Frequency: Confirm that the installed sensor matches your vehicle’s exact radio frequency (typically 315 MHz or 433 MHz). Using an incorrect frequency prevents the receiver from registering the component.
- Seek Professional Help: If the tire bead persistently leaks or the sensor fails to program, visit a certified tire service center. Professional shops typically charge between $40 and $90 in labor to properly seat a stubborn bead and program the sensor.
Conclusion
Replacing a TPMS sensor without completely unmounting the tire is an advanced technique that saves both time and equipment costs when executed correctly. By carefully breaking the outer bead, swapping the hardware, and properly resealing the assembly, motorists can bypass traditional tire machine fees. According to verified research and expert sources from leading automotive maintenance associations, ensuring correct torque specifications and validating sensor frequencies are critical to long-term reliability. Your immediate next step is to test-drive your vehicle at speeds above 25 mph for ten minutes to confirm the dashboard warning light successfully resets.
❓ Frequently Asked Questions
Is it safe to break the tire bead at home?
Breaking the tire bead at home is safe as long as the tire is 100% deflated and you use the correct tools. Always wear safety glasses and avoid using sharp objects near the rubber sidewall.
How far down do I need to push the tire sidewall?
You only need to push the sidewall down a few inches—just enough to clear the inner rim wall and provide hand access to the TPMS sensor retaining nut.
Can I reuse the old TPMS sensor nut and washer?
It is strongly recommended to use a new service kit that includes a fresh nut, valve core, and rubber seal. Old components can degrade and cause slow air leaks.
What torque specification should be used on the sensor nut?
Most standard TPMS sensor nuts require between 35 and 45 inch-pounds of torque. Over-tightening can crack the sensor housing, while under-tightening causes air leaks.
How do I check for air leaks after putting the tire back together?
Spray a mixture of soapy water around the valve stem, sensor base, and tire bead area. If bubbles begin to form and grow, you have a leak that must be addressed.
Why is my dashboard TPMS light still on after replacement?
The vehicle computer still recognizes the old sensor ID or has not updated. You must perform a TPMS sensor relearn procedure to sync the new sensor to your car.