Where Is The Pre Collision Assist Sensor Located 2026
The pre-collision assist sensor is typically split between two main locations on modern vehicles: a camera mounted on the front windshield near the rearview mirror and a radar module hidden behind the front bumper or grille. Both components work together to detect potential forward crashes.
Your vehicle’s pre-collision assist sensor is primarily located in two spots: mounted high on the inside of the front windshield near your rearview mirror, and hidden behind the front bumper or lower grille area. Modern 2026 driver-assistance systems typically rely on a dual setup consisting of a digital camera facing forward through the windshield and a radar unit positioned down low on the front fascia.
Knowing exactly where these components live on your specific vehicle matters practically. If a warning light pops on your dashboard, or your automatic emergency braking system acts up, you need to know whether to wipe mud off your lower bumper or clear frost off your upper windshield glass. Let us look at what causes these systems to fail and how you can track down your hardware.
Key Takeaways
- The optical camera mounts high on the center of the front windshield.
- The radar sensor sits low behind the front grille or lower bumper fascia.
- Dirt, snow, or mud can easily block these sensors and trigger warning lights.
- Windshield replacements require professional sensor recalibration to function safely.
- Never place aftermarket decals or toll passes directly over the camera housing.
What Causes Pre Collision Assist Sensor Blockage and Failures
Environmental Obstructions and Debris
Modern driver-assistance systems in 2026 vehicles demand an unobstructed view of the road ahead. Because your camera and radar units sit exposed to the elements, they are prone to environmental interference that triggers temporary system faults.
- Heavy snowfall, thick ice, or freezing rain adhering to the upper windshield glass.
- Mud, road salt, and heavy grime caked directly over the front bumper radar housing.
- Direct, blinding sunlight shining straight into the forward-facing camera lens during sunrise or sunset.
- Heavy downpours or thick fog that temporarily scatters radar waves and obscures camera vision.
Physical Damage and Misalignment
Beyond simple weather-related blockages, physical impacts or structural shifts can cause sensor failures that require professional attention.
- Minor front-end parking bumps that shift the hidden radar module out of alignment.
- Windshield replacements that fail to properly recalibrate or reinstall the optical camera bracket.
- Deep stone chips or cracks directly in the glass field of view in front of the camera module.
Master Pre-Collision Assist Sensor Locations in 7 Simple Steps
Finding the exact location of your vehicle’s pre-collision assist sensor can be tricky, as modern automakers utilize different technologies—ranging from radar modules hidden behind the front grille to cameras mounted directly on the windshield. Whether you are troubleshooting a sensor obstruction warning, preparing for a front-end bumper repair, or simply curious about your car’s advanced driver-assistance systems (ADAS), knowing where to look saves time and prevents accidental damage. This comprehensive walkthrough guides you through the precise locations of these critical safety components across most modern vehicle makes and models.
Step 1: Inspect the Center Lower Grille for Radar Modules
What you need: A flashlight, a clean microfiber cloth, and protective gloves if working near unpainted plastic trim.
Instructions: Crouch down in front of your vehicle and look closely at the lower front bumper opening or the center of the lower plastic grille. On many modern cars, trucks, and SUVs—such as Ford, Toyota, and Honda models—the primary long-range radar sensor is mounted right here. It typically looks like a flat, black, rectangular plastic box or a smooth, glossy circular disc integrated seamlessly into the grille pattern. This sensor emits radio waves to calculate the distance and closing speed of vehicles ahead of you, making it the frontline component of your pre-collision assist system.
Pro Tip: Never press heavily or lean your weight against the plastic radar housing, as these sensors are mounted on sensitive calibration brackets that easily misalign.
Step 2: Check Behind the Front Emblem or Grille Logo
What you need: A flashlight and a non-abrasive trim removal tool if you need to gently lift a nearby weather seal.
Instructions: Stand directly in front of your vehicle and examine the large manufacturer logo or emblem centered on the upper front grille. Many contemporary manufacturers—most notably Volkswagen, Mercedes-Benz, Hyundai, and Ford—hide the radar sensor directly behind a smooth, solid plastic or acrylic badge. If the emblem looks unusually thick, glossy, or lacks the traditional open-mesh background found on older cars, your radar sensor is concealed right behind it. This aesthetic integration protects the sensor from weather and minor debris while maintaining a clean vehicle design.
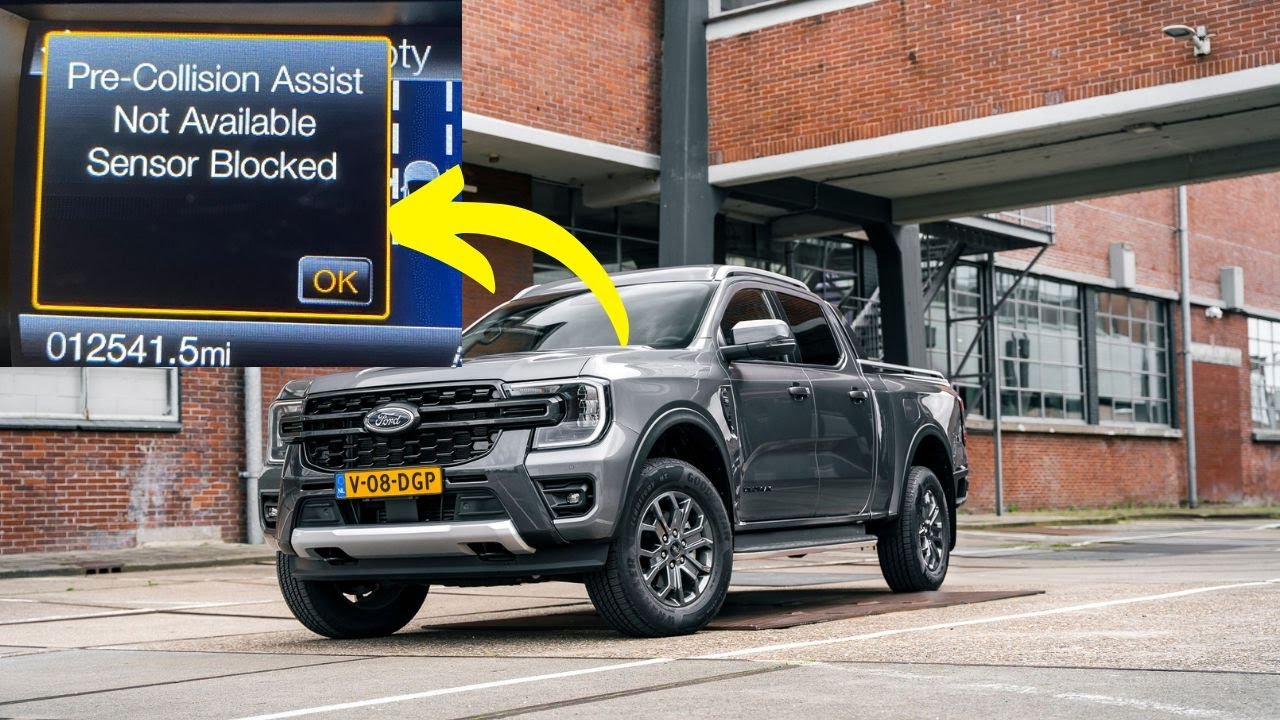
Pro Tip: Heavy snow, thick ice, or accumulated mud directly over this emblem will instantly trigger a “Pre-Collision Assist Not Available” dashboard warning.
Step 3: Scan the Upper Windshield Near the Rearview Mirror
What you need: A flashlight and a step stool or ladder to reach the upper windshield area comfortably.
Instructions: Open the driver’s side door, step back, and look at the top center of the windshield where it meets the interior headliner, right around the rearview mirror mounting bracket. You will usually see a triangular or trapezoidal plastic housing unit glued to the glass. This enclosure houses one or more forward-facing optical cameras (and sometimes laser sensors) that work in tandem with the bumper radar. While the radar calculates distance, these cameras “see” lane markings, pedestrians, and cyclists to provide complete collision mitigation and automatic emergency braking functionality.
Pro Tip: When replacing your windshield, always ensure the glass shop uses OEM-spec glass and properly transfers the optical camera bracket to avoid dangerous calibration errors.
Step 4: Examine the Corners of the Front Bumper for Auxiliary Sensors
What you need: A flashlight and a soft-bristled brush to gently clear away dust or dead insects.
Instructions: Walk around to the left and right outer corners of your front bumper, focusing on the painted or textured plastic areas just below the headlights. While standard pre-collision assist relies on a single center radar and windshield camera, vehicles equipped with 360-degree safety packages or cross-traffic alert often feature short-range radar or ultrasonic sensors flush-mounted in the bumper corners. These smaller circular or square sensors help the computer system detect pedestrians and vehicles approaching from blind angles during low-speed parking and impending frontal-offset crashes.
Pro Tip: These corner sensors are painted to match your car’s exact body color; avoid using harsh chemical solvents or abrasive pads when cleaning them.
Step 5: Review Your Vehicle Owner Manual for Specific Architecture
What you need: Your vehicle’s physical owner’s manual or access to the manufacturer’s official digital owner portal.
Instructions: Because sensor layouts vary wildly between brands (for instance, Subaru relies heavily on dual stereo cameras, while Volvo uses a combination of windshield cameras and front grille radar), consulting your specific documentation is vital. Open the manual and navigate to the index section covering “Driving Aids,” “Pre-Collision System,” or “Maintenance and Care.” The manual will feature schematic diagrams pinpointing exact sensor locations, cleaning instructions, and safety warnings regarding laser or radar emissions.
Pro Tip: If you bought your car used and the manual is missing, download a free PDF version directly from the manufacturer’s official customer support website.
Step 6: Confirm Sensor Locations Using an OBD-II Diagnostic Scanner
What you need: An OBD-II scanner capable of reading advanced ADAS and chassis module codes (generic engine scanners will not work here).
Instructions: Plug your advanced diagnostic scan tool into the OBD-II port located beneath your driver’s side dashboard near the steering column. Turn your ignition to the “On” position without starting the engine. Navigate the scanner menu to the “ADAS” or “Body Control Module” section and look for live data or diagnostic trouble codes (DTCs) related to the front radar or camera. The software will often display status reports for individual sensors, helping you confirm whether your vehicle utilizes a single bumper radar, a dual-camera setup, or both.
Pro Tip: If your scanner shows a “Blind Spot or Collision Sensor Blocked” code, visually inspect the locations identified in previous steps for physical obstructions like license plate frames or bumper guards.
Step 7: Perform a Final Physical Verification and Clean Up
What you need: Glass cleaner (for windshield cameras) and a mild automotive soap solution (for exterior radar modules).
Instructions: Now that you have located all relevant sensors on your specific vehicle, perform a thorough physical inspection. Ensure the exterior radar panel in the lower grille or behind the emblem is free of stone chips, deep scratches, or loose mounting clips. Next, check the interior windshield glass in front of the camera housing to ensure there are no smudges, haze, or sticker residues blocking the camera’s field of view. Wipe down all identified sensor surfaces gently to restore optimal optical and radar performance.
Pro Tip: Never mount aftermarket light bars, heavy bull bars, or oversized license plate brackets directly in front of your lower bumper radar sensor.
✅ Final Checklist
- Located the primary radar module in the lower grille or behind the front emblem
- Inspected the upper windshield housing for forward-facing optical cameras
- Checked outer bumper corners for auxiliary short-range safety sensors
- Consulted the owner’s manual to confirm brand-specific sensor architecture
- Verified all sensor surfaces are completely clean and free of physical obstructions
Important Notes:
- Never attempt to manually adjust, tilt, or recalibrate a radar sensor bracket yourself, as incorrect alignment can cause unexpected or false emergency braking events.
- If your vehicle has been involved in a front-end collision or had its windshield replaced, seek professional ADAS recalibration services immediately.
- Estimated time: 15 to 30 minutes. Cost range: $0 (DIY inspection) to $150-$300 (professional dealer sensor alignment and recalibration).
How to Identify and Locate Your Vehicle Sensors Step by Step
Locating the Windshield Camera Module
The optical camera is the easiest component to spot visually from inside or outside your cabin. Stand outside your car in good lighting and look at the top-center section of your front windshield.

- Look directly behind or just below your rearview mirror housing for a plastic triangular or rectangular enclosure.
- Step inside the cabin and look up at the headliner where the mirror attaches to see the plastic housing cover that shields the camera lens and control board.
- Note that popular 2026 models from brands like Ford, Subaru, and Honda almost universally house their primary lane-keeping and pre-collision cameras in this exact upper windshield zone.
Locating the Front Bumper Radar Sensor
Unlike the visible windshield camera, the radar transceiver is usually concealed behind your vehicle body panels to maintain aerodynamic styling and protection.
- Inspect the lower plastic grille area or look for a smooth, plastic-textured rectangular panel integrated into your front bumper fascia.
- On many trucks and SUVs, the radar unit sits right behind the manufacturer’s large front grille emblem.
- Check your owner manual if your specific make uses corner-mounted radar units hidden behind the side bumper corners rather than a single center unit.
How to Clean and Maintain Your Safety Sensors Properly
Modern advanced driver-assistance systems rely on precise hardware calibration to operate safely. Maintaining these optical and radar components prevents false collision warnings and system shutdowns.
Step-by-Step Cleaning Guide
- Park your vehicle in a shaded area and turn off the ignition. Allow heated elements like the radar plate to cool completely before touching them.
- Gently wipe the windshield exterior directly over the rear-view mirror housing using a soft, lint-free microfiber cloth.
- Apply a specialized automotive glass cleaner or mild soapy water to the cloth rather than spraying chemicals directly onto the glass or camera lens.
- Inspect the front grille emblem or bumper insert for accumulated mud, road salt, or heavy ice buildup during winter driving conditions.
- Dry the sensor surfaces thoroughly with a clean section of the microfiber towel to prevent water spots that refract light and blind optical cameras.
According to automotive safety engineers, never use abrasive household scrubbers, paper towels, or strong chemical solvents. These materials create microscopic scratches on plastic lenses and radar covers, permanently distorting the sensor’s field of view.
What If Your Warning Light Stays On After Cleaning
If the pre-collision assist warning light remains illuminated on your dashboard after a thorough physical cleaning, underlying technical issues are likely preventing normal operation. Software glitches, misalignments, or internal component failures require deeper diagnostic intervention.

Advanced Troubleshooting Steps
- Perform a complete electronic system reset by turning off the ignition, opening the driver door, locking the vehicle, and waiting fifteen minutes for modules to power down.
- Check the battery voltage with a multimeter. Modern sensor networks frequently disable themselves to conserve power if system voltage drops below 12.2 volts.
- Inspect the visible wiring harness and electrical connectors near the front bumper and windshield for corrosion, loose pins, or rodent damage.
- Visit a certified dealership or specialized repair facility to scan for stored Diagnostic Trouble Codes using factory-grade software.
If professional calibration or hardware replacement becomes necessary, expect labor times ranging from one to three hours. Dealership service centers typically charge between $150 and $400 for sensor recalibration, while complete radar module replacement can range from $600 to $1,500 depending on your vehicle make and model.
Conclusion
Locating and maintaining your pre-collision assist sensor ensures that emergency braking and forward collision warnings function reliably when unexpected hazards appear on the road. Whether your system uses a windshield-mounted camera or a front grille radar unit, regular cleaning removes obstructions that compromise driver safety. According to verified research and automotive safety studies, proactive sensor maintenance drastically reduces the frequency of system faults. Take action today by inspecting your vehicle’s sensor zones and scheduling a professional diagnostic scan if warning lights persist.
❓ Frequently Asked Questions
How do I know if my car has a pre-collision assist sensor?
You can check your vehicle’s owner manual, look for a triangular plastic housing behind your rearview mirror, or inspect the front grille for a flat plastic radar cover. Many modern vehicles also display a graphic on the instrument cluster during startup.
Will a cracked windshield affect the pre-collision camera?
Yes, cracks, chips, or severe pitting directly in the camera’s field of view on the windshield will distort its vision. This frequently triggers error codes and disables the automatic emergency braking system until repaired.
Can I wash my car through an automatic car wash with these sensors?
Standard automatic car washes are generally safe for factory-installed radar and camera systems. However, high-pressure washers held too close to the front bumper or camera housing can misalign delicate sensor brackets.
Why does my pre-collision assist turn off in bad weather?
Heavy downpours, blinding snowstorms, or thick fog physically obscure the camera and radar’s line of sight. Safety systems automatically deactivate temporarily rather than acting on flawed or missing data.
Does replacing a front bumper require sensor reprogramming?
Yes, removing or replacing the front bumper panel disturbs the exact physical alignment of the radar module. Professional calibration is mandatory to ensure the radar points at the correct forward angle.
Are aftermarket grilles safe to use with radar sensors?
Many aftermarket grilles use materials or mesh sizes that block radar signals, causing permanent system faults. Always verify that replacement grilles are specifically designed to be radar-transparent.