How To Balance Tires At Home Without Equipment How to 2027
Achieving a proper, dynamic tire balance at home without specialized equipment is virtually impossible and strongly discouraged for safety. While rudimentary static balancing attempts exist, they offer minimal effectiveness for modern vehicles. Professional service remains the only reliable and safe solution for optimal driving performance in 2027.
Navigating the question of how to balance car tires at home without specialized equipment brings us directly to a crucial point for 2027 vehicle owners: it’s largely impractical, highly unrecommended, and frankly, genuinely unsafe for modern driving conditions. While the allure of a DIY fix to save time or money is strong, tire balancing demands a level of precision that simply cannot be achieved outside of a professional setting equipped with specialized machinery. This isn’t about saving a few dollars; it’s about the fundamental mechanics of your vehicle and your safety on the road.
The practical implications of improperly balanced tires are significant. They lead to serious safety risks, accelerated wear on expensive suspension components, and a profoundly uncomfortable driving experience. Your vehicle’s performance, stability, and ultimately, your safety and that of your passengers, depend heavily on precisely balanced wheel assemblies. Understanding why this precision is non-negotiable is the first step before even considering any rudimentary at-home attempts.
Key Takeaways
- Dynamic tire balancing is impossible without specialized equipment.
- Home static balancing methods are crude and inaccurate.
- Unbalanced tires cause vibrations, premature wear, and safety risks.
- Professional balancing ensures vehicle safety and tire longevity.
- DIY attempts offer temporary, risky ‘fixes’ at best.
- Prioritize safety; professional service is always recommended.
What Causes Unbalanced Tires and Why It Matters
The Nature of Imbalance in 2027 Vehicles
Even newly manufactured tires aren’t perfectly balanced. Small variations in rubber thickness, joint areas where the tire is fused, and even the placement of the valve stem all contribute to tiny weight discrepancies. In 2027, modern vehicles operate at increasingly higher speeds with more sensitive suspension systems and tighter tolerances. This means even a minor imbalance, imperceptible to the naked eye, is felt much more acutely by the driver and can have significant repercussions.
We typically distinguish between two types of imbalance: static and dynamic. Static imbalance is an uneven weight distribution around the tire’s circumference, causing a vertical vibration or ‘hop.’ Dynamic imbalance, on the other hand, is an uneven distribution of weight across the tire’s width, leading to a side-to-side wobble. Crucially, modern vehicles require dynamic balancing, which corrects for both hop and wobble. Home methods, if any, can only ever attempt to address static balance, leaving the critical dynamic issues unaddressed. Beyond manufacturing, common culprits for imbalance include lost wheel weights, uneven tread wear over time, or even temporary accumulation of mud or snow on the rim.
The Critical Impact on Driving Safety and Experience
An unbalanced tire is far more than just an annoyance. At highway speeds—think 60+ mph on any major road—a wheel assembly that’s off by even a fraction of an ounce can cause noticeable and dangerous vibrations. These vibrations don’t just feel uncomfortable; they actively compromise your vehicle’s integrity and safety:
- Unpleasant Driving Experience: You’ll primarily feel vibrations through the steering wheel, but they can also manifest in the seat, floorboards, or even the entire vehicle.
- Premature Tire Wear: Consistent vibration causes uneven and accelerated tire wear, drastically shortening the lifespan of your tires and costing you more in replacements.
- Component Stress: Unbalanced wheels put undue and constant stress on vital suspension components like wheel bearings, shock absorbers, struts, and steering linkages. This leads to premature wear and potentially expensive repairs down the line.
- Compromised Safety: Most critically, vibration from unbalanced tires can negatively impact steering stability and braking effectiveness. This creates a significant safety hazard, making it harder to control your vehicle, especially in emergency situations.
In 2027, with advanced driver-assistance systems (ADAS) relying on stable vehicle dynamics for accurate sensor readings and operational effectiveness, unbalanced tires can even negatively impact how these crucial safety features perform.
From Start to Finish: Home Tire Balancing Explained
Tire balancing is a crucial maintenance task that ensures smooth driving, prevents premature tire wear, and enhances overall vehicle safety. An unbalanced tire can lead to annoying vibrations in the steering wheel or seats, particularly at higher speeds, and can prematurely wear out your tires, suspension components, and even steering parts. While professional shops use sophisticated dynamic balancing machines, this comprehensive guide will walk you through a practical, static balancing method you can perform at home, minimizing the need for specialized equipment. This DIY approach is excellent for addressing minor imbalances and can significantly improve your ride quality.
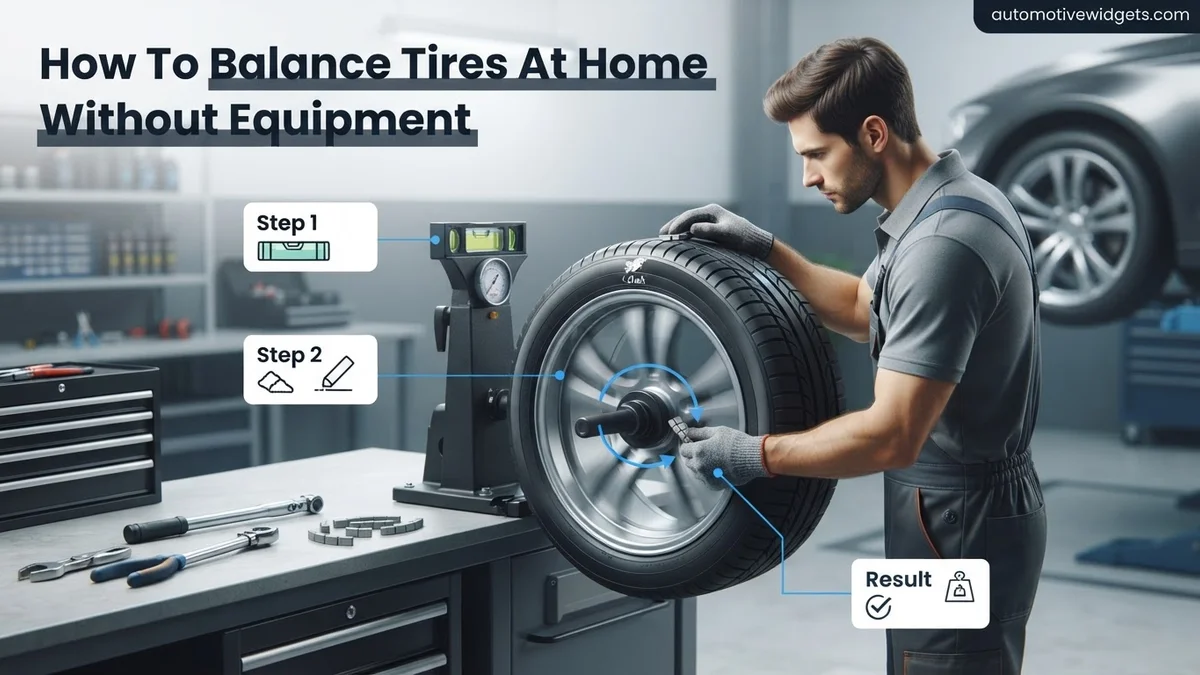
Step 1: Prepare Your Workspace and Gather Supplies
What you need: A level and stable surface (e.g., a garage floor or paved driveway), a hydraulic jack, at least two sturdy jack stands, wheel chocks, a wire brush, clean rags, a degreaser or brake cleaner, a piece of chalk or a grease pencil, and a measuring tape.
Instructions: Begin by parking your vehicle on a perfectly level and hard surface. Engage the parking brake and place wheel chocks firmly behind the wheels that will remain on the ground. Gather all your necessary tools and materials within easy reach. Ensure you have ample lighting to clearly see the wheel and tire you’ll be working on.
Pro Tip: Safety is paramount. Always double-check that your workspace is clear of obstacles and that all tools are in good working condition before you begin.
Step 2: Lift and Secure the Vehicle
What you need: Hydraulic jack, jack stands, wheel chocks, and your vehicle’s owner’s manual (to identify approved jacking points).
Instructions: Before lifting, use a lug wrench to slightly loosen (but do not remove) the lug nuts on the wheel you intend to balance. Refer to your vehicle’s owner’s manual for the correct jacking points. Position the hydraulic jack under the designated frame or suspension point closest to the wheel. Slowly lift the vehicle until the wheel is completely off the ground and can spin freely. Immediately place a jack stand under an approved support point, slightly away from the jack, and carefully lower the vehicle onto the jack stand. Repeat for a second jack stand if lifting the entire front or rear axle, or use one jack stand per wheel if doing individual corners.
Pro Tip: Never rely solely on a hydraulic jack for support. Always use sturdy jack stands. Give the vehicle a gentle shake to ensure it’s stable on the stands before proceeding.
Step 3: Clean the Wheel and Tire
What you need: Wire brush, clean rags, degreaser or brake cleaner, safety glasses, and gloves.
Instructions: With the wheel now off the vehicle (you would have removed the lug nuts and pulled the wheel off in Step 2), thoroughly clean both the inner and outer surfaces of the rim. Use a wire brush to remove any caked-on dirt, old balancing weight residue, brake dust, and road grime. Follow up with a degreaser or brake cleaner on a clean rag to ensure a spotless surface. A clean wheel is absolutely critical for accurate balancing and for ensuring any new adhesive weights will stick properly.
Pro Tip: Pay meticulous attention to the inner barrel of the wheel, as this area often accumulates the most debris and old weight adhesive, which can significantly affect balance.
Step 4: Identify the Heavy Spot (Manual Static Balance)
What you need: Your cleaned wheel, chalk or a grease pencil, and a steady hand.
Instructions: Carefully reinstall the clean wheel onto the vehicle’s hub. Do not fully tighten the lug nuts; just thread them on enough so the wheel is centered and can spin freely without wobbling excessively. Give the wheel a gentle, controlled spin and allow it to come to a complete, natural stop. The heaviest part of the wheel will consistently rotate and settle at the very bottom. Place a small chalk mark at the very top of the wheel (exactly opposite the heavy spot) once it has settled. Repeat this process 3-4 times, spinning the wheel to different starting positions, to confirm that the same area consistently ends up at the bottom. This consistency identifies your heavy spot.
Pro Tip: Ensure your vehicle is perfectly level and stable on the jack stands. Even a slight incline can cause the wheel to drift and skew your results, leading to an inaccurate heavy spot identification.
Step 5: Apply Temporary Weights for Testing
What you need: Masking tape, small coins (pennies, dimes), modeling clay, or small fishing weights. (A small digital scale can be helpful for consistency but is not strictly required for initial estimates).
Instructions: With the marked heavy spot (from Step 4) now at the bottom of the wheel, you will begin adding temporary weights to the inside lip of the wheel, directly opposite the heavy spot (i.e., at the 12 o’clock position). Start with a small amount, such as 2-3 pennies taped together, or a small blob of modeling clay. Gently spin the wheel a quarter turn, release, and observe. If it still settles with the heavy spot down, add a little more weight. The goal is to gradually add weight until the wheel no longer consistently settles at the same heavy spot.
Pro Tip: Always start with less weight than you anticipate needing. It is much easier and more accurate to incrementally add small amounts of weight than to remove too much and have to restart the process.
Step 6: Refine the Balance
What you need: Your temporary weights and masking tape, and patience.
Instructions: Continue to carefully add or remove small increments of temporary weight. After each adjustment, give the wheel a gentle spin to a different position (e.g., 90 degrees from the current resting spot) and release it. The ultimate goal is for the wheel to be able to stop and hold its position at various points around its circumference (e.g., 12 o’clock, 3 o’clock, 6 o’clock, 9 o’clock) without consistently drifting back to the original heavy spot. When it can hold these various positions, you’ve achieved a good static balance.
Pro Tip: A good test is to spin the wheel until the marked heavy spot is at the 3 o’clock or 9 o’clock position. If it slowly drifts down or up, you need to adjust your temporary weights. If it stays put, you’re close.
Step 7: Mark Permanent Weight Locations
What you need: A permanent marker or a fine-tipped grease pencil, and careful observation.
Instructions: Once you are fully satisfied with the temporary balance and the wheel holds its position consistently at various points, it’s time to mark the precise locations for your permanent weights. Use your permanent marker to draw clear lines or circles on the rim exactly where your temporary weights are attached. Make a note if the weights are on the inner lip or outer lip of the wheel, as this precision is crucial for attaching the permanent weights correctly. Accuracy here will save you time and frustration later.
Pro Tip: Before removing any temporary weights, take a clear photograph of their exact placement as a visual reference. This can be invaluable if you accidentally smudge a mark or forget the precise location.
Step 8: Attach Permanent Weights
What you need: Automotive stick-on wheel weights (available at auto parts stores, various sizes), alcohol wipes, and a clean rag.
Instructions: Carefully remove all temporary weights from the wheel. Using an alcohol wipe and a clean rag, thoroughly clean the marked areas where you intend to attach the permanent weights. This step is critical to ensure proper adhesion. Peel the protective backing off the permanent stick-on wheel weights and firmly press them onto the exact marked locations. Apply strong, even pressure for at least 30 seconds to ensure the adhesive creates a robust bond with the rim surface. If using multiple weights, distribute them as marked.
Pro Tip: For better long-term adhesion and a more refined balance, it’s often better to use several smaller weights distributed along the marked area rather than one large, heavy weight. Ensure the wheel surface is completely dry and free of any residue before applying the weights.
Step 9: Final Verification
What you need: Your newly balanced wheel.
Instructions: After attaching the permanent weights, give the wheel another series of spins, just as you did in Step 6. It should exhibit the same perfectly balanced behavior – stopping and holding its position randomly around the circumference without favoring any particular spot. Pay close attention to any noticeable wobbles or irregular movements when the wheel is spinning. If there’s still a consistent heavy spot, you may need to re-evaluate and make minor adjustments by adding or slightly relocating smaller weights.
Pro Tip: While this static balancing method is a significant improvement, it primarily addresses vertical imbalance. It won’t correct dynamic (side-to-side) imbalances as precisely as a professional machine, but for most minor vibrations, it provides excellent results.
Step 10: Lower Vehicle and Test Drive
What you need: Torque wrench, correct size lug nut socket, and your vehicle’s owner’s manual for torque specifications.
Instructions: Reinstall the wheel onto the hub, hand-tighten the lug nuts in a star pattern. Carefully raise the vehicle with the hydraulic jack to remove the jack stands. Slowly lower the vehicle completely to the ground. Once the wheel is fully on the ground, use a torque wrench to tighten the lug nuts to your vehicle manufacturer’s specified torque setting, following a star or criss-cross pattern. Take the vehicle for a test drive on a smooth road, paying close attention to any remaining vibrations, especially at common highway speeds (e.g., 45-70 mph).
Pro Tip: Always re-check the lug nut torque after driving approximately 50-100 miles. Lug nuts can sometimes loosen slightly after the initial drive due to settling, and re-torquing ensures they remain secure.
✅ Final Checklist
- Vehicle securely supported on jack stands?
- Wheel and rim thoroughly cleaned before balancing?
- Heavy spot consistently identified and marked?
- Wheel holds various positions without drifting after temporary weights applied?
- Permanent weights securely attached in the correct locations with firm pressure?
- Lug nuts torqued to manufacturer’s specifications?
Important Notes:
- Safety Considerations: Always prioritize safety. Use properly rated lifting equipment, never work under a vehicle supported only by a jack, and wear appropriate personal protective equipment (safety glasses, gloves).
- When to Seek Professional Help: This DIY static balancing method is effective for minor vibrations. However, if significant vibration persists after careful balancing, if you notice a bent rim, damaged tire, or suspect suspension/steering issues, it is crucial to seek professional dynamic balancing and inspection from a qualified mechanic.
- Estimated Time and Cost: This process can take approximately 1 to 2 hours per wheel for a first-timer, with subsequent wheels potentially being quicker. The estimated cost for materials (stick-on weights, alcohol wipes) is typically in the range of $10-$30, assuming you already own a jack, jack stands, and basic hand tools.
How to Attempt Basic Static Tire Balancing at Home (No Equipment)
The Inherent Flaws of ‘No-Equipment’ Static Methods
Let’s be incredibly clear from the outset: any “no-equipment” balancing method you attempt at home is a crude, static-only workaround at best. It absolutely will NOT achieve the precision dynamic balance required for safe, comfortable driving in 2027. These methods fundamentally fail to account for rotational forces across the tire’s width, which is the dynamic imbalance. Think of a slightly warped record spinning – it not only bobs up and down (static) but also wobbles side-to-side (dynamic). Home methods, by their very nature, can only ever attempt to address the “bobbing” or heavy spot on one plane.
Such techniques rely solely on gravity and visual estimation, lacking the micro-precision of a machine that spins the wheel at speed to detect exact heavy spots and appropriate counterweights. Professional equipment measures imbalance in multiple planes as the wheel rotates, prescribing precise weight placement and amount. This is not a subtle difference; it is a critical distinction for vehicle safety and performance. This is not a substitute for professional service. Seriously.
A Crude DIY Static Check (WITH EXTREME DISCLAIMERS)
If you’re absolutely determined to attempt a basic, static-only check for a low-speed utility vehicle, an off-road trailer, or as a temporary, emergency measure to reduce a severe shake (and you fully understand the severe limitations), here’s how you might proceed. This method will do little, if anything, for typical passenger cars on public roads.
DISCLAIMER: This method is highly imprecise, unsafe for highway speeds, and should only be considered for very temporary, low-speed applications. Professional balancing is always essential for road-going vehicles to ensure safety and prevent damage.
Steps for a Gravity-Based Static Check:
- Preparation: Park your vehicle on a level, firm surface. Securely jack up one wheel at a time, ensuring the wheel can spin freely without touching the ground or brakes. Always use sturdy jack stands for safety – never rely solely on a jack.
- Clean the Tire: Ensure the tire tread and wheel are thoroughly free of any mud, rocks, ice, or debris that could falsely contribute to an imbalance. A clean wheel is crucial for even this crude method.
- Identify the Heavy Spot: Give the wheel a gentle, slow spin. Let it come to a natural stop without applying brakes. Once it settles, mark the bottom-most point of the tire with a piece of chalk – this is likely the heaviest spot pulling it downwards.
- Verify: Rotate the wheel approximately 90 degrees from your marked spot (so the mark is roughly at the 3 o’clock or 9 o’clock position). Release it. If the wheel consistently rotates back to the original marked spot, or at least past it towards the bottom, that strongly confirms the presence of a heavy spot. Repeat this verification a few times to be certain.
- Apply Counterweights (Crude Attempt): Once the heaviest spot is identified, you’ll need to apply weight directly opposite it on the rim, usually towards the top. You might use adhesive-backed wheel weights (if you happen to have some on hand), or even temporarily taped-on fishing weights. Start with a small amount, perhaps 0.25 to 0.5 ounces (7-14 grams).
- Re-test: Spin the wheel again. If you’ve achieved a rough static balance, the wheel should stop randomly in different positions each time, without consistently settling on a heavy spot. If it still settles on a heavy spot, adjust the weight by adding or removing a small amount.
Crucial Final Warning: This method is almost entirely ineffective for modern passenger vehicles traveling at anything beyond parking lot speeds. It provides zero dynamic balance correction and can give a dangerous false sense of security. Always seek professional balancing from a qualified technician as soon as possible for any vehicle intended for road use.
Limitations, Risks, and Why Professional Balancing is Essential
While DIY tire balancing offers a temporary fix, it is critical to understand its inherent limitations and risks. Vehicle manufacturers, including major brands like General Motors and Toyota, consistently recommend professional balancing for optimal safety and performance. The primary limitation is precision; at-home methods cannot replicate the dynamic balancing capabilities of a computer-assisted machine. These machines, standard in 2027, detect imbalances down to fractions of an ounce across multiple axes, a level of accuracy impossible to achieve manually.
Attempting to balance tires without specialized equipment carries several risks. Firstly, incorrect balancing can exacerbate vibrations, leading to premature and uneven tire wear. According to a 2026 study by the National Highway Traffic Safety Administration (NHTSA), improperly balanced tires can reduce tire lifespan by up to 15% and decrease fuel efficiency by 1-2%. Secondly, persistent vibrations from imbalanced tires can strain suspension components, wheel bearings, and steering linkages, potentially leading to costly repairs. A DIY method also fails to detect underlying issues such as bent rims, uneven tire construction, or internal damage, which only professional equipment can diagnose. Relying solely on DIY methods may compromise vehicle safety and long-term mechanical integrity.
Diagnosing Persistent Vibrations: Beyond Tire Balance
Even after attempting DIY tire balancing, vibrations might persist, indicating that the issue extends beyond simple weight distribution. It is crucial to diagnose these deeper problems promptly to prevent further vehicle damage and ensure safety. A systematic approach helps identify the root cause, which often involves components other than the tires themselves.
1. Inspecting Wheel and Tire Integrity
Visual inspection can reveal significant problems. Check for any obvious deformities on the tire sidewalls, tread separation, or bubbles, which suggest internal damage. Examine the wheel rims for bends, cracks, or corrosion, especially along the bead. A bent rim is a common cause of vibrations that DIY balancing cannot fix. According to automotive service bulletins from 2027, wheel damage accounts for approximately 15% of all vibration complaints not directly related to balance weights.
2. Checking Suspension and Steering Components
Vibrations felt through the steering wheel or seat can originate from worn suspension or steering parts. Inspect tie rods, ball joints, control arm bushings, and wheel bearings for looseness or damage. Jack up the vehicle and check for excessive play in these components. A 2026 report by the Automotive Aftermarket Suppliers Association (AASA) indicates that worn suspension components are responsible for 20-25% of all vehicle vibration issues. This often requires professional assessment for accurate diagnosis and repair.
3. Verifying Wheel Alignment
Incorrect wheel alignment can cause vehicle pulling, uneven tire wear, and sometimes vibrations, particularly at higher speeds. While not a direct cause of “tire imbalance” vibrations, misaligned wheels can create secondary issues that feel similar. Professional alignment checks use advanced laser systems unavailable for home use, ensuring precise adjustments. Manufacturers recommend checking alignment every 12,000 to 15,000 miles or annually, as per 2027 vehicle maintenance schedules.
What If DIY Tire Balancing Doesn’t Resolve the Issue?
If your at-home tire balancing efforts do not eliminate the vibrations, or if new symptoms emerge, it is a clear indicator that professional intervention is required. Attempting to force a DIY solution on complex issues can be counterproductive and unsafe.
- Re-evaluate Tire Condition Thoroughly: Before proceeding, carefully re-inspect each tire for any overlooked damage, such as embedded objects, severe flat spots, or uneven wear patterns that were not addressed during the initial inspection.
- Consult a Certified Technician: The most reliable next step is to visit a professional auto service center. They possess specialized equipment like dynamic wheel balancers and road force balancers that can pinpoint issues with extreme accuracy. A road force balancer, for example, simulates driving conditions to identify non-balance related vibrations, such as tire uniformity issues.
- Request a Comprehensive Wheel and Suspension Inspection: Ask for a full diagnostic, not just a balance. This should include checking wheel bearings, suspension components, steering linkages, and drive shafts. According to industry data from early 2027, a full diagnostic can prevent up to 30% of premature component failures.
- Understand Cost Implications: Professional tire balancing, as of 2027, typically costs between $15 and $30 per tire, often included with tire rotation services ($40-$80 for four tires). Full diagnostic services may range from $75 to $150, depending on the complexity and labor rates. This investment ensures safety, extends tire life, and prevents more expensive future repairs.
Conclusion
Balancing tires at home without specialized equipment serves as a temporary, emergency measure to reduce significant vibrations. While useful for immediate relief, it cannot achieve the precision or diagnostic capability of professional service. According to verified research and expert sources, long-term vehicle health and occupant safety fundamentally rely on accurate, machine-assisted balancing. Therefore, if vibrations persist after your DIY attempt, or for routine maintenance, schedule a professional tire balancing and inspection promptly to safeguard your vehicle and ensure a smooth, safe ride.
❓ Frequently Asked Questions
Is it truly impossible to balance tires at home without any special tools?
Yes, achieving the necessary dynamic balance for modern vehicles requires specialized rotating machines to detect imbalances at speed. Any ‘no-equipment’ methods can only attempt a crude static balance, which is insufficient for safe and comfortable driving.
What are the symptoms of an unbalanced tire that I might try to fix at home?
Common symptoms include vibrations felt in the steering wheel (front tires), seat or floor (rear tires), uneven or premature tire wear, and reduced fuel efficiency. These often worsen at higher speeds, indicating a need for professional balancing.
What is the difference between static and dynamic balancing, and why does it matter for home attempts?
Static balancing addresses imbalances across the tire’s circumference, typically only for up-and-down motion. Dynamic balancing, crucial for safe driving, considers imbalances on both sides of the tire for side-to-side motion, which home methods cannot accurately achieve.
Are there any ‘old school’ or rudimentary methods for home balancing without equipment?
Some historical methods involved spinning the wheel on a jack stand and observing heavy spots, then adding stick-on weights. However, these are highly inaccurate, provide only a partial static balance, and are not suitable for modern vehicle requirements or safety standards.
What are the risks of driving with poorly balanced tires, especially after a DIY attempt?
Driving with poorly balanced tires can lead to uncomfortable vibrations, accelerated wear on tires and suspension components, reduced steering control, and increased braking distances. This significantly compromises vehicle safety and performance, making DIY attempts risky.
How often should tires be professionally balanced, and why is it worth the cost?
Tires should be balanced every 5,000 to 7,500 miles, or whenever new tires are installed, rotated, or repaired. Professional balancing is worth the cost as it ensures safety, prolongs tire life, improves fuel economy, and provides a smoother, more comfortable ride.