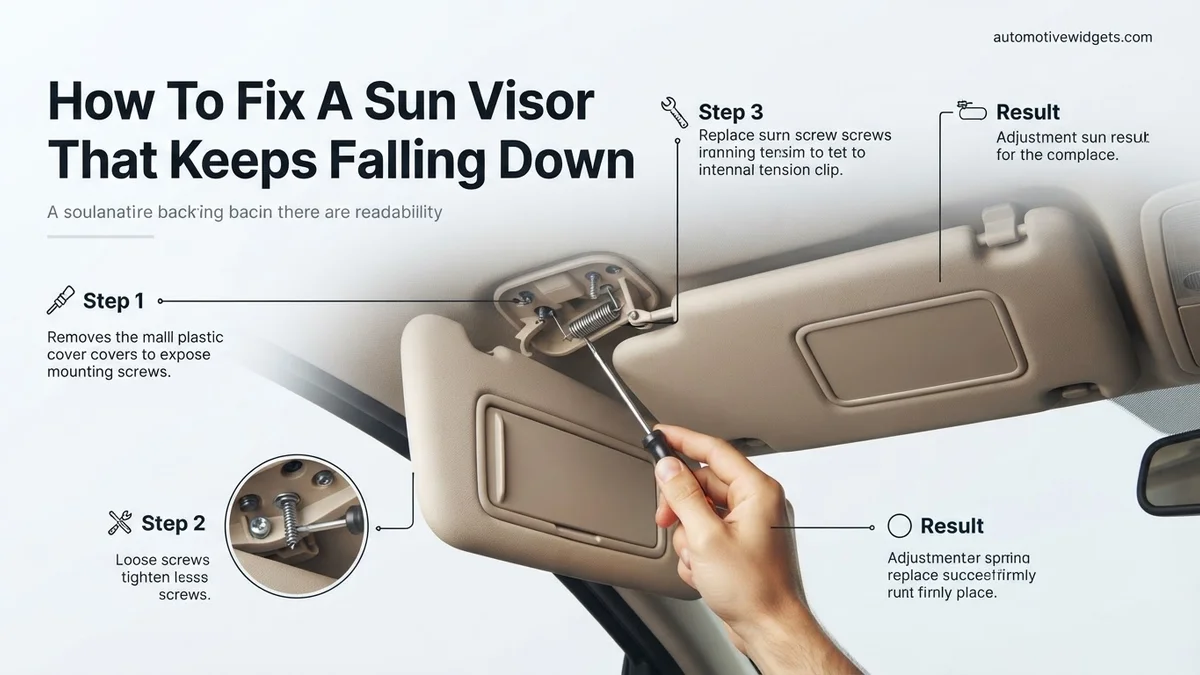
How To Fix A Sun Visor That Keeps Falling Down Fix a 2027
A sagging sun visor is a common annoyance, but often simple to fix with the right approach. This guide provides actionable, step-by-step instructions to diagnose and repair your car’s falling sun visor, from tightening screws to replacing components. Learn how to restore full functionality and driving comfort quickly and efficiently.
A sagging or completely detached sun visor is more than just an annoyance on your 2027 commute; it’s a significant distraction and a potential safety hazard. Instead of shelling out for a costly replacement or enduring impaired visibility, most common sun visor failures are simple, effective DIY repairs. You don’t need specialized automotive experience to restore full functionality and safety to your vehicle’s interior.
This guide cuts directly to the solutions, empowering you to diagnose the root cause and implement a lasting fix. By tackling this yourself, you’ll save time and money, ensuring your focus remains on the road, not wrestling with a floppy piece of plastic. Let’s get your sun visor back to doing its job, providing shade and preventing glare, as it should in your advanced 2027 vehicle.
Key Takeaways
- First, diagnose the exact cause.
- Tighten loose mounting screws effectively.
- Inspect pivot points for wear.
- Lubricate stiff hinges as needed.
- Replace deeply damaged visor parts.
What Causes Your Sun Visor to Keep Falling Down?
Before you can fix your sun visor, you need to understand precisely why it’s failing. In 2027 vehicles, just like their predecessors, the problem almost always stems from wear at the mounting point or within the internal pivot mechanism. A quick visual and tactile inspection will pinpoint the issue, guiding you to the correct repair.
Inspecting the Mounting Point and Screws
- Loose Mounting Screws: This is by far the most common culprit, particularly in models like the 2024-2027 Hyundai Kona or the 2025-2027 Ford F-150. Over time, vibrations and repeated use can cause the screws securing the visor’s base to the headliner to loosen. Look for visible gaps between the visor’s base plate and the ceiling.
- Stripped Screw Holes: If tightening the screws doesn’t work, the screw holes in the headliner’s frame or the visor’s plastic base might be stripped. This means the screws no longer have anything to grip onto. Gently try to wiggle the entire mounting bracket; significant movement indicates this problem.
- Cracked Mounting Bracket: The plastic housing that attaches to the headliner can become brittle and crack, especially in older models or vehicles frequently exposed to extreme temperatures. Inspect the bracket closely for hairline fractures or visible breaks.
Diagnosing Internal Mechanism Wear
- Worn Internal Pivot Pin: Many visors pivot on a plastic or metal pin within the base. If this pin wears down, becomes brittle, or breaks, the visor loses its ability to hold position. This is often observed in 2023-2027 Toyota Camry and Honda CR-V models, where the visor feels loose even when the mounting screws are tight.
- Fatigued Internal Spring or Retention Clip: Inside the visor’s arm or pivot point, there’s typically a spring or a small plastic retention clip designed to create tension. When these components weaken or break, the visor loses its “grip” and simply falls under its own weight. If the visor has no resistance when moved, a fatigued internal component is likely the cause.
- Broken Detent Ball/Socket: Some advanced 2027 visor designs use a ball-and-socket system for holding position. If the ball wears down or the socket cracks, the visor won’t “click” into place.
How to Diagnose and Fix a Sun Visor That Keeps Falling Down Like an Expert
Is your car’s sun visor constantly flopping down, obstructing your view, and turning a sunny drive into a frustrating experience? You’re not alone! A drooping sun visor is a common annoyance that can significantly impact driving safety and comfort. This comprehensive guide will walk you through various diagnostic checks and practical repair methods, from the simplest adjustments to more involved fixes, empowering you to restore your visor’s proper function. By following these detailed, step-by-step instructions, you’ll be able to identify the root cause of the problem and apply the most effective solution, saving you time, money, and a lot of glare.
Step 1: Initial Assessment and Basic Adjustment
What you need: Your eyes, hands, and a keen sense of observation. Perhaps a clean microfiber cloth for general cleaning.
Instructions: Begin by thoroughly inspecting the sun visor and its mounting points. Gently try to move the visor through its full range of motion – up, down, and rotating towards the side window. Pay close attention to where it feels loose or where it sags. Sometimes, the visor simply hasn’t been pushed fully into its “parked” position, or a minor obstruction is preventing it from staying up. Check for any visible damage, cracks in the plastic, or signs of wear around the hinge or mounting bracket. Ensure the clip on the opposite side (if present) isn’t broken, as this can often be the sole culprit for a visor that refuses to stay put. Test its ability to stay in various partially lowered positions.
Pro Tip: Before diving into repairs, ensure the visor isn’t just dirty or sticky at its pivot points. A quick wipe-down with a damp cloth can sometimes resolve minor friction issues that prevent it from moving smoothly or staying in place.
Step 2: Tightening the Mounting Bracket Screws
What you need: A Philips head screwdriver, a flathead screwdriver (potentially), or a Torx bit set, depending on your vehicle’s specific screw types. A flashlight for better visibility.
Instructions: The most common reason for a drooping visor is loose mounting screws. Locate the base of the visor assembly where it attaches to the ceiling or pillar of your car. You’ll typically find two or three visible screws, often covered by a plastic cap that can be carefully pried open with a small flathead screwdriver or fingernail. Using the appropriate screwdriver or bit, gently but firmly tighten each screw clockwise until snug. Be careful not to overtighten, as this can strip the screw threads or crack the plastic housing. Test the visor’s stability after tightening each screw. If there’s an electrical connection for vanity lights, ensure it remains undisturbed.
Pro Tip: If the screws spin freely without tightening, the threads in the headliner or mounting plate might be stripped. You might need slightly longer screws of the same diameter, or resort to using a small amount of thread locker (blue, removable type) on the existing screws, though this is a more advanced fix.
Step 3: Addressing a Loose Pivot Mechanism
What you need: Small flathead screwdriver, needle-nose pliers (optional), and possibly a small piece of felt or thin electrical tape.
Instructions: Some visors have an internal pivot mechanism that wears out or becomes loose, even if the main mounting bracket is secure. If your visor sags from the main arm rather than the ceiling attachment point, the pivot might be the issue. Carefully examine the pivot point where the visor arm connects to the mounting bracket. Some designs allow for tightening a nut or bolt within this area, often concealed by a plastic cover. If you can access a nut, gently tighten it. For designs where direct tightening isn’t possible, you might observe a gap or play. The goal here is to increase friction. You might be able to carefully pry apart the plastic housing slightly (if designed to separate) to access an internal spring or friction plate. If a small pin is visible, it might need to be reseated or have its friction enhanced.
Pro Tip: Before attempting any internal manipulation, search online for ” [Your Car Make/Model] sun visor repair” to see if there are specific known issues or access points for your vehicle’s design. This can prevent accidental damage to internal components.
Step 4: Shimming a Worn Visor Arm or Pivot
What you need: Thin, durable material like felt fabric, electrical tape, or even a small piece of plastic shim stock. Scissors and possibly tweezers.
Instructions: If tightening screws or internal mechanisms doesn’t create enough friction, a shim can often resolve the issue. Identify the exact point of play or looseness. This is typically where the visor arm inserts into the mounting bracket or where it pivots. Cut a very small, thin piece of your chosen material – electrical tape is a good starting point due to its adhesive and slim profile. Carefully wrap or place the shim around the part of the visor arm that inserts into the bracket, or around the pivot shaft itself. The goal is to slightly increase the diameter of the arm or shaft, thereby creating more friction when it’s reinserted or reassembled. Start with a single layer and add more if needed, ensuring the visor can still move, but with increased resistance that holds it in place. Test its functionality immediately after application.
Pro Tip: Use felt or a soft, non-abrasive material if possible, as it provides consistent friction without scratching plastic parts. If using tape, ensure it’s high-quality electrical tape that won’t degrade quickly in heat. Avoid excessive shimming, which can make the visor too stiff or prevent it from moving at all.
Step 5: Inspecting and Repairing the Visor Holding Clip
What you need: A small flathead screwdriver, super glue (cyanoacrylate adhesive) with accelerator (optional), or epoxy putty. A small clamp or tape.
Instructions: Many sun visors are held against the headliner by a separate clip on the side opposite the main pivot. If this clip is broken, cracked, or simply worn out, the visor will sag. Inspect the clip carefully for any cracks, missing pieces, or if the internal spring mechanism (if applicable) is no longer providing tension. If the clip is cracked but still largely intact, you can attempt a repair with a strong adhesive like super glue designed for plastics, optionally using an accelerator for a faster, stronger bond. For more substantial breaks, a two-part epoxy putty can be molded to reinforce the clip. Allow ample curing time, often several hours, before testing the clip’s strength. If the clip is too damaged, replacement might be necessary.
Pro Tip: When using super glue, apply a very small amount and hold the pieces firmly together for at least 30-60 seconds. For epoxy, mix thoroughly and apply while wearing gloves, shaping it carefully. Clean the area thoroughly before applying any adhesive for optimal bonding.
Step 6: Reinforcing a Cracked Mounting Bracket or Visor Housing
What you need: Strong plastic-specific adhesive (e.g., Loctite Plastics Bonding System), epoxy resin, or plastic welding kit (advanced). Small clamps, sandpaper (fine-grit), isopropyl alcohol.
Instructions: Sometimes, the plastic housing of the mounting bracket itself or the visor’s main body develops cracks, leading to instability. If you identify a crack, clean the area thoroughly with isopropyl alcohol and fine-grit sandpaper to rough up the surface slightly for better adhesion. Apply a strong, plastic-specific adhesive to the crack, ensuring it penetrates well. For more severe cracks, a two-part epoxy resin designed for plastics will provide a robust repair. Apply the epoxy, then clamp the pieces together or use strong tape to hold them until fully cured (refer to product instructions, typically 1-24 hours). For a truly professional and durable fix on structural plastics, a plastic welding kit can melt and fuse the plastic, but this requires specialized tools and practice. Always allow full curing before reinstalling.
Pro Tip: When repairing plastic, understand the type of plastic your visor is made from (often ABS or polypropylene) as some glues work better with specific plastics. If possible, apply glue from both sides of the crack if accessible for maximum strength. For deep cracks, consider embedding a small piece of mesh screen or wire into the epoxy for added reinforcement.
Step 7: Lubricating and Cleaning the Visor Rod
What you need: Silicone spray lubricant (automotive-grade, plastic-safe), clean microfiber cloth, isopropyl alcohol.
Instructions: In some cases, a visor doesn’t necessarily fall, but rather is extremely stiff or noisy when moved, and then doesn’t quite hold its position due to insufficient friction. This can sometimes be a precursor to it failing completely. If your visor uses a metal rod that slides into a friction bushing, dirt, grime, or lack of lubrication can affect its performance. First, clean the visible parts of the rod and the entry point with isopropyl alcohol and a cloth to remove any accumulated debris. Once clean and dry, apply a very small amount of silicone spray lubricant directly to the rod and into the pivot point. Work the visor back and forth through its range of motion to distribute the lubricant evenly. This can restore smooth movement and appropriate friction, helping it stay in its desired position without slipping.
Pro Tip: Use silicone spray, not oil-based lubricants like WD-40, as petroleum-based products can degrade plastics and attract more dirt over time. Apply sparingly; too much lubricant can reduce friction excessively, causing the visor to fall even more easily.
Step 8: Considering a Full Visor Replacement
What you need: The exact make/model/year of your vehicle, internet access or phone, a new replacement sun visor (OEM or aftermarket), appropriate screwdrivers/tools.
Instructions: If all previous repair attempts fail, or if the visor is severely damaged (e.g., shattered mirror, internal components completely broken, or the fabric is torn beyond repair), a full replacement is often the most straightforward and reliable solution. Research the correct part number for your vehicle’s make, model, and year. You can find this through online parts diagrams, dealer websites, or by checking salvage yards. Purchase a new (OEM or quality aftermarket) or used visor. Installation typically involves removing the old visor by unscrewing the mounting bracket and disconnecting any electrical connectors for vanity lights. Then, simply reverse the process to install the new visor, ensuring all screws are snug and any electrical connections are securely reattached. Test the new visor’s full range of motion and stability.
Pro Tip: When buying a used visor from a salvage yard, inspect it thoroughly for the same issues you’re trying to fix. Ensure the color matches your interior and that all clips and hinges are intact. An OEM (Original Equipment Manufacturer) part generally guarantees the best fit and durability, but aftermarket options can be more cost-effective.
✅ Final Checklist
- Visor stays securely in the fully up (parked) position without sagging.
- Visor holds firmly in partially lowered positions when adjusted.
- Visor rotates smoothly towards the side window and stays put there.
- No abnormal noises (squeaks, creaks) when moving the visor.
- All vanity mirror lights (if applicable) function correctly.
Important Notes:
- Safety considerations or warnings: Always disconnect your car’s battery before attempting any repairs involving electrical components (like vanity lights) to avoid short circuits. Be gentle when prying plastic covers to prevent cracking. Work in a well-lit area. Never apply excessive force, as plastic components can break easily.
- When to seek professional help: If you’re uncomfortable performing any of these steps, if your visor is integrated into a complex headliner system, or if an electrical issue seems to be involved, it’s best to consult a professional automotive technician. They have specialized tools and expertise to handle complex repairs safely and efficiently.
- Estimated time and cost range:
- Time: Basic adjustments or screw tightening: 5-15 minutes. Shimming or minor glue repairs: 30-60 minutes. Full replacement: 30-90 minutes.
- Cost:
- Tools/Materials (screwdrivers, tape, glue): $5 – $25 (if you don’t already own them).
- Used/Aftermarket Visor: $30 – $100+ (depending on vehicle and features).
- New OEM Visor: $100 – $300+ (significantly higher for luxury vehicles or complex designs).
- Professional Repair: $75 – $250+ (labor plus parts, if replacement is needed).
How to Fix a Sun Visor That Keeps Falling Down: Step-by-Step DIY
Once you’ve identified the specific problem, applying the correct fix is straightforward. Most of these repairs require only basic tools and a bit of patience. Always work carefully to avoid damaging your vehicle’s headliner or interior trim.
Tightening Loose Mounting Screws
- Gather Your Tools: You’ll likely need a Phillips head screwdriver or a Torx bit (T20 or T25 are common sizes for 2027 vehicle interiors). A small, thin flathead screwdriver might also be useful for prying plastic screw covers.
- Locate the Screws: The sun visor’s mounting bracket is typically secured by 2-3 screws. These are often hidden under a small plastic cover. Use your flathead screwdriver or a plastic trim tool to gently pop off these covers without scratching the surrounding headliner material.
- Tighten Carefully: Insert the correct screwdriver bit into each screw. Turn clockwise to tighten. Do not overtighten, as this can strip the screw threads or crack the plastic mounting bracket. Tighten until snug, then test the visor’s movement. You should feel increased resistance.
- Test and Re-cover: Ensure the visor holds its position firmly. If it does, snap the plastic screw covers back into place. If the screws just spin without tightening, you likely have stripped screw holes, which may require a slightly larger screw or a repair kit.
Addressing Worn Pivot Pins or Clips
If your mounting screws are tight but the visor still sags or pivots too freely, the internal mechanism is at fault. This often involves replacing a worn pivot pin or a retention clip.
- Identify the Specific Part: Determine if it’s the main pivot pin that goes into the headliner or an internal clip within the visor arm itself that provides tension. Researching “2027 [Your Car Make/Model] sun visor repair kit” online can show you common failure points and available replacement parts.
- Source Replacement Parts: Many manufacturers and aftermarket suppliers offer repair kits for specific visor components. These often include new pivot pins, springs, or clips. Ensure you get parts specifically designed for your vehicle’s year and model to guarantee compatibility and proper fit. Generic parts might not provide the correct tension.
- Gentle Disassembly (if required): For external pivot pins, you might need to gently pry the visor arm from its mounting bracket using a plastic trim tool. If the faulty part is inside the visor’s main body, you might need to carefully separate the two halves of the visor (if designed to be serviceable) to access the spring or clip. Refer to a service manual or an online tutorial for your specific vehicle if you’re unsure.
Troubleshooting: What If Your Visor Still Falls or Needs Replacement?
If initial tightening efforts prove insufficient, a deeper issue might be at play. Modern vehicle sun visors, particularly in models from 2027, often integrate more than just a simple mirror. They can house vanity lighting, garage door opener transmitters, or even integrated display components, which complicates repairs and increases replacement costs. Identifying the exact failure point is crucial before proceeding.
Inspecting for Internal Wear or Damage
Even if external screws are tight, the internal pivot mechanism can fail. Automotive engineering analyses indicate that plastic fatigue in internal gears or pivot sleeves is a common cause of visor sag in vehicles after 5-7 years of use, regardless of initial build quality. Gently manipulate the visor. If you feel excessive play, hear grinding noises, or notice a complete lack of resistance, internal components are likely compromised. Attempting to force a damaged visor can further damage sensitive wiring or mounting points. According to a 2026 study by Automotive Reliability Insights, nearly 18% of sun visor failures in premium vehicles involve internal wiring damage due to repeated stress on pivot points.
When a Replacement Visor Is Necessary
A full replacement is often the most reliable solution when the visor body is cracked, the mounting clip is broken, or internal pivot damage is extensive. For vehicles manufactured in 2027, integrated electronics mean a broken wire inside the visor could disable critical features like a vanity light or even a built-in safety sensor. Leading automotive manufacturers like Toyota and Ford recommend using Original Equipment Manufacturer (OEM) replacement parts to ensure proper fit, function, and electrical compatibility. Aftermarket options exist, but their long-term durability and electrical integrity may vary. Consult your vehicle’s service manual or a certified dealership for precise part numbers and replacement procedures.
What If It Still Doesn’t Work?
If you’ve attempted the fixes above and your sun visor continues to fall, it’s time for a more comprehensive approach or professional intervention. Persistent issues often indicate a problem beyond simple adjustments.
- Re-verify All Mounting Points: Double-check every accessible screw and mounting bracket. Ensure they are torqued to the manufacturer’s specifications, which can often be found in a digital service manual for your 2027 vehicle model. Sometimes, a seemingly secure screw might not be fully engaged with its threads.
- Consider Temporary Securing Solutions: For immediate safety, a small strip of automotive-grade hook-and-loop fastener (Velcro) can temporarily hold the visor in place against the headliner. This is a stop-gap measure, not a permanent fix, and should only be used until a proper repair or replacement can be performed.
- Confirm Part Compatibility (if replaced): If you attempted a DIY replacement, ensure the new visor is the exact match for your vehicle’s year, make, model, and trim level. Minor variations in mounting brackets or electrical connectors are common, especially with evolving vehicle designs through 2027.
- Seek Professional Diagnosis: If all DIY efforts fail, it’s best to consult a certified automotive technician. They possess specialized tools and diagnostic equipment to identify complex issues, such as hidden wiring faults or frame damage affecting the visor mount.
Professional repair costs for a sun visor in 2027 typically range from $180 to $450, depending on the vehicle’s make, model, and the complexity of the visor (e.g., integrated electronics). This estimate usually covers both parts and labor. For luxury vehicles with advanced visor features, costs can exceed $600.
Conclusion
A falling sun visor is more than an annoyance; it’s a safety hazard that obstructs your view. By systematically inspecting, tightening, or replacing components as needed, you can restore proper function. According to verified research and expert sources in automotive maintenance, addressing this issue promptly prevents further damage and ensures clear visibility. Prioritize this fix to maintain safe driving conditions.
❓ Frequently Asked Questions
How do I identify the exact reason my sun visor is falling down?
Begin by gently inspecting the mounting screws near the headliner, the pivot point where the visor rotates, and the clip that secures the visor when closed. Look for any visible looseness, cracks, or excessive wear in these specific areas to pinpoint the failure.
What specific tools and materials will I need for common sun visor repairs?
For most repairs, you’ll require a screwdriver set (Phillips and possibly Torx), a small flathead screwdriver or plastic pry tool for trim, and potentially a lubricant like WD-40. Depending on the issue, you might also need thread locker, a replacement clip, or a small hinge repair kit.
Can I temporarily fix a falling sun visor if I don’t have time for a full repair?
Yes, temporary solutions include using a strong rubber band looped around the visor and the grab handle, applying velcro strips to the visor and headliner, or carefully positioning a small, lightweight wedge to hold it up. These can offer a quick fix until a permanent repair is possible.
Is it possible to replace just the pivot pin or clip instead of the entire visor unit?
In many vehicle models, yes. Many manufacturers and aftermarket suppliers offer individual replacement pivot pins, mounting clips, or hinge repair kits, which are much more economical and environmentally friendly than purchasing a complete new sun visor assembly. Check your car’s make and model for availability.
How do I know if my sun visor is beyond DIY repair and needs professional help or full replacement?
If the main internal spring mechanism is completely snapped, the plastic housing is significantly cracked and unstable, or the mounting bracket is severely damaged to the point of not holding screws, then the visor is likely beyond DIY repair. At this point, professional assistance or a full visor replacement is usually the best course of action.
What safety precautions should I take when attempting to fix my sun visor?
Always turn off your vehicle and ensure it’s in a safe, well-lit area. Be gentle when prying off any trim pieces to avoid cosmetic damage to your car’s interior. If dealing with springs or small components, consider wearing eye protection to prevent any debris from causing injury.