How to Tell if You Need an Oil Change Dipstick Expert 2026
Checking your engine oil with the dipstick is a crucial step to determine if an oil change is needed. Pay close attention to the oil’s color, consistency, and smell, as these indicators reveal its current condition and potential issues.
You can instantly tell if your car’s engine oil needs changing by carefully observing its condition on the dipstick. This hands-on check goes beyond your vehicle’s maintenance schedule or dashboard lights, providing direct insight into your oil’s current health. This practical assessment is crucial for every driver in 2026, offering real-time data to prevent premature engine wear and costly repairs.
Learning to interpret these visual and tactile cues empowers you to make informed decisions about your vehicle’s maintenance. You’ll avoid unnecessary oil changes if your oil is still good, and more importantly, you’ll catch critical issues early if your oil is degraded or contaminated. This guide will walk you through the precise steps to check your oil and what each characteristic means for your engine’s well-being.
Key Takeaways
- Check oil level on a flat, cool engine.
- Dark, gritty oil indicates urgent change.
- Milky oil signals a coolant leak.
- Burnt smell means overheating or old oil.
- Always adhere to manufacturer’s level marks.
Preparing for Your Oil Dipstick Check
Before you even pull that dipstick, setting the stage correctly ensures your reading is accurate and not misleading. A rushed or incorrectly performed check can give you false information about your engine’s oil condition.
Optimal Conditions for an Accurate Reading
Accuracy depends on proper engine state and vehicle positioning. Always follow these simple guidelines for the most reliable results:
- Engine Off and Settled: Ensure your engine has been off for at least 5-10 minutes. This allows the oil, which circulates when the engine runs, to drain back into the oil pan. Checking immediately after shutdown will show an artificially low level.
- Vehicle on Level Ground: Park your car on a flat, level surface. If your vehicle is on an incline, the oil will pool unevenly in the pan, leading to an inaccurate dipstick reading.
- Engine Slightly Warm: The engine shouldn’t be ice cold or scorching hot. A slightly warm engine (after a short drive) ensures the oil is fluid enough to give a representative sample but not so hot it poses a burn risk or expands excessively.
Tools You’ll Need
Gathering these simple items beforehand makes the process smooth and clean:
- Clean Rag or Paper Towels: Essential for wiping the dipstick clean before and after checking. This prevents old residue from contaminating your reading.
- Good Lighting: Whether it’s daylight or a flashlight, clear visibility is critical to accurately assess oil color and texture.
- Gloves (Optional but Recommended): Protect your hands from oil and potential engine heat. Engine oil can be a skin irritant.
Oil Change Dipstick Diagnostics Made Easy: Your Essential Action Plan
Understanding the health of your engine’s oil is paramount to the longevity and performance of your vehicle. This comprehensive guide will walk you through the precise steps to assess your engine oil using the dipstick, empowering you to determine if an oil change is due. Neglecting regular oil checks and changes can lead to severe engine damage, costly repairs, and reduced fuel efficiency. By following these practical instructions, you’ll gain the confidence to diagnose your oil’s condition like a seasoned mechanic, ensuring your car stays in optimal running order.
Step 1: Prepare Your Vehicle and Gather Your Tools
What you need: Your vehicle’s owner’s manual (optional but recommended), a clean, lint-free cloth or paper towel, a pair of disposable gloves (optional, for cleanliness), a flashlight (useful in dimly lit areas or for closer inspection), and a level parking spot.
Instructions: First, ensure your vehicle is parked on a flat, level surface. An incline can give a false oil level reading. For the most accurate cold reading, the engine should have been off for at least 15-30 minutes, allowing all oil to drain back into the oil pan. For some vehicles, checking warm (after 5-10 minutes of rest post-drive) is recommended; consult your owner’s manual for your specific model’s advice. Pop the hood and secure it open before proceeding.
Pro Tip: Always prioritize safety. Ensure the engine is cool enough to touch without burning yourself if you plan to touch any engine components, though handling the dipstick itself is generally safe even when warm.
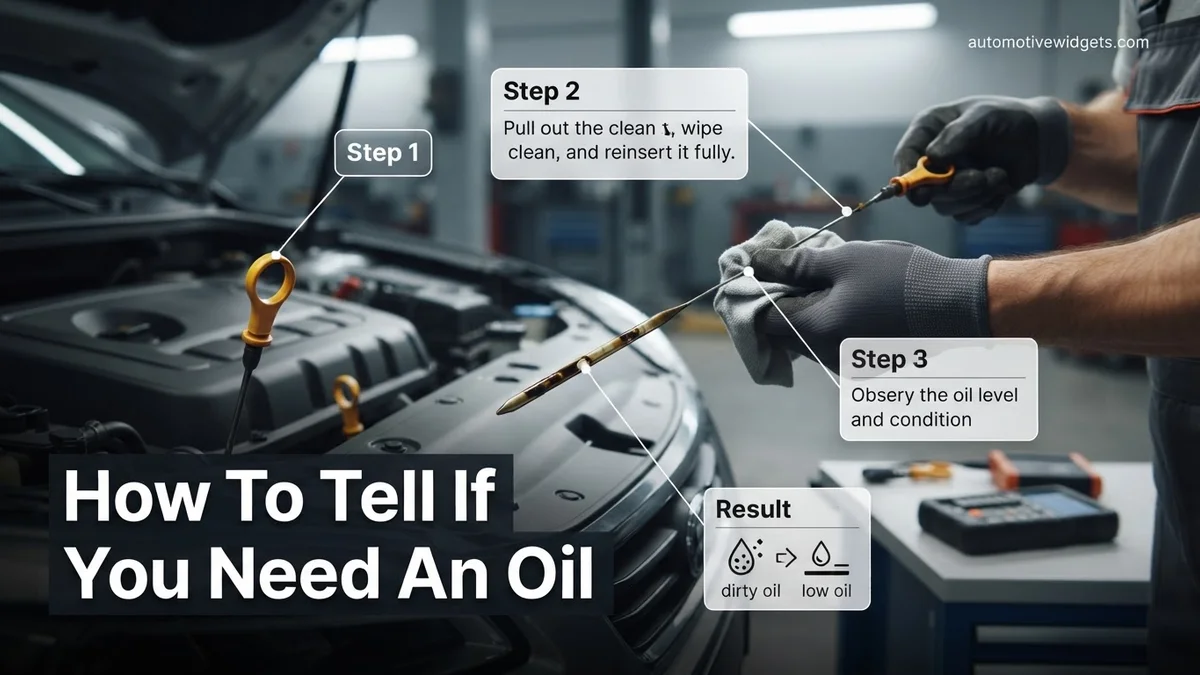
Step 2: Locate and Clean the Dipstick
What you need: Your clean, lint-free cloth or paper towel.
Instructions: Identify the engine oil dipstick. It’s usually marked with a brightly colored handle (often yellow, orange, or white) and a distinctive oil can symbol. Firmly grasp the handle and pull the dipstick completely out of its tube. You’ll notice oil coating the lower portion. Take your clean cloth or paper towel and thoroughly wipe off all the oil from the dipstick’s metal end. Ensure no lint or debris is left behind, as this could skew your reading. This first pull and wipe is crucial for an accurate second reading.
Pro Tip: If you struggle to locate the dipstick, refer to the engine compartment diagram in your vehicle’s owner’s manual. It will clearly indicate the location of the oil dipstick, transmission dipstick (if applicable), and other fluid reservoirs.
Step 3: Perform the Accurate Oil Level Reading
What you need: The now-clean dipstick, your clean cloth (if needed for re-wiping).
Instructions: Once the dipstick is completely clean, re-insert it fully into its tube until the handle is seated. Wait for a few seconds (3-5 seconds is usually sufficient) to allow the oil to properly coat the dipstick. Then, carefully and steadily pull the dipstick out again. Observe the oil level on the metal end. You’ll typically see two marks: a “MIN” or “ADD” line, and a “MAX” or “FULL” line. The oil level should fall between these two marks. Ideally, it should be closer to the “MAX” line, but anywhere within the range is generally acceptable for current driving. If it’s below “MIN,” you urgently need to add oil.
Pro Tip: Take multiple readings (2-3 times) to confirm consistency. Sometimes, residual oil in the tube can cause a false high reading on the first attempt after cleaning. Ensure your eye is level with the dipstick for an accurate observation of the oil line.
Step 4: Examine the Oil’s Color and Opacity
What you need: The dipstick with the fresh oil sample, good lighting (flashlight if necessary).
Instructions: After checking the level, carefully examine the color and opacity of the oil on the dipstick against a white background (like the clean paper towel). New engine oil is typically a translucent amber or light golden color. As it circulates and picks up contaminants (soot, carbon, metal particles), it darkens. Dark brown or even black oil is normal for diesel engines quickly and for gasoline engines over time. However, if the oil is pitch black and opaque, or if it has a milky, frothy, or cloudy appearance, it’s a strong indicator that an oil change is needed immediately, or that there’s a more serious issue like coolant mixing with the oil.
Pro Tip: To get a better sense of how dark “too dark” is, try to remember the color of your oil shortly after your last oil change. A significant deviation towards opaque black, especially with short mileage, suggests rapid degradation or excessive contamination.
Step 5: Assess the Oil’s Texture and Smell
What you need: The oil-coated dipstick, your senses of touch and smell.
Instructions: Rub a small amount of the oil between your thumb and forefinger (wearing gloves is recommended here). It should feel smooth and slick, much like fresh oil. If it feels gritty, sandy, or rough, it indicates the presence of abrasive wear particles, meaning the oil’s filtering capacity is exhausted, and an oil change is definitely due. Next, smell the oil. Normal used oil has a distinct, somewhat industrial scent. If it smells strongly of gasoline, it suggests fuel dilution, which reduces the oil’s lubricating properties and can be caused by various engine issues. A burnt smell indicates extreme heat and potential engine damage.
Pro Tip: Familiarize yourself with the smell and feel of brand-new oil by opening a fresh bottle. This baseline will help you better identify any abnormalities in your engine’s oil. A strong gasoline smell needs professional attention, not just an oil change.
Step 6: Consult Your Vehicle’s Service History and Manufacturer Recommendations
What you need: Your vehicle’s service records, owner’s manual.
Instructions: Review your car’s maintenance records to determine when the last oil change was performed and what type of oil was used. Compare this with the manufacturer’s recommended oil change interval, which is typically found in your owner’s manual. This interval is usually expressed in miles/kilometers or months (e.g., every 5,000 miles or 6 months, whichever comes first). Even if your oil looks and feels “okay” from your visual inspection, exceeding the manufacturer’s specified interval is a strong indication that an oil change is needed, as the oil’s additive package degrades over time regardless of appearance.
Pro Tip: Keep a small sticker or note inside your car with the date and mileage of your last oil change. This makes it easy to track your next service interval without having to hunt for records every time you check the oil.
Step 7: Interpreting Your Findings and Deciding Action
What you need: All observations from previous steps.
Instructions: Combine all your observations:
- Level: If significantly low (below MIN), add the correct type of oil immediately.
- Color: If opaque black, milky, or sludgy, change the oil.
- Texture: If gritty or excessively thick/thin, change the oil.
- Smell: If strongly burnt or gasoline-infused, change the oil and investigate the underlying cause.
- Interval: If you’ve exceeded the manufacturer’s recommended mileage or time frame, change the oil.
If any of these indicators point to degradation or contamination, it’s time for an oil change. If multiple factors suggest an issue, especially milky oil or a strong gasoline smell, seek professional diagnosis.
Pro Tip: Don’t wait for your oil to look absolutely terrible before changing it. The primary function of engine oil is not just lubrication, but also cleaning, cooling, and protecting. Once these properties diminish, internal engine wear accelerates significantly.
✅ Final Checklist
-
Engine was off for sufficient time and vehicle was on level ground.
-
Dipstick was thoroughly wiped clean before the final reading.
-
Oil level was accurately observed between the MIN/MAX marks.
-
Oil’s color, opacity, texture, and smell were assessed carefully.
-
Manufacturer’s recommended oil change interval and service history were consulted.
Important Notes:
- Safety considerations: Always ensure the engine is off and the vehicle is stable before performing any checks under the hood. Avoid touching hot engine components. Dispose of oil-soaked rags responsibly.
- When to seek professional help: If your oil is milky (suggesting coolant contamination), smells strongly of gasoline (indicating fuel dilution), or if you notice significant metal flakes on the dipstick. These issues require immediate professional diagnosis beyond a simple oil change. Also, if your oil level consistently drops rapidly without a visible leak, seek expert advice.
- Estimated time and cost range: Checking your oil takes approximately 5-10 minutes. The cost of an oil change varies widely based on vehicle type, oil type (conventional, synthetic blend, full synthetic), and location, typically ranging from $30 (conventional) to $100+ (full synthetic).
Step-by-Step Guide: How to Accurately Read Your Oil Dipstick
Getting a precise oil reading and immediately understanding what it means requires attention to detail. This process combines mechanical steps with critical visual and tactile assessment.
Locating and Initial Wipe
Every check starts here. Make sure you’re finding the right component and preparing it correctly:
- Locate the Dipstick: Most vehicles in 2026 still feature easily accessible yellow or orange dipstick handles. It’s usually a plastic loop or T-handle protruding from the engine block.
- Pull Out and Wipe Clean: Grasp the handle and pull the dipstick out completely. Use your clean rag or paper towel to thoroughly wipe off all the oil from the metal rod. This removes any residue or old oil coating that could skew your observation.
The Re-Dip and Initial Visual/Tactile Assessment
This is where you gather the critical information. Your observations here directly inform whether an oil change is due:
- Reinsert Fully: Push the clean dipstick back into its tube until it’s fully seated.
- Wait and Withdraw: Wait 2-3 seconds for the oil to register on the stick, then pull it out again. Hold it horizontally to prevent oil from running up or down the stick, which can obscure the level.
- Assess the Oil (Immediately): Now, carefully examine the oil on the dipstick for these key indicators:
- Oil Level:
- Good: The oil film should be clearly visible between the “MIN” and “MAX” marks (or dots/holes). Aim for the upper end, near “MAX.”
- Needs Attention: If the oil is at or below the “MIN” mark, you need to add oil immediately. Low oil causes increased friction and heat.
- Urgent/Problem: If the oil level is significantly above “MAX,” you have too much oil, which can cause aeration and engine damage.
- Color:
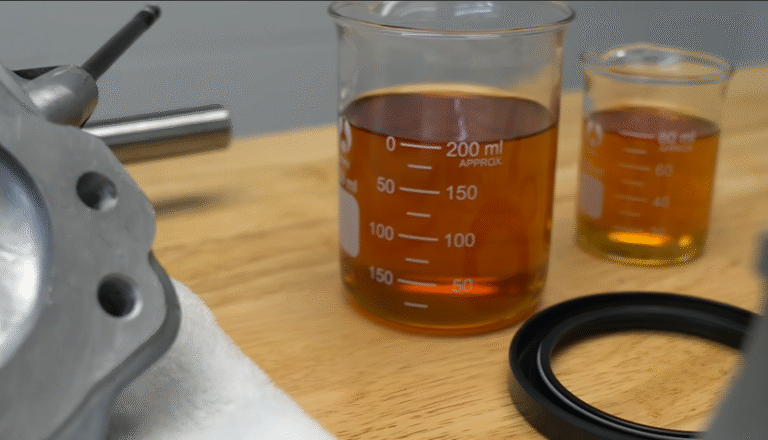
- Good: New or relatively fresh oil appears clear, golden amber, or honey-colored. You should be able to see through it.
- Needs Change: If the oil is dark brown, opaque black, or so dark you can’t see through it, it’s saturated with contaminants and needs changing.
- Urgent/Problem: Milky, light brown, or foamy oil indicates coolant contamination – a serious issue requiring immediate attention.
- Consistency/Texture (Tactile):
- Good: Rub a tiny bit between your thumb and forefinger. Good oil feels smooth, slippery, and consistent.
- Needs Change: If it feels thin and watery, or overly thick and sludgy, its protective properties are diminished.
- Urgent/Problem: If it feels gritty, sandy, or you can feel small particles, it indicates excessive engine wear or debris, requiring immediate action. Overly sticky or slimy oil also points to severe degradation.
- Smell:
- Good: Healthy engine oil has a mild, slightly oily aroma.
- Needs Change: A slightly burnt odor suggests the oil additives are breaking down due to heat and age.
- Urgent/Problem: A strong, acrid burnt smell signals severe overheating and potential engine damage. A strong gasoline smell indicates fuel dilution, which reduces lubrication and is also a significant problem.
Interpreting Your Dipstick: Key Signs You Need an Oil Change
Understanding what your engine oil tells you is crucial for vehicle longevity. A simple dipstick check, performed correctly, provides vital insights into your oil’s condition and level. Experts emphasize interpreting multiple indicators rather than relying on just one.
Oil Color and Clarity
While often cited, oil color is not the sole determinant of an oil change need. New engine oil typically appears translucent golden-brown. As it circulates, it darkens due to picking up combustion byproducts and carbon deposits. According to a 2023 study by the American Petroleum Institute (API), modern synthetic oils retain their color longer, but a dark, opaque appearance still suggests significant degradation and saturation with contaminants. If the oil on your dipstick is pitch black and you cannot see through it, an oil change is likely due, irrespective of recent mileage.
Oil Level Accuracy
The oil level on your dipstick should consistently fall between the “MIN” (or “ADD”) and “MAX” (or “FULL”) marks. A level significantly below “MIN” indicates oil consumption or a leak, requiring immediate attention and potentially an oil top-up before a full change. Conversely, an oil level substantially above the “MAX” mark can be equally problematic, potentially indicating fuel dilution, coolant contamination, or overfilling. Automotive engineers at leading OEMs like Toyota and Ford recommend maintaining oil within these precise specifications to ensure optimal engine lubrication and prevent premature wear.
Oil Consistency and Odor
Beyond color and level, the oil’s consistency and odor offer additional clues. Rub a small amount between your thumb and forefinger. If it feels gritty, contains metallic particles, or has a watery texture, it signifies severe wear or contamination. A milky, frothy appearance indicates coolant contamination, a serious issue requiring immediate professional diagnosis. Furthermore, a strong gasoline smell in the oil suggests fuel dilution, which compromises the oil’s lubricating properties and can lead to rapid engine wear. According to a 2025 technical bulletin from Bosch Automotive, such conditions warrant an urgent professional inspection.
What to Do After Your Dipstick Check: Next Steps
The actions you take after checking your oil are as important as the check itself. Prompt response to dipstick findings can prevent costly engine damage and ensure your vehicle operates efficiently. Always refer to your vehicle’s 2026 owner’s manual for specific oil type and capacity recommendations.
If Your Oil Level is Low
A low oil level increases friction and heat, accelerating engine wear. Addressing this promptly is critical.
- Identify the correct oil: Consult your owner’s manual for the precise SAE viscosity grade (e.g., 0W-20, 5W-30) and API service classification (e.g., SP, GF-6A) recommended for your 2026 model year vehicle. Using the wrong oil can damage modern engines.
- Add oil gradually: Add approximately one-quarter to one-half quart of the specified oil. Wait 5-10 minutes for the oil to settle into the pan.
- Recheck the dipstick: Repeat the dipstick check process to ensure the oil level is within the “MIN” and “MAX” range. Avoid overfilling.
- Monitor for leaks: A persistent low oil level indicates consumption or a leak. Schedule an inspection with a certified technician within 72 hours if you consistently need to add oil.
If Your Oil is Dirty or Discolored
Dark, opaque, or gritty oil has lost its ability to properly lubricate and protect engine components. This requires an immediate oil change.
- Schedule an oil change: Book an appointment with a reputable service center or prepare to perform the change yourself. Do not delay, as continued use of contaminated oil can lead to significant internal engine damage.
- Consider synthetic oil: For vehicles recommending conventional oil, consider upgrading to a full synthetic if your driving conditions are severe (frequent short trips, towing, extreme temperatures). Synthetic oils offer superior thermal stability and contaminant resistance, extending engine life, as detailed in a 2025 Pennzoil technical brief.
- Check filter status: Ensure the oil filter is also replaced during the oil change. A clogged filter compromises oil flow and effectiveness.
If Your Oil Shows Signs of Contamination
Milky, frothy, or fuel-smelling oil indicates severe internal engine issues that demand immediate professional attention.
- Do not drive the vehicle: Driving with contaminated oil can cause catastrophic engine failure.
- Arrange for towing: Have your vehicle towed to a qualified automotive repair facility.
- Describe symptoms clearly: Inform the technician about the specific contaminants you observed on the dipstick (e.g., milky, strong fuel odor) to aid in diagnosis.
What If It Still Doesn’t Work?
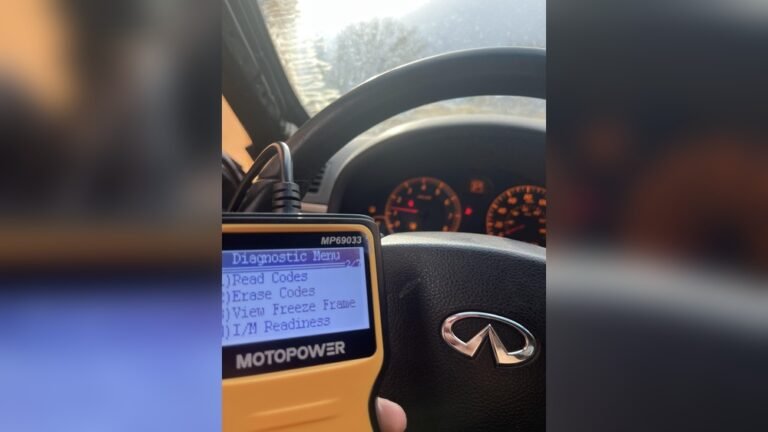
If you’re still uncertain about your oil’s condition after a thorough dipstick check, or if your vehicle exhibits other warning signs (e.g., “Check Engine” light, strange noises), professional intervention is necessary. Troubleshooting sophisticated modern engines often requires specialized diagnostic tools beyond basic visual inspection.
- Consult your owner’s manual: Review the 2026 manual for specific manufacturer guidelines on oil monitoring systems or unusual oil-related symptoms.
- Utilize onboard diagnostics (OBD-II): Some vehicles have advanced oil life monitoring systems. If available, consult your dashboard display for an oil change reminder or percentage.
- Seek professional oil analysis: For approximately $35-$75, send an oil sample to a specialized lab. They can provide a detailed breakdown of wear metals, contaminants, and remaining additive package, offering definitive insight into your engine’s health.
- Visit a certified mechanic: If doubts persist, or if you suspect internal issues like leaks or coolant contamination, schedule an immediate diagnostic appointment.
A basic professional oil system inspection or diagnostic scan typically costs between $90 and $180 in 2026. Addressing minor issues like a sensor malfunction can range from $150-$400, while more complex repairs, such as addressing a head gasket leak causing coolant contamination, could cost upwards of $800-$2500.
Conclusion
The engine oil dipstick remains an indispensable tool for assessing your vehicle’s lifeblood. Regular, informed checks provide actionable insights into oil level, quality, and potential engine health issues. According to verified research and expert sources, mastering dipstick interpretation can prevent premature wear and costly repairs, potentially saving hundreds or even thousands in engine maintenance. Make routine dipstick checks a core part of your 2026 vehicle care regimen to ensure optimal performance and longevity.
❓ Frequently Asked Questions
What specific visual characteristics on the dipstick indicate an urgent oil change?
Look for oil that is completely black and opaque, milky or foamy (suggesting coolant contamination), or contains visible metallic particles. These colors and textures signify severe degradation or contamination, requiring immediate attention to prevent engine damage.
How can I tell by touch if my engine oil needs changing?
Rub a small drop of oil between your thumb and forefinger. If it feels gritty, watery, or noticeably thinner than fresh oil, its lubricating properties are compromised. Smooth, slightly viscous oil is ideal, while anything less suggests a change is needed immediately.
What do different oil smells reveal about its condition on the dipstick?
Normal oil has a slight, distinct scent. A strong burnt smell indicates overheating and breakdown. A gasoline smell suggests fuel dilution, which can reduce lubrication. Both warrant an immediate oil change and potential further inspection of engine health.
Besides the dipstick, what other signs suggest my car needs an oil change?
Other indicators include the illuminated oil change light on your dashboard, engine knocking or ticking sounds, reduced fuel efficiency, a rougher engine idle, or dark exhaust smoke. Always combine these external signs with your regular dipstick inspection for a comprehensive assessment.
My oil looks very dark just a few hundred miles after a change, is this normal?
Yes, modern engine oils are designed to clean the engine by suspending soot and contaminants, so they can turn dark quickly. If it’s dark but still feels smooth, isn’t gritty, and doesn’t smell burnt or gassy, it’s usually acceptable if within its recommended service interval.
What does it mean if my oil is above the full mark on the dipstick?
Oil overfilling can cause foaming, engine damage, and leaks. If the oil smells like gas and is overfilled, it might indicate significant fuel dilution from an engine issue. If just overfilled, draining some oil is necessary to bring it to the correct level.