How to Pass Inspection with Check Engine Light 2026
Passing a vehicle inspection with an active check engine light (CEL) is often impossible without proper diagnosis and repair, as most states require a clear system. Understanding readiness monitors and state-specific rules is crucial for successfully addressing the CEL and getting your vehicle approved.
Your check engine light (CEL) is on, and you need to pass vehicle inspection in 2026. The critical factor for success isn’t solely about fixing the underlying code; it’s also about ensuring your vehicle’s onboard diagnostic (OBD-II) system completes its essential “readiness monitors.” Many drivers mistakenly clear a code, only to fail inspection because these monitors haven’t reset to a “ready” state.
Failing inspection means you can’t register your vehicle, leading to significant inconvenience and potential fines. Understanding readiness monitors is paramount for a smooth re-inspection process. This knowledge can save you valuable time and money, getting you back on the road compliant with 2026 emissions standards.
Key Takeaways
- Diagnose CEL codes immediately for root cause.
- Clear codes only AFTER repairs are complete.
- Complete drive cycles for readiness monitors to set.
- Know your state’s specific inspection regulations.
- Address common issues like a loose gas cap first.
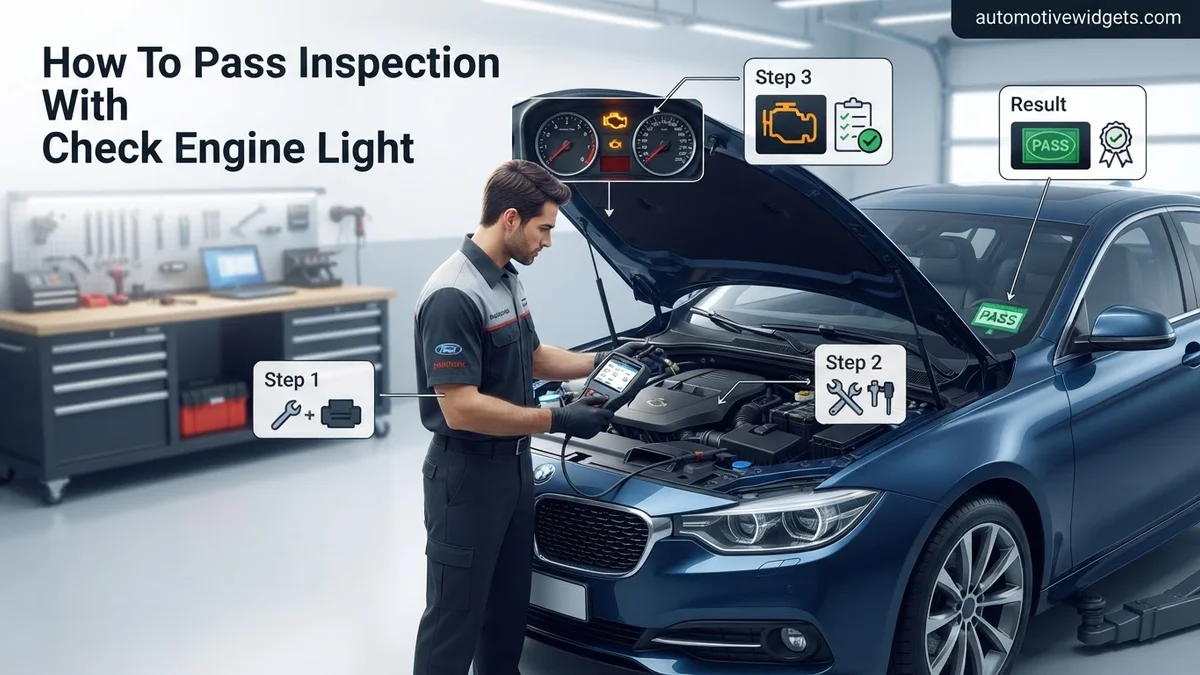
What Causes Your Check Engine Light to Stay On for Inspection?
Beyond the Malfunction: Understanding Readiness Monitors
While the check engine light illuminates to signal a problem, for inspection purposes in 2026, the real hurdle is your car’s readiness monitors. These are self-tests performed by your vehicle’s engine control unit (ECU) to confirm all emissions-related systems are functioning correctly. Modern vehicles typically have between 8 to 11 monitors, continuously checking components like oxygen sensors, the catalytic converter, and the evaporative emission control (EVAP) system.
If your CEL was recently cleared, either by a repair shop or yourself, these monitors automatically reset to an “incomplete” or “not ready” status. An inspection station’s OBD-II scanner will detect this. Most states in 2026 permit only one or two “not ready” monitors (usually for non-continuous systems like EVAP or Catalyst). If too many are incomplete, you face an automatic inspection failure, even if the CEL itself is off.
Your vehicle’s system requires specific driving conditions over time to re-run and complete these tests. This critical process is universally known as a “drive cycle.”
Common CEL Triggers Beyond Readiness
While monitor readiness is paramount for inspection, the CEL itself always points to an underlying fault. In 2026, the common culprits for a check engine light haven’t changed significantly:
- Loose or faulty gas cap: This is the simplest and often overlooked fix, directly impacting the EVAP system.
- Failing oxygen (O2) sensor: A bad O2 sensor directly affects fuel efficiency and increases harmful emissions.
- Catalytic converter issues: This is a costly repair, often caused by other unresolved engine problems like persistent misfires.
- Faulty spark plugs or ignition coils: Misfires lead to incomplete combustion and higher emissions.
- Mass Airflow (MAF) sensor: A dirty or failing MAF sensor sends incorrect air intake data, causing an improper fuel mixture.
Correctly diagnosing these issues is the essential first step before even thinking about monitor readiness. Remember, clearing a code without addressing the root cause virtually guarantees the light will return, and it will reset your readiness monitors all over again.
From Start to Finish: Passing Inspection with a Check Engine Light Explained
A glowing Check Engine Light (CEL) can be a source of immediate dread, especially when your vehicle’s inspection or emissions test is looming. While simply clearing the code might seem like a quick fix, it often leads to a failed inspection because emission monitors haven’t had enough time to reset. This comprehensive guide will walk you through the essential steps, from diagnosing the root cause to ensuring your vehicle is fully ready to pass its mandated inspection. Following these instructions meticulously will not only help you resolve the issue but also prevent unnecessary re-tests and potential fines.
Step 1: Retrieve Diagnostic Trouble Codes (DTCs)
What you need: An OBD-II (On-Board Diagnostics II) scanner. These can be purchased affordably online or at auto parts stores, or you can often get a free scan at a local auto parts retailer.
Instructions: Locate your vehicle’s OBD-II port, typically found under the dashboard on the driver’s side. Plug in the scanner and turn your ignition to the “ON” position (do not start the engine). Follow the scanner’s prompts to “Read Codes.” Carefully write down all displayed codes (e.g., P0420, P0301) along with any accompanying descriptions. Some scanners also show “pending” codes; note these as well, as they indicate issues that haven’t yet triggered the CEL but are close to doing so.
Pro Tip: Most modern scanners can display live data. While advanced, even basic real-time readings like engine temperature or RPM can give clues about engine health. Always note the “freeze frame” data if your scanner provides it, as this records engine conditions when the code was set.
Step 2: Decode and Research Your Diagnostic Trouble Codes (DTCs)
What you need: Internet access (smartphone, computer), and potentially a vehicle-specific repair manual (online or physical).
Instructions: Once you have your DTCs, the next crucial step is to understand what they mean. Use a search engine (e.g., Google) to look up each code individually. For example, search “P0420 code meaning” and include your car’s make and model. You’ll find common causes, symptoms, and potential fixes. Pay attention to multiple sources to get a well-rounded understanding. Websites like OBD-Codes.com or forums specific to your vehicle model are invaluable resources for real-world experiences and troubleshooting tips.
Pro Tip: Don’t just address the first code. Sometimes, one faulty component (like a failing oxygen sensor) can trigger multiple related codes (e.g., catalytic converter inefficiency). Always look for Technical Service Bulletins (TSBs) issued by the manufacturer for your specific codes, as these often detail known issues and official repair procedures.
Step 3: Perform Initial Visual Inspection and Simple Fixes
What you need: Flashlight, work gloves, basic hand tools (screwdriver, pliers), and potentially a new gas cap.
Instructions: Before diving into complex repairs, check the simplest culprits. Start by ensuring your gas cap is tightened securely; a loose cap is a very common cause of evaporative emission (EVAP) system codes (P0440, P0442, P0455). Visually inspect all accessible vacuum hoses under the hood for cracks, disconnections, or obvious damage. Look for frayed or chewed wires, especially near sensors. Check fluid levels and any signs of leaks. Sometimes, a minor issue like a disconnected mass airflow sensor (MAF) connector can trigger a CEL.
Pro Tip: If your gas cap looks old or its seal is cracked, replace it with a new OEM (Original Equipment Manufacturer) or high-quality aftermarket cap. This is a cheap and easy fix that resolves many EVAP-related CELs. Ensure the new cap clicks several times when tightened.
Step 4: Address the Root Cause with Necessary Repairs
What you need: Specific hand tools (wrenches, sockets, torque wrench), replacement parts (e.g., O2 sensor, EVAP purge valve, spark plugs), safety glasses, and a reliable repair manual for your vehicle.
Instructions: Based on your research and initial inspection, identify the most likely faulty component. For example, if you have a P0420 code after ruling out exhaust leaks, it might point to a failing catalytic converter or a faulty oxygen sensor. If it’s a P030X misfire code, check spark plugs, ignition coils, or fuel injectors. Disconnect the car’s battery before starting any electrical work. Carefully follow repair manual instructions for replacing the component, paying attention to torque specifications and proper connections. Ensure all new parts are correctly installed.
Pro Tip: When replacing sensors, always opt for OEM or reputable aftermarket brands. Cheap, generic sensors can sometimes cause more problems than they solve, leading to inaccurate readings and persistent CELs. Use dielectric grease on electrical connectors to prevent corrosion and ensure a good connection.
Step 5: Clear Codes and Initiate Drive Cycle Procedures
What you need: OBD-II scanner.
Instructions: After completing the repair, reconnect the battery (if disconnected). Use your OBD-II scanner to clear all stored diagnostic trouble codes. This will turn off the Check Engine Light. The crucial next step is to perform a “drive cycle.” This is a specific sequence of driving conditions (cold start, varied city driving, sustained highway speed, deceleration) designed to allow your vehicle’s onboard computer to run self-tests and “set” all the emission monitors. Consult your vehicle’s owner’s manual or an online resource for your specific make/model’s drive cycle procedure, as they vary.
Pro Tip: Simply clearing the codes and immediately going for an inspection will result in a failure because the “readiness monitors” will be “not ready” or “incomplete.” It can take 50-200 miles of varied driving, sometimes over several days, for all monitors to complete their tests. Patience is key here.
Step 6: Verify Emission Monitor Readiness Status
What you need: OBD-II scanner with I/M Readiness (Inspection/Maintenance Readiness) function.
Instructions: After completing your drive cycle, plug in your OBD-II scanner again. Navigate to the “I/M Readiness” or “Readiness Monitors” section of the scanner’s menu. This function displays the status of various emission system tests (e.g., O2 Sensor, EVAP System, Catalyst, EGR System). You want to see “READY” or “COMPLETE” next to as many monitors as possible. Most states allow one or, in some cases, two monitors to be “NOT READY” and still pass inspection (excluding the Catalyst and EVAP monitors in many areas). Consult your local DMV or inspection station for precise requirements.
Pro Tip: If certain monitors remain “NOT READY” despite extensive driving, there might be a lingering issue that prevents their completion, or your specific drive cycle wasn’t sufficient. Focus on ensuring critical monitors like Catalyst, O2 Sensor, and EVAP are complete first. Persistent “NOT READY” status usually points to a subtle problem or a difficult-to-complete monitor for your vehicle model.
Step 7: Final Pre-Inspection Check and Proceed
What you need: Your vehicle, current registration, proof of insurance, and a calm demeanor.
Instructions: Before heading to the inspection station, perform a final verification. Ensure the Check Engine Light is off and has not re-illuminated. Connect your OBD-II scanner one last time and confirm that all required emission monitors are showing “READY” or “COMPLETE” according to your state’s regulations. Drive the vehicle normally to the inspection station; avoid any aggressive driving or rapid changes in speed immediately before arrival. Present your vehicle for inspection with confidence, knowing you’ve diligently prepared it to pass.
Pro Tip: Do NOT clear the codes again right before inspection, even if the light isn’t on. Clearing codes resets all the monitors to “NOT READY,” guaranteeing a failed inspection. The goal is to fix the underlying problem, allow the computer to confirm the fix (by setting the monitors), and then present the car with a clear light and ready monitors.
✅ Final Checklist
-
All DTCs (Diagnostic Trouble Codes) have been retrieved, researched, and understood.
-
The root cause of the Check Engine Light has been identified and properly repaired.
-
The Check Engine Light is OFF and has remained off for a significant drive period.
-
All required emission “readiness monitors” show “READY” or “COMPLETE” on an OBD-II scanner, meeting your state’s specific inspection criteria.
-
No new codes have appeared since the repair and drive cycle.
Important Notes:
- Safety considerations: Always disconnect the car’s battery before working on electrical components. Allow the engine to cool before working on hot components like exhaust or engine parts. Use jack stands if lifting the vehicle. Wear appropriate personal protective equipment (gloves, safety glasses).
- When to seek professional help: If you’re unsure about diagnosing the problem, lack the necessary tools, or if the repair involves complex engine components (e.g., internal engine work, transmission issues), it’s always best to consult a certified mechanic. They have specialized diagnostic equipment and expertise to handle intricate problems.
- Estimated time and cost range:
- Time: From a few hours (for simple fixes like a gas cap or a quick sensor replacement) to several days (for extensive drive cycles after a major repair).
- Cost: Can range from $0 (if only a gas cap tightening was needed) to $50-$200 (for an OBD-II scanner, new gas cap, or a simple sensor) up to $500-$2000+ (for more complex repairs like catalytic converters or major engine component replacements, especially if professional labor is involved).
Step-by-Step Guide to Fix Your Check Engine Light for Inspection
Diagnosing the Root Cause (Before Clearing Codes)
Never simply clear your CEL; you must first understand what triggered it. Your personal OBD-II scanner is your most valuable tool here. Many auto parts stores continue to offer free code readings in 2026, or you can easily purchase an inexpensive scanner. Bluetooth-enabled models that connect directly to your smartphone are very popular and user-friendly.
- Retrieve the Trouble Code: Plug your scanner into the OBD-II port, typically located under the dashboard on the driver’s side. Make sure to accurately record the specific P-code displayed (e.g., P0420 for catalyst efficiency, P0171 for a lean condition).
- Research the Code: Perform a quick online search using your specific P-code. This will provide you with common causes, diagnostic procedures, and potential solutions. For example, a P0420 almost always indicates the catalytic converter’s efficiency is below the required threshold.
- Inspect the Obvious: Always start with the simplest checks. Ensure your gas cap is tightened correctly until it clicks. Visually inspect your engine bay for any obvious disconnected hoses, loose wires, or visible leaks.
- DIY vs. Professional: Minor fixes, like a loose gas cap or even replacing an accessible O2 sensor, are often manageable DIY projects. However, for complex issues such as catalytic converter replacement or intricate internal engine faults, professional diagnosis and repair are strongly recommended. Modern mechanics in 2026 utilize advanced diagnostic equipment far beyond simple code reading to pinpoint exact problems.
Always prioritize fixing the actual problem first. Clearing the code before completing a repair is merely guessing, and it will unnecessarily reset those critical readiness monitors, delaying your inspection success.
Executing the Drive Cycle for Readiness Monitors
Once you’ve completed the necessary repair and the trouble code has either been cleared or has extinguished itself, the next critical step is getting those readiness monitors to switch to “ready.” This requires performing a specific “drive cycle.” While the exact pattern can vary slightly between vehicle manufacturers, the general principles remain consistent for 2026 vehicles:
- Cold Start: Begin your drive with a completely cold engine. This is crucial for some monitors to run.
- Mixed Driving: Incorporate a blend of driving conditions. This should include sustained highway speeds (typically 55-60 mph for 10-15 minutes) and stop-and-go city driving with varying acceleration and deceleration.
- Idle Periods: Allow the car to idle for several minutes at various points during your drive. This helps specific monitors complete their tests.
- Fuel Level: Maintain your fuel tank level between 1/4 and 3/4 full. Very low or very high fuel levels can prevent the EVAP monitor from running.
You might need to repeat this drive cycle a few times over several days. Use your OBD-II scanner to periodically check the status of your monitors; it will display “complete” or “ready” for each one. Only proceed to the inspection station once almost all monitors are complete. Always verify your local 2026 inspection rules for the specific number of incomplete monitors allowed in your jurisdiction.
What If Your Check Engine Light Still Returns After Fix Attempts?
Even after addressing initial trouble codes, the Check Engine Light (CEL) can sometimes reappear. This often indicates a deeper, unresolved issue or a misdiagnosis. According to a 2025 Automotive Service Association report, approximately 15% of CEL diagnoses require a second-level investigation due to persistent symptoms.
Re-evaluating the Diagnostic Trouble Codes (DTCs)
- Perform a fresh scan: Use an OBD-II scanner to re-read any current or pending DTCs. New codes may have appeared, pointing to a different component failure or an issue triggered by the initial repair.
- Analyze freeze frame data: This data, captured by your vehicle’s Powertrain Control Module (PCM) the moment a fault occurred, provides crucial operating conditions (engine RPM, temperature, load, fuel trim). This can help identify specific scenarios where the fault recurs, guiding further diagnostics.
- Check for related TSBs (Technical Service Bulletins): Vehicle manufacturers often issue TSBs for known, recurring issues that might not trigger distinct DTCs or are part of a larger system problem. Accessing these through a professional diagnostic service can save significant time and money.
Inspecting Intermittent Issues and Related Systems
Intermittent CELs are particularly challenging. Expert technicians in 2026 frequently use advanced diagnostic tools that monitor live data streams over extended periods, identifying anomalies that occur under specific driving conditions. For example, a failing sensor might only malfunction when the engine reaches a certain operating temperature or under heavy acceleration. Focus on components related to the original fault, checking wiring harnesses for chafing, connectors for corrosion, and vacuum lines for subtle leaks that might only open under engine movement or vacuum changes. Modern vehicles, compliant with 2026 emission standards, are highly sensitive to even minor deviations in sensor readings.
Mastering Readiness Monitors: Your Key to Passing Inspection
Even with no active Check Engine Light, your vehicle can fail an inspection if its “readiness monitors” are not set. These are self-tests the vehicle’s computer performs on emission-related systems. For a successful 2026 inspection, most states require all monitors (excluding evaporative emissions, which can sometimes be pending) to show a “ready” or “complete” status, as outlined by EPA guidelines.
Understanding Monitor Status
When you clear DTCs or disconnect the battery, readiness monitors reset to “not ready.” The vehicle must then undergo specific driving conditions, known as a “drive cycle,” to re-run these tests. Common monitors include oxygen sensor, catalytic converter, EVAP system, and exhaust gas recirculation (EGR). According to emissions testing protocols updated for 2026, a vehicle may be allowed one or two “not ready” monitors, but this varies by state and vehicle model year.
Performing a Drive Cycle to Set Monitors
While specific drive cycles vary by manufacturer, a general procedure can often set most monitors:
- Cold Start: Start the engine and let it idle for 2-3 minutes. This allows the O2 sensor heater and secondary air injection system (if equipped) to run their tests.
- Mixed Driving: Drive for about 10-15 minutes at highway speeds (55-60 mph) while maintaining a steady throttle. Avoid hard acceleration or braking.
- Sustained Speed: Reduce speed to around 20-30 mph and maintain it for 5-10 minutes. This helps the EVAP and catalytic converter monitors complete their cycles.
- Varying Conditions: Include several periods of deceleration (coasting) and some city driving with stops and starts.
- Check Status: Use an OBD-II scanner to check monitor status periodically. Repeat the cycle if necessary until all required monitors are “ready.” This process can take one to three drive cycles, depending on the vehicle and specific monitor requirements.
What If It Still Doesn’t Work?
If you’ve followed diagnostic steps, attempted repairs, and completed drive cycles, but the CEL persists or readiness monitors won’t set, it’s time for expert intervention. Complex vehicle systems often require specialized tools and knowledge.
- Advanced Diagnostic Scan: A professional technician has access to dealership-level scan tools that can perform bidirectional controls, specific component tests, and deeper module diagnostics. These tools can often pinpoint issues missed by generic OBD-II scanners.
- Smoke Test for Leaks: For persistent EVAP or vacuum system codes, a smoke test can visually identify hard-to-find leaks in hoses, lines, and gaskets that are otherwise undetectable.
- Electrical System Inspection: Many CEL issues stem from faulty wiring, corroded connections, or poor grounds. A professional can meticulously check circuit integrity using multimeters and oscilloscopes.
- PCM Reprogramming/Update: Sometimes, a CEL is resolved by updating the vehicle’s Powertrain Control Module (PCM) software with the latest manufacturer calibration. This addresses known software bugs or optimizes system performance.
Seeking professional help is advisable when issues persist. A comprehensive diagnostic can cost anywhere from $120 to $250, depending on the shop and complexity. This investment can prevent costly, incorrect repairs and ensure your vehicle is compliant and reliable.
Conclusion
Navigating vehicle inspection with an active Check Engine Light requires a systematic approach, starting with accurate diagnosis and effective repairs. Ensuring your readiness monitors are set is equally critical for a successful outcome in 2026. According to verified research and expert sources, addressing these issues promptly not only ensures inspection compliance but also maintains your vehicle’s performance and longevity. Your actionable next step is to obtain a professional diagnostic if your CEL persists after initial troubleshooting.
❓ Frequently Asked Questions
What are the primary reasons a check engine light would prevent passing inspection, even if the car seems to run fine?
The CEL indicates an emissions-related fault, which directly relates to air quality regulations. Even minor issues trigger it, and inspection stations will fail vehicles with active emission system warnings, regardless of apparent drivability, as it signifies a non-compliant system.
How do I perform a ‘drive cycle’ to set readiness monitors after a repair?
A drive cycle involves specific driving patterns—like cold starts, sustained highway speeds, and stop-and-go traffic—that allow the vehicle’s computer to re-test all emission systems. The exact procedure varies by manufacturer, but general guides are available online or from a mechanic.
Are there any states where it’s possible to pass inspection with a check engine light on?
Almost universally, an active check engine light will cause an inspection failure. However, some states might allow one or two ‘not ready’ monitors (often excluding the catalytic converter monitor) if the CEL itself is not illuminated and no hard codes are present, but this is rare for an active light.
What should I do if my CEL comes back on right after I’ve cleared the codes and driven for a bit?
If the CEL reappears quickly, it indicates the underlying issue wasn’t resolved or there’s a new problem. You’ll need to re-scan for new codes, re-diagnose the problem, and perform the necessary repairs again before attempting another inspection.
Can a failing O2 sensor or catalytic converter directly cause an inspection failure via the CEL?
Yes, a faulty O2 sensor can trigger a CEL by reporting incorrect exhaust gas readings, impacting fuel economy and emissions. A failing catalytic converter, often indicated by specific O2 sensor codes, directly means the vehicle isn’t properly cleaning exhaust, both of which are common causes for emission-related inspection failures.
What kind of repairs are typically needed when a check engine light is on for common issues, and what’s the average cost?
Common repairs vary widely: a loose gas cap costs nothing to fix, while replacing an O2 sensor might be $150-$300. More serious issues like catalytic converter replacement can range from $1,000 to over $3,000. Diagnosis by a qualified mechanic (often $100-$200) is crucial to determine the exact repair needed.