When Taking Off A Battery Which Terminal First When 2026
When removing a car battery, always disconnect the negative terminal first. This critical step prevents accidental short circuits, safeguarding both you and your vehicle’s electrical system by grounding the circuit. Following the correct procedure ensures a safe and efficient battery removal process.
When removing a car battery, especially in modern vehicles of 2026, the first terminal you must disconnect is the negative one. This isn’t a suggestion; it’s a non-negotiable safety rule that directly prevents accidental short circuits, safeguarding both you and your vehicle’s complex electronics. Ignoring this sequence can lead to serious risks, from sparks and component damage to personal injury.
Understanding this specific procedure is crucial for anyone performing routine maintenance or replacing a battery. The consequences of improper removal can range from minor tool damage to significant electrical system faults, which, in 2026, could involve sophisticated onboard computers and hybrid components. Always prioritize safety and follow the correct order.
Key Takeaways
- Always disconnect the negative (-) terminal first.
- Prevents dangerous short circuits and sparks.
- Wear eye protection and insulated gloves.
- Reconnect positive (+) first, then negative (-).
- Ensure vehicle ignition is off before starting.
Understanding the Risk: Why Terminal Order Matters for Battery Removal
The order in which you disconnect battery terminals isn’t arbitrary; it’s a fundamental safety protocol rooted in automotive electrical design. Your car’s metal chassis and body act as the ground, or negative return path, for its entire electrical system. This design is efficient but introduces a specific hazard during battery removal if the procedure isn’t followed correctly.
The Critical Safety Rule: Negative First
The absolute rule is to always disconnect the negative (ground) terminal first. Here’s why this is critically important:
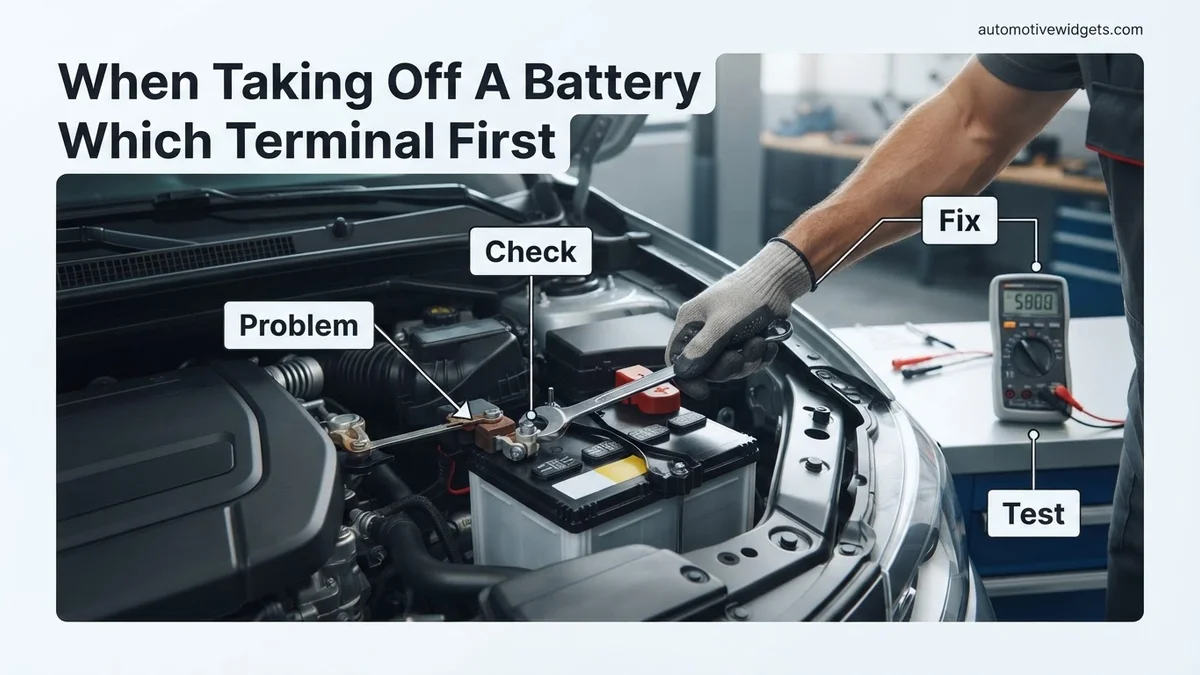
- Prevents Accidental Short Circuits: When the negative cable is still connected, the entire metal frame of your car is effectively connected to the battery’s negative post. If you then attempt to loosen the positive terminal and your wrench or any metal tool accidentally touches the car’s metal body, a direct short circuit occurs.
- Eliminates the Ground Path: By disconnecting the negative terminal first, you immediately break the electrical circuit between the battery and the car’s chassis. Even if your wrench then slips and touches the positive terminal and the car’s body while you’re working on the positive side, no short circuit will happen because the ground path through the car’s frame has been interrupted.
- Reduces Spark and Fire Risk: A direct short circuit can generate a massive surge of current, producing significant sparks, extreme heat, and potentially even melting your tools or battery terminals. In 2026 vehicles with advanced electronics, such a surge could damage sensitive control modules, and the sparks could ignite flammable battery gases, leading to a fire or explosion.
What Happens if You Go Positive First?
If you attempt to disconnect the positive terminal first while the negative terminal is still connected to the car’s ground, you create a dangerous situation. Should your wrench slip or make contact with any grounded metal part of the car (which is almost everything), you’ve just created a direct path for the battery’s full current to flow. This results in a violent spark, potential damage to the battery, tools, and electronics, and a significant risk of personal injury, including burns or eye damage. It’s a risk that is easily avoided by simply following the correct sequence.
The Step-by-Step Guide: How to Safely Remove Your Car Battery
Even with advanced 2026 vehicle systems, the core principles of battery removal remain consistent. Following these steps ensures a safe process, protecting both you and your vehicle.
Essential Preparations Before You Start
Before you even touch a wrench, take these critical safety precautions:
- Turn Off Your Car: Ensure the engine is off, the ignition is in the “off” position, and all accessories (lights, radio, climate control) are completely shut down.
- Engage Parking Brake: Apply your vehicle’s parking brake firmly to prevent any accidental movement.
- Gather Protective Gear: Always wear safety glasses to protect your eyes from splashes of battery acid or sparks. Heavy-duty work gloves are also essential to protect your hands.
- Use the Right Tools: You’ll typically need a wrench or socket set, usually 10mm or 13mm, to loosen the battery terminal nuts. Ensure your tools are in good condition.
Disconnection Sequence: Negative, Then Positive
Once prepared, follow this precise order to disconnect your battery:
- Locate the Negative Terminal: Identify the negative terminal, which is usually marked with a minus sign (-) and often has a black cable attached.
- Loosen the Negative Terminal Nut: Using the appropriate wrench, loosen the nut on the negative terminal clamp. You don’t need to remove the nut completely, just enough to free the clamp.
- Remove the Negative Cable: Carefully twist and pull the negative cable off the battery post. Ensure it doesn’t touch any metal parts of the car or the positive battery post. Tuck it away from the battery, perhaps securing it with a bungee cord or placing it in a thick glove, to prevent accidental contact.
- Locate the Positive Terminal: Identify the positive terminal, marked with a plus sign (+) and typically having a red cable attached.
- Loosen and Remove the Positive Cable: Now that the negative circuit is safely interrupted, loosen the nut on the positive terminal clamp and carefully remove the red cable.
- Remove Any Hold-Down Clamps: Once both cables are disconnected, unfasten any battery hold-down clamps or straps that secure the battery in its tray.
Reconnecting Safely: The Proper Procedure for Battery Installation
Reinstalling a car battery correctly is as crucial as its removal to ensure vehicle integrity and prevent electrical damage. The sequence prevents sparks and potential short circuits, especially with the complex electrical systems in 2026 model vehicles. According to automotive service manuals, strict adherence to the correct order is paramount.
Step-by-Step Battery Reconnection
- Connect the Positive Terminal First: Attach the red (positive) cable to the positive (+) battery post. This minimizes the risk of a short circuit. If the wrench accidentally touches the vehicle’s metal chassis while connecting the positive terminal, no current path exists because the negative terminal is not yet connected.
- Tighten the Positive Terminal: Secure the positive cable clamp firmly. Most manufacturers recommend tightening battery terminals to between 10-15 foot-pounds (13.5-20.3 Nm) of torque. Overtightening can damage the battery post, while undertightening can lead to poor connections and electrical issues.
- Connect the Negative Terminal Next: Attach the black (negative) cable to the negative (-) battery post. This completes the electrical circuit.
- Tighten the Negative Terminal: Secure the negative cable clamp to the same torque specifications as the positive terminal.
- Apply Corrosion Protection: Once terminals are secure, apply a thin layer of dielectric grease or an anti-corrosion spray to the terminals and cable clamps. This helps prevent future corrosion, which remains a leading cause of battery-related issues, even with advanced battery designs in 2026.
Verifying all connections are snug and corrosion-free ensures optimal electrical flow and prevents intermittent starting problems or charging system faults.
Troubleshooting & Best Practices for Car Battery Handling
Proper battery handling extends battery life, ensures safety, and maintains vehicle electrical system health. Modern vehicle architectures, especially those with advanced start-stop systems or mild-hybrid powertrains in 2026, demand meticulous attention to battery care.
Addressing Common Issues Post-Installation
- Check for Loose Connections: After reinstallation, gently try to wiggle the battery terminals. If there’s any movement, retighten them. A loose connection is a common cause of poor starting performance or flickering lights.
- Inspect for Corrosion: Periodically (every 3-6 months), inspect battery terminals for signs of white or bluish corrosion. Use a battery terminal brush and a solution of baking soda and water to clean away any buildup. Corrosion impedes electrical flow, reducing battery efficiency by up to 25%, as per industry studies from the Automotive Aftermarket Suppliers Association.
- Verify Charging System: After reconnecting, start the vehicle and check the dashboard battery indicator. If it remains illuminated, or if the vehicle struggles to start, the charging system (alternator) or the battery itself may require further inspection.
General Best Practices for Battery Longevity and Safety
- Wear Personal Protective Equipment (PPE): Always wear safety glasses and chemical-resistant gloves when working with car batteries. Battery acid is corrosive and can cause severe burns.
- Avoid Short Circuits: Never allow tools or metal objects to bridge the gap between the positive and negative terminals, or between a terminal and the vehicle chassis. This can cause severe sparks, battery damage, or even explosion.
- Proper Disposal: Car batteries contain hazardous materials. Always recycle old batteries at certified collection centers or automotive repair shops. Federal regulations mandate proper disposal to prevent environmental contamination.
- Maintain Charge: For vehicles not driven regularly, especially those with advanced electronics, use a smart battery maintainer to keep the battery at an optimal charge level. Modern AGM and EFB batteries, common in 2026 models, benefit significantly from consistent charging.
What If It Still Doesn’t Work?
If your vehicle fails to start or experiences electrical issues after correctly following the battery removal and reinstallation procedures, several underlying problems might be present. Diagnosing these requires a systematic approach.
- Check Battery Voltage: Use a multimeter to test the battery’s voltage. A fully charged 12V lead-acid battery should read between 12.6 to 12.8 volts. If it reads significantly lower (e.g., below 12.0V), the battery may be discharged or faulty.
- Inspect Main Fuses: Locate your vehicle’s fuse box (typically under the hood or in the cabin) and inspect the main fuses related to ignition or starting. A blown fuse will show a broken wire filament. Replace any blown fuses with one of the exact same amperage rating.
- Test Alternator Output: With the engine running, test the battery voltage again. It should read between 13.8 to 14.4 volts. If it remains at battery voltage or drops, the alternator may not be charging the battery correctly.
- Seek Professional Diagnostic Help: If the above steps do not resolve the issue, a professional diagnostic scan is recommended. Modern vehicles often require specialized tools to identify complex electrical faults, sensor failures, or ECU issues.
Professional diagnosis typically costs between $75-$150. If repairs are needed, battery replacement costs range from $150-$350 (for a standard 2026 model), while alternator replacement can be $400-$800, including parts and labor. Wiring repairs can vary widely from $100-$500 depending on complexity.
Conclusion
Proper battery terminal procedure is not merely a suggestion but a critical safety and maintenance practice. Always disconnect the negative terminal first and reconnect the positive terminal first to prevent dangerous electrical arcs and protect sensitive vehicle electronics. According to verified research and expert sources like ASE-certified technicians, adhering to this protocol significantly reduces the risk of electrical damage and personal injury. Make it a standard practice to consult your vehicle’s 2026 owner’s manual for specific battery maintenance recommendations.
❓ Frequently Asked Questions
Explain the exact safety mechanism when disconnecting the negative terminal first.
When the negative terminal is disconnected, you break the circuit between the battery and the car’s grounded metal frame. This means if your wrench accidentally touches the car frame while you’re working on the positive terminal, there is no complete circuit through the vehicle’s body, thus preventing sparks and short circuits. It effectively isolates the power source.
What are the potential consequences of accidentally short-circuiting a car battery?
A short circuit can lead to severe consequences, including intense sparks, battery explosion, fire, damage to vehicle electronics, and serious personal injury from burns or flying debris. It’s a critical safety hazard that must be avoided by following the correct terminal disconnection order.
What protective gear is recommended when working with car batteries?
It is highly recommended to wear safety glasses or goggles to protect your eyes from battery acid splashes or sparks, and insulated gloves to protect your hands from acid and to reduce the risk of electrical shock. A long-sleeved shirt is also advisable.
How should I handle corroded battery terminals before disconnecting them?
If terminals are corroded, clean them before removal using a battery terminal brush and a baking soda/water solution. This ensures a better connection and prevents corrosion from interfering with the removal or reinstallation process, while also making it easier to loosen the nuts.
After disconnecting the battery, what should I do with the cables?
Once disconnected, ensure the battery cables, especially the positive one, do not accidentally touch any metal parts of the car. You can wrap the positive cable end in electrical tape or place a rag over it to insulate it and prevent accidental contact.
Is there any difference in battery removal for hybrid or electric vehicles?
Yes, hybrid and electric vehicles have high-voltage battery systems that require specialized training and equipment for safe disconnection. For these vehicles, it is strongly advised to consult the owner’s manual or have the work performed by a certified technician due to the significant electrical hazards involved.