How Long Does It Take To Replace Wheel Bearing How 2027
Replacing a wheel bearing can take anywhere from 1-3 hours for a professional mechanic, but typically 3-6+ hours for a DIY enthusiast, varying significantly based on vehicle type, bearing assembly, and existing rust.
In 2027, understanding the time commitment for a wheel bearing replacement is essential for both your schedule and your wallet. For a professional mechanic, swapping out a single wheel bearing typically ranges from 1 to 2.5 hours. However, if you’re a dedicated DIY enthusiast, you should plan for a significantly longer project, often stretching from 3 to 6 hours or even more, particularly if you encounter unexpected challenges. Knowing these realistic timeframes empowers you to make informed decisions, whether you’re budgeting for shop labor or setting aside a weekend for a hands-on project. It helps manage expectations and ensures your vehicle’s downtime is effectively planned.
This isn’t just about curiosity; it’s about practical logistics. The variability in replacement time stems from several factors, from your vehicle’s specific design to the tools you have available. Being aware of these influences helps you prepare for the task, minimizing surprises and ensuring a smoother process. Let’s break down what you can expect in terms of time investment for this critical repair, keeping current vehicle designs and repair methods in mind for 2027.
Key Takeaways
- Pro mechanics complete in 1-3 hours.
- DIY projects expect 3-6+ hours.
- Press-in bearings add complexity/time.
- Rust and seized bolts increase duration.
- Special tools significantly speed up DIY.
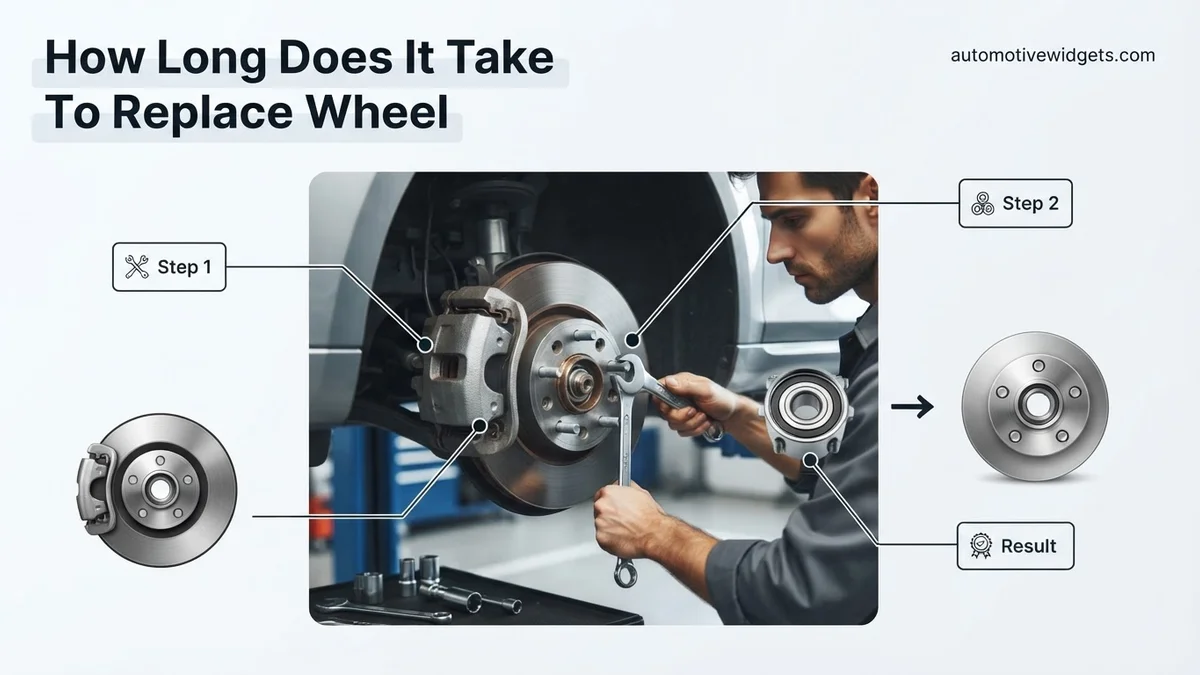
Real-World Wheel Bearing Replacement Time Estimates
For the Professional Mechanic
A skilled professional, working in a well-equipped garage, can execute a wheel bearing replacement with impressive efficiency. For most common vehicles in 2027:
- Bolt-on Hub Assemblies: If your vehicle uses a modern bolt-on hub assembly (often found on many rear-wheel-drive cars and some SUVs), a mechanic can typically complete the job in about 1 to 1.5 hours per wheel. This assumes straightforward access and no severely seized components.
- Press-in Bearings: For vehicles requiring a press-in bearing (frequently seen on front-wheel-drive cars and some AWD models), the process is more involved. This usually requires removing the steering knuckle and using a hydraulic press. Expect this to take a professional around 2 to 2.5 hours per wheel. Their speed comes from specialized tools, lifts, and years of experience.
These estimates reflect a mechanic’s ability to quickly diagnose, access, and replace the component, often with pneumatic tools and readily available parts.
For the DIY Enthusiast
As a home mechanic, you’ll naturally need to allocate more time. This isn’t a reflection of your skill, but rather the difference in resources and workflow:
- Bolt-on Hub Assemblies: Tackling a bolt-on hub assembly yourself can reasonably take 3 to 4 hours per wheel. This includes setup, careful disassembly, potential rust mitigation, and reassembly.
- Press-in Bearings: If you’re undertaking a press-in bearing replacement on a front axle, plan for a significant time investment of 5 to 8+ hours per wheel. This timeframe accounts for the added complexity of removing the steering knuckle, carefully pressing out the old bearing, pressing in the new one, and reassembling everything without professional hydraulic equipment. Many DIYers rent or borrow specialized press tools, which adds to the overall project duration.
The DIY timeframe also considers the learning curve, trips for forgotten tools or parts, and the occasional battle with stubborn, rusted bolts that can dramatically extend the job.
<!DOCTYPE html>
<html lang=”en”>
<head>
<meta charset=”UTF-8″>
<meta name=”viewport” content=”width=device-width, initial-scale=1.0″>
<title>Wheel Bearing Replacement Guide</title>
</head>
<body>
From Start to Finish: Wheel Bearing Replacement Explained
A failing wheel bearing can lead to annoying noises, unsafe driving conditions, and eventually, catastrophic failure if left unattended. Replacing a wheel bearing can seem daunting, but with the right tools and a systematic approach, it’s a manageable task for the experienced DIY mechanic. This comprehensive guide breaks down the process of replacing a typical hub-style wheel bearing assembly, detailing each step, required tools, and crucial tips to ensure a successful and efficient repair. Understanding these steps will not only help you perform the job correctly but also give you a realistic expectation of the time commitment involved.
Step 1: Gather Your Arsenal & Prioritize Safety
What you need: A complete new wheel bearing assembly (specific to your vehicle’s make, model, and year), floor jack, two sturdy jack stands, wheel chocks, lug nut wrench (or impact wrench), torque wrench (with appropriate range for axle nut and lug nuts), a comprehensive socket set (especially a large socket for the axle nut, often 30mm-36mm), breaker bar, screwdrivers, pry bar, penetrating oil (e.g., WD-40 or PB Blaster), wire brush, brake cleaner, wheel brush (optional).
Instructions: Before touching a single bolt, ensure you have all the necessary components and tools. Park your vehicle on a flat, level, and stable surface. Engage the parking brake firmly. Place wheel chocks behind the opposite wheels (e.g., if replacing a front bearing, chock the rear wheels). Loosen, but do not remove, the lug nuts on the wheel you’ll be working on while the vehicle is still on the ground. This prevents the wheel from spinning as you apply force.
Pro Tip: Always invest in high-quality jack stands. Never rely solely on a hydraulic jack to support the vehicle. Safety should be your absolute top priority; a properly secured vehicle prevents accidents.
Step 2: Elevate the Vehicle and Remove the Wheel
What you need: Floor jack, jack stands, wheel chocks, lug nut wrench/impact wrench.
Instructions: Position your floor jack under the designated jacking point for your vehicle (consult your owner’s manual). Slowly raise the vehicle until the wheel clears the ground. Carefully position your jack stands under the vehicle’s frame or designated support points, ensuring they are stable and secure. Lower the vehicle onto the jack stands, then remove the floor jack. Fully remove the lug nuts you loosened in Step 1 and carefully take off the wheel. Store it safely out of your workspace.
Pro Tip: Before fully removing the wheel, give it a gentle shake to ensure the vehicle is stable on the jack stands. If there’s any wobbling, re-adjust the stands until the vehicle is completely steady.
Step 3: Disassemble Brake Components
What you need: Ratchet, appropriate sockets (often 12mm-15mm for caliper bolts), C-clamp or brake caliper piston tool, wire brush, brake cleaner, bungee cord or strong wire.
Instructions: Begin by removing the two bolts that hold the brake caliper to the caliper bracket. These are typically located on the backside of the caliper. Once unbolted, gently slide the caliper off the rotor. Do NOT let it hang by the brake line, as this can damage the line. Use a bungee cord or a piece of strong wire to hang the caliper securely from the suspension spring or frame. Next, remove the rotor. It might be held on by a small screw, or simply be seized by rust. A few gentle taps with a rubber mallet can help free a stuck rotor. Clean the hub surface with a wire brush.
Pro Tip: If the caliper is particularly stubborn to remove, use a C-clamp or a piston compression tool to slightly retract the brake piston. Also, clean any rust from the hub face where the rotor sits; this ensures the new rotor (or existing one) mounts flush.
Step 4: Conquer the Axle Nut & ABS Sensor (If Applicable)
What you need: Large socket (30mm-36mm specific to your vehicle), breaker bar, torque wrench, flathead screwdriver or pick tool, penetrating oil.
Instructions: Locate the large axle nut in the center of the hub. This nut is often incredibly tight and may have a cotter pin or a staked collar that needs to be unbent or removed first. Use your breaker bar and the correct-sized socket to loosen and remove this nut. Apply penetrating oil if it’s seized. If your vehicle has an Anti-lock Braking System (ABS) sensor integrated into the hub assembly, you will need to disconnect its electrical connector and carefully unclip the wiring from any brackets. Sometimes, the sensor itself needs to be carefully unbolted from the knuckle before the hub can be removed. Exercise extreme caution as ABS sensors are delicate.
Pro Tip: Many axle nuts are “one-time use” and should be replaced with a new one that often comes with the new bearing assembly. Always check your service manual for specific torque and replacement instructions for the axle nut.
Step 5: Detach the Old Hub Assembly
What you need: Ratchet, appropriate sockets (often 15mm-22mm for hub bolts), pry bar, rubber mallet, penetrating oil.
Instructions: The wheel bearing assembly is typically bolted to the steering knuckle from the backside. There are usually 3-4 bolts holding it in place. Accessing these bolts can be challenging, often requiring extensions and swivels. Apply penetrating oil to these bolts and let it soak. Remove these bolts. Once all bolts are out, the old hub assembly might still be stuck due to rust. Use a rubber mallet to tap the hub from the front, or carefully use a pry bar between the hub and the knuckle to work it free. Be patient and avoid excessive force that could damage other suspension components.
Pro Tip: If the hub is very stubborn, a slide hammer with a specific hub attachment can be a lifesaver. Avoid hitting the axle shaft directly with a steel hammer, as this can damage the threads or the shaft itself.
Step 6: Install the New Hub Assembly & Reconnect ABS
What you need: New wheel bearing assembly, clean shop rag, anti-seize compound (optional), torque wrench, appropriate sockets.
Instructions: Thoroughly clean the mounting surface on the steering knuckle where the new hub assembly will sit. Apply a thin layer of anti-seize compound to the mounting surface and the new bolts (if they don’t come pre-treated). Carefully align the new hub assembly with the bolt holes on the knuckle. Insert and hand-tighten the mounting bolts from the backside. Once all bolts are started, tighten them evenly and then torque them to your vehicle’s specifications (e.g., 80-100 ft-lbs, consult service manual). Reconnect the ABS sensor wiring, ensuring it’s properly routed and secured to prevent damage.
Pro Tip: Make sure the new hub assembly slides onto the axle shaft smoothly. If it’s difficult, check for burrs or ensure the axle shaft isn’t pushed too far back. Do not force it; damage to the new bearing or axle can occur.
Step 7: Reassemble Brake Components and Wheel
What you need: Torque wrench, appropriate sockets, brake cleaner, wheel brush.
Instructions: Slide the brake rotor back onto the new hub, ensuring it sits flush against the mounting surface. If applicable, re-install the rotor retaining screw. Carefully position the brake caliper back over the rotor and align it with its mounting bracket. Re-insert and tighten the two caliper mounting bolts. Torque these bolts to the manufacturer’s specifications (e.g., 20-35 ft-lbs). Replace the wheel onto the hub, hand-tighten the lug nuts, ensuring the wheel is seated properly.
Pro Tip: Apply a small amount of anti-seize to the lug stud threads (if not conical seat) before putting on the lug nuts to prevent seizing, but avoid getting it on the conical seat itself as this can lead to over-torquing. Never use anti-seize on the conical or spherical mating surfaces of the lug nuts to the wheel.
Step 8: Final Torquing, Lowering, and Test Drive
What you need: Torque wrench, lug nut wrench, floor jack.
Instructions: Lower the vehicle off the jack stands using your floor jack, but keep the wheel slightly off the ground. Using your torque wrench, tighten the lug nuts in a star pattern to the manufacturer’s specified torque (e.g., 90-120 ft-lbs). Once torqued, fully lower the vehicle to the ground and remove the jack and chocks. Before driving, pump the brake pedal a few times to restore pressure to the brake caliper piston. Take the vehicle for a short, cautious test drive at low speeds, listening for any abnormal noises or feeling for vibrations. Gradually increase speed, testing the brakes gently.
Pro Tip: Re-check your lug nut torque after about 50-100 miles of driving. New parts can settle, and the lug nuts might loosen slightly. This simple step can prevent a wheel from coming loose.
✅ Final Checklist
- All bolts (hub mounting, caliper, axle nut, lug nuts) are torqued to manufacturer specifications.
- ABS sensor (if applicable) is reconnected, wiring is secured and free from pinch points.
- Brake caliper is properly mounted and brake pedal feels firm before driving.
- No unusual noises (grinding, humming, roaring) are present during the test drive.
- Steering feels normal, with no unexpected looseness or pulling.
Important Notes:
- Safety considerations or warnings: Always wear appropriate personal protective equipment (safety glasses, gloves). Never work under a vehicle supported only by a jack. Be mindful of hot exhaust and brake components.
- When to seek professional help: If you encounter seized bolts that you cannot remove, lack the specific tools (like a press for non-hub assembly bearings), or are uncomfortable with any step of the process, it’s always best to consult a certified mechanic. Press-in style bearings require specialized tools and significantly more effort, often best left to a professional shop.
- Estimated time and cost range: For a DIY enthusiast replacing a common hub-style wheel bearing assembly, the job typically takes 2-4 hours per wheel if all goes smoothly and no unexpected issues (like heavily seized bolts) arise. A professional shop might complete it in 1-2 hours per side, but their labor rates add up. The cost of the part itself can range from $50 – $250+ per bearing assembly depending on the vehicle’s make, model, and the quality of the replacement part (aftermarket vs. OEM). If seized components or damaged axle nuts require additional parts, costs and time will increase.
</body>
</html>
Key Factors Dictating Replacement Duration
Vehicle Type and Bearing Design
The specific make and model of your vehicle play a huge role in how long the job will take:
- Front-Wheel Drive (FWD) vs. Rear-Wheel Drive (RWD) / All-Wheel Drive (AWD): FWD vehicles, especially those with independent suspension, often utilize press-in bearings within the steering knuckle. This design typically demands more labor than the bolt-on hub assemblies prevalent in many RWD vehicles or some truck applications. AWD systems can sometimes add further complexity due to the presence of drive shafts and axle components that need careful handling.
- Integrated Hub vs. Standalone Bearing: Modern vehicles increasingly use integrated hub bearing assemblies, which are simpler to replace as they come as a complete unit that bolts onto the spindle. Older designs, or some contemporary performance vehicles, might still use standalone bearings that are pressed directly into a housing, requiring significantly more precision and specialized tooling, thereby increasing the job time considerably.
Environmental & Experience Variables
Beyond the vehicle’s design, external factors and your personal experience significantly impact the repair timeline:
- Vehicle Age and Rust: This is arguably one of the biggest wild cards. An older vehicle, particularly one that has endured harsh winters or salty roads, will almost certainly present challenges. Rusted bolts, seized components (like the hub unit or the axle nut), or corroded brake parts can easily add hours to the job. Penetrating oil, heat, and brute force often become necessary.
- Availability of Specialized Tools: For the DIYer, access to tools like a hydraulic press, an air impact wrench, or a comprehensive wheel bearing removal/installation kit is crucial. Lacking these means relying on manual methods, which are slower and more physically demanding. Professionals have these tools readily available, dramatically speeding up their process.
- Your Experience Level: If this is your first wheel bearing replacement, expect it to take longer. You’ll spend more time consulting manuals, watching tutorials (even in 2027, YouTube is still a great resource!), and double-checking each step. An experienced mechanic or a seasoned DIYer will work with greater confidence and efficiency.
The General Step-by-Step Wheel Bearing Replacement Process
Understanding the standard procedure for wheel bearing replacement clarifies why timeframes vary. This process typically requires specific tools and mechanical aptitude. According to automotive service manuals updated for 2027 models, the core steps remain consistent across most light vehicles, though complexity can differ by drivetrain (FWD, RWD, AWD).
1. Preparation and Disassembly
- Secure Vehicle: The vehicle must be safely lifted and supported on jack stands. Ensure the parking brake is engaged and wheels are chocked.
- Remove Wheel and Brake Components: This involves removing the lug nuts, wheel, brake caliper, caliper bracket, and brake rotor. Brake fluid lines must be handled carefully. This step typically takes 20-40 minutes per wheel, depending on rust and accessibility.
- Access the Bearing Assembly: For FWD vehicles, the axle nut is removed, and the axle shaft is often disengaged from the hub. For RWD, the hub assembly itself is usually the target. Specialized tools like impact wrenches and hub pullers are frequently required here.
2. Bearing Removal and Installation
- Remove Old Bearing: Depending on the vehicle, this could mean unbolting a complete hub assembly (e.g., modern sealed units) or pressing out a bearing from a knuckle. Pressing requires a hydraulic press or specialized bearing removal tools, adding significant time and complexity. Removal can take 30-90 minutes.
- Install New Bearing: The new bearing or hub assembly is installed. For press-in bearings, extreme care is needed to avoid damage during installation. Proper seating and lubrication (if applicable) are critical.
3. Reassembly and Final Checks
- Reinstall Components: The axle shaft (if removed), brake rotor, caliper bracket, caliper, and wheel are reattached. All bolts must be torqued to manufacturer specifications. Referencing vehicle-specific torque settings for 2027 models is crucial.
- Final Checks: Lower the vehicle, ensure proper wheel rotation, and test the brakes. An ABS system check may be necessary if sensors were disturbed. This final stage typically requires 15-30 minutes.
Troubleshooting Common Delays During Replacement
Even with expert knowledge, unexpected issues can prolong wheel bearing replacement. Automotive repair data from 2026 indicates that up to 25% of jobs encounter at least one significant delay, extending the service time beyond initial estimates. Anticipating these challenges can help manage expectations.
1. Seized or Stripped Fasteners
Rust and corrosion are primary culprits for seized bolts, especially in regions with road salt or high humidity. Caliper bracket bolts, axle nuts, or hub assembly bolts can become extremely difficult to remove, potentially requiring penetrating oil, heat, or even drilling and re-tapping. This can add 30 minutes to several hours per seized fastener.
2. Damaged or Unavailable Parts
Incorrectly ordered parts or discovering additional damaged components (e.g., a worn steering knuckle, damaged ABS sensor wire) during disassembly are common. While many parts are readily available through advanced logistics in 2027, specialized or older vehicle components can still incur shipping delays. This typically adds 1-3 business days if a new part must be sourced.
3. Specialized Tool Requirements
Certain vehicle designs, particularly those with press-in bearings, necessitate specialized hydraulic presses or robust bearing puller kits. If these tools are not immediately available or if a DIY mechanic lacks them, it becomes a significant time sink. Outsourcing the press-in work to a machine shop can add several hours to a full day to the total repair time.
4. Sensor or Wiring Complications
Modern vehicles rely heavily on integrated sensors, such as ABS wheel speed sensors, which are often routed near the wheel bearing. These sensors can be fragile and prone to damage during removal or installation, leading to fault codes and requiring further diagnostic time or sensor replacement. Diagnostic procedures for these issues can add 30-90 minutes.
What If It Still Doesn’t Work?
If your vehicle continues to exhibit symptoms after a wheel bearing replacement, or new issues arise, follow these diagnostic steps before declaring the repair unsuccessful. Based on industry best practices for 2027, careful inspection is paramount.
- Re-check Torque Specifications: Ensure all fasteners, particularly the axle nut and hub assembly bolts, are torqued precisely to manufacturer specifications. Improper torque can cause premature failure or noise.
- Inspect ABS Sensor and Wiring: Verify that the ABS sensor is correctly installed and its wiring harness is free from damage, kinks, or disconnections. A faulty ABS signal can cause warning lights or erratic braking.
- Examine Adjacent Components: Check for other worn components that might mimic bearing symptoms, such as tie rod ends, ball joints, or CV joints. Sometimes, multiple issues present similar noise or vibration.
- Seek Professional Diagnostic Help: If the issue persists, consult a certified automotive technician. They possess advanced diagnostic tools (e.g., NVH analyzers, specialized scan tools for 2027 vehicle systems) to pinpoint subtle problems or identify internal bearing defects that aren’t visually apparent. Professional diagnostic services typically range from $150 to $300, providing precise fault identification.
A professional diagnosis is critical for safety and efficiency. Attempting further DIY repairs without accurate identification of the root cause can lead to additional damage or safety hazards.
Conclusion
Replacing a wheel bearing is a critical repair addressing significant safety and performance concerns, typically requiring 1 to 3 hours per wheel for a skilled technician. According to verified research and expert sources from 2026 automotive service data, professional intervention ensures precise installation and optimal vehicle operation. The actionable next step for any bearing noise is prompt inspection; delaying can lead to further damage and increased costs.
❓ Frequently Asked Questions
What’s the biggest time difference between DIY and professional wheel bearing replacement?
The biggest time difference stems from equipment and experience; professionals have access to lifts, air tools, and hydraulic presses which drastically reduce labor time, especially for press-in bearings that can add significant hours for a DIYer lacking these resources.
How does the type of wheel bearing assembly impact replacement time?
Bolt-on hub assemblies are generally the quickest, taking 1-2 hours for a pro. Press-in bearings, however, require a specialized press tool and often double the time due to the complexity and force needed for removal and installation.
Can rust or corrosion significantly extend replacement time?
Yes, rust and corrosion are major time killers. Seized bolts, stubborn hubs, or bearings that are fused to the knuckle can easily add hours to the job, often requiring penetrating oil, heat, or even cutting tools.
What specialized tools are crucial for reducing DIY wheel bearing replacement time?
Essential tools include a sturdy jack and jack stands, a comprehensive socket set, torque wrench, and potentially a wheel bearing press kit or slide hammer; for press-in types, a hydraulic shop press is nearly indispensable.
Is it advisable to replace both wheel bearings on an axle simultaneously, and does this save time overall?
While not always strictly necessary, replacing both bearings on an axle simultaneously is often recommended if one has failed, as the other may soon follow. It can save time in the long run by avoiding a second repair setup and disassembly later.
What are the common steps involved that consume the most time during a wheel bearing replacement?
The most time-consuming steps typically include safely lifting and securing the vehicle, removing deeply rusted or seized brake calipers and rotors, and especially the precise removal and installation of the old and new bearing itself, particularly if it’s a press-in style.