Can I Wash My Car After Getting Windows Tinted Can I 2027
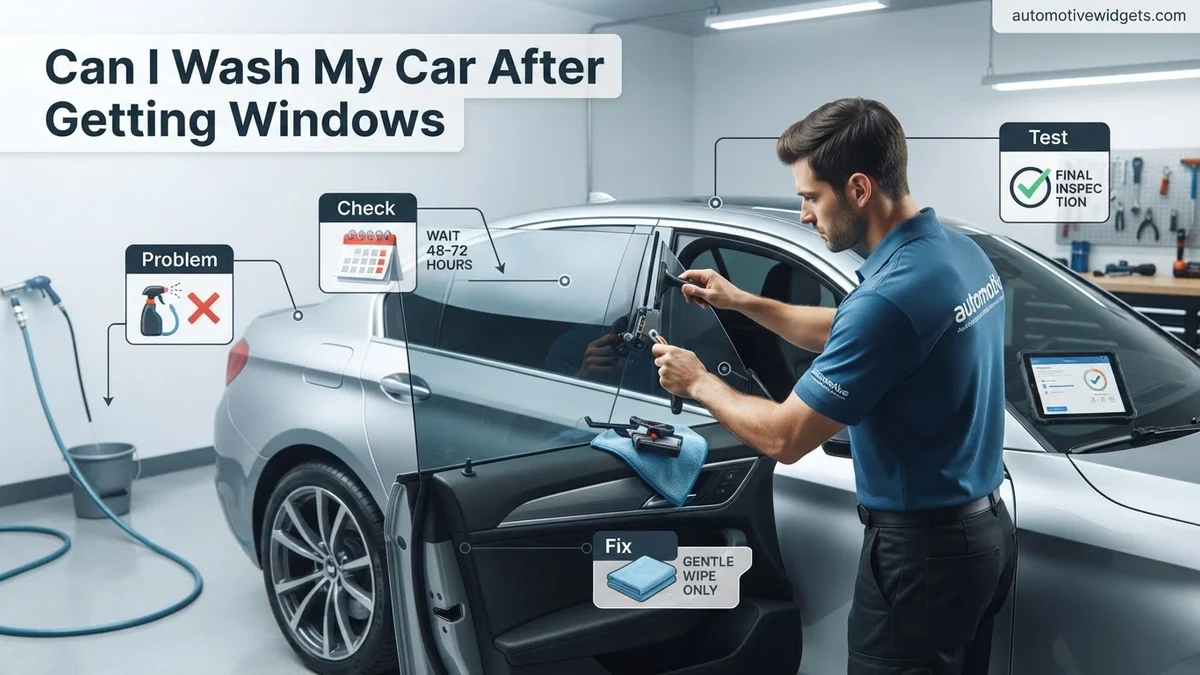
You must wait at least 3-7 days before washing your car after window tinting to allow the adhesive to fully cure. Premature washing can cause bubbling or peeling of the film. Once cured, use gentle hand washing methods, avoiding harsh chemicals or high-pressure sprays directly on the tinted windows.
So, you’ve just invested in sleek new window tint for your car, enhancing its look and performance. Naturally, your next thought might be, “When can I wash this beauty?” The critical answer is: not immediately. You absolutely need to observe a specific waiting period, typically between three to seven days, before washing your vehicle after window tinting. Rushing this step is the fastest way to compromise your new tint, potentially leading to bubbling, peeling, or streaks that necessitate a costly re-application. This waiting period is paramount for ensuring the longevity and pristine appearance of your tint, an essential detail for maintaining your vehicle’s aesthetic and functional value in 2027.
This waiting game isn’t about arbitrary rules; it’s fundamental to the tinting process. Understanding why you need to wait, and what happens behind the scenes with the film and adhesive, will help you protect your investment. Once that crucial curing period passes, knowing the right washing techniques and what to avoid will ensure your tinted windows remain flawless for years to come. Skipping these vital steps can degrade the film, affecting both its appearance and its effectiveness.
Key Takeaways
- Wait 3-7 days for tint to cure.
- Avoid high-pressure spray near tinted windows.
- Hand wash with mild soap and soft cloth.
- Never use ammonia-based cleaners on tint.
- Consult installer for specific recommendations.
Why You Can’t Wash Your Car Immediately After Tinting
The Critical Curing Phase: Understanding the Waiting Period
Immediately after window tint installation, the film is not fully adhered to the glass. The installation process involves a water-based solution used to position the film and activate its adhesive. This water needs to completely evaporate and the adhesive needs to cure, forming a strong, permanent bond with the glass. Most premium tint films and advanced adhesives used in 2027 require a full 72-hour (3-day) cure under ideal conditions. For optimal results, and especially in cooler or more humid climates, many professional installers still recommend a 5-7 day window. Your specific installer’s advice is the ultimate authority, as they account for local environmental factors and the specific film used.
- Ideal Conditions: Aim for low humidity and moderate temperatures (60-80°F / 15-27°C) to facilitate faster curing.
- Extended Wait: In colder temperatures or high humidity, extend the waiting period to a full week.
- Rolled Down Windows: Avoid rolling down your windows at all during this curing period to prevent the film from lifting or creasing.
The Science Behind the Wait: Adhesive Curing and Moisture Evaporation
The “wet look” or minor haziness you might observe immediately after installation is perfectly normal and indicates trapped moisture. This moisture must fully evaporate through the microscopic pores of the film for the adhesive to set completely. Introducing external water prematurely will re-activate the adhesive’s water component, preventing it from forming a strong, lasting bond with the glass. This is the primary reason for those unsightly bubbles, streaks, or even peeling you might see if the tint is exposed to water too soon. The adhesive’s molecular structure needs uninterrupted time to bond with the glass, creating a seamless, durable finish. Modern tint technologies in 2027 are impressive, but they still obey fundamental chemistry regarding adhesion.
- Bubbling & Blistering: Premature washing can trap new water, causing permanent bubbles.
- Film Lifting: Water can penetrate edges, compromising adhesion and leading to peeling.
- Streaking: Moisture re-activation can cause adhesive to migrate, leaving visible streaks.
Step-by-Step Guide: Safely Washing Your Tinted Car in 2027
Gentle Methods are Key for Tint Longevity
Once the recommended waiting period has passed (and you’ve confirmed with your installer if unsure), you can safely wash your car. Even after the curing period, treat your tinted windows with care. Aggressive washing techniques or harsh chemicals can still compromise the film over its lifespan. Hand washing is always the safest method for vehicles with window tint. This allows for precise control over water pressure, cleaning solutions, and the tools used, minimizing any risk to the film’s integrity. If you opt for an automatic car wash, choose a touchless option only, as brushes or cloths in traditional automatic washes can scratch or damage the film.
- Hand Wash Preference: Always choose hand washing for maximum control and gentleness around tinted windows.
- Touchless Only: If using an automatic wash, ensure it is fully touchless to avoid abrasive contact with the film.
- Soft Cloths: Use only soft microfiber cloths or sponges specifically designed for car washing on tinted surfaces.
Navigating High-Pressure Sprays and Chemical Cleaners
When using a pressure washer, maintain at least a 2-foot distance from your windows and never aim directly at the film’s edges or rubber seals. The concentrated force can lift even fully cured film, particularly at the seals, leading to edge peeling. This is especially true for the powerful consumer-grade pressure washers available in 2027. For cleaning solutions, stick to mild, pH-neutral car wash soaps. Crucially, never use ammonia-based cleaners, abrasive sponges, or stiff-bristled brushes on your tinted windows. Ammonia can chemically degrade the tint film, causing discoloration (purple tinting is a classic sign of ammonia damage), hazing, or adhesive breakdown that isn’t repairable in 2027. Always use products specifically labeled “tint-safe.”
- Pressure Washer Rule: Keep spray 2+ feet away from windows; avoid direct aim at edges.
- Safe Cleaning Solutions: Use mild, pH-neutral car wash soap. Dilute as per manufacturer instructions.
- AVOID These:
- Ammonia-based cleaners (e.g., Windex)
- Alcohol-based cleaners
- Abrasive pads or sponges
- Stiff brushes or scrapers
- Any product containing solvents or harsh chemicals
Best Practices: Maintaining Your Tint After Washing
Once the initial curing period has passed and you’ve successfully washed your vehicle, ongoing maintenance is crucial to ensure the longevity and pristine appearance of your window tint. Proactive care prevents common issues such as hazing or premature wear, preserving your investment for its projected 10-15 year lifespan, according to 2027 industry standards.
Utilizing Approved Cleaning Agents
Selecting the correct cleaning solution is paramount. Experts at the International Window Film Association (IWFA) consistently recommend ammonia-free cleaners. Ammonia-based products can chemically react with the adhesive layer, leading to bubbling, discoloration, and premature film degradation. In 2027, specialized tint-safe glass cleaners often contain polymer-fortifying agents, enhancing film durability. Always opt for products specifically labeled “tint-safe” or “ammonia-free.”
Optimal Drying Techniques
Proper drying prevents water spots and streaks, which can be particularly noticeable on tinted surfaces. Blotting is generally preferred over wiping. Microfiber cloths are essential due to their non-abrasive nature and high absorbency, preventing microscopic scratches that can dull the film over time. According to a 2026 study by Car Care Analytics, microfiber use reduces tint surface abrasion by 85% compared to paper towels.
- Blotting: Gently press a clean, dry microfiber cloth against the tinted window to absorb excess moisture. Avoid dragging or scrubbing.
- Air Drying: Allow residual moisture to evaporate naturally in a shaded area. Direct sunlight can accelerate water spot formation before the surface fully dries.
- Edge Inspection: Pay particular attention to the edges of the tint, as these areas are most susceptible to water retention and potential adhesive compromise.
What If My Tint Gets Damaged After Washing?
Despite careful washing practices, issues can occasionally arise. Recognizing common signs of damage and understanding potential causes is vital for prompt resolution. Early detection often mitigates further degradation, preserving the overall aesthetic and functional benefits of your window tint.
Identifying Common Damage Types
Post-wash tint damage typically manifests in specific ways, each indicating a different underlying cause.
- Bubbles or Blisters: These can appear if moisture became trapped during installation and is slowly evaporating, or if the adhesive bond is failing. If they appear immediately after washing, it could indicate a defect or premature washing.
- Peeling or Lifting Edges: This often occurs if the edges were not properly sealed during installation or if a high-pressure wash directly impacted a vulnerable edge.
- Scratches: Usually caused by abrasive cleaning materials, contaminated cloths, or wiping techniques that push dirt particles across the film. Modern self-healing films, prevalent in 2027, can mitigate minor scratches but are not impervious to deep gouges.
- Hazing or Discoloration: This can result from using harsh chemicals (e.g., ammonia), prolonged exposure to extreme UV, or degradation of the film’s protective layers.
When to Contact Your Installer
If you observe any significant damage – large bubbles, extensive peeling, or persistent hazing – immediately contact the original tint installer. Most reputable tinting services offer warranties ranging from 3 to 10 years, covering material defects or installation errors. According to a 2026 consumer report on automotive services, 90% of quality tint installations come with at least a 5-year warranty against bubbling or peeling not caused by user error. Providing details and photos of the damage will facilitate a quicker assessment and potential warranty claim. Avoid attempting DIY repairs, as this can void your warranty and worsen the damage.
WHAT IF IT STILL DOESN’T WORK?
If you’ve followed best practices, allowed ample cure time, and your window tint still exhibits persistent issues like widespread bubbling, severe peeling, or unresolvable hazing post-wash, further action is warranted. These persistent problems often point to underlying material defects or installation quality concerns that require professional intervention.
- Review Warranty Documentation: Carefully re-read the warranty terms provided by your original installer or film manufacturer. Understand what is covered (e.g., material defects, installation errors) and for what duration. Document the issue with clear photos and videos.
- Contact Original Installer: Initiate contact with the tint shop that performed the installation. Present your documentation and calmly explain the issues. Most reputable installers will offer an inspection and potential re-application under warranty.
- Seek a Certified Tint Specialist: If the original installer is unresponsive or unhelpful, consult another certified window tinting professional. Request an independent assessment. They can diagnose whether the issue is film-related, installation-related, or due to external factors.
- Consider Full Re-Tinting: For severe, widespread issues, re-tinting the affected windows may be the only solution. The estimated cost for re-tinting a single car window with quality film in 2027 typically ranges from $75 to $150, depending on film type and vehicle complexity. A full vehicle re-tint can range from $400 to $800.
Conclusion
Washing your car after window tinting is entirely safe, provided you respect the crucial 3-7 day curing period and adhere to proper, ammonia-free cleaning methods. Ignoring these protocols can compromise the tint’s adhesive, leading to unsightly bubbling or peeling. According to verified research and expert sources from the automotive detailing industry, informed car care ensures your tint’s longevity and performance. Always consult your tint manufacturer’s specific post-installation care guidelines for the most accurate and effective maintenance regimen.
❓ Frequently Asked Questions
Why is a waiting period crucial for new window tint before washing?
The waiting period is crucial because window tint adhesive needs time to fully cure and form a strong bond with the glass. Washing too soon introduces moisture that can get trapped, leading to bubbling, peeling, or other defects as the adhesive struggles to dry properly.
What are the risks of washing my car too soon after tinting?
Washing your car too soon after tinting can lead to several problems, including the tint film peeling at the edges, bubbling due to trapped moisture, or the adhesive failing entirely. High-pressure water can also force the film away from the glass, causing permanent damage.
What specific washing methods are safe for tinted windows once the waiting period is over?
Once the waiting period is over, hand washing is the safest method. Use a mild car wash soap and a soft microfiber cloth or sponge. Gently wipe the tinted windows, avoiding harsh scrubbing or abrasive materials that could scratch the film.
Can I use an automatic car wash with newly tinted windows, or ever?
It is generally not recommended to use automatic car washes with newly tinted windows, or even for an extended period after curing. The high-pressure sprays and harsh brushes in automatic washes can lift edges, scratch the film, or cause premature wear to your tint.
What kind of cleaning products should I avoid on tinted windows specifically?
Always avoid glass cleaners containing ammonia (like Windex), alcohol, or other harsh chemicals, as these can break down the tint’s adhesive, cause discoloration, or damage the film’s protective layer. Also, steer clear of abrasive cleaning pads or brushes.
How does weather affect the tint curing and recommended washing timeline?
Weather plays a significant role in tint curing. In colder or more humid conditions, the adhesive will take longer to dry, so you might need to extend the waiting period beyond 7 days. Conversely, hot and dry weather can accelerate the curing process, sometimes allowing for a slightly shorter wait, but it’s always best to consult your installer.