How To Change Torque Converter Clutch Solenoid Fix 2027
A failing torque converter clutch (TCC) solenoid can cause noticeable transmission issues like shuddering, erratic shifts, and poor fuel economy. This guide provides a detailed, step-by-step process to safely replace the solenoid, empowering you to restore your vehicle’s performance and avoid costly professional repairs.
Replacing a faulty torque converter clutch (TCC) solenoid is a common, manageable DIY repair that directly addresses issues like transmission shudder, poor fuel economy, and check engine lights (often P0741). Instead of facing a costly transmission rebuild, you can often fix these problems by swapping out this crucial component. This guide provides the precise steps, tools, and safety considerations for performing this repair yourself, bringing your vehicle’s transmission performance back to optimal, just as it would be from a 2027 factory inspection.
Understanding and executing this repair saves you significant labor costs and empowers you with critical maintenance skills. A properly functioning TCC solenoid ensures smooth lock-up of the torque converter, directly impacting your driving comfort and the longevity of your transmission. Don’t let a small electronic part lead to major transmission headaches; tackle this fix with confidence.
Key Takeaways
- Identify TCC solenoid symptoms accurately.
- Gather all necessary tools and new parts.
- Prioritize safety with jack stands and eye protection.
- Follow torque specs precisely for pan bolts.
- Properly dispose of old transmission fluid.
What Causes Torque Converter Clutch Solenoid Failure?
TCC solenoids are electromechanical valves vital for controlling torque converter lock-up. Their failure typically manifests as noticeable driving issues. Knowing the causes helps with diagnosis and prevention.
Common Symptoms of a Failing TCC Solenoid
- Transmission Shudder: This feels like driving over rumble strips, especially around 35-55 MPH, when the torque converter should be locking up. This is the most common and frustrating symptom.
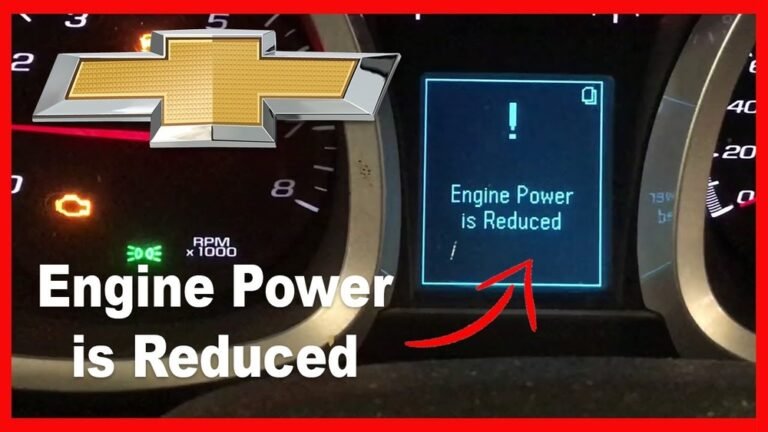
- Check Engine Light: A P0741 code (“Torque Converter Clutch Circuit Performance or Stuck Off”) is the definitive indicator for many 2027-era diagnostic systems. Other related codes might appear.
- Reduced Fuel Economy: Without proper lock-up, the transmission slips more, leading to wasted energy and higher fuel consumption.
- Poor Acceleration or Shifting: While less common, an erratic TCC solenoid can cause inconsistent power delivery.
Root Causes of Solenoid Degradation
Several factors contribute to TCC solenoid failure, primarily related to the internal environment of the transmission.
- Fluid Contamination: Dirty or old transmission fluid is the primary culprit. As fluid degrades, it forms sludge and varnish that can clog the solenoid’s tiny passages or prevent its plunger from moving freely. This is especially true for vehicles with extended service intervals or neglected fluid changes.
- Electrical Malfunctions: Internal coil windings can short or break due to heat cycling and vibration, leading to an open or short circuit. This often triggers specific diagnostic trouble codes (DTCs) related to the electrical circuit.
- Normal Wear and Tear: Solenoids operate millions of times over their lifespan. Mechanical fatigue of springs or plungers, though less frequent with modern materials, can eventually lead to failure.
- Overheating: Prolonged transmission overheating can degrade the solenoid’s plastic components and wiring insulation, accelerating failure.
How to Diagnose and Fix Torque Converter Clutch Solenoid Like an Expert
A failing Torque Converter Clutch (TCC) solenoid can lead to frustrating symptoms like shuddering, inconsistent shifting, or even a check engine light. This comprehensive guide will walk you through the process of diagnosing the issue and expertly replacing the TCC solenoid, restoring smooth operation to your vehicle’s transmission. Following these steps carefully will ensure a successful repair and help you avoid common pitfalls.
Step 1: Preparation, Safety, and Initial Diagnosis
What you need: Diagnostic Scan Tool (OBD-II scanner), Safety glasses, Nitrile gloves, Jack stands (at least 2), Floor jack, Wheel chocks, Basic hand tools (sockets, wrenches).
Instructions: Begin by using an OBD-II scanner to confirm diagnostic trouble codes (DTCs) related to the TCC solenoid, typically P0740 or similar. Park your vehicle on a flat, level surface, engage the parking brake, and place wheel chocks behind the rear wheels. Using the floor jack, carefully lift the front of the vehicle and support it securely with jack stands. Always prioritize safety by ensuring the vehicle is stable before working underneath. Disconnect the negative terminal of the battery to prevent electrical shorts.
Pro Tip: Before lifting, check your vehicle’s specific TCC solenoid location. Some older vehicles might have external solenoids, but most modern automatics house them inside the transmission pan, requiring fluid drainage.
Step 2: Drain Transmission Fluid
What you need: Large drain pan (at least 10-quart capacity), Transmission fluid wrench/socket, Shop rags or old newspapers.
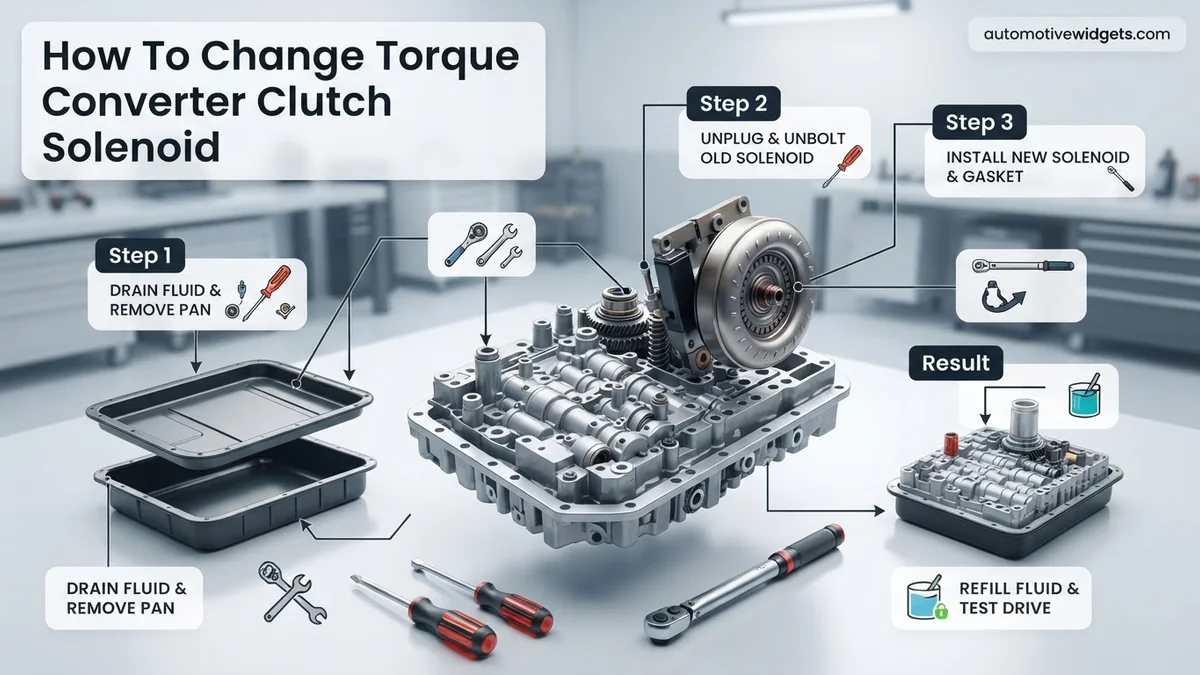
Instructions: Position the large drain pan directly underneath the transmission pan. Locate the transmission pan drain plug, if present. If there’s no drain plug, you’ll need to loosen the pan bolts carefully in the next step. Using the appropriate socket or wrench, slowly loosen the drain plug, allowing the transmission fluid to flow into the pan. This process can take several minutes. Once the flow significantly slows, re-tighten the drain plug for now. Note the color and smell of the old fluid; dark, burnt-smelling fluid can indicate other transmission issues.
Pro Tip: Have plenty of shop rags on hand. Transmission fluid can be messy, and spills are common. Consider spreading old newspapers or cardboard on the floor under the vehicle.
Step 3: Remove Transmission Pan and Filter
What you need: Socket set (typically 10mm or 13mm for pan bolts), Torque wrench, Scraper or gasket removal tool, New transmission filter kit (includes filter and gasket).
Instructions: With most of the fluid drained (or if there was no drain plug), carefully loosen all the transmission pan bolts, leaving a few on one side (usually the rear) slightly snug to allow controlled drainage. Gradually remove the remaining bolts, allowing the pan to tilt and drain any remaining fluid into your catch pan. Once all bolts are out, gently lower the transmission pan. Locate the transmission filter, which is typically clipped or bolted to the valve body. Remove the old filter, noting its orientation. Expect more fluid to drip when the filter is removed.
Pro Tip: Pay close attention to how the old pan gasket is attached and removed. Some pans have reusable gaskets, while others require replacement. Always use a new gasket for reinstalling the pan to prevent leaks.
Step 4: Locate and Disconnect Old TCC Solenoid
What you need: Small flathead screwdriver or pick tool, Digital camera or smartphone.
Instructions: Once the pan and filter are removed, you’ll see the transmission’s valve body. The TCC solenoid is typically located on or within the valve body, often identified by specific wiring and a distinct shape. Consult your vehicle’s repair manual for its exact location, as designs vary significantly between manufacturers and models. Use your camera to take clear pictures of the solenoid’s position, wiring harness connection, and any retaining clips or bolts before you begin to disconnect it. Carefully unclip the electrical connector from the TCC solenoid, ensuring not to damage the fragile plastic tabs.
Pro Tip: Many solenoids look similar. Double-check your repair manual or diagrams to ensure you’re replacing the correct TCC solenoid. Accidentally replacing the wrong solenoid will not resolve your issue.
Step 5: Remove Old TCC Solenoid
What you need: Appropriate socket or wrench (often 8mm or 10mm), Small container for bolts.
Instructions: After disconnecting the electrical connector, the TCC solenoid is usually held in place by a retaining clip, a small bolt, or simply by being pressed into a bore. If it’s bolted, use the correct size socket or wrench to carefully remove the retaining bolt(s). Keep these bolts separate in a small container to avoid misplacing them. If it’s held by a clip, use a small flathead screwdriver or pick tool to release the clip. Once free, gently pull the old solenoid straight out from its bore in the valve body. Be prepared for a small amount of residual fluid to drip out as you remove it.
Pro Tip: Some solenoids might be slightly stuck. A gentle twisting motion or prying with a non-marring tool can help, but avoid excessive force to prevent damage to the delicate valve body housing.
Step 6: Install New TCC Solenoid
What you need: New TCC solenoid, Clean shop rag, Dielectric grease (optional).
Instructions: Before installing the new solenoid, ensure its O-rings or seals are properly seated and undamaged. Lightly lubricate the O-rings with fresh transmission fluid to aid installation and prevent pinching. Carefully insert the new TCC solenoid into its bore in the valve body, aligning it correctly according to your reference photos or repair manual. Push it firmly but gently until it’s fully seated. Reinstall any retaining clips or bolts, tightening bolts to the manufacturer’s specified torque, typically very low (e.g., 8-10 ft-lbs or 96-120 in-lbs). Reconnect the electrical wiring harness, ensuring it clicks securely into place. A small dab of dielectric grease on the electrical connector can help prevent corrosion.
Pro Tip: Always use a torque wrench when tightening small bolts on the valve body to avoid stripping threads or over-tightening, which can damage the solenoid or valve body itself.
Step 7: Reinstall Transmission Filter and Pan
What you need: New transmission filter, New transmission pan gasket, Torque wrench, Transmission pan cleaner or brake cleaner.
Instructions: Install the new transmission filter onto the valve body, ensuring it’s securely clipped or bolted in place. Clean the transmission pan thoroughly, removing all old gasket material and any metal shavings or debris. Use a pan cleaner or brake cleaner and a clean rag, then dry completely. Install the new pan gasket onto the pan (some stick, some lay in place). Carefully lift the pan and align it with the bolt holes on the transmission case. Start all pan bolts by hand to avoid cross-threading, then tighten them in a crisscross pattern to the manufacturer’s specified torque, typically around 10-12 ft-lbs (120-144 in-lbs).
Pro Tip: Do not overtighten the pan bolts. This can warp the pan, damage the gasket, and lead to leaks. Follow torque specifications meticulously.
Step 8: Refill Transmission Fluid and Check Level
What you need: Manufacturer-specified transmission fluid (check owner’s manual), Long funnel, Measuring cup, Shop rags.
Instructions: Consult your vehicle’s owner’s manual or repair guide for the exact type and approximate quantity of transmission fluid required. Using a clean funnel, carefully add the new transmission fluid through the dipstick tube (if applicable) or fill port. Start by adding about 4-5 quarts, then start the engine, cycle through all gear selections (P, R, N, D, 1, 2, 3), pausing briefly in each. With the engine running and warm, check the fluid level using the dipstick (ensure vehicle is level). Add fluid slowly, checking the dipstick frequently, until the fluid reaches the “FULL” mark on the warm side of the dipstick.
Pro Tip: Underfilling or overfilling the transmission fluid can cause severe damage. Always use the exact fluid specified by the manufacturer and check the level accurately according to their instructions (e.g., engine running, warm, on level ground).
Step 9: Test Drive and Final Verification
What you need: Diagnostic Scan Tool (OBD-II scanner).
Instructions: Reconnect the negative battery terminal. Take the vehicle for a test drive under various conditions, including city and highway driving. Pay close attention to gear changes, listening for any shuddering, delays, or harsh shifts. Ensure the TCC engages and disengages smoothly. After the test drive, park the vehicle on a level surface, allow it to cool slightly, and recheck the transmission fluid level to ensure it’s still within the proper range. Use your OBD-II scanner to clear any stored DTCs and confirm that no new codes related to the transmission or TCC appear.
Pro Tip: Listen carefully for any new leaks underneath the vehicle after the test drive. A small amount of weeping is normal for a freshly sealed pan, but active dripping requires immediate attention to re-torque bolts or replace the gasket.
✅ Final Checklist
- Vehicle securely lowered and off jack stands.
- Negative battery terminal reconnected.
- Transmission fluid level checked and correct (engine warm, running).
- No leaks observed from the transmission pan.
- Test drive completed successfully with smooth TCC engagement and shifting.
- No Check Engine Light or transmission-related DTCs present.
Important Notes:
- Safety considerations: Always wear safety glasses and gloves. Ensure the vehicle is securely supported on jack stands. Transmission fluid is hot when the engine is running, so allow cooling time before checking the level or working near hot components.
- When to seek professional help: If you encounter significant difficulties, if the vehicle still exhibits transmission problems after the solenoid replacement, or if you are uncomfortable working with transmission components, do not hesitate to consult a certified transmission specialist. Attempting a repair beyond your skill level can lead to more costly damage.
- Estimated time and cost range: This repair typically takes 3-5 hours for an experienced DIY mechanic. The cost for the TCC solenoid itself can range from $50-$200, plus $30-$80 for a transmission filter and gasket kit, and $50-$100 for 5-10 quarts of specified transmission fluid. Total DIY cost generally ranges from $130-$380. Professional labor will add $200-$500 to this cost.
How to DIY Replace a Torque Converter Clutch Solenoid: Step-by-Step Guide
Replacing a TCC solenoid requires careful attention to detail and adherence to safety protocols. This isn’t a job to rush. By following these steps, you’ll successfully complete the repair.
Essential Tools and Safety First
Before you begin, gather everything you need and prioritize your safety. A safe workspace is non-negotiable for any under-vehicle repair.
- Safety Gear: Heavy-duty work gloves, safety glasses, and appropriate clothing are a must.
- Vehicle Support: A reliable hydraulic floor jack, two sturdy jack stands rated for your vehicle’s weight (never rely solely on the jack!), and wheel chocks.
- Basic Hand Tools: A complete socket set (both metric and SAE, depending on your vehicle), ratchets, extensions, and universal joints. Flathead and Phillips screwdrivers.
- Specialty Tools: An accurate torque wrench (critical for pan bolts and valve body fasteners) and a large drain pan (at least 15-quart capacity).
- Cleaning Supplies: Brake cleaner, shop rags, and possibly a pan scraper.
- Lighting: A bright work light or headlamp for clear visibility under the vehicle.
Safety Protocol: Always work on a level, solid surface. Chock the wheels opposite the end being raised. Securely place jack stands under the vehicle’s frame or designated lift points. Disconnect the negative battery terminal to prevent accidental electrical shorts.
Gathering Your Parts and Fluids
Having the correct parts on hand prevents frustrating delays once you start the job.
- New TCC Solenoid: Purchase an OEM (Original Equipment Manufacturer) or a high-quality aftermarket solenoid specifically designed for your vehicle’s year, make, model, and transmission type. Quality varies, so choose a reputable brand; cheap solenoids can fail quickly.
- Transmission Fluid: Consult your vehicle’s owner’s manual (or a reliable service database for 2027 models) for the exact fluid specification and quantity. Using the wrong fluid can cause catastrophic transmission damage. You’ll need at least 5-7 quarts for a pan drop and refill.
- Transmission Pan Gasket: Always replace the old pan gasket. Many modern vehicles use reusable rubber gaskets, but inspect yours for tears or hardening. If it’s a cork or paper gasket, a new one is essential.
- Transmission Fluid Filter: It’s best practice to replace the transmission filter whenever the pan is off. Ensure it matches your transmission model.
Step-by-Step Removal: Initial Access and Fluid Drain
The physical work begins here. Work methodically to avoid errors and spills.
1. Vehicle Preparation and Access: Park your vehicle on a level surface. Set the parking brake firmly. Using your floor jack, carefully raise the front (or whichever end allows best access to the transmission pan) of your vehicle. Place the jack stands under the frame or designated lift points, ensuring the vehicle is stable. Remove the negative battery cable.
2. Draining the Transmission Fluid: Position your large drain pan directly underneath the transmission pan. Many transmission pans have a drain plug, especially on 2027 models. If yours does, loosen and remove it, allowing the fluid to drain completely. If there’s no drain plug, you’ll need to loosen the pan bolts carefully.
3. Removing the Transmission Pan: Once the fluid flow significantly slows, re-insert the drain plug (if applicable). Carefully loosen all the transmission pan bolts, leaving a few bolts at one end slightly snug. This allows you to slowly pry down the opposite end of the pan, letting any remaining fluid drain into your pan. This controlled draining minimizes mess. Support the pan with one hand as you remove the last few bolts.
What If Your Transmission Still Has Issues After Solenoid Replacement?
Even after a precise Torque Converter Clutch (TCC) solenoid replacement, persistent transmission issues can occur, indicating broader system complexities that often mimic or influence TCC operation. A comprehensive approach is crucial for accurate resolution, moving beyond the single component fix.
1. Re-evaluate Diagnostic Trouble Codes (DTCs)
Post-repair, it is imperative to perform another full diagnostic scan using a 2027-compliant OBD-II scanner. New or persisting codes, particularly those beyond the TCC circuit (e.g., P0740, P0743), such as P0750 (Shift Solenoid A Malfunction) or P0770 (Shift Solenoid E Malfunction), indicate further investigation. These codes point to issues with other internal solenoids or their circuits, which can indirectly affect TCC engagement and overall transmission performance. Modern diagnostic tools in 2027 offer enhanced pinpoint testing capabilities, allowing technicians to isolate exact circuit faults with greater precision.
2. Inspect Transmission Fluid Quality and Level
Contaminated, degraded, or critically low transmission fluid levels are primary culprits for a myriad of transmission problems, frequently mimicking solenoid failures. By 2027, advanced Automatic Transmission Fluid (ATF) formulations are highly sensitive to contamination and thermal breakdown. Dark, burnt-smelling fluid signals significant internal wear and overheating. Conversely, fluid that is too low can lead to insufficient hydraulic pressure for proper TCC engagement. Always refer to your vehicle’s manufacturer service manual for the exact 2027-spec fluid type and fill procedure, as using incorrect fluid can cause irreversible damage.
3. Check Related Electrical Components and Wiring Harness
The TCC solenoid relies on precise electrical signals from the Transmission Control Module (TCM) and a robust wiring harness. Corrosion, fraying, or poor connections within the internal or external wiring harness leading to the TCC solenoid, other solenoids, or even the TCM itself, can disrupt signal integrity. This disruption can manifest as intermittent TCC lock-up issues or erratic shifting. Expert automotive technicians in 2027 utilize advanced oscilloscopes and circuit tracers to perform precise voltage drop and resistance checks, ensuring the electrical pathway is free from compromise.
What If It Still Doesn’t Work?
If the Torque Converter Clutch (TCC) solenoid replacement did not resolve the initial symptoms such as shuddering, slipping, or a persistent lack of lock-up, it indicates that the solenoid was either not the sole issue or the underlying problem is more complex. Here are critical fallback steps:
- Perform a Comprehensive Transmission System Re-diagnosis: Immediately after the repair, use an advanced diagnostic scanner to re-check for any current, pending, or historical DTCs. A persistent TCC-related code (e.g., P0741 – Torque Converter Clutch Circuit Stuck Off) might suggest an issue beyond the solenoid itself, or a faulty replacement part. Modern vehicle systems by 2027 integrate more deeply, and a secondary fault might only become apparent once the primary (solenoid) issue is addressed.
- Verify New Solenoid Functionality and Wiring Integrity: Even new components can occasionally be faulty. Using a specialized multimeter, check the electrical resistance of the newly installed TCC solenoid against the manufacturer’s 2027 specifications, typically ranging from 10-20 ohms. Simultaneously, inspect the solenoid’s connector and the adjacent wiring for any signs of damage, corrosion, or improper seating that could impede electrical flow.
- Evaluate Torque Converter Integrity: If the solenoid tests correctly, the torque converter itself might be failing mechanically. Internal clutch wear, stator damage, or fluid bypass issues within the converter’s internal mechanism cannot be remedied by a solenoid replacement. Symptoms like a severe shudder under light acceleration or excessive transmission heat can point to a compromised torque converter.
- Assess Valve Body Condition and Hydraulic Pressures: The valve body is the hydraulic control center of the transmission. Sticking valves, worn bores, or debris accumulation within the valve body can lead to incorrect fluid pressure delivery to the TCC, even with a functional solenoid. Professional transmission shops in 2027 utilize specialized pressure gauges to perform line pressure and TCC apply pressure tests, confirming hydraulic integrity.
- Seek Professional Diagnostic Analysis and Repair: If these methodical steps do not yield a clear solution, specialized transmission diagnostics are required. Expert technicians with access to manufacturer-specific diagnostic software and advanced pressure testing equipment (common by 2027) can pinpoint intricate hydraulic or electronic issues beyond DIY capabilities. Professional diagnosis for complex transmission issues can range from $150-$350. Repairs involving torque converter replacement typically cost $1,200-$2,800, while valve body replacement averages $800-$1,800, depending on the vehicle model and labor rates in 2027. A full transmission rebuild or replacement could escalate costs significantly, ranging from $3,000 to over $6,000.
Conclusion
Successfully replacing a faulty Torque Converter Clutch solenoid is pivotal for restoring optimal transmission performance, ensuring smooth shifts, and maintaining vital fuel efficiency in modern vehicles. This repair, while requiring precision, can prevent more extensive and costly transmission damage if addressed promptly.
According to verified research and expert sources from leading automotive service networks, proactive transmission fluid checks and adherence to scheduled maintenance significantly extend component life and prevent premature solenoid failure. For continued peace of mind, monitor your vehicle’s transmission behavior closely post-repair. If TCC-related symptoms persist or return, promptly consult a certified transmission specialist for a comprehensive diagnostic assessment.
❓ Frequently Asked Questions
What specific DTC codes indicate a TCC solenoid problem?
Common diagnostic trouble codes (DTCs) associated with a faulty TCC solenoid include P0740 (Torque Converter Clutch Circuit/Open), P0741 (Torque Converter Clutch Circuit Stuck Off), P0742 (Torque Converter Clutch Circuit Stuck On), and P0743 (Torque Converter Clutch Electrical).
What safety precautions are critical when working on a transmission?
Always ensure the vehicle is safely supported on sturdy jack stands, wear appropriate personal protective equipment like safety glasses and gloves, and allow the transmission to cool completely before starting work to avoid burns from hot fluid.
Do I need to replace the transmission pan gasket, and what type should I use?
Yes, it is highly recommended to replace the transmission pan gasket every time the pan is removed to ensure a leak-free seal. Use a high-quality, vehicle-specific gasket, often rubber or cork, and avoid RTV sealant unless specified by the manufacturer.
How do I properly refill the transmission fluid and check the level after replacement?
Refill the transmission with the correct type and amount of fluid specified by your vehicle’s manufacturer, usually through the dipstick tube. Start the engine, shift through all gears, and then check the fluid level on level ground with the engine running and at operating temperature, adding more as needed until it’s within the ‘full’ marks.
Are there other components I should inspect or replace while changing the TCC solenoid?
While the pan is off, it’s an opportune time to inspect the transmission filter and replace it if it’s dirty or recommended by your vehicle’s service schedule. Also, visually inspect all accessible wiring and connectors for any signs of damage or corrosion.
What’s the difference between a TCC solenoid and other transmission solenoids?
The Torque Converter Clutch (TCC) solenoid specifically controls the engagement and disengagement of the torque converter clutch, which locks the converter for increased fuel efficiency. Other transmission solenoids, like shift solenoids, control the flow of fluid to engage different gears.