How Often Should You Change Your Brake Rotors How 2027
The frequency for changing brake rotors varies significantly based on driving habits, vehicle type, and rotor material. While average lifespans are 30,000-70,000 miles, regular inspection and recognizing wear signs are crucial for safety and performance.
Your brake rotors typically need replacement every 30,000 to 70,000 miles, but this is a broad average for 2027 vehicles. The actual frequency depends heavily on several critical factors, making a one-size-fits-all answer impossible. Understanding these influences helps you manage maintenance effectively.
Knowing when to change your rotors is crucial for both safety and your wallet. Worn rotors compromise braking performance, increasing stopping distances and putting you at risk. Proactive replacement prevents further damage to other brake components, saving you from more expensive repairs down the line.
Key Takeaways
- Rotor lifespan varies:30k-70k miles, depends on factors.
- Inspect rotors regularly for visible wear signs.
- Aggressive driving significantly reduces rotor longevity.
- Listen for grinding, feel for vibrations; these signal wear.
- Timely replacement prevents safety hazards and costly repairs.
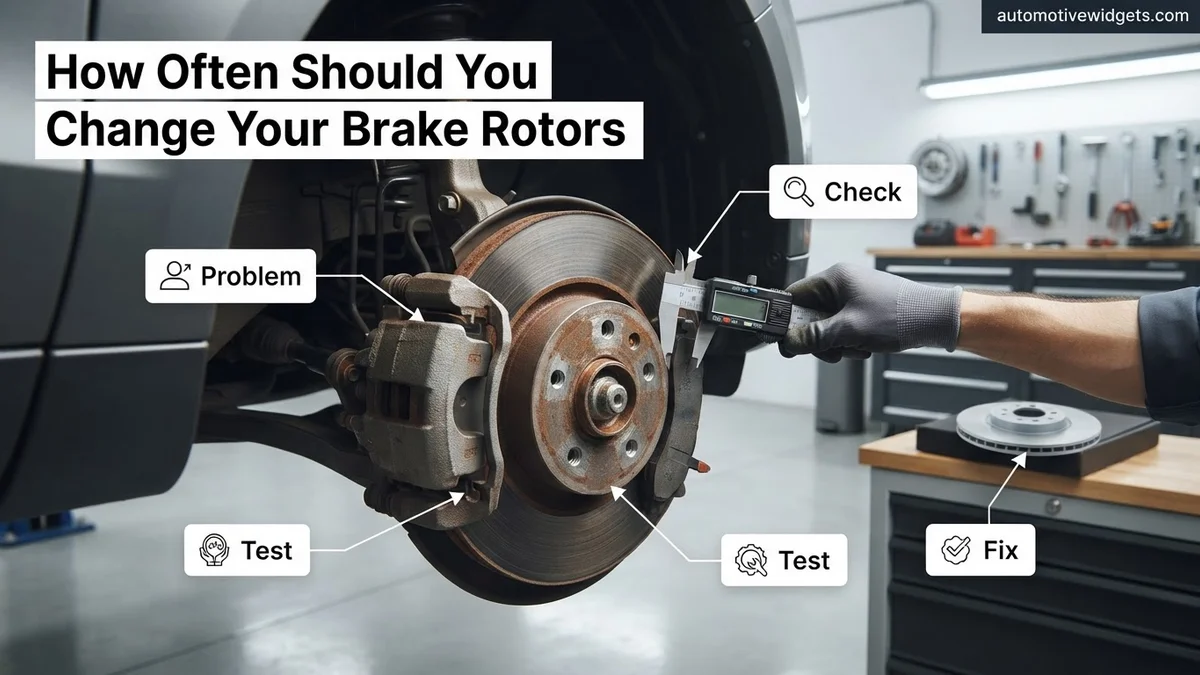
Factors That Determine Your Brake Rotor Lifespan in 2027
Determining precisely when to replace brake rotors isn’t about hitting an exact mileage number. It’s about how various elements interact with your vehicle’s braking system. By 2027, material science has refined standard rotor durability, but the fundamentals of wear remain constant.
Driving Habits and Environment
- Aggressive Driving: Frequent hard braking, sudden stops, and rapid acceleration-deceleration cycles generate more heat and friction, significantly accelerating rotor wear. If you consistently drive this way, expect rotor life closer to the 30,000-mile mark.
- City vs. Highway: Stop-and-go city driving with its constant braking cycles wears rotors much faster than highway driving, which involves more sustained speeds and less frequent, lighter braking.
- Terrain: Driving in mountainous or hilly areas demands heavy brake use, especially downhill, leading to increased heat and wear. Vehicles regularly navigating such terrain will see reduced rotor lifespan.
- Climate: Areas with high humidity or frequent road salt use (for snow and ice) can accelerate corrosion on rotors. While most rotors have improved anti-corrosion coatings by 2027, prolonged exposure still impacts their longevity.
Vehicle Type and Rotor Material
- Vehicle Weight: Heavier vehicles like SUVs, trucks, and performance cars naturally put more stress on their braking systems. They require larger, more robust rotors, but even these wear quicker under the increased load. Expect lower mileage lifespans compared to lighter compact cars.
- Rotor Material and Design:
- Standard Cast Iron: The most common type. Modern formulations in 2027 offer good durability, typically lasting the average 30,000-70,000 miles.
- High-Carbon Rotors: Often found in premium or performance vehicles, these dissipate heat better and are more resistant to warping, potentially extending life slightly under stress.
- Slotted/Drilled Rotors: Designed for enhanced cooling and gas dissipation, these are common on performance vehicles. While they offer better braking performance, the drilling/slotting can sometimes reduce overall material thickness faster, leading to a similar or slightly shorter lifespan than solid rotors under extreme use.
- Ceramic Composite Rotors: While still very expensive and rare for mainstream vehicles in 2027, these offer extreme durability (often lasting over 100,000 miles) and are found almost exclusively in high-end sports cars.
As a general rule, most drivers will find their rotors needing attention between 40,000 and 60,000 miles, or every 3-5 years, depending on the factors above.
How to Diagnose and Fix Brake Rotor Wear Like an Expert
Your vehicle’s brake rotors are unsung heroes, silently working to bring you to a safe stop every time you press the pedal. These crucial components endure immense friction and heat, which inevitably leads to wear and tear. Understanding when to inspect and ultimately change your brake rotors isn’t just about saving money; it’s paramount for your safety and the longevity of your braking system. This comprehensive guide will walk you through the essential diagnostic steps, helping you identify signs of wear and make informed decisions, ensuring your brakes are always performing at their best.
Step 1: Understanding Rotor Basics and Wear Indicators
What you need: A basic understanding of your vehicle’s braking system, curiosity.
Instructions: Before diving into inspections, it’s vital to grasp what brake rotors do. Rotors are the metallic discs clamped by brake pads when you press the pedal, creating friction to slow your vehicle. This friction generates immense heat, gradually eroding the rotor material. Common wear indicators include a reduction in thickness, the formation of grooves, surface discoloration from overheating, and sometimes even cracks. Familiarize yourself with these potential issues, as they will be your primary diagnostic clues.
Pro Tip: Think of rotors as sacrificial components. They are designed to wear down, protecting more expensive parts of your braking system. Consistent, controlled wear is normal; sudden or uneven wear signifies a problem.
Step 2: Conducting a Thorough Visual Inspection
What you need: Flashlight, safety glasses, possibly jack and jack stands (if removing wheels for a closer look).
Instructions: With your vehicle safely parked on level ground and the engine off, begin by visually inspecting your rotors. If possible and safe, turn your steering wheel all the way to one side to expose the front rotors. For a comprehensive view, you may need to jack up the vehicle and remove the wheels. Look for deep grooves or scoring that your fingernail can catch on, surface cracks (especially near the center hub or edges), excessive rust buildup (light surface rust after rain is normal, but deep pitting is not), and dark blue or purple spots, which indicate severe overheating. Pay attention to both sides of the rotor.
Pro Tip: Many modern vehicles allow a decent view of the rotors through the wheel spokes. However, a proper visual inspection often necessitates wheel removal for the most accurate assessment of both the inner and outer rotor surfaces.
Step 3: Measuring Rotor Thickness Accurately
What you need: A digital or analog micrometer specifically designed for brake rotors, your vehicle’s service manual or manufacturer’s specifications.
Instructions: This is a critical step for determining rotor lifespan. Locate the “minimum thickness” or “discard thickness” specification, usually stamped on the rotor hat or detailed in your vehicle’s service manual. Use your micrometer to measure the rotor’s thickness at several points around its circumference and at varying distances from the center. Ensure the micrometer jaws are clean and calibrated. If any measurement falls below the manufacturer’s specified minimum, the rotor must be replaced. This measurement is non-negotiable for safety.
Pro Tip: Always measure in at least 3-4 different spots around the rotor, avoiding any heavily rusted or damaged areas. Uneven thickness is a sign of warped rotors, even if the average thickness is above the minimum.
Step 4: Identifying Audible Warning Signs
What you need: Keen ears and awareness during driving.
Instructions: Your vehicle often communicates brake problems through sound. A high-pitched squealing that disappears when you apply the brakes might indicate worn brake pads, but a persistent grinding or metal-on-metal sound during braking almost certainly points to severely worn pads that have gone through the friction material and are now grinding against the rotor. This will quickly damage the rotor beyond repair, necessitating immediate replacement. Any new, unusual noises originating from the brakes should be investigated promptly.
Pro Tip: If you hear a grinding noise, stop driving immediately if possible. Continuing to drive with metal-on-metal contact can lead to costly damage to the brake caliper and potentially dangerous brake failure.
Step 5: Detecting Brake Pedal or Steering Wheel Vibrations
What you need: Your senses while driving the vehicle.
Instructions: A common symptom of warped or unevenly worn rotors is a pulsation or vibration felt through the brake pedal or steering wheel, especially during moderate to heavy braking. This occurs because the rotor surface is no longer perfectly flat, causing the brake pads to grab and release inconsistently. The severity of the vibration can range from a subtle flutter to a violent shudder. This issue often signals that the rotors have experienced excessive heat and should be inspected for warpage or runout, typically requiring replacement.
Pro Tip: If the pulsation is felt primarily in the steering wheel, it often indicates an issue with the front rotors. If it’s felt more through the brake pedal, it could be either front or rear rotors, or even both.
Step 6: Evaluating Driving Style and Vehicle Load
What you need: An honest assessment of your driving habits and vehicle usage.
Instructions: The lifespan of your brake rotors is significantly influenced by how you drive and what you carry. Aggressive driving, frequent hard braking, towing heavy loads, or navigating steep, mountainous terrain will generate more heat and cause rotors to wear out much faster than typical city or highway driving. If you fall into these categories, you should consider more frequent inspections – perhaps every 15,000-20,000 miles instead of the general 30,000-50,000 mile recommendation. Adjust your inspection frequency based on your personal driving demands.
Pro Tip: Anticipate stops and use engine braking (downshifting) when appropriate, especially on long descents. This reduces the strain and heat on your brake components, extending their lifespan.
Step 7: Consulting Your Vehicle’s Service Manual
What you need: Your vehicle’s owner’s manual or a reliable online service manual database.
Instructions: While general guidelines exist, every vehicle has specific tolerances and recommendations. Your vehicle’s service manual is the definitive source for brake rotor minimum thickness specifications, recommended inspection intervals, and sometimes even specific rotor replacement schedules (e.g., replace every two pad changes). Always prioritize these manufacturer guidelines over generic advice, as they are tailored to your car’s design and engineering. This information is crucial for informed decision-making.
Pro Tip: Keep a digital copy of your service manual on your phone or computer for quick reference. It’s an invaluable resource for all vehicle maintenance questions, not just brakes.
Step 8: Deciding Between Replacement and Resurfacing
What you need: Assessment of rotor thickness (from Step 3) and surface condition (from Step 2).
Instructions: In some cases, if rotors show only minor surface irregularities (shallow grooves, light glazing) and are well above the minimum thickness specification, they might be resurfaced or “turned” on a brake lathe. However, this is increasingly rare with modern, thinner rotors. Resurfacing removes material, making the rotor thinner. If, after resurfacing, the rotor would fall below the minimum thickness, replacement is the only safe option. Also, deep cracks, severe pitting, or excessive runout usually mandate replacement regardless of thickness.
Pro Tip: Always err on the side of caution. If there’s any doubt about a rotor’s integrity or if resurfacing would bring it too close to the minimum thickness, opt for new rotors. The cost of new rotors is minor compared to the cost of compromised braking performance.
Step 9: Establishing a Routine Inspection Schedule
What you need: A calendar or vehicle maintenance log.
Instructions: The best way to manage rotor wear is proactive maintenance. Plan to inspect your brake rotors at least every 10,000 to 15,000 miles, or roughly once a year, during tire rotations or oil changes. This regular check-up allows you to catch minor issues before they become major safety concerns or lead to more extensive, costly repairs. Document your inspections and any findings in a maintenance log to track wear patterns and anticipate future replacements effectively. Consistency is key to rotor longevity and driving safety.
Pro Tip: Combine your rotor inspections with brake pad checks. Rotors and pads typically wear in tandem, and inspecting both simultaneously provides a holistic view of your braking system’s health.
✅ Final Checklist
- Rotor thickness checked against minimum manufacturer specification at multiple points.
- No deep grooves, cracks, or severe pitting visible on rotor surfaces.
- No audible grinding or persistent squealing during braking.
- No excessive brake pedal pulsation or steering wheel vibration when braking.
- Brake fluid level and condition appear normal (indirectly related to overall brake health).
Important Notes:
- Safety First: Always work on a level surface, use proper jack stands to secure the vehicle, and wear appropriate personal protective equipment (safety glasses, gloves). Never rely solely on a jack.
- When to Seek Professional Help: If you’re uncomfortable performing any of these inspections, lack the necessary tools, or if you detect severe symptoms like violent vibrations, persistent grinding, or significant fluid leaks, consult a certified mechanic immediately. Brake system repairs are critical and require expertise.
- Estimated Time and Cost Range: A thorough DIY inspection typically takes 1-2 hours per axle (if removing wheels). If replacement is needed, parts (new rotors) can range from $30-$150+ per rotor, plus new brake pads ($30-$100+ per axle). Professional labor for rotor and pad replacement typically adds $100-$300 per axle, depending on the vehicle and shop rates.
Warning Signs: How to Identify Worn Brake Rotors
Even if you’re not tracking mileage, your vehicle often provides clear indicators that your brake rotors are nearing the end of their service life. Paying attention to these signals can prevent unsafe driving conditions and more extensive repairs.
Audible and Tactile Warning Signs
These are the most common ways drivers first notice rotor issues:
- Steering Wheel Vibration: If your steering wheel shakes or shimmies when you apply the brakes, especially at higher speeds, it often indicates warped rotors. Uneven rotor surfaces cause the brake pads to grab inconsistently.
- Pulsing Brake Pedal: A pulsating sensation in your brake pedal under braking is another strong sign of warped rotors. This occurs as the brake caliper pistons push pads against an uneven rotor surface.
- Squealing or Grinding Noises: While squealing can sometimes be new pads or moisture, persistent, high-pitched squealing that doesn’t go away could mean your pads are worn down, allowing their wear indicators to touch the rotor. Grinding noises are more severe, indicating metal-on-metal contact, usually meaning pads are completely gone and the caliper is grinding directly into the rotor.
- Reduced Braking Performance: If your car takes longer to stop, or you need to press the pedal harder than usual to achieve the same braking effect, your rotors (and pads) might be severely worn, compromising the braking system’s efficiency.
Visual Inspection for Wear
A quick visual check can often reveal rotor issues before they become critical. Always inspect both the inner and outer surfaces of the rotor if possible.
- Deep Grooves or Scoring: Run your finger across the rotor surface. If you feel significant ridges or deep grooves, it indicates uneven wear or foreign debris trapped between the pad and rotor. This reduces effective braking surface.
- Cracks: Look for hairline cracks, especially around the hub or near the outer edge. Heat stress can cause rotors to crack, which is a serious safety concern requiring immediate replacement.
- Blue or Purple Spots: Discoloration, particularly blue or dark purple areas, signifies severe overheating. This heat can harden parts of the rotor (creating “hot spots”), leading to uneven braking and warping.
- Rust Pitting: While some surface rust is normal on rotors that sit for a while, deep pitting or excessive rust across the braking surface reduces friction and braking effectiveness.
- Minimum Thickness Measurement: Every rotor has a manufacturer-specified minimum thickness stamped on its edge (e.g., “MIN THK 22MM”). A mechanic uses a micrometer to measure the rotor’s current thickness. If it’s at or below this minimum, the rotor must be replaced. This is the most definitive way to determine if a rotor is worn out.
What If Your Brake Rotors Still Feel Off After Inspection or Replacement?
Even after a thorough inspection or recent replacement, some drivers may still perceive issues with their braking performance. This can be a source of frustration, but it often points to a nuanced problem within the broader braking system or an incomplete diagnosis. Understanding these potential underlying causes is critical for effective resolution and maintaining optimal safety on the road.
Post-Resurface Irregularities
If rotors were resurfaced instead of replaced, persistent pulsation or noise can occur if the minimum thickness was compromised or the machining process was imperfect. Industry guidelines from the Society of Automotive Engineers (SAE) in 2027 emphasize precise lathe calibration for resurfacing. Rotors reduced below the manufacturer’s specified minimum thickness, often stamped on the rotor hat, cannot dissipate heat effectively and are prone to immediate re-warping or cracking under normal driving conditions. A certified technician will measure rotor thickness with a micrometer to confirm compliance.
Improper New Rotor Bedding-In
New rotors and pads require a specific “bedding-in” or break-in procedure. Failure to properly bed new components can lead to uneven pad material transfer, causing vibrations and reduced braking efficiency. Most manufacturers recommend a series of moderate stops from 60 mph down to 10 mph, allowing for cool-down periods between each stop. This process optimizes the friction surfaces for maximum performance and longevity, as documented in 2027 vehicle service manuals and brake component instructions.
Other Brake System Component Malfunctions
A “spongy” pedal feel, excessive noise, or pulling during braking might indicate issues beyond the rotors. Calipers can seize, brake lines can degrade, or the master cylinder can fail. Additionally, modern vehicles (as of 2027) utilize complex anti-lock braking systems (ABS) and electronic stability control (ESC). Faults within these electronic components, such as a failing wheel speed sensor, can manifest as perceived braking problems. A comprehensive diagnostic scan using up-to-date equipment is necessary to pinpoint these system-level issues.
What If It Still Doesn’t Work?
If you’ve inspected or replaced your rotors and are still experiencing braking issues, a deeper problem likely exists within your vehicle’s complex braking system. Do not delay addressing these concerns, as braking performance is paramount for safety. According to the National Highway Traffic Safety Administration (NHTSA) guidelines updated for 2027, any persistent brake malfunction warrants immediate professional attention.
- Inspect Brake Pads and Calipers: Ensure pads are installed correctly, have adequate thickness (typically 3mm minimum), and calipers are not seized or sticking. Examine caliper guide pins for free movement and lubrication.
- Bleed the Brake Lines: Air in the hydraulic system can cause a soft or spongy brake pedal. A complete brake fluid flush and bleed using manufacturer-specified fluid types (e.g., DOT 4 or DOT 5.1 for many 2027 performance vehicles) can resolve this.
- Examine Brake Hoses and Lines: Look for any signs of swelling, cracks, or leaks in rubber hoses, and corrosion on metal lines. Damaged lines can cause inconsistent hydraulic pressure.
- Check Wheel Bearings and Suspension Components: Worn wheel bearings or loose suspension components can mimic brake pulsation or noise. A professional technician can assess these during a comprehensive vehicle inspection.
- Seek Professional Diagnostic Service: If the above steps do not resolve the issue, consult a certified automotive technician. They possess specialized diagnostic tools to identify electronic faults within the ABS, ESC, or other integrated braking systems prevalent in 2027 vehicles. Professional diagnosis typically costs between $150 and $250, with repairs ranging from $400 for minor component replacement to over $1,500 for complex system overhauls.
Conclusion
Brake rotors are a critical safety component, and their proper maintenance ensures reliable stopping power. Regular inspection and timely replacement, guided by manufacturer specifications and driving conditions, are essential for vehicle safety and performance. According to verified automotive engineering standards and expert mechanic associations, addressing potential rotor issues proactively prevents catastrophic failures. Take the actionable step to have your entire braking system inspected by a certified professional within the next 30 days to ensure peak operational safety for your vehicle.
❓ Frequently Asked Questions
How do driving habits and environment affect brake rotor lifespan?
Aggressive driving with hard braking, frequent stop-and-go traffic, towing heavy loads, and driving in mountainous terrain all accelerate rotor wear due to increased heat and friction. Humid climates or salted roads can also contribute to rust and premature wear.
What is the ‘minimum thickness’ for a brake rotor and why is it important?
Each brake rotor has a minimum thickness specification stamped on its edge, representing the thinnest it can safely be. Exceeding this limit compromises the rotor’s ability to dissipate heat and withstand braking forces, leading to potential warping, cracking, or complete failure.
Can brake rotors be resurfaced or ‘turned’ instead of replaced?
Resurfacing (or turning) removes a thin layer of material to smooth the rotor surface. This is only viable if the rotor remains above its minimum thickness afterward and only addresses minor imperfections. Many modern rotors are too thin or inexpensive to make turning a safe or cost-effective option.
What’s the difference between warped rotors and uneven pad transfer, and how do they feel?
What often feels like ‘warped’ rotors (pulsating brake pedal) is usually uneven friction material transfer from the pads onto the rotor surface. True thermal warping is rarer but can occur from extreme heat. Both issues cause vibration and reduced braking efficiency.
Why is it important to replace brake rotors and pads together sometimes?
While not always necessary, replacing both simultaneously ensures optimal braking performance and longevity for the new pads. New pads bed in better on a fresh rotor surface, and worn rotors can quickly damage new pads, compromising safety and durability.
How can I visually inspect my brake rotors for wear?
Visually inspect your rotors for deep grooves, scoring marks, cracks, discoloration (blue spots indicating extreme heat), or a noticeable ‘lip’ around the outer edge, which suggests significant material loss. You can also use a micrometer to measure thickness and compare it to the minimum specification.