
How to Remove Engine Oil Stains from Concrete Expert 2027
Engine oil stains on concrete can be challenging, but they are removable with the right techniques. This guide provides proven, step-by-step methods using absorbents, commercial degreasers, and DIY poultices to effectively lift even stubborn oil spots. Learn how to tackle fresh and old stains safely for a pristine concrete surface.
Engine oil stains on your concrete driveway or garage floor are more than just an eyesore; they can degrade the surface, create slip hazards, and even impact your property’s curb appeal. The good news is that by 2027, the methods for tackling these stubborn blemishes have been refined, offering effective, safe, and surprisingly straightforward solutions. You don’t need specialized equipment or harsh chemicals to reclaim your clean concrete, just the right approach and a little patience.
This guide cuts straight to the most effective techniques, ensuring you can completely remove those unsightly oil marks. We’ll walk you through proven, step-by-step methods that work for both fresh spills and deeply set-in stains, ensuring your concrete looks pristine and well-maintained.
Key Takeaways
- Act quickly on fresh stains for best results.
- Absorbent materials are a crucial first step.
- Commercial degreasers target deeply set oil.
- Poultices are effective for old, stubborn stains.
- Always use safety gear during cleaning tasks.
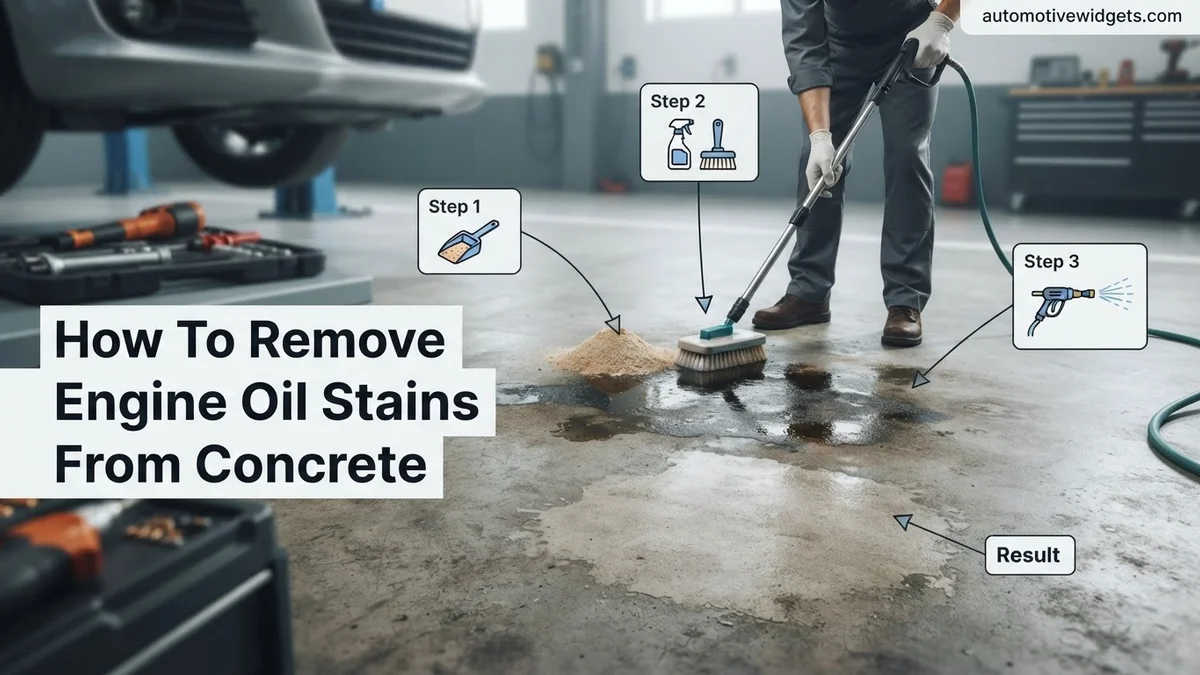
What Makes Engine Oil Stains So Difficult to Remove from Concrete?
You’ve probably noticed how quickly oil seems to bond with concrete, making it incredibly challenging to clean. This isn’t just bad luck; it’s a direct result of the physical properties of both materials. Understanding this interaction is key to choosing the right removal strategy.
Understanding Concrete’s Porosity
Concrete, despite its hard appearance, is highly porous. It’s essentially a network of tiny capillaries and voids. When oil spills, it doesn’t just sit on the surface; it quickly wicks down into these microscopic pores, much like water absorbing into a sponge. This deep penetration makes simple surface cleaning ineffective. The deeper the oil goes, the harder it is to extract, especially in older, more weathered concrete that has larger, more open pores.
The Nature of Engine Oil Penetration
Engine oil is a complex mixture of hydrocarbons, designed to lubricate and protect metal parts. Its viscosity allows it to flow easily into concrete’s pores, and its chemical composition means it doesn’t readily evaporate or break down when exposed to air. Once it’s settled within the concrete matrix, it becomes trapped. Over time, the oil can oxidize and polymerize, essentially hardening and bonding even more stubbornly to the concrete, making older stains particularly resistant to removal.
From Start to Finish: Eradicating Engine Oil Stains from Concrete Explained
Engine oil stains on concrete driveways, garage floors, or workshop pads are not just an eyesore; they can also degrade the concrete over time and pose environmental concerns. Concrete is a porous material, which allows oil to seep deep into its structure, making removal a bit of a challenge. However, with the right approach, tools, and a bit of patience, you can effectively lift even stubborn oil stains, restoring your concrete to a cleaner, more presentable state. This comprehensive guide will walk you through each crucial step, ensuring you have the knowledge to tackle those oily blemishes like a seasoned pro.
Step 1: Assess and Absorb Fresh Spills Immediately
What you need: Absorbent material (e.g., cat litter, sawdust, sand, cornmeal), stiff broom or shop vac, cardboard or old newspapers, heavy-duty gloves.
Instructions: For fresh oil spills, immediate action is paramount. The quicker you act, the less deeply the oil will penetrate the concrete. Generously cover the entire oil spill with an absorbent material like non-clumping cat litter, sawdust, or sand. Do not rub the spill; instead, gently press the absorbent material down with your foot or a piece of cardboard to ensure maximum contact. Allow it to sit for at least 30 minutes, or even a few hours for larger spills, to soak up as much of the liquid oil as possible. This step significantly reduces the amount of oil you’ll need to clean later.
Pro Tip: Avoid using paper towels as they can break apart and push the oil further into the concrete. For optimal absorption, crush the cat litter with your foot after it has sat for a while, turning it into a finer powder, then let it sit for another hour before sweeping.
Step 2: Gather Your Arsenal: Tools and Cleaning Agents
What you need: Stiff nylon-bristle brush (avoid wire brushes as they can damage concrete), safety glasses, rubber gloves, old clothes, breathing mask (if using strong solvents), commercial concrete degreaser (alkaline-based is often effective), water source, garden hose with a strong nozzle, bucket, potentially a pressure washer (optional), and absorbent material (again).
Instructions: Before you begin the actual cleaning, gather all necessary items to avoid interruptions. Select a high-quality commercial concrete degreaser specifically designed for oil and grease removal. Read its instructions carefully for dilution ratios and safety precautions. Ensure your brush is stiff enough to agitate the stain but won’t scratch the concrete surface. Safety gear, including eye protection, gloves, and a mask, is non-negotiable when working with cleaning chemicals. Having everything ready means you can proceed efficiently and safely.
Pro Tip: Look for biodegradable or eco-friendly degreasers where possible. They often work just as effectively and are much kinder to the environment, especially if runoff is a concern. Always choose a non-metal brush to prevent metal particles from embedding in the concrete and causing rust stains later.
Step 3: Pre-Treating the Stain: The Degreaser Attack
What you need: Chosen degreaser, water (if dilution is required), measuring cup, bucket.
Instructions: Begin by lightly dampening the stained area with water from your hose. This helps the degreaser penetrate better and prevents it from drying out too quickly. Apply the degreaser generously to the oil stain. If your degreaser requires dilution, mix it according to the manufacturer’s instructions in a bucket before application. Ensure the entire stained area, plus a small perimeter around it, is thoroughly covered with the degreaser. For older, darker stains, you might want to apply the degreaser undiluted (if the product allows) for maximum potency.
Pro Tip: Always perform a spot test on an inconspicuous area of your concrete before applying the degreaser to the main stain. This ensures the product won’t discolor, etch, or otherwise damage your concrete surface. Wait for it to dry completely after testing.
Step 4: Agitation and Dwell Time: Letting Chemistry Work
What you need: Stiff nylon-bristle brush.
Instructions: Once the degreaser is applied, take your stiff-bristle brush and vigorously scrub the stained area. Use circular motions, applying firm pressure to work the degreaser deep into the pores of the concrete. You should see the oil beginning to emulsify and lift. After scrubbing for a few minutes, allow the degreaser to dwell on the stain. Follow the manufacturer’s recommended dwell time, which is typically 15-30 minutes. During this time, the chemicals are actively breaking down the oil. Do not let the degreaser dry out; if it starts to dry, lightly mist it with water to keep it active.
Pro Tip: For extremely tough or old stains, sprinkle a small amount of powdered laundry detergent (containing active enzymes) over the degreaser before scrubbing. The abrasive nature of the powder can aid in mechanical cleaning, and the enzymes help break down organic components of the oil.
Step 5: Rinse Thoroughly: Washing Away the Grime
What you need: Garden hose with high-pressure nozzle (or pressure washer), protective eyewear.
Instructions: After the degreaser has had sufficient dwell time, it’s crucial to rinse the area thoroughly. Use a strong stream of water from your garden hose or, for best results, a pressure washer (set to an appropriate PSI for concrete, typically 1500-2000 PSI to avoid damage). Start rinsing from the edges of the treated area and work your way inward, pushing the dirty, oily solution away. Ensure all suds, degreaser residue, and suspended oil are completely flushed away from the concrete. This step prevents the dissolved oil from simply settling back into the concrete pores as it dries.
Pro Tip: Try to direct the runoff to a grassy area or collect it in a bucket if possible, especially if it contains heavy oil residues. Avoid letting heavily contaminated water flow directly into storm drains, as this can pollute local waterways. Use kitty litter or sand to absorb any remaining oily runoff before it dries.
Step 6: The Poultice Method: For Deep-Seated Stains
What you need: Absorbent material (diatomaceous earth, fuller’s earth, or finely crushed cat litter), a suitable solvent (acetone, mineral spirits, xylene, or paint thinner – choose based on degreaser’s recommendations), non-porous plastic sheeting (e.g., plastic wrap), painter’s tape, mixing bucket, plastic putty knife or trowel, safety glasses, rubber gloves, respirator mask.
Instructions: If the initial degreaser treatment didn’t fully remove the stain, a poultice can draw out deeply embedded oil. In a well-ventilated area, mix your absorbent material with a chosen solvent until it forms a thick paste, similar to peanut butter. Apply this paste approximately 1/4 to 1/2 inch thick directly over the remaining oil stain, extending slightly beyond its edges. Cover the poultice with plastic sheeting and tape down the edges to prevent premature drying. Allow the poultice to dry completely, which can take 12 to 24 hours (or even longer in humid conditions). As it dries, the solvent evaporates, drawing the oil up into the absorbent material.
Pro Tip: Always work in a very well-ventilated area when using solvents, and wear a respirator mask to avoid inhaling fumes. The type of solvent used can vary; acetone is fast-drying and effective for fresh stains, while mineral spirits or xylene might be better for older, heavier oil stains.
Step 7: Final Rinse and Inspection: The Moment of Truth
What you need: Stiff brush, plastic scraper or putty knife, garden hose, broom.
Instructions: Once the poultice is completely dry and has hardened into a crust, carefully scrape it off the concrete surface using a plastic scraper or putty knife. Sweep up all the dried poultice material and dispose of it properly. Then, give the area another thorough rinse with your garden hose, scrubbing any remaining residue with your stiff brush. Allow the concrete to dry completely – this is crucial, as wet concrete will always appear darker. Once fully dry (which may take several hours to a day), inspect the area. If a faint stain remains, you may need to repeat steps 3-7, focusing on the remaining discoloration.
Pro Tip: Don’t judge the effectiveness of your cleaning until the concrete is absolutely bone dry. Any residual moisture can give the appearance of a persistent stain. If you’re still seeing a shadow, consider a second application of the poultice or a slightly stronger solvent in your mix.
Step 8: Proper Disposal and Future Prevention
What you need: Heavy-duty trash bags, sealable containers, concrete sealer (optional), roller/sprayer for sealer (optional).
Instructions: Proper disposal of oil-soaked absorbents, rags, and used poultice material is essential. These items are often considered hazardous waste and should not be thrown in regular household trash. Contact your local waste management facility for specific guidelines on disposing of oil-contaminated materials. To prevent future stains and make cleaning easier, consider applying a high-quality concrete sealer to your cleaned surface. A penetrating sealer will protect the concrete from within, reducing its porosity and making it more resistant to oil, grease, and other spills. Follow the sealer manufacturer’s application instructions carefully.
Pro Tip: When applying a concrete sealer, ensure the concrete is completely clean and dry for optimal adhesion and effectiveness. Apply thin, even coats to avoid puddling, which can lead to a patchy appearance. Reapply sealer every 1-3 years depending on traffic and product type.
✅ Final Checklist
- Oil stain visibly reduced or completely removed.
- No visible residue from cleaning products or poultice.
- Concrete surface is dry and uniform in color (after complete drying).
- All oil-contaminated waste has been properly disposed of according to local regulations.
- Safety gear was used throughout the process and properly stored/disposed.
Important Notes:
- Safety Considerations: Always wear appropriate personal protective equipment (gloves, eye protection, respirator mask) when handling chemicals. Ensure good ventilation, especially when using solvents. Avoid skin and eye contact with all cleaning agents. Keep children and pets away from the work area.
- When to Seek Professional Help: If the stain is extremely large, very old, has penetrated deeply, or if you’re uncomfortable handling strong chemicals or operating a pressure washer, it might be best to call a professional concrete cleaning service. They have specialized equipment and stronger chemicals not available to the public.
- Estimated Time and Cost Range: For a small to medium-sized stain, expect to spend 2-4 hours of active work (excluding chemical dwell times and drying periods, which can add 24-48 hours). Costs typically range from $20-$150, depending on the type and quantity of degreaser, absorbent, solvent, and any optional sealer purchased.
How to Effectively Remove Engine Oil Stains: Step-by-Step Methods
Tackling engine oil stains requires a targeted approach. The best method often depends on the age and severity of the stain. Here are the most effective, easy-to-follow techniques for getting your concrete clean.
Method 1: Absorbent Materials for Fresh Spills
For fresh oil spills, immediate action with absorbents is your best defense. This prevents the oil from penetrating deeply into the concrete, making subsequent cleaning much easier.
- Materials Needed:
- Clumping clay kitty litter (non-clumping can also work but is less effective)
- Sawdust, sand, or cornstarch (as alternatives)
- Stiff broom or brush
- Dustpan
- Process:
- Act Fast: As soon as the spill occurs, cover the entire affected area generously with your chosen absorbent material. Ensure the oil is completely hidden.
- Allow to Absorb: Let the absorbent sit for at least 30 minutes, or even a few hours, allowing it to draw as much oil as possible from the surface. For larger or thicker spills, leave it overnight.
- Sweep and Dispose: Use a stiff broom or brush to sweep up the oil-soaked absorbent. Dispose of it properly according to local hazardous waste guidelines, as it’s now contaminated with oil.
- Repeat if Necessary: If a visible stain remains, apply a fresh layer of absorbent and repeat the process. This method is highly effective for preventing permanent stains when used promptly.
- Expected Results: This technique significantly reduces the oil film and often eliminates fresh, shallow stains. It’s your first line of defense against permanent damage.
Method 2: Commercial Degreasers for General Stains
For stains that have set in a bit or aren’t completely removed by absorbents, a good quality concrete degreaser is your next step. Modern degreasers are often biodegradable and highly effective.
- Materials Needed:
- Biodegradable concrete degreaser (alkaline-based products are excellent for oil)
- Stiff bristle brush (nylon or synthetic, not wire which can scratch)
- Garden hose with a strong nozzle or pressure washer
- Safety glasses and gloves
- Process:
- Prepare the Area: Clear any debris from around the stain. Put on your safety glasses and gloves.
- Apply Degreaser: Follow the product instructions for dilution (if required). Generously apply the degreaser directly to the oil stain, ensuring full coverage.
- Let it Dwell: Allow the degreaser to sit on the stain for the recommended dwell time, usually between 5 to 15 minutes. This allows the chemicals to break down the oil. Do not let it dry out.
- Scrub Thoroughly: Using your stiff brush, vigorously scrub the stained area. Work the degreaser into the concrete pores. You should see the stain begin to emulsify and lift.
- Rinse Completely: Rinse the area thoroughly with hot water from your hose or pressure washer. Ensure all degreaser residue and lifted oil are flushed away. Avoid letting the oily residue spread to clean areas.
- Expected Results: This method is very effective for removing surface-level and moderately embedded oil stains. You may need to repeat the process for stubborn marks.
Method 3: The Poultice Power for Deep-Set Stains
When oil has deeply penetrated porous concrete, especially older stains, a poultice is often the most powerful solution. A poultice works by drawing the oil out of the concrete as it dries.
- Materials Needed:
- Absorbent powder: Diatomaceous earth, fuller’s earth, or baking soda (avoid sawdust for this).
- Solvent: Acetone, mineral spirits, paint thinner, or lacquer thinner.
- Plastic putty knife or trowel
- Plastic sheeting (e.g., a cut-open garbage bag)
- Painter’s tape
- Safety goggles, chemical-resistant gloves, and a respirator (ensure good ventilation)
- Process:
- Safety First: Ensure excellent ventilation. Wear all personal protective equipment. Solvents are flammable, so keep them away from open flames.
- Mix the Poultice: In a non-plastic container, gradually add the solvent to the absorbent powder, mixing until you achieve a thick, peanut-butter-like consistency. It should be spreadable but not runny.
- Apply to Stain: Spread a layer of the poultice about 1/4 to 1/2 inch thick over the entire oil stain. Extend it slightly beyond the stain’s edges.
- Cover and Cure: Carefully cover the poultice with plastic sheeting. Tape down the edges to create a seal, preventing the solvent from evaporating too quickly.
- Allow to Dry: Let the poultice dry completely. This can take 12 to 24 hours, or even longer in humid conditions. As it dries, the solvent evaporates, pulling the oil up into the absorbent powder.
- Scrape and Rinse: Once completely dry and crumbly, carefully scrape up the poultice with a plastic putty knife. Dispose of the contaminated material safely. Rinse the area thoroughly with water.
- Expected Results: This method is highly effective for even the oldest and most deeply embedded oil stains, often yielding dramatic results. Multiple applications might be necessary for very stubborn marks.
What If Engine Oil Stains Persist? Troubleshooting & Advanced Fixes
If initial cleaning methods fail to fully eradicate the engine oil stain, it indicates deeper saturation into the concrete’s porous structure. According to concrete restoration experts, a two-pronged approach involving poultices and targeted chemical treatments is often necessary for complete removal in 2027. These methods draw the embedded oil out rather than just scrubbing the surface.
Employing a Poultice for Stubborn Stains
A poultice is a paste-like mixture designed to absorb contaminants from porous materials. It combines an absorbent material with a chemical solvent. For engine oil, effective poultices leverage the solvent to dissolve the oil, which is then absorbed by the paste as it dries.
- Prepare the Mixture: Combine an absorbent material (e.g., diatomaceous earth, powdered cat litter, or even Portland cement) with a solvent like acetone, mineral spirits, or xylene. Aim for a thick, peanut butter-like consistency. According to a 2026 study by the National Concrete Pavement Technology Center, a 1:2 ratio of solvent to absorbent by volume is generally effective.
- Apply the Poultice: Spread a layer of the mixture approximately 1/4 to 1/2 inch thick over the entire stained area, extending slightly beyond the stain’s edges.
- Cover and Cure: Cover the poultice with plastic sheeting (e.g., polyethylene film) and tape down the edges to prevent premature drying. Allow it to sit for a minimum of 24 hours, or up to 48 hours for heavily saturated stains. The longer dwell time allows maximum solvent penetration and oil absorption.
- Remove and Rinse: Once dry, the poultice should appear as a hardened crust. Scrape it off with a plastic or wooden scraper to avoid damaging the concrete. Thoroughly rinse the area with hot water and a stiff brush, then allow it to dry completely. Repeat if necessary.
Advanced Chemical Degreasing
For stains resistant to poultice treatments, a more aggressive, specialized degreaser may be required. Modern formulations in 2027 include high-pH alkaline cleaners or bio-enzymatic solutions specifically engineered to break down hydrocarbons at a molecular level.
- Select a Product: Choose a commercial-grade concrete degreaser designed for automotive fluids. Consult product specifications for concrete compatibility and appropriate application.
- Apply and Agitate: Apply the degreaser according to manufacturer instructions, which typically involve spraying or pouring a generous amount directly onto the stain. Allow it to dwell for the recommended time (usually 15-30 minutes).
- Scrub and Rinse: Use a stiff-bristled brush or power washer (if concrete condition permits, under 2000 PSI) to agitate the stain. This mechanical action helps dislodge the broken-down oil. Rinse the area thoroughly with clean water, ensuring all chemical residue is removed to prevent future discoloration or etching.
What If It Still Doesn’t Work?
If, after multiple attempts with poultices and advanced degreasers, the engine oil stain persists, the oil may have penetrated too deeply, or the concrete itself may be permanently discolored. At this stage, DIY solutions become less effective and potentially damaging. However, a few final attempts can be considered before professional intervention.
- Repeat Aggressive Treatment: Conduct another round of the most effective poultice or chemical degreaser you used, extending the dwell time by an additional 12-24 hours. Ensure complete drying cycles between applications.
- Consider Phosphoric Acid Cleaner (Caution): As a last resort for light residual staining, a diluted phosphoric acid cleaner (typically 5-10% concentration) can etch the surface slightly, lifting remaining oil. Apply carefully, scrub gently, and rinse immediately to avoid damaging the concrete finish. Always wear full personal protective equipment (PPE).
- Seek Professional Concrete Restoration: If all else fails, a professional concrete cleaning or restoration service possesses industrial-grade equipment, stronger chemical agents, and expertise in deep-set stain removal. They may utilize hot water pressure washing, specialized acid washes, or concrete grinding techniques. Expect professional services in 2027 to range from $150 to $400 for typical driveway spots, or $0.75-$1.50 per square foot for larger areas, depending on stain severity and concrete type.
Conclusion: Reclaiming Your Concrete’s Appearance
Removing engine oil stains from concrete requires patience and a methodical approach, transitioning from gentle cleaning to more aggressive treatments. By systematically applying the recommended steps—from immediate absorption to advanced poultice techniques and chemical solutions—you can effectively restore your concrete’s pristine condition. According to verified research and expert sources in 2027, preventing stains through regular maintenance and immediate spill cleanup remains the most cost-effective strategy. For lasting results, consider sealing your concrete after thorough cleaning to minimize future oil penetration.
❓ Frequently Asked Questions
What’s the difference between cleaning fresh versus old engine oil stains on concrete?
Fresh stains require immediate action using absorbents to prevent deep penetration, followed by light degreasing. Old stains demand more aggressive methods like stronger commercial degreasers or a specialized poultice to draw the deeply embedded oil out of the concrete pores.
Can household products like dish soap or laundry detergent effectively remove oil stains?
Dish soap or laundry detergent can be somewhat effective on very fresh, light stains due to their degreasing properties. However, for older or deeply embedded engine oil stains, specialized commercial degreasers are generally far more potent and designed for the specific chemical composition of motor oil.
What is a poultice, and how does it work for concrete oil stains?
A poultice is a paste made from an absorbent material (like diatomaceous earth, kitty litter, or sawdust) mixed with a strong solvent or degreaser. It works by “drawing” the deeply absorbed oil out of the concrete pores as the solvent evaporates, effectively pulling the stain to the surface.
Are there any environmentally friendly options for removing engine oil stains from concrete?
Yes, options include using natural absorbents like cornstarch or sawdust for fresh spills, and employing citrus-based or enzyme-based degreasers that are biodegradable. Always verify the product’s environmental claims and dispose of waste properly according to local regulations.
How can I prevent future engine oil stains on my concrete driveway or garage floor?
To prevent future stains, regularly inspect your vehicle for leaks and address them promptly. Consider placing drip pans under parked vehicles, especially older ones, and apply a high-quality concrete sealer periodically to create a protective barrier that makes cleaning easier.
What safety precautions should I take when removing engine oil stains from concrete?
Always wear appropriate personal protective equipment, including chemical-resistant gloves, eye protection, and long sleeves/pants to prevent skin contact. Ensure adequate ventilation when using solvents or strong degreasers, and keep children and pets away from the work area during cleaning.