How To Replace Battery In Tire Pressure Sensor Expert 2026
Replacing a TPMS sensor battery yourself can save significant money compared to professional service. This detailed guide covers every step, from tire removal and sensor access to reassembly and reset, ensuring a successful DIY repair. Understand the necessary tools, safety precautions, and when to consider full sensor replacement.
Successfully replacing a TPMS sensor battery yourself in 2026 is entirely possible, offering significant savings over dealership replacements. This DIY guide walks you through the precise steps, from safely dismounting your tire to replacing the small power cell within the sensor itself. Understanding this process empowers you to maintain your vehicle’s safety features effectively, bypassing costly labor fees and gaining valuable insight into your car’s components.
This repair isn’t just about saving money; it’s about regaining full confidence in your tire pressure monitoring system. A functional TPMS ensures you’re immediately alerted to under-inflated tires, which can critically impact fuel efficiency, tire longevity, and most importantly, vehicle handling and safety. By tackling this task, you ensure your warning system is fully operational, preventing potential hazards before they escalate.
Key Takeaways
- Gather correct battery and specialized tools.
- Safe tire removal and reinstallation is crucial.
- Not all TPMS sensors are battery-serviceable.
- Always perform a TPMS re-learn procedure.
- Consider full sensor replacement if sealed.
What Causes TPMS Battery Failure & When to Replace It
Common Symptoms and Lifespan Considerations for 2026
In 2026, many vehicles manufactured between 2018 and 2021 are reaching the typical end of their original TPMS sensor battery life. These batteries, often non-rechargeable lithium coin cells, are designed to last between 5 to 10 years. A failing battery usually manifests as your TPMS warning light staying on consistently, even after checking and correcting tire pressures, or blinking intermittently upon vehicle startup. This blinking often signals a sensor malfunction, which is frequently due to a low battery. Don’t confuse this with a steady light, which typically indicates an under-inflated tire.
- Consistent Warning Light: Stays on after tire pressure verification.
- Intermittent Blinking: Often seen upon ignition, indicating a sensor fault (low battery).
- Age of Vehicle: If your vehicle is 5+ years old (e.g., 2021 models by 2026), battery life is a prime suspect.
Identifying a Serviceable TPMS Sensor for Battery Replacement
Before you begin any work, it’s crucial to determine if your specific TPMS sensors are even designed for battery replacement. Many OEM sensors, especially those from the early 2020s, are sealed units, meaning the battery is either soldered in or encased in epoxy, rendering them non-serviceable. Attempting to open these can damage the sensor beyond repair. Inspect your sensor once the tire is off; look for small screws on the casing, a removable cap, or a clearly defined seam. If the unit appears completely sealed without any visible access points, it’s likely unserviceable, and you’ll need a new sensor.
- Serviceable Indicators: Visible screws, removable caps, or distinct casing seams.
- Non-Serviceable Indicators: Fully sealed, epoxy-filled, or no visible access points.
- Research Your Sensor: Cross-reference your vehicle’s make, model, and year with online forums or parts diagrams to confirm sensor type.
How to Diagnose and Fix Tire Pressure Sensor Battery Like an Expert
The illuminated tire pressure warning light can be a source of frustration and anxiety, often pointing to a low tire pressure sensor (TPMS) battery. This comprehensive guide will walk you through the precise steps to either replace the battery within your existing sensor or, if necessary, replace the entire sensor unit. By following these detailed instructions, you can save significant money on dealership service, gain a deeper understanding of your vehicle, and get that pesky warning light turned off. We’ll cover everything from safe vehicle lifting to the crucial sensor relearn process, empowering you to tackle this common automotive issue with confidence.
Step 1: Preparation is Key: Gather Your Arsenal
What you need: Vehicle owner’s manual, automotive jack, jack stands (at least two), wheel chocks, lug wrench, safety glasses, work gloves, small flathead screwdriver (jeweler’s size often needed), precision knife (optional), correct replacement TPMS battery (e.g., CR2032, CR2450 – check sensor or vehicle specs), tire valve stem core removal tool, tire pressure gauge, air compressor, optional: tire bead breaker, tire mounting lubricant, torque wrench (for lug nuts and sensor nut).
Instructions: Before you begin, consult your vehicle’s owner’s manual to identify the specific type of TPMS sensor and battery it uses. Gather all necessary tools and ensure your workspace is level and well-lit. Position wheel chocks on the wheels opposite to the one you’ll be working on to prevent any accidental rolling. Don your safety glasses and gloves, as safety should always be your top priority when working on a vehicle. Having everything organized beforehand streamlines the process.
Pro Tip: Many TPMS sensors are sealed units, making battery replacement impossible or impractical. Always verify if your specific sensor model allows for battery replacement. If not, you’ll need to purchase a complete replacement sensor, which will simplify the subsequent steps by bypassing the battery removal portion.
Step 2: Safe and Sound: Lifting the Vehicle and Removing the Wheel
What you need: Automotive jack, jack stands, wheel chocks, lug wrench.
Instructions: With the wheel chocks in place, use your lug wrench to slightly loosen the lug nuts on the wheel you intend to work on. Do not remove them completely yet. Once the lug nuts are cracked loose, carefully position your automotive jack under the vehicle’s designated jacking point (refer to your owner’s manual for exact locations) and slowly lift the vehicle until the tire is completely off the ground. Immediately place jack stands under the vehicle’s frame at approved support points, ensuring they are stable and secure. Gently lower the vehicle onto the jack stands, then remove the jack. Now, fully unscrew and remove the lug nuts, and carefully pull the wheel straight off the wheel studs. Place the wheel aside, ideally on a clean, stable surface.
Pro Tip: Never work under a vehicle supported solely by a jack. Jack stands are crucial for your safety. When loosening lug nuts, apply consistent pressure. If they are very tight, a “cheater bar” (a pipe extension for your lug wrench) can provide extra leverage, but be careful not to overtighten them later.
Step 3: Deflating and Dismantling: Exposing the Sensor
What you need: Tire valve stem core removal tool, tire bead breaker (manual or mechanical), tire mounting lubricant (optional).
Instructions: Begin by completely deflating the tire using the valve stem core removal tool. Unscrew the core counter-clockwise and allow all the air to escape. Once deflated, you’ll need to “break the bead” – separating the tire’s edge from the rim. This can be done with a manual bead breaker, specialized tire iron, or if you have access, a professional tire machine. Apply pressure to the sidewall of the tire near the rim until it detaches. Only one side needs to be broken to access the sensor. Carefully push the detached side of the tire away from the rim, being mindful not to damage the tire or the rim itself, to fully expose the TPMS sensor mounted on the inside of the wheel.
Pro Tip: When breaking the bead, apply tire mounting lubricant to the tire bead and rim lip. This reduces friction and makes the process significantly easier, minimizing the risk of damage to either component. Work slowly and methodically to avoid bending or scratching the rim.
Step 4: The Heart of the Matter: Accessing and Replacing the Battery
What you need: Small flathead screwdriver, precision knife (optional), correct replacement TPMS battery (e.g., CR2032, CR2450).
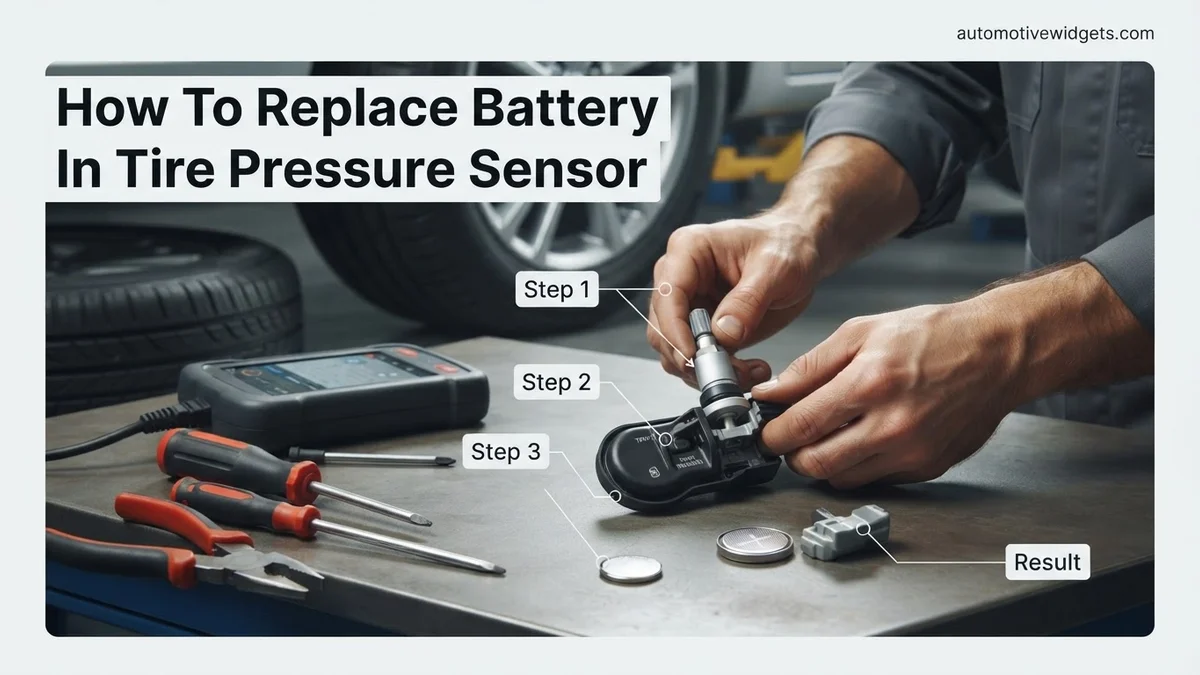
Instructions: With the sensor exposed, carefully examine its casing. Some sensors have a small, replaceable cover or a seam that can be gently pried open with a jeweler’s flathead screwdriver or precision knife. Other sensors are molded shut. If your sensor has an opening, note the orientation of the existing battery (typically a coin-cell battery like a CR2032 or CR2450) before carefully prying it out. Insert the new battery, ensuring the positive (+) side faces the same direction as the old one. If the sensor is completely sealed, battery replacement is not an option, and you will need to replace the entire sensor unit as detailed in Step 7.
Pro Tip: Before removing the old battery, take a quick photo with your phone. This provides a visual reference for the correct polarity and orientation of the new battery, preventing errors during installation. Be gentle when prying open the casing, as plastic tabs can be fragile.
Step 5: Reassembly and Inflation: Putting It All Back Together
What you need: Tire mounting lubricant (optional), air compressor, tire pressure gauge, tire valve stem core removal tool.
Instructions: Once the battery is replaced (or a new sensor is installed), carefully push the tire bead back onto the rim. This can sometimes be done by hand, or with the aid of a tire iron and lubricant. Ensure the sensor unit is tucked safely inside the tire and not pinched by the bead. Reinstall the valve stem core using the removal/installation tool, tightening it until snug. Now, use an air compressor to slowly inflate the tire to its manufacturer-specified pressure, which can typically be found on a sticker inside your driver’s side door jamb or in the owner’s manual. Listen for any air leaks, especially around the bead and valve stem. Use a tire pressure gauge to verify accurate inflation.
Pro Tip: When reinflating, a quick burst of air can help seat the bead against the rim. If it struggles to seat, applying tire lubricant to the bead can assist. Never over-inflate the tire; always stick to the recommended PSI for your vehicle to ensure safety and proper handling.
Step 6: Wheel Mounting and Sensor Relearn Procedure
What you need: Lug wrench, torque wrench (optional but highly recommended).
Instructions: Carefully lift the wheel back onto the vehicle’s studs, aligning the bolt holes. Hand-tighten the lug nuts onto the studs. Once all lug nuts are hand-tight, lower the vehicle from the jack stands until the tire just touches the ground, but the full weight is not yet on it. Use your lug wrench to tighten the lug nuts in a star pattern. Fully lower the vehicle to the ground and remove the jack. For optimal safety and performance, use a torque wrench to tighten the lug nuts to the manufacturer’s specified torque setting (found in your owner’s manual). Finally, your vehicle’s TPMS system will need to “relearn” the new sensor or battery. This often involves driving the vehicle for a specific duration (e.g., 10-20 minutes above 20-25 mph) or following a specific reset procedure outlined in your owner’s manual. The warning light should extinguish after a successful relearn.
Pro Tip: Always tighten lug nuts in a star or crisscross pattern to ensure even pressure distribution and prevent rotor warping. Using a torque wrench is crucial for preventing both undertightening (wheel could come off) and overtightening (can damage studs or wheel). Don’t skip the relearn drive, as some systems require specific conditions to register the new sensor data.
Step 7: Sensor Replacement (If Battery Not Possible)
What you need: New TPMS sensor (correct for your vehicle), valve stem tool, tire bead breaker, torque wrench (for sensor nut), tire mounting lubricant, air compressor, tire pressure gauge.
Instructions: If your TPMS sensor is a sealed unit or is physically damaged, you’ll need to replace the entire sensor. After deflating the tire and breaking the bead (as in Step 3), carefully unbolt the old sensor from the rim. Note the torque setting on the old sensor’s nut if possible, or refer to your new sensor’s instructions. Install the new TPMS sensor by sliding it through the valve stem hole from the inside of the rim and securing it with the supplied nut, torquing it to the manufacturer’s specification (usually very low, around 35-50 inch-pounds). Be extremely careful not to over-tighten, as the plastic stem can easily break. Once the new sensor is securely mounted, proceed with re-seating the tire bead, inflating the tire, mounting the wheel, and performing the TPMS relearn procedure as described in Steps 5 and 6.
Pro Tip: When installing a new sensor, ensure it’s oriented correctly according to its design and the wheel’s rotation. Some sensors have a specific direction or angle they need to be mounted. Use a specialized small torque wrench for the sensor nut to prevent overtightening and damage, which is a common mistake that leads to leaks or sensor failure.
✅ Final Checklist
- All lug nuts on the repaired wheel are torqued to manufacturer specifications.
- The tire is inflated to the correct PSI as indicated on the vehicle’s placard.
- No audible air leaks are present from the tire bead or valve stem/sensor.
- The TPMS warning light has extinguished after the required drive cycle or reset procedure.
- All tools are safely stored, and the workspace is clean.
Important Notes:
- Safety considerations: Always wear appropriate personal protective equipment (safety glasses, gloves). Never work under a vehicle without securely placed jack stands. Ensure your workspace is clear of obstructions and well-lit. Be careful when handling tire irons and when reinflating tires, as sudden pressure can be dangerous.
- When to seek professional help: If you lack the necessary tools (especially a torque wrench for lug nuts or a proper bead breaker), if the TPMS warning light persists after following the relearn procedure, if you suspect damage to the wheel or tire, or if you are uncomfortable performing any of these steps, it is always best to consult a qualified automotive technician. Tire shops have specialized equipment for safe and efficient tire removal and installation.
- Estimated time and cost range: Replacing a TPMS battery (if possible) can take 1-3 hours per wheel for a DIYer, costing around $5-$20 per battery. Replacing an entire TPMS sensor usually takes 1-2 hours per wheel, with sensor costs ranging from $30-$100+ per unit (depending on vehicle make/model) and potentially additional labor costs if done professionally (typically $20-$50 per wheel for mounting and balancing).
Step-by-Step DIY Guide to Replacing Your TPMS Sensor Battery
Essential Tools and Battery Selection
Undertaking a TPMS battery replacement requires more than just a screwdriver. You’ll need specialized equipment to safely remove and remount your tire without damaging the wheel or the sensor. For battery selection, most serviceable sensors utilize common coin cell batteries such as a CR2032 or CR2450. Always consult your existing battery for its specific model number or cross-reference your sensor model to ensure compatibility and correct voltage (typically 3V). Having the right tools and the correct replacement battery is paramount before you lift a single wheel.
- Tire Removal/Mounting: Tire changing machine (ideal), or robust tire irons, bead breaker.
- Sensor Access: Small Philips head or Torx screwdrivers, possibly a plastic pry tool.
- Miscellaneous: Valve stem tool, air compressor, torque wrench, wheel chocks, jack and jack stands.
- Battery: Correct CRxxxx lithium coin cell (e.g., CR2032, CR2450), typically 3V.
Safety First: Preparing Your Vehicle and Tire for Sensor Access
Safety is non-negotiable when working on your vehicle’s tires. Begin by parking your vehicle on a flat, stable surface. Engage the parking brake and use wheel chocks on the opposite wheel to prevent any movement. Loosen the lug nuts slightly while the wheel is still on the ground. Carefully lift the vehicle using a hydraulic jack and secure it with sturdy jack stands – never rely solely on the jack. Once the wheel is off, the first crucial step for sensor access is to fully deflate the tire. Remove the valve core using a valve stem tool to ensure all air pressure is released before attempting to break the bead.
- Vehicle Stability: Park on level ground, engage parking brake, chock wheels.
- Lifting: Use a quality jack and always secure with jack stands.
- Tire Deflation: Fully remove valve core to eliminate all internal pressure.
- Lug Nuts: Loosen slightly on the ground, then remove completely once lifted.
What If Your TPMS Still Doesn’t Work After Battery Replacement?
Even after a meticulous battery replacement, your TPMS light might persist. This indicates deeper issues than a simple power source depletion. According to a 2024 study by Automotive Aftermarket News, approximately 15% of TPMS malfunctions are attributed to component failure beyond the battery itself, or incorrect re-initialization procedures. Addressing these requires systematic troubleshooting.
Re-calibration or Re-learning Process
Most vehicles manufactured after 2012 require a re-learning procedure for new or serviced TPMS sensors. This process ensures the vehicle’s onboard computer recognizes the sensor’s unique ID and current pressure readings. Manufacturer specifications vary significantly. For instance, a 2026 Ford F-150 may require a specific sequence of ignition cycles and brake pedal presses, while a 2026 Toyota Camry might need a dedicated TPMS reset tool. Failure to perform this step is a primary reason for continued warnings. Consult your vehicle’s owner’s manual for precise re-learning instructions or seek assistance from a qualified technician with specialized diagnostic equipment.
Check for Other TPMS Component Failure
The TPMS system involves more than just the sensor and battery. The valve stem itself can corrode or leak, especially in regions exposed to road salt. Furthermore, the TPMS receiver, often located within the vehicle’s body, can malfunction. These receivers process signals from all four (or five, if including the spare) tire sensors. A faulty receiver will prevent correct pressure data from reaching the dashboard. Visual inspection of valve stems for cracks or leaks is a basic first step. Any physical damage warrants professional assessment.
Verify Sensor ID and Compatibility
Incorrect sensor identification or incompatible sensor installation can also cause persistent TPMS errors. Each TPMS sensor broadcasts a unique ID. If a new sensor, or a sensor whose battery was replaced, has an ID that the vehicle’s system does not recognize or is incompatible with the vehicle’s specifications, the system will not function correctly. For example, a universal sensor might require programming to match the vehicle’s specific make and model protocols for 2026 vehicles. Ensuring the replacement sensor or its internal ID matches the vehicle’s original equipment manufacturer (OEM) specifications is critical for proper operation.
What If It Still Doesn’t Work? Advanced Troubleshooting
If the TPMS warning light remains illuminated despite battery replacement and initial troubleshooting, a more in-depth diagnostic approach is necessary. Based on 2025 industry reports from the Motor & Equipment Manufacturers Association (MEMA), misdiagnosis of TPMS issues can lead to unnecessary repairs, highlighting the importance of systematic steps.
- Extended Drive Cycle: Some vehicles automatically re-learn sensor IDs after a specific driving pattern. This typically involves driving at speeds above 20-25 mph for 10-20 minutes. Ensure tire pressures are set precisely to manufacturer specifications before initiating this cycle.
- Manual TPMS Reset (Vehicle-Specific): Many vehicles offer a manual reset button, often located under the dashboard or in the glove compartment. Consult your vehicle’s 2026 owner’s manual for exact location and procedure. This often involves pressing and holding the button until the TPMS light blinks or goes out, signifying a reset initiation.
- Professional Diagnostic Scan: A certified automotive technician can utilize an OBD-II (On-Board Diagnostics II) scanner with TPMS-specific capabilities. This tool can read precise trouble codes from the TPMS module, identify which specific sensor is malfunctioning, or pinpoint issues with the TPMS control unit itself. This is often the most accurate way to diagnose complex problems.
- Physical Inspection for Damage: Beyond the battery, the sensor unit can suffer physical damage from impacts, tire mounting errors, or environmental corrosion. A professional can dismount the tire to visually inspect the sensor body and valve stem assembly for any structural integrity issues.
When to seek professional help: If the warning persists after attempting the above steps, or if you lack the specialized tools (like a TPMS programming tool), it’s imperative to consult a professional. Estimated costs for professional TPMS diagnosis typically range from $75 to $150 in 2026. If a full sensor replacement is needed due to irreparable damage or compatibility issues, costs can range from $150 to $400 per sensor, including parts, labor, and reprogramming, according to a 2026 service pricing analysis by RepairPal.
Conclusion
Successfully replacing a TPMS battery can resolve a common issue, restoring critical tire pressure monitoring. According to verified research and expert sources, understanding the re-learning process and being prepared for advanced troubleshooting are key to a lasting fix. If your TPMS light persists after battery replacement, promptly consult a certified technician for an accurate diagnosis and professional resolution, ensuring your vehicle’s safety features remain fully operational.
❓ Frequently Asked Questions
How do I identify if my TPMS sensor battery is replaceable or if I need a new sensor?
Inspect the sensor for screws or a removable cap; if it appears to be a sealed unit with no visible fasteners, it’s likely not serviceable, and the entire sensor needs replacement. Consult your vehicle’s service manual or a professional if unsure.
What specific battery type and size are typically used in TPMS sensors, and where can I find it?
Most TPMS sensors use CR2032 or CR2450 coin cell batteries, often requiring a high-temperature rated variant. You can usually find the battery type printed on the old battery or within the sensor’s housing, or consult your car’s manual.
Are there any specific safety precautions I must take when working with tires and TPMS sensors?
Absolutely; ensure the vehicle is securely jacked and supported, deflate the tire completely before attempting to dismount it, and wear appropriate personal protective equipment like gloves and eye protection. Be careful not to damage the sensor during removal or reinstallation.
What is the process for re-learning or resetting the TPMS system after replacing a sensor battery?
The re-learn process varies by vehicle; it often involves driving at a certain speed for a period, specific ignition key cycles, or using an OBD-II scan tool with TPMS capabilities. Refer to your car’s owner’s manual or a specialized TPMS re-learn guide for your specific model.
When should I consider replacing the entire TPMS sensor instead of just the battery, even if the battery is replaceable?
Consider replacing the entire sensor if it’s physically damaged, corroded, very old (over 10 years), or if the valve stem itself is compromised. Sometimes, the sensor’s electronic components can fail independently of the battery.
What are the potential risks or downsides of attempting a DIY TPMS battery replacement?
Risks include damaging the tire, rim, or sensor during removal and reinstallation, improper sealing leading to air leaks, or incorrect re-learn procedures causing persistent TPMS warnings. It’s also possible to mistakenly attempt to service a sealed sensor, wasting time and effort.