How to Test a Car Battery Without a Multimeter in 2026
Diagnosing a weak or dead car battery doesn’t always require a multimeter. This guide provides practical, step-by-step methods using common car functions like headlights and horn, plus visual inspections, to accurately assess your battery’s condition. Learn what each test reveals and your next best action.
Don’t have a multimeter but suspect your car battery is failing? Even in 2026, you don’t always need specialized tools to diagnose its health. Modern vehicle systems may offer more data, but the fundamental indicators of a struggling battery remain clear and audible, often visible right from your driveway. Knowing these simple, no-tool methods empowers you to quickly assess your battery’s condition, saving you time and potential roadside frustration.
This practical guide walks you through effective ways to determine if your car battery is weak, dead, or still in good shape, using only your senses and a few basic car functions. Identifying these issues early can prevent being stranded and helps you decide whether your battery needs a charge, a jump-start, or a full replacement.
Key Takeaways
- Use headlights to check battery strength.
- Listen to cranking sounds for diagnostics.
- Visually inspect terminals for issues.
- Understand ‘if-then’ results for action.
- Prioritize safety during all battery tests.
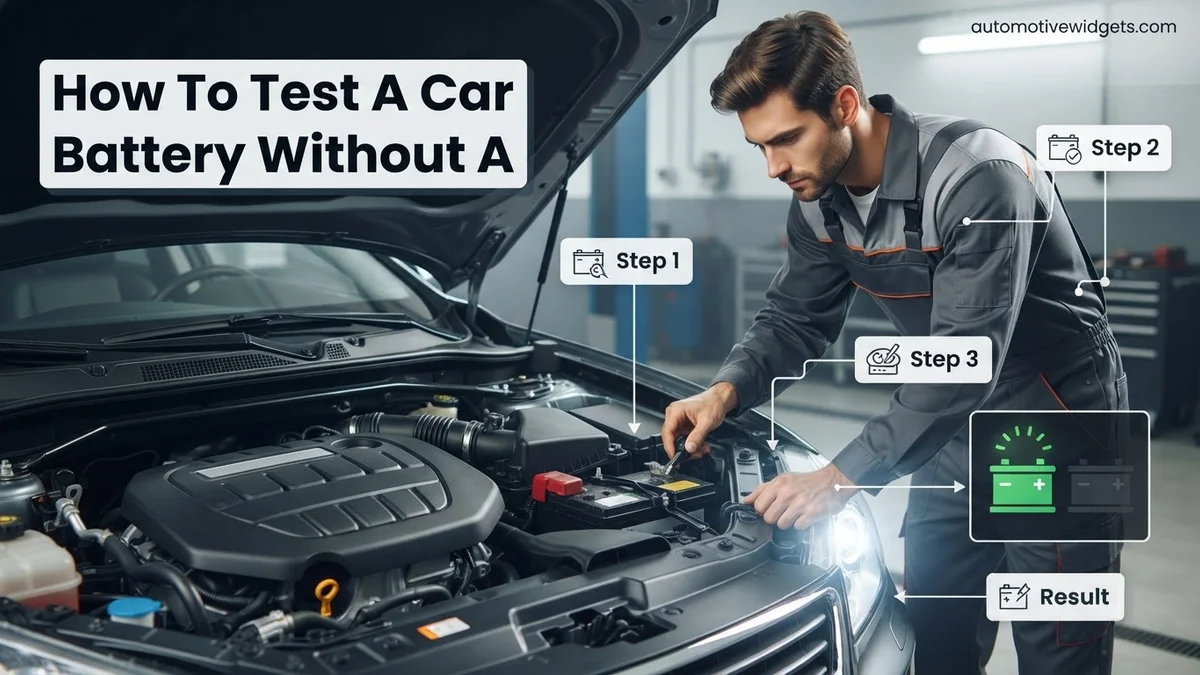
How to Diagnose a Weak Car Battery Without Tools
Even with the advanced diagnostics found in 2026 vehicles, understanding the basic physical and auditory cues of a car battery’s health is crucial. These non-tool methods leverage your car’s existing systems to give you a surprisingly accurate picture of its power reserves. You’re looking for symptoms that indicate the battery isn’t providing consistent, strong electrical current.
Why Visual and Auditory Clues Still Matter in 2026
- Your vehicle’s on-board computers might not always flag a subtly weakening battery until it’s too late.
- These manual checks are immediate and don’t require external devices or a diagnostic port.
- They offer real-time insights into your battery’s current ability to deliver power under load.
Understanding Early Warning Signs
Before even performing a specific test, pay attention to common symptoms. Is your engine cranking slower than usual? Are your dashboard lights or infotainment system flickering when you turn the key? A battery often gives subtle hints of its decline before it completely fails. Recognizing these early signs can prompt you to perform the following simple tests, avoiding an unexpected breakdown.
How to Diagnose a Car Battery Issue Like an Expert: A Practical Walkthrough
Even without fancy electronic tools, you can often pinpoint a dying or faulty car battery using your senses and a little mechanical intuition. This guide will walk you through a series of practical, hands-on tests that utilize your car’s own systems to reveal the health of its battery. Following these steps carefully is crucial not only for an accurate diagnosis but also for your safety, as car batteries contain corrosive acid and produce flammable gases.
Step 1: The Initial Visual Check-Up for Health Clues
What you need: Safety glasses, protective gloves (latex or nitrile), a flashlight, and potentially a stiff wire brush or baking soda solution if corrosion is present.
Instructions: Pop your car’s hood and locate the battery. Carefully inspect its exterior. Look for any visible cracks, bulges, or swelling in the battery casing – these are serious signs of internal damage. Check the battery terminals (the posts where cables attach, marked ‘+’ and ‘-‘) for excessive white, blue, or green powdery corrosion. Also, ensure the battery is securely fastened in its tray and not wobbling.
Pro Tip: A swollen or cracked battery casing is a strong indicator of a dying battery, often due to overcharging or internal short circuits, and usually requires immediate replacement. Minor corrosion can often be cleaned with a wire brush and a baking soda paste (1 part baking soda to 1 part water), but heavy corrosion suggests a poor connection or acid leakage.
Step 2: The Headlight Load Test (Engine Off)
What you need: Your car.
Instructions: With your car’s engine completely off and the key removed from the ignition, turn on your headlights to their full beam (not just parking lights). Observe their brightness. They should be bright and steady. Let them stay on for approximately 60 seconds. During this time, note if they dim significantly. After the 60 seconds, try to start your car immediately. A healthy battery should still be able to crank the engine robustly.
Pro Tip: If the headlights are noticeably dim from the start, or if they rapidly dim further within that minute, your battery likely has a low charge or is losing its capacity. If the car struggles or fails to start after this short headlight test, it’s a clear sign of a weak battery that cannot handle even a moderate load.
Step 3: The Engine Cranking Performance Test
What you need: Your car.
Instructions: Ensure your car is in park (automatic transmission) or neutral with the parking brake engaged (manual transmission). Attempt to start the engine. Pay extremely close attention to the sound the starter motor makes. Does it spin quickly and consistently, bringing the engine to life within a second or two? Or does it sound sluggish, slow, or make a rapid “click-click-click” noise without engaging the engine?
Pro Tip: A slow, struggling crank is the hallmark of a battery that’s low on charge or losing its cold-cranking amps. The “click-click-click” often indicates there’s enough power to engage the starter solenoid but not enough to actually spin the engine. No sound at all when turning the key could mean a completely dead battery, a faulty starter, or an immobilizer issue.
Step 4: Accessory Power Draw Test (Engine Off)
What you need: Your car.
Instructions: With the engine still off and the key in the “accessory” or “on” position (but not starting), activate several power-hungry accessories simultaneously. This includes your radio at a reasonable volume, power windows (operating up and down), and windshield wipers on a steady setting. Observe the performance of these components. Do they operate at their normal speed and power, or do they seem sluggish, intermittent, or do their speeds drop significantly as more accessories are turned on?
Pro Tip: A healthy battery should be able to power these accessories for a brief period without noticeable performance degradation. If power windows crawl, wipers hesitate, or the radio flickers, it indicates the battery is struggling to provide adequate voltage under load, suggesting it’s weak or has a low charge.
Step 5: Horn Honk & Warning Light Symphony
What you need: Your car.
Instructions: While still inside the car with the engine off (and key in the ‘on’ position), press and hold the horn for a few seconds. Listen carefully to its volume and consistency. A strong, steady horn blast is expected. Also, observe your dashboard warning lights as you turn the key to the ‘on’ position before starting. Do they illuminate brightly and clearly, then extinguish as expected (except for the battery light if the engine isn’t running)? Pay attention to the battery warning light; if it’s unusually dim or flickers, it can also be a clue.
Pro Tip: A weak, sputtering, or unusually quiet horn is a reliable indicator of low battery power. Similarly, dashboard lights that appear dim, flicker erratically, or don’t illuminate with their usual intensity suggest insufficient voltage from the battery. The battery light staying on after the engine starts indicates an alternator/charging system issue, but its behavior before starting can also reflect battery health.
Step 6: Terminal Connection Stability Check
What you need: Protective gloves, safety glasses. Optionally, an appropriate-sized wrench for battery terminals.
Instructions: With the engine completely off and the key removed, carefully put on your safety gear. Locate the positive (+) and negative (-) battery cable clamps. Gently try to wiggle each cable where it connects to the battery terminal post. They should be absolutely firm and show no movement whatsoever. Any looseness here will impede the flow of electricity, mimicking a dead battery even if the battery itself is healthy.
Pro Tip: Loose battery connections are an incredibly common cause of no-start or intermittent starting issues. Even if the battery holds a good charge, a poor connection prevents that power from reaching the starter effectively. If they are loose, and you have the correct wrench, carefully tighten them. Remember to tighten the positive terminal first, then the negative.
Step 7: The “Sniff Test” for Hazardous Fumes
What you need: Your nose, and caution.
Instructions: With extreme care, briefly lean over the battery (without getting your face too close) and take a gentle sniff. Are you detecting a strong, unpleasant odor similar to rotten eggs or sulfur? This distinctive smell is hydrogen sulfide gas, a byproduct of battery acid boiling, which typically occurs due to severe overcharging or significant internal battery damage. It’s a clear warning sign.
Pro Tip: This “rotten egg” smell is a critical indicator of a seriously compromised battery. Not only does it signify damage, but it also means the battery is releasing potentially flammable and toxic gases. If you detect this odor, consider the battery unsafe and avoid further contact. Professional assessment and likely replacement are urgently required.
✅ Final Checklist
- Battery casing is free of cracks, swelling, or leaks.
- Terminals are clean and free of excessive corrosion (white/blue powder).
- Battery cables are securely attached to the terminals and do not wiggle.
- Headlights are bright and maintain brightness for 30-60 seconds (engine off) before attempting to start.
- Engine cranks strongly and consistently without hesitation when attempting to start.
- All accessories (radio, power windows, wipers) operate normally and consistently with the engine off for a short period.
- No strong rotten egg or sulfur smell detected from the battery.
Important Notes:
- Safety considerations or warnings: Always wear safety glasses and protective gloves when working near a car battery. Battery acid is highly corrosive. Avoid creating sparks or having open flames near a battery, as it can produce highly flammable hydrogen gas. If you need to disconnect terminals, always remove the negative (-) terminal first to prevent accidental short circuits.
- When to seek professional help: If your battery consistently fails multiple tests in this guide, shows signs of physical damage (swelling, cracks, leaks), or if you detect a strong sulfur smell, it’s time to seek professional automotive assistance or consider replacing the battery. If your car starts after a jump-start but quickly dies again, it might indicate an issue with your alternator or charging system, not just the battery.
- Estimated time and cost range: Performing these diagnostic tests typically takes 5-15 minutes. If a battery replacement is determined to be necessary, the cost for a new battery typically ranges from $100 to $300+, with potential additional labor costs if professional installation is required.
Step-by-Step Methods to Test Your Battery Health
These methods are designed to put your battery under a small load and observe its reaction, or to visually inspect its physical state. Always perform these tests with the car parked on a level surface, in a safe environment.
The Headlight Test
This simple test assesses the battery’s ability to maintain a consistent power output when under a mild, sustained load without the engine running.
- Ensure your car’s engine is off and the ignition is in the “off” position.
- Turn on your vehicle’s headlights. Do NOT start the engine.
- Observe the brightness of the headlights for approximately 10-15 seconds.
- While the headlights are on, try to start the engine.
- If your headlights are bright and consistent, then dim significantly or go out when you try to start the car: Your battery is likely weak or has a low charge. It has enough power for basic accessories but can’t handle the high current draw of the starter motor.
- If your headlights are dim or flicker from the start, and then barely respond when you try to start the car: This indicates a very weak or nearly dead battery. It lacks sufficient power for even basic functions.
- If your headlights are bright and remain relatively consistent when you try to start the car (and the car starts): Your battery is likely in good health.
- If your headlights don’t turn on at all: Your battery is probably completely dead, severely discharged, or there’s a serious connection issue.
The Horn and Accessory Check
This test checks if your battery can power auxiliary systems effectively, indicating its overall charge level and capacity.
- Make sure your engine is off and all car doors are closed.
- Turn your car’s ignition to the “accessory” position (don’t start the engine).
- Turn on various electrical accessories one at a time: the radio, interior lights, windshield wipers, and most importantly, honk the horn.
- If the horn sounds loud and clear, and all accessories function normally and brightly: Your battery likely has sufficient charge for typical operations.
- If the horn sounds weak, muffled, or delayed, and accessories (like wipers or lights) operate slowly or dimly: Your battery is weak and struggling to provide adequate power. It might be able to start the car, but it’s on its way out.
- If the horn doesn’t sound at all, and accessories fail to turn on or barely flicker: Your battery is likely dead or critically low on charge.
Visual Inspection for 2026 Vehicles
Even with the sophisticated design of 2026 vehicles, a physical check of your battery can reveal critical issues that indicate impending failure.
- Ensure your car is off and the hood is safely propped open.
- Locate your car battery (often under the hood, but sometimes in the trunk or under a seat in newer models).
- Carefully inspect the battery terminals, cables, and the battery casing itself.
- Look for corrosion: A white, blue, or green powdery substance around the terminals indicates a poor connection and potential acid leakage. This reduces current flow and needs cleaning.
- Check for cracks or bulges: Any visible cracks in the battery casing or swelling/bulging of the sides suggests internal damage or overcharging, and the battery is likely failing and unsafe.
- Inspect cable connections: Ensure the battery cables are securely fastened to the terminals and are not frayed or damaged. Loose connections can mimic a dead battery.
- If you see significant corrosion, cracks, bulges, or loose connections: The battery is compromised, even if it might temporarily hold a charge. It should be professionally inspected or replaced promptly.
- If the battery and terminals appear clean, dry, and secure: Physically, the battery appears healthy, though it may still be weak internally due to age or discharge.
Interpreting Your Test Results and Next Steps
Once you’ve performed the manual tests, the observable symptoms provide crucial insights into your battery’s condition. Accurate interpretation guides your next immediate actions.
Interpreting Headlight Test Outcomes
- Bright Headlights That Dim When Cranking: This scenario strongly suggests a weakened battery. The battery can hold a surface charge but lacks the necessary Cold Cranking Amps (CCA) to reliably start the engine. According to a 2025 Automotive Service Excellence (ASE) report, slow cranking is indicative of a battery operating below 75% charge.
- Dim Headlights, No Cranking Power: This indicates a significantly discharged or failing battery. It may not even possess enough power to engage the starter solenoid. Immediate action is required.
- Headlights Are Off or Flicker Sporadically: This points to a critically low charge, a completely dead battery, or a poor electrical connection. A thorough inspection of terminals is warranted before any further testing.
Next Steps: If symptoms suggest a weak or discharged battery, immediate charging with a modern smart charger is recommended. These chargers, common by 2026, can assess battery health and apply appropriate charging profiles, including desulfation for some lead-acid types. If charging fails to restore power, or if the battery rapidly loses charge after a full cycle, replacement is likely necessary.
Interpreting Horn Test and Accessory Anomalies
- Weak or Fading Horn Sound: A strong horn requires significant current. If it’s weak or intermittent, the battery’s overall voltage and current delivery capacity are compromised. This aligns with findings from Battery Council International (BCI), which states that consistent horn operation demands a stable 12.0-12.6V output.
- Slow or Erratic Power Window Operation: Similar to the horn, power windows draw considerable current. Sluggish movement signals inadequate power from the battery.
- Dashboard Lights Flicker or Are Absent: If dashboard lights behave erratically or don’t illuminate consistently, the battery’s voltage is too low to power the vehicle’s critical electronic control units (ECUs) and display systems.
Next Steps: These symptoms collectively confirm a severe battery issue. Before attempting to jump-start, verify that battery terminals are clean and securely fastened. Loose or corroded terminals can mimic a dead battery. If connections are sound, a jump-start may get you moving, but a professional battery assessment or replacement should be prioritized.
Safety Precautions and Limitations of Manual Testing
While manual tests offer quick diagnostic insights, adhering to strict safety protocols is paramount. These methods also have inherent limitations that necessitate professional evaluation for definitive battery health assessments.
Essential Safety Precautions
- Wear Protective Gear: Always use safety glasses and chemical-resistant gloves. Car batteries contain sulfuric acid, a corrosive electrolyte that can cause severe burns and eye damage. The National Institute for Occupational Safety and Health (NIOSH) consistently recommends eye and skin protection when handling lead-acid batteries.
- Ensure Ventilation: Batteries can produce hydrogen gas, which is highly flammable and explosive. Perform tests in a well-ventilated area to prevent gas accumulation. Avoid enclosed spaces like garages without open doors.
- Prevent Sparks and Flames: Keep all sources of ignition — including open flames, cigarettes, and sparking tools — away from the battery. A spark near a gassing battery can trigger an explosion.
- Remove Jewelry: Metal jewelry can short-circuit battery terminals, causing severe burns and damage to the battery or vehicle electrical system.
- Proper Tool Handling: Use insulated tools where possible. Avoid dropping metal tools onto the battery terminals, as this can create a short circuit.
Limitations of Manual Testing
Manual tests are preliminary and provide symptomatic evidence rather than precise health metrics.
- Inaccurate CCA Assessment: These tests cannot accurately measure Cold Cranking Amps (CCA), which is the battery’s ability to start an engine in cold temperatures. A battery might appear functional with manual tests but fail under heavy load or cold conditions.
- No Internal Resistance Reading: Internal resistance is a key indicator of a battery’s degradation. Manual methods cannot detect rising internal resistance, which diminishes a battery’s efficiency and lifespan, even if it holds a surface charge.
- Not Suitable for Advanced Batteries: Modern vehicle architectures in 2026 frequently use Absorbent Glass Mat (AGM) or Enhanced Flooded Batteries (EFB) in start-stop systems. These batteries require specific diagnostic tools and charging procedures that manual tests cannot replicate. Battery manufacturers like Yuasa and Optima explicitly state that visual and ‘load-light’ tests provide preliminary indications, recommending professional load testing for accurate health assessment.
- Cannot Detect Intermittent Faults: A battery may perform adequately during a brief manual check but have an intermittent fault that only manifests under specific conditions or extended use.
What If It Still Doesn’t Work?
If your manual diagnostics point to a battery issue, but charging or jump-starting efforts fail, a deeper problem likely exists. Do not repeatedly attempt to crank a non-starting vehicle, as this can damage the starter motor.
- Inspect and Clean Battery Cables: Even minor corrosion on terminals or cable ends can impede electrical flow. Remove and thoroughly clean both positive and negative terminals, as well as the cable clamps, with a wire brush. Re-secure them tightly.
- Check Main Ground Cable: A loose or corroded ground connection, often between the battery and the vehicle chassis or engine block, can mimic battery failure. Ensure it is securely fastened and clean.
- Verify Alternator Function: If the car starts but quickly dies or the battery light illuminates, the alternator may not be charging the battery. This requires professional diagnosis.
- Seek Professional Automotive Diagnosis: When manual tests and basic troubleshooting are exhausted, a certified mechanic in 2026 can utilize specialized diagnostic tools, including advanced load testers and electrical system analyzers, to pinpoint the exact issue. These tools accurately assess battery health, starter motor performance, and alternator output.
A professional electrical system diagnosis typically costs $50-$150, depending on the complexity and labor rates. If a battery replacement is needed, costs for standard lead-acid batteries range from $200-$450, while AGM or EFB types can cost $300-$600, including installation, based on 2026 market data.
Conclusion
Performing manual battery tests without a multimeter offers a practical and immediate way to diagnose common starting problems. These methods provide symptomatic indications of a weak or dead battery, guiding initial troubleshooting efforts. According to verified research and expert sources, these manual checks provide a robust preliminary assessment for vehicle owners. Utilize these techniques to make informed decisions about charging, jump-starting, or seeking professional electrical system diagnosis.
❓ Frequently Asked Questions
What are the best methods to test a car battery without a multimeter if my car won’t start?
If your car won’t start, try the headlight test (dim or no lights mean weak/dead), listen for cranking sounds (slow crank indicates low power), and check for any accessory functionality to gauge remaining battery life.
How can the headlight test tell me about my battery’s charge level?
Turn on headlights for 15-30 seconds without starting the car. If they’re bright and remain so when you attempt to start, the battery is likely good; if they dim significantly or go out, the battery is weak or dead due to insufficient voltage.
What specific visual signs indicate a bad car battery?
Look for heavy corrosion on terminals, a cracked or bulging battery case, fluid leaks, or a missing/damaged vent cap, as these are clear indicators of a failing battery that needs immediate attention.
Why do accessories like the horn or radio help test the battery without a multimeter?
Testing high-draw accessories like the horn or interior lights can show if the battery can supply sufficient current. If they’re weak, intermittent, or don’t work, it suggests a low charge or internal battery issue.
What’s the difference between a weak battery and a completely dead battery during manual testing?
A weak battery might still allow some accessories to work faintly or produce slow, struggling engine cranks, while a completely dead battery will result in no lights, no cranking, or only a rapid clicking sound from the starter solenoid.
What safety precautions should I take when manually testing a car battery?
Always wear safety glasses and gloves, avoid touching battery terminals with bare hands or metal tools simultaneously, and ensure no sparks are present near the battery to prevent igniting hydrogen gas which can cause an explosion.