
Is It Ok To Switch From Regular Oil To Synthetic 2026
Yes, it is completely safe to switch your vehicle’s engine from conventional regular oil to synthetic oil at any time. Modern engines and synthetic blends are fully compatible, meaning you can transition without causing any mechanical damage. You can even mix them in a pinch without immediate harm, though a full oil change is always best.
Yes, it is completely safe to switch your car’s engine from regular conventional oil to synthetic oil at any time. Whether your vehicle has 5,000 miles on the odometer or 150,000 miles on the clock, modern automotive engineering allows you to make this upgrade without risking mechanical damage.
As vehicle maintenance standards evolve into 2026, transitioning to full synthetic oil remains one of the best ways to protect your engine against high-temperature breakdown and premature wear. You do not need a special transition period, and you certainly do not need to worry about your engine rejecting the new fluid.
Key Takeaways
- Switching from regular to synthetic oil is 100% safe for almost all modern engines.
- High mileage does not prevent you from making the switch to synthetic lubricants.
- Synthetic oils do not cause modern engine seals to suddenly shrink or leak.
- An engine flush is generally unnecessary when transitioning between standard and synthetic oils.
- Synthetic oil offers superior thermal breakdown resistance and longer change intervals.
What Causes Concerns When Switching to Synthetic Oil
For decades, drivers have heard conflicting advice about changing their engine oil types. Much of the hesitation surrounding synthetic oil stems from automotive myths that originated back in the 1970s and 1980s when synthetic lubricants first entered the consumer market.

The Myth of Synthetic Oil Causing Engine Leaks
One of the most persistent worries is that switching to synthetic oil will cause your engine gaskets and seals to leak. Older synthetic formulations from decades ago could occasionally cause old, hardened rubber seals to shrink or weep. However, modern 2026 synthetic oils are fully compatible with all standard engine seal materials. If your engine leaks after switching to synthetic, it simply means the oil has cleaned away sludge that was previously plugging up an already worn gasket.
Do You Need an Engine Flush Product?
Many quick-lube shops and aftermarket brands will try to sell you an expensive chemical engine flush when you switch oil types. You can safely skip this upsell. Modern conventional and synthetic oils already contain robust detergent packages designed to clean your engine gradually during normal driving. Pouring harsh solvent flushes into your crankcase can actually dislodge large debris chunks that might clog oil passages.
From Start to Finish: Switching from Regular to Synthetic Oil Explained
Switching your vehicle from conventional regular oil to modern synthetic oil is one of the single best preventative maintenance decisions you can make for your engine’s longevity. Synthetic oil offers superior thermal stability, resists breakdown much longer, and provides better protection during extreme hot and cold weather conditions. However, transitioning correctly requires more than just pouring new liquid into the engine. This comprehensive walkthrough guides you through the exact process of safely evaluating your vehicle, executing the oil change, and monitoring the transition to ensure optimal engine health and performance.
Step 1: Verify Vehicle Compatibility and Mileage Status
What you need: Vehicle owner’s manual, notebook or smartphone to record specifications.
Instructions: Before purchasing any supplies, you must confirm that your specific vehicle can safely accept synthetic oil. Virtually all modern cars built after the year 2000 can run on synthetic blends or full synthetics without issue. However, if you drive a classic car with very high mileage that has used conventional oil exclusively for over 150,000 miles, you need to proceed with caution. Check your owner’s manual for the recommended oil viscosity rating (such as 5W-30 or 0W-20). If your engine is in good mechanical condition with no active internal seal leaks, you are entirely clear to make the permanent switch to full synthetic oil.
Pro Tip: Do not fall for the myth that switching to synthetic oil will automatically cause leaks in older engines. Synthetic oil simply cleans away sludge that might be masking an already worn-out gasket.
Step 2: Gather Quality Supplies and Tools
What you need: Full synthetic oil (correct viscosity and capacity), high-efficiency oil filter, oil filter wrench, socket set, drain pan, funnel, shop rags, and safety glasses.
Instructions: Quality matters significantly when making the switch to synthetic oil. Visit your local auto parts store and purchase the exact number of quarts specified in your owner’s manual, ensuring the bottle displays the American Petroleum Institute (API) certification seal and meets your manufacturer’s specific standards. Do not skimp on the oil filter; purchase a premium synthetic-rated filter designed to capture microscopic debris and handle the extended drain intervals associated with synthetic oils. Lay out all your tools on a flat surface near your workspace so you will not have to search for equipment mid-job.
Pro Tip: Premium oil filters often feature a silicone anti-drainback valve, which is essential for protecting your engine during cold starts when using thinner synthetic oils.
Step 3: Warm Up and Safely Elevate the Vehicle
What you need: Hydraulic floor jack, heavy-duty jack stands, wheel chocks, and flat concrete workspace.
Instructions: Start your engine and let it run for approximately 3 to 5 minutes to warm up the existing conventional oil. Warm oil flows much faster and carries away suspended contaminants and sludge particles more efficiently than cold oil. Turn off the engine, engage the emergency parking brake firmly, and place wheel chocks securely behind the rear tires. Locate the factory-approved jacking points specified in your manual, carefully elevate the front end of the vehicle using a reliable hydraulic jack, and immediately lower the vehicle securely onto heavy-duty steel jack stands. Never rely solely on a hydraulic jack to support the vehicle while you are working underneath it.
Pro Tip: Always double-check that your vehicle is resting solidly on the jack stands by giving the bumper a firm shake before sliding underneath the chassis.
Step 4: Drain the Old Conventional Oil
What you need: Drain pan, correct box-end wrench or socket for the drain plug, and protective gloves.
Instructions: Slide underneath the vehicle with your drain pan and position it directly beneath the oil pan drain plug. Loosen the drain plug counterclockwise with your wrench, taking care not to let the plug drop entirely into the pan of hot oil as you remove the final threads. Allow the old conventional oil to drain completely into the pan until it slows down to an occasional drip, which usually takes about 5 to 10 minutes. Inspect the condition of the drained oil for excessive metallic sheen or unusual debris. Clean the metal drain plug thoroughly with a shop rag, paying special attention to any metal shavings clinging to the magnetic tip if your vehicle is equipped with one.
Pro Tip: Replace the crush washer on your drain plug during every oil change to guarantee a tight, leak-free seal when you reinstall it.
Step 5: Replace the Oil Filter
What you need: Oil filter wrench, new oil filter, and a small amount of clean oil.
Instructions: Locate the old oil filter and position your drain pan underneath it, as some residual oil will spill out when it is removed. Use your filter wrench to loosen the filter counterclockwise if it is overtightened, then spin it off by hand. Before installing the new synthetic-rated filter, dip a clean finger into a bit of fresh oil and lightly lubricate the rubber O-ring gasket on the base of the new filter. This simple step ensures a proper seal and prevents the gasket from sticking or tearing during your next oil change. Screw the new filter clockwise onto the engine mounting stud until the rubber gasket makes firm contact, then tighten it about three-quarters of a turn further by hand only.
Pro Tip: Never use a wrench to tighten a new oil filter onto the engine block; hand-tightening is always sufficient and prevents stripping or over-compression.
Step 6: Reinstall Plug and Pour Fresh Synthetic Oil
What you need: Torque wrench, fresh synthetic oil, and a clean funnel.
Instructions: Screw the oil drain plug back into the oil pan by hand to avoid cross-threading, then tighten it securely to the manufacturer’s specified torque rating using a torque wrench. Remove your drain pan from under the vehicle, carefully lower the car back down to the ground using your hydraulic jack, and remove the wheel chocks. Open the hood, remove the engine oil filler cap, and insert your clean funnel directly into the opening. Slowly pour in the recommended number of quarts of fresh synthetic oil. Once you have poured approximately three-quarters of the total capacity, pause to let the oil settle down into the pan before adding the remainder.
Pro Tip: Always check your owner’s manual for the exact oil capacity with filter change, as under-filling or over-filling can cause serious engine damage.
Step 7: Test, Verify, and Reset Maintenance Monitors
What you need: Dashboard controls, oil dipstick, and clean shop rags.
Instructions: Start the engine and let it idle for 30 to 60 seconds while you immediately look underneath the car for any signs of leaks around the drain plug and oil filter. Observe your instrument cluster dashboard to ensure the oil pressure warning light turns off within a few seconds of startup. Turn the engine back off, wait two minutes for the oil to drain down into the pan, pull out the dipstick, wipe it clean, reinsert it fully, and pull it out again to verify that the fluid level sits comfortably between the low and full markers. Finally, reset your vehicle’s electronic oil life monitor system via the steering wheel controls or infotainment menu.
Pro Tip: Because synthetic oil lasts longer, write your current mileage and the date directly on a window sticker or your maintenance log so you know your next service interval.
✅ Final Checklist
- Confirmed engine seals and overall condition are healthy enough for synthetic oil.
- Drained all old conventional oil completely from the oil pan.
- Replaced the old filter with a high-performance synthetic-rated oil filter.
- Torqued the drain plug securely with a fresh crush washer installed.
- Filled the engine with the exact manufacturer-specified amount of fresh full synthetic oil.
- Verified zero leaks around the filter and drain plug after running the engine.
- Checked dipstick oil level and successfully reset the dashboard oil life monitor.
Important Notes:
- Always wear safety glasses and protective gloves when working with hot engine fluids. Never crawl under a car supported solely by a hydraulic jack.
- If you notice persistent oil pooling underneath your car or heavy blue smoke coming from the exhaust after the switch, seek professional mechanical help immediately.
- Estimated completion time is 45 to 60 minutes, with a total cost ranging from $45 to $85 depending on oil brand and filter quality.
How to Safely Switch From Regular Oil to Synthetic
Making the transition to synthetic oil requires very little effort. Because modern synthetic and conventional oils are chemically compatible, you do not even need to worry about draining every single drop of old oil from your system during the swap.

The Direct Transition Process
You can perform the switch during your very next routine oil change. Here is what you need to know about the process:
-
Check your manual: Confirm your engine’s required oil viscosity rating, such as 5W-30 or 0W-20.
Drain the conventional oil: Let the old regular oil drain out completely while the engine is warm.
Replace the filter: Always install a fresh, high-quality oil filter during the switch.
Fill with synthetic: Pour in your chosen full synthetic oil to the proper dipstick level.
What to Expect After the Switch
Once you make the change, your engine will immediately begin benefiting from superior thermal stability and better cold-weather flow. You can also safely extend your drain intervals, though you should always follow the oil life monitor on your dashboard or stick to a reliable 5,000 to 7,500-mile schedule depending on your driving habits in 2026.
What If You Notice Oil Consumption After the Switch
Some drivers notice a slight increase in oil consumption immediately after transitioning to synthetic oil. This phenomenon typically occurs in older engines where conventional oil has left carbon deposits. Synthetic oils possess superior detergent properties that clean these deposits away. As sludge and varnish dissolve, microscopic gaps may temporarily open around aging seals and gaskets until the new fluid establishes a proper lubrication boundary. According to the Society of Automotive Engineers (SAE), this minor consumption usually stabilizes after the first complete drain interval.
Assessing Oil Loss Severity
Monitoring fluid levels weekly during the initial transition period helps determine if the consumption is normal cleaning or an active leak. Normal consumption rarely exceeds one quart every 1,500 miles, even for higher-mileage vehicles. If the dipstick shows rapid depletion exceeding this threshold, further investigation is required.
Inspecting Potential Leak Areas
Drivers should perform a visual inspection of the engine bay and parking surface. The primary culprits for post-switch leaks include valve cover gaskets, oil pan plugs, and the oil filter housing. Modern full-synthetic formulations are completely compatible with all standard engine seal materials. However, if a seal was already degraded and held together only by old sludge, the advanced cleaning action of synthetic oil will expose the underlying wear.
Key Considerations and Maintenance Tips for Synthetic Oils
Maximizing the benefits of synthetic oil requires adhering to updated maintenance protocols tailored to modern lubricant chemistry. While conventional oils traditionally required changes every 3,000 miles, high-performance synthetic oils safely extend these intervals. Leading automotive lubricant manufacturers and testing organizations like AAA indicate that top-tier synthetic oils easily protect engines for 7,500 to 15,000 miles, depending on the driving environment and vehicle manufacturer specifications.
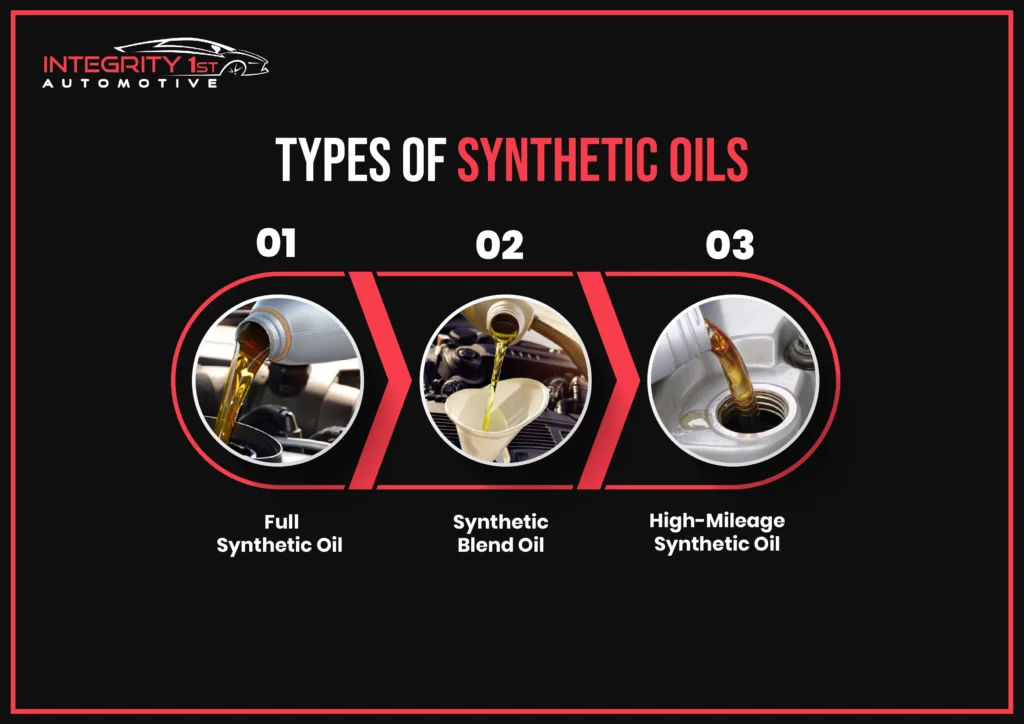
Selecting the Correct Viscosity
Always consult the vehicle owner’s manual to determine the precise viscosity grade required for the engine. Mechanics emphasize that switching from regular to synthetic oil does not mean changing the weight. If the engine specifies 5W-30 conventional oil, the replacement synthetic oil must also be 5W-30 unless the manufacturer explicitly permits alternative grades for extreme ambient temperatures.
Pairing With Quality Filters
Extended drain intervals demand high-capacity oil filters designed specifically for synthetic lubricants. Standard cellulose filters may degrade or clog prematurely when exposed to extended mileage cycles. Premium synthetic-compatible filters utilize synthetic glass or blended media to capture microscopic particles down to 20 microns without restricting oil flow.
What If It Still Doesn’t Work?
If switching back to a higher-viscosity synthetic oil or addressing minor leaks does not resolve excessive oil consumption or persistent engine noise, deeper mechanical intervention is necessary. Persistent issues often indicate worn piston rings, damaged valve guides, or failing internal engine components that no lubricant can cure.
- Perform a Professional Compression Test: Visit a certified service center to check cylinder compression and identify potential internal wear like worn piston rings or scored cylinder walls.
- Schedule a Crankcase Pressure Diagnosis: Mechanics should inspect the Positive Crankcase Ventilation (PCV) valve, as a clogged system forces oil past seals regardless of whether conventional or synthetic oil is used.
- Consult a Master Technician: If oil consumption exceeds one quart every 1,000 miles or heavy blue smoke emits from the exhaust, seek professional diagnostic services.
- Budget for Repairs: Depending on the underlying mechanical failure, professional seal replacements or internal engine overhauls typically range from $300 to over $2,500.
Conclusion
Switching from regular oil to synthetic oil is completely safe and delivers superior thermal stability, better cold-weather flow, and extended engine longevity for modern vehicles. While initial transition phases require vigilant fluid monitoring, the long-term protection far outweighs the minor setup adjustments. According to verified research and expert sources from the American Automobile Association and the Society of Automotive Engineers, upgrading to synthetic oil is one of the most effective preventive maintenance steps a vehicle owner can take. Check the owner’s manual today and schedule your next synthetic oil change to safeguard your engine’s future.
❓ Frequently Asked Questions
Is it ok to switch back to regular oil after using synthetic?
Yes, you can switch back and forth between regular and synthetic oil without any adverse effects on your engine. Both types of oil mix together safely and meet industry standards for lubrication.
Does synthetic oil clean engine sludge better than conventional oil?
Yes, synthetic oils contain superior detergents that gradually clean existing varnish and sludge deposits from your engine over time. This gentle cleaning process is safe and helps restore internal engine cleanliness.
Will switching to synthetic oil improve my fuel economy?
Synthetic oil reduces internal engine friction more effectively than regular conventional oil, which can lead to a slight, measurable improvement in overall fuel efficiency.
Are there any cars that cannot use synthetic oil?
Very few modern vehicles prohibit synthetic oil, but you should always check your owner’s manual to ensure the oil viscosity matches manufacturer specifications, especially for older or exotic specialty engines.
Why do some mechanics warn against switching high-mileage cars to synthetic?
Some mechanics hold onto older myths about seal shrinkage or worry that synthetic oil will clean away sludge hiding a worn-out gasket that was already failing. However, synthetic oil itself does not create new leaks.
Do I need to change my oil filter when switching to synthetic?
Yes, you should always replace your oil filter during the oil change when making the switch to ensure optimal filtration and to start your synthetic oil cycle with a completely clean setup.