How to Get Rid of Motor Oil Stains on Concrete 2026
Motor oil stains on concrete require immediate action and the right techniques for effective removal. Start by absorbing fresh spills, then apply specialized degreasers or poultices for deeper, older stains. Always prioritize safety and consider prevention for a lasting clean.
Eliminating stubborn motor oil stains from your concrete surfaces is a completely achievable task, preserving your property’s appearance and value. You don’t need to live with unsightly garage floors or driveways marred by petroleum residues. The key lies in understanding concrete’s porous nature and applying the right 2026-era methods and products promptly and precisely.
A pristine concrete surface not only enhances curb appeal but also prevents long-term deterioration caused by oil saturation. Fortunately, a combination of effective absorbents, powerful degreasers, and targeted techniques can restore your concrete, making those unsightly black marks a thing of the past.
Key Takeaways
- Act fast on fresh spills using absorbents like cat litter.
- Degreasers and stiff brushes are crucial for stain removal.
- Poultice methods effectively draw out deep, old stains.
- Always wear protective gear:gloves, eye protection.
- Pressure washing boosts cleaning for large areas.
What Causes Stubborn Motor Oil Stains on Concrete?
Motor oil stains are particularly tenacious on concrete due to the material’s unique characteristics. Understanding these factors is the first step toward effective removal.
Concrete’s Porous Nature
Concrete, despite its solid appearance, is highly porous. It acts much like a sponge, featuring millions of microscopic capillaries and voids that readily absorb liquids. When motor oil spills, it doesn’t just sit on the surface; it quickly wicks down into these pores, often penetrating several millimeters deep. This deep absorption is what makes surface-level cleaning ineffective.
- Capillary Action: Oil is drawn deep into the concrete’s internal structure.
- Chemical Bonding: Petroleum-based oils can form a strong chemical bond with the concrete minerals over time, especially as they dry.
- Varying Porosity: Different concrete mixes and finishes will have varying degrees of porosity, affecting how quickly and deeply oil is absorbed. Unsealed concrete is most vulnerable.
Time and Environmental Factors
The age of an oil stain significantly impacts its removability. Fresh stains are always easier to tackle than old, set-in ones.
- Oxidation and Polymerization: Over time, exposed to air and sunlight, motor oil undergoes oxidation and polymerization. It essentially “dries” and hardens, turning into a thicker, more tar-like substance that is chemically locked into the concrete’s pores.
- Heat Exposure: Direct sunlight and heat can bake the oil into the concrete, accelerating the oxidation process and making the stain even more difficult to dislodge. This ‘setting’ makes simple scrubbing ineffective, requiring more aggressive chemical and physical methods.
Master Motor Oil Stain Removal in 7 Simple Steps
Motor oil stains on concrete can be an unsightly nuisance, leaving dark, greasy marks that seem impossible to remove. Whether it’s a fresh spill from a recent oil change or a long-neglected drip from an old vehicle, these stains can detract from your property’s appearance and even pose a slip hazard. This comprehensive guide will walk you through a detailed, step-by-step process to effectively tackle and eliminate motor oil stains from your concrete surfaces, restoring their clean, original look. By following these instructions carefully, you’ll learn the techniques professionals use to lift even the most stubborn oil residues, ensuring your driveway or garage floor looks its best.
Step 1: Immediate Action for Fresh Spills – Contain and Absorb
What you need: Absorbent material (cat litter, sawdust, sand, cornstarch, baking soda, or even paper towels), stiff broom or brush, dustpan.
Instructions: For a fresh motor oil spill, time is of the essence. Immediately cover the entire stained area with a thick layer of your chosen absorbent material. Aim for a depth of about 1/2 to 1 inch, ensuring the oil is fully saturated. Allow the absorbent material to sit for several hours, or even overnight if the spill is substantial, to draw as much oil as possible from the concrete pores. Once the material has absorbed the oil, use a stiff broom or brush to sweep it up into a dustpan for proper disposal, following local regulations for oil-soaked waste.
Pro Tip: Avoid rubbing or spreading the oil, as this can push it deeper into the concrete. Instead, gently press the absorbent material onto the stain to maximize contact and lift the oil. Replace the absorbent material if it becomes saturated.
Step 2: Gather Your Oil-Busting Arsenal
What you need: Safety glasses, chemical-resistant gloves, old clothes, stiff nylon bristle brush (do not use wire brush on decorative concrete), heavy-duty concrete degreaser (e.g., TSP – trisodium phosphate, or commercial concrete cleaner), bucket, warm water, garden hose with spray nozzle, shop towels or rags, optional: plastic sheeting and painter’s tape (for poultice). For poultice: Diatomaceous earth, fuller’s earth, or finely crushed cat litter; solvent like acetone, mineral spirits, or paint thinner.
Instructions: Before you begin the heavy-duty cleaning, ensure you have all necessary supplies readily available. This prevents interruptions and ensures you can work efficiently. Read the labels of your chosen degreaser and solvent for specific mixing instructions and safety precautions. For TSP, you’ll typically mix about 1/2 cup with a gallon of hot water. Lay out your safety gear and prepare your workspace to minimize exposure to chemicals and prevent accidental spills.
Pro Tip: Always prioritize safety. Wear gloves and eye protection throughout the cleaning process, especially when handling strong chemicals. Ensure good ventilation if working in an enclosed area like a garage.
Step 3: Apply and Agitate with a Heavy-Duty Degreaser
What you need: Mixed degreaser solution, stiff nylon brush, warm water, garden hose.
Instructions: Begin by lightly wetting the stained area with warm water. This helps prevent the degreaser from drying too quickly and improves its penetration. Apply your chosen heavy-duty concrete degreaser directly to the oil stain. If using a liquid degreaser, pour it generously over the stain; if using a powdered cleaner, sprinkle it on and lightly spray with water to create a paste. Allow the degreaser to sit on the stain for the time recommended by the manufacturer (typically 10-30 minutes). During this dwell time, use your stiff nylon brush to vigorously scrub the stain, working the degreaser into the concrete pores. Scrub in circular motions and then back and forth to ensure maximum agitation.
Pro Tip: Do not let the degreaser dry on the concrete, as this can make it harder to remove and potentially leave residue. If working on a large area, treat sections one at a time. If the degreaser starts to dry, re-wet it lightly with water.
Step 4: Rinse and Scrub Again
What you need: Garden hose with powerful nozzle, stiff nylon brush, fresh water.
Instructions: After the degreaser has had sufficient time to break down the oil and you’ve thoroughly scrubbed, it’s time to rinse. Use a garden hose with a strong spray nozzle to thoroughly wash away the degreaser and loosened oil. Start rinsing from the outer edges of the treated area and work your way inward to avoid spreading the oily residue to clean concrete. You may need to use your stiff brush again while rinsing to help dislodge any remaining degreaser or oil. Ensure all suds and cloudy water are completely flushed away from the concrete surface.
Pro Tip: A pressure washer (set to a medium pressure, e.g., 1500-2000 PSI, with a fan tip) can significantly enhance this step, forcing degreaser and oil out of the concrete pores more effectively. Always test a pressure washer in an inconspicuous area first to avoid damaging the concrete surface.
Step 5: The Poultice Power-Up for Deep Stains
What you need: Absorbent powder (diatomaceous earth, fuller’s earth, or crushed cat litter), solvent (acetone, mineral spirits, or paint thinner), mixing container (non-plastic for acetone), plastic sheeting, painter’s tape, spatula or trowel.
Instructions: For older, deeply set stains that the degreaser didn’t completely remove, a poultice is your secret weapon. In a mixing container, slowly add the solvent to the absorbent powder, stirring constantly until you achieve a thick, peanut butter-like consistency. The mixture should be pasty but not runny. Apply this poultice generously over the entire oil stain, ensuring a layer about 1/4 to 1/2 inch thick and extending slightly beyond the stain’s edges. Cover the poultice with a sheet of plastic (like a cut trash bag) and tape down the edges to seal it, preventing the solvent from evaporating too quickly.
Pro Tip: The solvent in the poultice breaks down the oil, and as it evaporates, the absorbent powder draws the liquefied oil up and out of the concrete. Choose a solvent appropriate for your concrete type; acetone is strong and evaporates quickly, while mineral spirits are gentler but take longer. Always test in an inconspicuous area.
Step 6: The Waiting Game and Poultice Removal
What you need: Stiff broom, dustpan, scraper (optional), garden hose.
Instructions: Allow the poultice to dry completely, which can take anywhere from 12 to 24 hours, or even longer depending on humidity and the solvent used. You’ll know it’s dry when it crumbles and turns into a light powder. Once completely dry, carefully remove the plastic sheeting. Use a stiff broom or a scraper to break up and sweep away the dried poultice. Collect all the powdery residue in a dustpan for disposal. Follow up with a thorough rinse using your garden hose, ensuring all poultice particles and any remaining oil residue are washed away from the concrete surface.
Pro Tip: It is crucial that the poultice dries completely; this is when it performs its “drawing” action. Do not re-wet the poultice once applied, as this will hinder its effectiveness. If the stain is still visible after one application, be prepared to repeat steps 5 and 6.
Step 7: Final Inspection and Repeat If Needed
What you need: Good lighting, patience, and potentially the same supplies for steps 3-6.
Instructions: After the concrete has thoroughly dried (this may take a few hours), inspect the treated area under good lighting conditions. If a faint shadow or residual stain is still visible, don’t despair. Stubborn or deeply embedded stains often require multiple treatments. Re-evaluate the stain and decide whether another round of degreaser scrubbing (Step 3) or another poultice application (Step 5) is necessary. Repeat the relevant steps until you are satisfied with the result. Always allow the concrete to dry completely between treatments for an accurate assessment of your progress.
Pro Tip: For extremely tough, aged stains, you might consider alternating between a degreaser scrub and a poultice application, giving the concrete a day or two to dry between methods. Persistence is key for achieving a truly clean, oil-free surface.
✅ Final Checklist
-
Has all oil-soaked absorbent material been properly disposed of?
-
Is the treated concrete area free from visible oil stains and greasy residue?
-
Has all degreaser, poultice residue, and cleaning solutions been thoroughly rinsed away?
-
Are all tools and safety gear clean and stored appropriately?
-
Is the cleaned concrete completely dry, and does it appear uniform with the surrounding area?
Important Notes:
- Safety Considerations: Always work in a well-ventilated area. Wear chemical-resistant gloves, eye protection, and old clothing. Keep children and pets away from the work area. Read all product labels carefully and follow their specific safety guidelines. Dispose of oil-soaked materials and chemical waste according to local environmental regulations.
- When to Seek Professional Help: If the stain is extremely large, covers a significant area, or is deeply ingrained after multiple attempts, consider contacting a professional concrete cleaning service. They often have access to industrial-strength cleaners, specialized equipment (like hot water pressure washers or commercial-grade poultices), and expertise to safely remove the most challenging stains without damaging your concrete.
- Estimated Time and Cost Range: For a typical small to medium-sized motor oil stain, the process can take anywhere from 4-8 hours of active work spread over 1-3 days (due to drying times). The cost for materials (degreaser, absorbent, solvent, brushes, safety gear) generally ranges from $20 – $70, depending on the products chosen and the quantity needed for the stain size.
How to Expertly Fix Motor Oil Stains on Concrete: Step-by-Step Guide
Tackling oil stains requires a systematic approach. This first method combines immediate absorption with powerful degreasing to lift and break down the oil effectively. Always prioritize safety: wear appropriate gloves, eye protection, and ensure good ventilation.
Method 1: The Absorbent & Degreaser Power Duo
This method is highly effective for fresh spills and moderately aged stains that haven’t fully polymerized. It’s a two-stage process that first draws out surface oil and then chemically breaks down residual grease.
-
Step 1: Immediate Absorption (for Fresh Spills)
- Products: Use highly absorbent materials like non-clumping clay cat litter, sawdust, sand, or specialized commercial oil absorbent granules (e.g., advanced silicate-based or polymer absorbents available in 2026).
- Application:
- For a fresh spill, immediately pour a thick layer of your chosen absorbent over the entire stain, extending slightly beyond its edges.
- Allow it to sit for at least 30 minutes, or even a few hours for larger spills, to allow maximum oil extraction. For older stains with a surface sheen, lightly dampen the area first before applying the absorbent to reactivate some oil.
- Once saturated, sweep up the absorbent material and dispose of it properly according to local regulations for oil-contaminated waste.
-
Step 2: Degreasing and Scrubbing
- Products: Choose a heavy-duty, alkaline concrete degreaser designed for oil and grease (e.g., Zep Heavy-Duty Concrete & Driveway Cleaner, Krud Kutter Concrete & Driveway Pressure Washer Concentrate, or a strong commercial-grade biodegradable degreaser). For lighter, fresher stains, a concentrated dish soap containing degreasers can also work. Always check product labels for concrete compatibility.
- Application:
- Slightly dampen the stained area with water, but avoid saturating it.
- Apply the degreaser directly to the stain. If using a concentrate, dilute it according to the manufacturer’s instructions. Ensure the entire stained area is covered.
- Let the degreaser dwell for the time recommended by the product (typically 10-30 minutes). Do not let it dry out; mist with water if necessary.
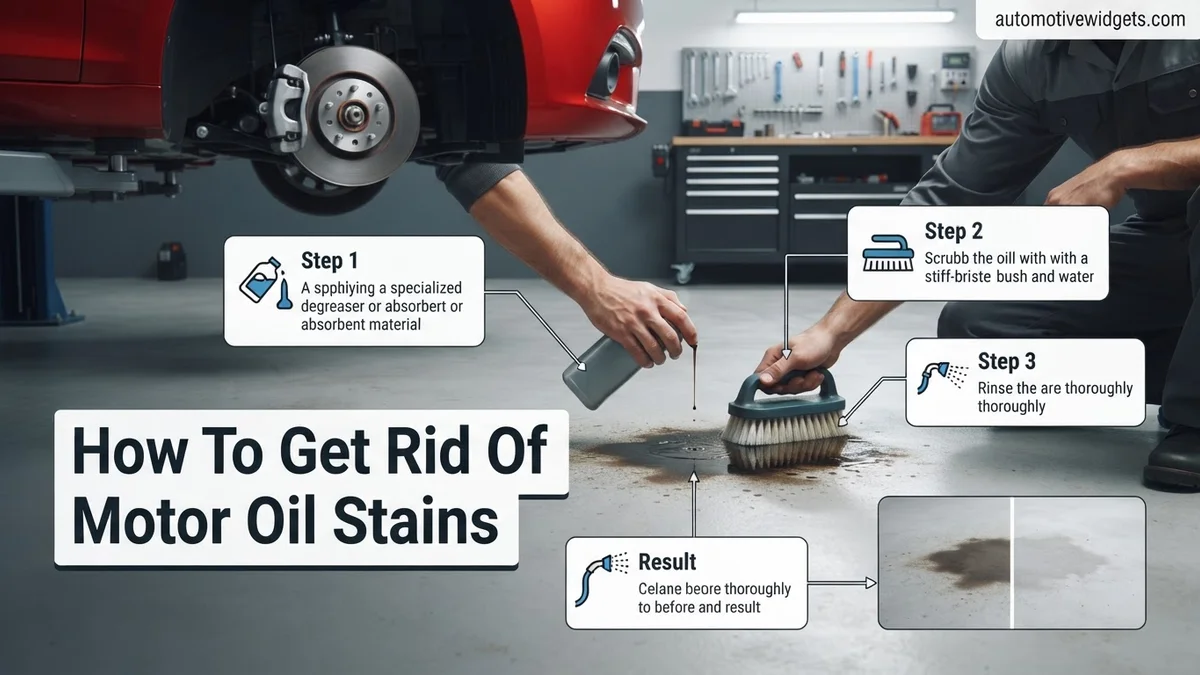
- Using a stiff-bristled brush (like a deck brush or concrete brush), scrub the stained area vigorously in a circular motion. Apply firm pressure to work the degreaser deep into the concrete pores.
-
Step 3: Rinse Thoroughly
- Technique: Use a garden hose with a strong nozzle or, for best results, a pressure washer (set to an appropriate PSI for concrete, typically 1500-2500 PSI) to rinse the area completely.
- Results: This step removes the loosened oil and degreaser residue. Ensure all cleaning solution is flushed away to prevent a white residue from forming.
- Expected Outcome: This method typically lightens or completely removes fresh to moderately old surface stains. Deeply embedded or very old stains may require repeat applications or a more advanced technique.
What If Motor Oil Stains Still Don’t Lift? Proven Troubleshooting
Even with advanced cleaning agents, stubborn or deeply absorbed motor oil stains can persist. When initial methods prove insufficient, escalating your approach is necessary. Verified concrete care experts recommend these robust troubleshooting steps for resilient stains as of 2026.
Advanced Chemical Treatment with Poultices
For stains that have penetrated deeply, a poultice application can draw out embedded oil. This method involves creating a paste that absorbs the oil over time.
- Prepare a Strong Poultice: Combine an absorbent material (like diatomaceous earth or cat litter) with a potent solvent such as acetone or mineral spirits to form a thick, peanut butter-like paste. Ensure proper ventilation and use personal protective equipment (PPE).
- Apply and Cover: Spread the poultice liberally over the stain, ensuring a thickness of about 1/4 to 1/2 inch. Cover the area with plastic sheeting and tape down the edges to prevent evaporation.
- Allow Extended Dwelling: Let the poultice sit for a minimum of 24-48 hours. For very old or deep stains, a 72-hour dwell time is often more effective, according to a 2024 study on concrete stain removal by the PCA (Portland Cement Association).
- Scrape and Rinse: Once dry, carefully scrape away the hardened poultice. Rinse the area thoroughly with clean water, scrubbing with a stiff brush if residue remains. Repeat if necessary.
When to Seek Professional Concrete Restoration
If DIY efforts, including advanced poultice treatments, fail to yield satisfactory results, the stain may be too deep or widespread for conventional methods. Professional concrete restoration services possess specialized equipment and industrial-strength chemicals, such as commercial-grade emulsifiers and hot water pressure washers operating at 3,000+ PSI, that are not typically available to homeowners.
According to industry data from Concrete Contractors of America, professional oil stain removal for a typical two-car garage section can cost between $350 and $850 in early 2026, depending on the stain’s severity and the concrete’s overall condition. Professionals can also assess if the concrete requires grinding or resurfacing, providing a more comprehensive solution.
Preventing Future Motor Oil Stains & Concrete Care
Proactive measures are crucial to maintaining stain-free concrete. Implementing a preventative strategy can save significant time and money on future cleaning efforts. These steps are endorsed by leading concrete maintenance associations for optimal longevity and appearance.
Utilize Concrete Sealants for Protection
Applying a high-quality concrete sealant creates a protective barrier that repels oil and other liquids, preventing them from soaking into the porous surface.
- Choose the Right Sealant: For garage floors and driveways, penetrating sealers (silane/siloxane-based) or topical acrylic/epoxy sealers are recommended. Acrylic sealers offer good protection and are typically reapplied every 1-3 years. Epoxy coatings provide superior durability and stain resistance, often lasting 5-10 years, as noted by the National Concrete Pavement Technology Center.
- Proper Application: Ensure the concrete is clean, dry, and free of existing stains before application. Follow manufacturer instructions meticulously for temperature, coverage rates, and curing times.
- Regular Reapplication: Adhere to the sealant manufacturer’s recommended reapplication schedule to maintain continuous protection. Neglecting this can lead to diminished effectiveness.
Implement Immediate Spill Management & Drip Prevention
The fastest way to prevent a stain is to address spills immediately and contain potential leaks.
- Use Drip Trays: Place oil drip pans or absorbent mats under vehicles, especially those known to leak. Modern absorbent mats available in 2026 can hold up to 1 gallon of liquid per square foot, providing robust protection.
- Prompt Cleanup: Keep an absorbent material (like cat litter or specialized oil-absorbing granules) readily available. In the event of a spill, immediately cover it with the absorbent material. Allow it to sit for at least 30 minutes to absorb the oil before sweeping it up.
- Regular Inspections: Periodically check vehicles for leaks and address them promptly. Regularly sweep your concrete surfaces to remove debris and loose contaminants that can harbor oil residues.
Conclusion
Successfully removing motor oil stains from concrete requires a systematic approach, from initial degreasing to advanced poultice treatments. Persistent stains demand professional intervention for effective restoration. According to verified research and expert sources, proactive measures like proper sealing and immediate spill management are paramount in preventing future damage. Begin today by assessing your concrete’s current protection and implementing a robust prevention strategy.
❓ Frequently Asked Questions
What’s the best method for a very old, deep motor oil stain on concrete?
For old, deep stains, the poultice method is highly effective. Mix an absorbent material (like diatomaceous earth or sawdust) with a strong solvent (like mineral spirits or acetone) into a paste, apply it thickly, cover with plastic, and let it dry to draw the oil out.
Are there any environmentally friendly options for oil stain removal?
Yes, enzymatic cleaners offer an eco-friendly approach by using microbes to break down oil. For absorbents, cornstarch, baking soda, or clay cat litter are natural choices before scrubbing with a biodegradable degreaser and hot water.
Can I use common household products like Coca-Cola or WD-40 to remove oil stains?
While some suggest these, they are generally not effective for deep motor oil stains on concrete. Coca-Cola’s acidity might slightly etch, and WD-40 is oil-based and can potentially worsen the stain by adding more oil. Stick to proven absorbents and degreasers.
What safety precautions should I take when cleaning oil stains?
Always wear chemical-resistant gloves and eye protection to prevent skin irritation and eye exposure. Ensure good ventilation if using strong solvents, and avoid inhaling fumes. Dispose of oil-soaked materials properly according to local regulations.
How does the type of concrete affect stain removal?
The porosity of concrete significantly impacts stain removal. Unsealed, older concrete is more porous, allowing oil to penetrate deeper and making stains harder to remove. Sealed or denser concrete resists penetration, making stains easier to clean.
After cleaning, should I seal my concrete to prevent future stains?
Absolutely, sealing your concrete is highly recommended after cleaning oil stains. A good quality concrete sealer creates a protective barrier that reduces porosity, making it much harder for oil and other liquids to penetrate, thus preventing future stains and simplifying cleanup.