How Can You Tell If The Ignition Switch Is Bad How Can 2027
Identifying a bad ignition switch often involves recognizing common symptoms like no-starts, stalling, or flickering dash lights. This guide will help you perform simple diagnostic checks to confirm the issue. Timely diagnosis prevents further car troubles.
Determining if your car’s ignition switch is failing doesn’t have to be a mystery. You can identify a faulty switch by observing specific vehicle behaviors and performing straightforward diagnostic steps. Understanding these signs and tests is crucial because a failing ignition switch can leave you stranded or even pose a safety risk, as your vehicle might lose power unexpectedly, a concern that remains just as relevant in 2027 as it ever has been. Pinpointing this issue quickly allows you to address it before it escalates into a more significant, more costly problem.
This diagnosis process focuses on what you can observe and test yourself, without needing specialized automotive tools or advanced electrical expertise. Your ability to accurately identify these symptoms and run basic checks will save you time and provide clear information if professional help becomes necessary. Let’s get into the definitive indicators.
Key Takeaways
- Recognize common no-start or stalling symptoms.
- Test accessory power at different key positions.
- Listen for specific clicks or lack thereof.
- Differentiate from battery or starter issues.
- Seek professional help if unsure about repair.
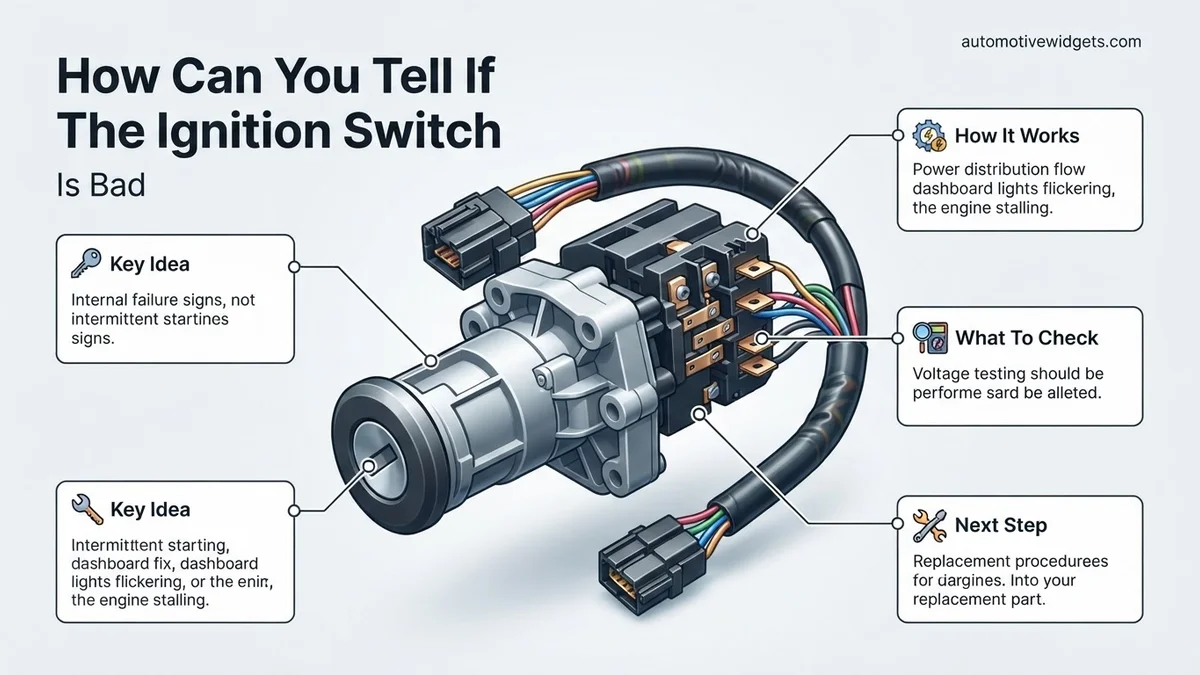
What Are the Signs of a Bad Ignition Switch?
A failing ignition switch can manifest in several distinct ways, often leaving you with a sense of frustration and confusion. Paying close attention to these symptoms provides the clearest path to diagnosis. In 2027, despite advancements in automotive electronics, the fundamental mechanical and electrical principles of ignition switches mean these classic failure signs are still your primary indicators.
Intermittent Power and Cranking Issues
- No Power to Accessories or Dashboard: When you turn your key to the “ACC” or “ON” position, your radio, dashboard lights, or other electrical accessories might not activate, or they might flicker. Sometimes they work, other times they don’t, indicating an intermittent connection failure within the switch. Your climate control might remain dark, or the infotainment screen could stay blank.
- Engine Cranks But Won’t Start: You turn the key, you hear the starter motor engage and the engine turn over, but it simply refuses to fire up. This suggests the ignition switch is providing power to the starter circuit but failing to send power to the engine’s fuel pump, ignition coils, or ECU (Engine Control Unit). Without these critical components receiving power, combustion cannot occur.
- No Cranking at All: This is a more definitive sign. When you turn the key to the “START” position, absolutely nothing happens—no click, no whirring, just silence. The dashboard lights may or may not come on, but the starter motor gets no signal. This indicates a complete failure in the switch’s ability to complete the starter circuit.
Stalling and Key Anomalies
- Vehicle Stalls While Driving: This is one of the most dangerous and frustrating symptoms. Your car might suddenly lose all power, including the engine, power steering, and brakes, while you’re in motion. The dashboard lights might go dark, then flicker back on, or the car might momentarily restart if the switch makes a temporary connection. This is often due to internal wear or loose connections within the switch failing to maintain consistent power to critical systems. Modern vehicles, even with advanced fault detection, can be caught off guard by this sudden power cut.
- Key Sticks or is Hard to Turn: You find yourself struggling to turn the key in the ignition cylinder, or it gets stuck in one position. While this can sometimes point to a worn lock cylinder itself, a faulty electrical portion of the switch can also create resistance or mechanical binding, especially if internal components are misaligned or damaged. The key might feel gritty or require excessive force, which is never a good sign.
How to Diagnose and Fix a Bad Ignition Switch Like an Expert
The ignition switch is the heart of your vehicle’s electrical system, acting as the master controller for starting the engine and powering various accessories. When it malfunctions, your car can exhibit a range of frustrating symptoms, from intermittent electrical issues to a complete no-start condition. This comprehensive guide will walk you through a detailed, step-by-step process to accurately diagnose whether your ignition switch is the culprit, saving you time, money, and unnecessary parts replacement. By meticulously following these instructions, you’ll gain the confidence to pinpoint the problem like a seasoned professional.
Step 1: Understand Symptoms & Perform Initial Checks
What you need: Your vehicle’s owner’s manual (for fuse box location/diagrams), a notepad and pen, your car keys.
Instructions: Begin by observing and documenting the symptoms your vehicle is exhibiting. Does the car fail to crank or start? Do some accessories (radio, wipers, dash lights) work while others don’t? Is there an intermittent loss of power while driving? Try turning the key to the ‘ACC’ (accessory) position, then ‘ON’ (run), and finally ‘START’. Pay close attention to what happens at each stage: do dash lights illuminate, does the radio come on, do headlights work? Note any specific positions where power is lost or gained. Sometimes, simply wiggling the key in the ignition can temporarily restore power, which is a strong indicator of a failing switch.
Pro Tip: A common sign of a failing ignition switch is when your car starts but then unexpectedly dies, or when accessories like the radio or climate control intermittently cut out, especially after hitting a bump or wiggling the key. Documenting these precise symptoms is crucial for accurate diagnosis.
Step 2: Check Battery Voltage and Terminal Connections
What you need: Digital Multimeter (DMM), safety glasses, wire brush (optional), 10mm/13mm wrench (optional).
Instructions: Before diving into the ignition switch, eliminate the most common cause of electrical issues: a dead battery or poor connections. With the vehicle off, use your DMM set to DC Volts (20V range) to measure the voltage across your battery terminals. A healthy battery should read approximately 12.6 volts. Anything below 12.0 volts indicates a discharged battery that needs charging or replacement. Next, visually inspect the battery terminals and cables for corrosion, looseness, or damage. Corroded terminals can significantly impede electrical flow. If present, disconnect the battery (negative first) and clean the terminals thoroughly with a wire brush before re-securing them tightly.
Pro Tip: A car battery can show 12.6V when unloaded, but drop significantly under load (like trying to start the car) if it’s failing. Have someone try to start the car while you monitor the battery voltage; if it drops below 10V, the battery is likely weak or faulty, even if it measures acceptable static voltage.
Step 3: Test Key Functionality and Steering Column Lock
What you need: Your primary and spare car keys.
Instructions: Sometimes, the issue isn’t the switch itself, but the key. If your car uses a transponder key, a damaged chip can prevent the car from starting, even if the ignition switch is perfectly fine. Try using your spare key; if the car starts with the spare but not the primary, the primary key’s transponder chip may be faulty. Additionally, ensure the steering wheel isn’t locked in a position that prevents the key from fully turning. Gently jiggle the steering wheel left and right while trying to turn the key to the ‘ON’ position. A stiff or stuck steering column lock can prevent the ignition switch from engaging correctly. If the key feels excessively loose or sticky in the barrel, it might be a worn key or tumbler issue rather than the electrical switch.
Pro Tip: Many vehicles have an immobilizer light on the dashboard that illuminates or flashes if the car doesn’t recognize the key’s transponder chip. Pay attention to this light when attempting to start the car; its behavior can quickly diagnose a key-related issue versus a mechanical ignition switch problem.
Step 4: Check Fuses and Relays Related to Ignition
What you need: Owner’s manual, fuse puller (usually in fuse box), DMM with continuity test feature or test light.
Instructions: Consult your vehicle’s owner’s manual to locate the fuse boxes (typically under the hood and/or inside the cabin, often under the dashboard or by the kick panel). Identify all fuses and relays associated with the ‘IGNITION’, ‘START’, ‘ECM/PCM’, ‘FUEL PUMP’, and ‘ACC’ circuits. Visually inspect each fuse for a broken filament. For a more reliable test, remove each relevant fuse and use your DMM’s continuity setting to check if current flows through it. Replace any blown fuses with a new one of the exact same amperage rating. Also, consider swapping relevant relays (e.g., starter relay, ignition relay) with an identical known good relay from another non-critical circuit (e.g., horn relay) to rule out a faulty relay.
Pro Tip: When testing fuses, even a visually intact fuse can sometimes be faulty. Always use a continuity tester or multimeter to confirm. For relays, a common diagnostic trick is to gently tap on them while someone tries to start the car; if it suddenly works, the relay might be sticking or intermittently failing.
Step 5: Test for Power at the Ignition Switch Connector
What you need: Owner’s manual (for wiring diagrams if possible), DMM, test light, safety glasses, basic trim removal tools.
Instructions: This step requires accessing the ignition switch, which usually involves removing steering column shrouds or dash trim. Once exposed, locate the main electrical connector that plugs into the ignition switch. With your DMM set to DC Volts (20V range) or using a test light, check for constant 12-volt power at the main power wire(s) leading into the ignition switch. This wire should have power even with the key off. Then, turn the key to the ‘ACC’, ‘ON’, and ‘START’ positions one by one, checking for 12V output on the respective wires leaving the switch. For example, in the ‘ON’ position, you should see 12V on the wires powering the ECU and accessories. No power at the input indicates a problem upstream (battery, main fuse); no power at an output wire while the input is good and the key is in the correct position strongly suggests a faulty switch.
Pro Tip: Always consult a vehicle-specific wiring diagram if available. This will clearly identify which wires should have power in each key position, preventing guesswork and ensuring accurate testing. Exercise caution when probing wires to avoid short circuits.
Step 6: Perform a Voltage Drop Test Through the Switch
What you need: DMM, safety glasses, a helper (optional but recommended).
Instructions: A voltage drop test can reveal resistance within the ignition switch, even if it’s passing some current. With the ignition switch connected, back-probe the main power input wire to the switch and one of its output wires (e.g., the ‘run’ circuit wire) while the key is in the ‘ON’ position (or the ‘start’ circuit wire while a helper tries to crank). Set your DMM to the lowest DC millivolt (mV) range. You should see a reading as close to 0 mV as possible. A voltage drop greater than 100-200 mV (0.1-0.2V) indicates excessive resistance within the switch, suggesting an internal fault. Repeat this for different output circuits (ACC, ON, START) as applicable to ensure the entire switch assembly is functioning optimally.
Pro Tip: Perform this test under load – meaning while the circuit is actively drawing power. For the start circuit, have a helper hold the key in the “START” position for a few seconds. A high voltage drop on any circuit when the key is in the appropriate position is a definitive sign of an internal fault in the ignition switch.
Step 7: Check for Power at the Starter Solenoid (Crank No-Start)
What you need: DMM or test light, safety glasses, a helper, wiring diagrams (if possible).
Instructions: If your primary symptom is a “crank, no-start” or “no-crank,” the ignition switch’s ‘START’ position circuit needs direct verification. Locate your starter motor and its solenoid wire (usually a small-gauge wire attached to the starter solenoid). With your DMM set to DC Volts or using a test light, probe this wire while a helper turns and holds the key in the ‘START’ position. You should see a momentary 12-volt signal. If you have 12V here, the ignition switch’s ‘START’ circuit is likely functioning, and the issue lies further downstream (starter, battery cables, engine ground). If there’s no voltage or significantly low voltage, it points back to a problem with the ignition switch or its associated wiring/relay for the starter circuit.
Pro Tip: Be extremely careful when working around the starter motor and its associated wiring. Ensure the vehicle is in park/neutral with the parking brake engaged. If you get 12V at the solenoid wire but the starter doesn’t engage, try jumping the solenoid directly with a known good 12V source (briefly!) to confirm the starter motor itself is functional.
Step 8: Simulate Ignition Switch States (Advanced)
What you need: Vehicle-specific wiring diagram, fused jumper wires (10A rating), DMM, safety glasses, extreme caution.
Instructions: This step is for advanced users and requires a detailed wiring diagram. Disconnect the main ignition switch connector. Identify the constant 12V input wire and the output wires for ‘ACC’, ‘ON’, and ‘START’ according to your diagram. Using fused jumper wires, carefully and briefly apply 12V directly from the constant power wire to each of the output wires, one at a time, to simulate the key positions. For example, jump constant 12V to the ‘ACC’ wire; accessories should power on. Then jump to the ‘ON’ wire; dash lights should illuminate. For the ‘START’ wire, a quick, momentary jump should engage the starter. If the car starts and runs normally by bypassing the switch in this manner, it’s definitive proof that the ignition switch itself is faulty. DO NOT leave jumper wires connected for prolonged periods, especially for the ‘START’ circuit.
Pro Tip: Use only fused jumper wires of appropriate amperage. A 10A fuse is generally safe for diagnostic jumping, protecting against accidental shorts. Always confirm wire functions with a diagram before connecting jumpers, as misidentification can cause significant electrical damage.
✅ Final Checklist
- Symptoms (intermittent power, no-start) are clearly documented and consistently point to ignition.
- Battery voltage is confirmed healthy (12.6V static, >10V under load) and terminals are clean.
- All relevant fuses and relays have been inspected and tested for continuity.
- Constant 12V power is confirmed present at the ignition switch’s input wire.
- Voltage drop across the ignition switch is minimal (<0.1-0.2V) in all key positions.
Important Notes:
- Safety considerations or warnings: Always disconnect the negative battery terminal before performing any work that involves manipulating wiring or components directly connected to the electrical system, especially when removing or installing the ignition switch. Wear safety glasses. Be extremely cautious when probing live circuits with a multimeter or test light to avoid short circuits, which can damage electrical components or cause injury. When working around the steering column, be mindful of airbags; improper handling can trigger accidental deployment. Never force the key or the switch.
- When to seek professional help: If you are uncomfortable with electrical diagnostics, cannot safely access the ignition switch, or if your vehicle’s symptoms are complex and don’t clearly match a faulty ignition switch (e.g., multiple unrelated electrical failures), it’s best to consult a certified automotive technician. Modern vehicles have intricate electrical systems that can be easily damaged by incorrect diagnosis or repair. If your car has anti-theft systems integrated with the ignition switch, replacement might require specialized programming by a dealer or locksmith.
- Estimated time and cost range: Diagnosing a bad ignition switch using these methods can take anywhere from 1 to 3 hours for a moderately experienced DIYer, depending on vehicle access and complexity. If the diagnosis confirms a bad ignition switch, the cost of the part itself can range from $50 to $250+, depending on the make and model. Professional labor for replacement typically adds another $100 to $400+, as it can be a labor-intensive job requiring dash or steering column disassembly.
Step-by-Step Guide to Diagnose a Faulty Ignition Switch
Before you conclude that your ignition switch is the culprit, perform these practical, accessible diagnostic tests. Most only require basic tools like a test light or multimeter, readily available at any auto parts store in 2027. Always ensure your vehicle is in Park (automatic) or Neutral (manual) with the parking brake engaged for safety.
Initial Checks and Power Verification
- Check Your Battery: Begin with the simplest check. Ensure your car battery is charged and the terminals are clean and tight. A dead or weak battery can mimic many ignition switch symptoms. Try jump-starting the vehicle. If it starts, your ignition switch might be fine, and the battery is the issue.
- Observe Dashboard Lights: Turn your key to the “ON” position (without trying to start). Do all the normal dashboard warning lights illuminate brightly? If they are dim, flickering, or completely absent, it suggests a power supply issue. This could be the switch, but also a low battery or a main fuse. If some lights work but others don’t, pay close attention to which ones are affected.
- Test Fuses: Locate your vehicle’s fuse boxes (usually under the hood and/or inside the cabin). Check the fuses related to the ignition, starter, fuel pump, and main electrical systems. A blown fuse can prevent specific components from receiving power, mimicking a switch failure. Replace any blown fuses with new ones of the correct amperage.
Testing Key Positions and Starter Engagement
- Listen for Clicks and Whirs: With the car quiet, turn your key to the “START” position. Listen carefully for a single click from the engine bay. A single click often points to a starter solenoid issue or a low battery, not necessarily the ignition switch. If you hear multiple rapid clicks, it almost certainly indicates a weak battery. If you hear nothing at all, the ignition switch, battery, or starter motor circuit is completely open.
- Use a Test Light or Multimeter: This is your most effective DIY diagnostic tool.
- Test at the Starter Solenoid: With assistance, or by carefully propping your test light, connect its ground clip to a good chassis ground. Have someone turn the key to “START.” Touch the test light probe to the small “trigger” wire on the starter solenoid. If the light illuminates, the ignition switch is successfully sending power to the starter solenoid, suggesting the switch is likely okay, and the issue lies with the starter motor itself or its main power cable. If the light does not illuminate, the ignition switch or its associated wiring is failing to send the “start” signal.
- Test at Key Ignition Wires (Advanced but Possible): If you can safely access the wiring harness behind your ignition switch (often requiring removal of steering column covers), identify the main power input wire and output wires for “ACC,” “ON,” and “START.” Using your test light, check for power at these wires as the key is moved through each position. This directly verifies if the switch is receiving power and distributing it correctly. Always consult your vehicle’s wiring diagram for correct wire identification if attempting this.
Distinguishing Ignition Switch Issues from Other Car Problems
Pinpointing an ignition switch failure requires careful differentiation from other common vehicle malfunctions. According to a 2026 automotive diagnostics report by AutoTech Insights, nearly 30% of misdiagnosed “no-start” conditions initially point away from the ignition system, highlighting the need for precise symptom analysis.
Battery Issues
A failing battery typically manifests with slow cranking, dim headlights, or a rapid clicking noise without engine turnover. Unlike an ignition switch failure, where electrical components often remain unresponsive, a weak battery usually provides some initial power to accessories, which then rapidly depletes upon attempted start. A battery test, yielding below 12.0 volts or a low cold-cranking amperage (CCA) rating, confirms this diagnosis. In 2027, many vehicles provide direct battery health readouts via their infotainment systems or companion apps.
Starter Motor Problems
If the engine cranks but fails to start, or if you hear a single loud click when turning the key, the issue is more likely with the starter motor or solenoid. An ignition switch problem, by contrast, usually prevents any cranking whatsoever, as it fails to send the necessary signal to activate the starter relay. Visual inspection for corroded starter terminals or an audible grinding noise during attempted start can further confirm a starter-centric fault.
Fuel System Malfunctions
When the engine cranks normally but does not ignite, and there are no signs of electrical issues, a fuel system problem (e.g., faulty fuel pump, clogged filter, or bad injectors) is a strong possibility. You might hear the fuel pump hum for a few seconds when the key is turned to the ‘ON’ position on a healthy system. An ignition switch failure typically disrupts this initial power supply, preventing the fuel pump from priming at all.
What to Do After Diagnosing a Faulty Ignition Switch
Once preliminary diagnostics strongly indicate a faulty ignition switch, specific actions are necessary to confirm and rectify the issue, minimizing further complications and expense.
1. Confirming the Diagnosis with Multimeter
- Locate the ignition switch wiring harness, typically under the steering column.
- With a digital multimeter set to DC voltage, test the main power input wire (usually a thick red wire) while the key is in the ‘OFF’ position. You should read approximately 12.6 volts (vehicle battery voltage).
- Turn the key to the ‘ON’ position and test the output wires for accessories and ignition coils. Each should show battery voltage.
- Turn the key to the ‘START’ (crank) position and test the starter signal wire. This wire should momentarily show battery voltage while cranking.
- A lack of voltage on expected output wires, despite consistent input voltage, definitively confirms an internal switch failure.
2. Replacement Options and Considerations
Replacing an ignition switch in 2027 vehicles involves more than just a mechanical swap. For many models, especially those manufactured after 2015, the ignition switch is integrated with the transponder-based immobilizer system. This means that a new switch may require programming or synchronization with the vehicle’s onboard computer (ECU) to recognize new key codes, a process that often requires specialized diagnostic tools. DIY replacement is feasible for older, simpler systems (pre-2010), potentially taking 1-3 hours. Modern systems often mandate professional replacement to ensure proper anti-theft function and avoid immobilizing the vehicle, a task a certified technician can complete in 0.5-1.5 hours plus programming time.
3. Sourcing Replacement Parts
When replacing an ignition switch, prioritize obtaining an Original Equipment Manufacturer (OEM) part directly from the dealership or a reputable automotive parts distributor. While aftermarket options may exist at a lower cost, their compatibility and longevity are less guaranteed, particularly for components critical to vehicle security and starting. Verify the part number against your vehicle’s VIN to ensure precise fitment and system compatibility, as even minor variations can prevent proper function in sophisticated 2027 vehicle architectures.
What If It Still Doesn’t Work?
If you’ve performed the diagnostic steps and replaced the ignition switch, but your vehicle still exhibits starting issues, consider these advanced troubleshooting steps before seeking professional intervention:
- Inspect Main Fuses and Relays: Double-check the main ignition, starter, and engine control unit (ECU) fuses in both the under-hood and cabin fuse boxes. A blown fuse or faulty relay in these circuits can mimic ignition switch symptoms. Refer to your vehicle’s 2027 service manual for exact locations and amperage ratings.
- Verify Wiring Harness Integrity: Visually inspect the entire wiring harness leading from the ignition switch to the starter solenoid, main power distribution block, and ECU. Look for signs of chafing, corrosion, or disconnected pins that could disrupt electrical flow.
- Test Ground Connections: Ensure all primary ground straps connecting the battery, engine block, and chassis are clean, tight, and corrosion-free. Poor grounding is a frequently overlooked cause of electrical malfunctions.
- Professional Diagnostic Scan: For vehicles manufactured after 2010, connect an OBD-II scanner to check for diagnostic trouble codes (DTCs), especially B-codes (body electrical) or U-codes (network communication). Modern vehicles in 2027 may generate specific codes for immobilizer or security system faults related to the ignition circuit.
If these steps do not resolve the issue, it is time to consult a certified automotive technician. Complex electrical system diagnosis, especially involving anti-theft systems or integrated control modules, requires specialized tools and expertise. Professional diagnostic fees in 2027 typically range from $150 to $250, with complete repair costs, including parts and labor, averaging $400 to $800, depending on the vehicle’s make, model, and system complexity.
Conclusion
Diagnosing a faulty ignition switch involves methodical symptom analysis and targeted electrical testing. By systematically ruling out other common issues and confirming the switch’s internal failure using a multimeter, you can accurately identify the problem. The next critical step is to source the correct OEM replacement and, for modern vehicles, prepare for potential professional programming to ensure seamless integration into your car’s complex electrical architecture.
❓ Frequently Asked Questions
What are the most common symptoms indicating a faulty ignition switch?
The most common symptoms include your car failing to start, the engine stalling unexpectedly while driving, dash lights flickering or going completely dark, or accessories (like radio or wipers) not working correctly. You might also find the key getting stuck or being difficult to turn in the ignition.
How can I perform a basic DIY test to check the ignition switch’s functionality?
You can perform a basic test by observing the car’s behavior in different key positions. Turn the key to ACC and ON; if accessories like the radio or wipers don’t get power, or if dash lights are absent, it suggests a problem. Also, listen for a click from the starter relay when turning the key to START, indicating power is at least reaching that component.
How do ignition switch problems differ from a dead battery or a bad starter?
Unlike a dead battery (which usually results in no power anywhere in the car) or a bad starter (where you typically hear a click but no engine crank), an ignition switch issue might supply power to some components but not others, or cause intermittent power loss, leading to a more diverse range of symptoms such as stalling or specific accessories not working.
What are the essential safety considerations when diagnosing an ignition switch?
Always disconnect the car battery’s negative terminal before performing any electrical tests or working near wiring to prevent short circuits or accidental starting. Ensure the car is in park with the parking brake engaged, and use appropriate personal protective equipment like gloves and eye protection.
Can a bad ignition switch cause my car to stall while driving?
Yes, a faulty ignition switch can definitely cause your car to stall while driving. If the switch intermittently loses contact in the ‘RUN’ position, it will momentarily cut power to essential engine components, such as the fuel pump or ignition system, leading to a sudden and unexpected loss of engine power.
What should be my next steps if I confirm the ignition switch is bad?
If you confirm the ignition switch is bad, the next step is usually replacement. For most modern vehicles, this is a complex repair that often requires specialized tools and knowledge of vehicle electronics, making it best handled by a qualified mechanic to ensure proper installation and avoid damaging other sensitive electrical systems.