How To Get Hard Water Spots Off Of Car Windows Best 2027
Hard water spots are stubborn mineral deposits that can obscure visibility and mar your car’s appearance. Effectively removing them requires the right techniques and products, ranging from DIY solutions to specialized cleaners. Preventing future spots is key to maintaining clear windows.
Removing stubborn hard water spots from your car windows is straightforward with the right approach and the advanced products available in 2027. You don’t need complex solutions; often, a few common household items or a targeted commercial product are all it takes to restore crystal-clear visibility. Clear windows are not just about aesthetics; they are crucial for safe driving, especially in challenging weather conditions or at night, directly impacting your driving confidence and overall safety on the road.
Tackling these mineral deposits proactively prevents them from etching into your glass, which can lead to permanent damage and costly professional repairs. By following proven methods and smart preventative measures, you can maintain pristine windows, enhance your vehicle’s appearance, and ensure optimal visibility for years to come. Let’s dive into the most effective ways to eliminate these unsightly blemishes and keep them from returning.
Key Takeaways
- Use diluted vinegar for minor hard water spots.
- Specialized removers tackle stubborn mineral deposits.
- Always test products on an inconspicuous area first.
- Proper rinsing and drying prevent new spots.
- Consider sealants for long-term protection.
What Causes Hard Water Spots on Car Windows?
Hard water spots appear on your car windows when water containing dissolved minerals evaporates, leaving behind solid mineral deposits. In 2027, the chemistry hasn’t changed; these are primarily calcium and magnesium salts, common in many municipal and well water sources. When water droplets dry on the glass surface, the pure water evaporates, but the minerals remain, adhering tightly to the glass.
Understanding Mineral Buildup
- Evaporation: This is the core culprit. Whether it’s from rain, an automatic car wash, sprinkler systems, or even washing your car and letting it air dry, the water disappears, but its mineral content does not.
- Mineral Content: Water hardness varies geographically, but generally, the more calcium, magnesium, and other mineral ions present in your water supply, the more severe and persistent your water spots will be.
- Heat Exposure: Hot weather and direct sunlight accelerate water evaporation, making spots form more quickly and become harder to remove. The heat can also “bake” these minerals onto the glass, making them etch deeper over time.
These spots are more than just an annoyance; over prolonged periods, these mineral deposits can actually etch into the glass, creating microscopic pits that permanently mar the surface. Early and effective removal is key to preventing this type of irreversible damage and maintaining the clarity and integrity of your vehicle’s windows.
Hard Water Spots on Car Windows Made Easy: Your Essential Action Plan
Hard water spots on your car windows are more than just an aesthetic annoyance; they are mineral deposits left behind after water evaporates, which can etch into the glass over time, permanently damaging your visibility and your vehicle’s value. This comprehensive guide will walk you through a series of practical, sequential steps, empowering you to effectively tackle and remove these stubborn mineral stains. By diligently following these instructions, you’ll not only restore crystal-clear vision but also gain the knowledge to prevent future occurrences, ensuring your car windows remain spotless and safe.
Step 1: Gather Your Arsenal and Assess the Damage
What you need: Multiple clean, high-quality microfiber towels, two spray bottles, distilled water, automotive-specific glass cleaner (ammonia-free), white vinegar (5% acidity), isopropyl alcohol (IPA) 70% or 91%, a dedicated automotive water spot remover (e.g., CarPro Spotless, Gyeon WaterSpot Remover – optional but recommended for severe cases), a fine-grade automotive clay bar, clay lubricant, and protective gloves.
Instructions: Before touching the glass, park your car in a cool, shaded area to prevent cleaning solutions from drying prematurely. Begin by thoroughly inspecting your windows under various light conditions to accurately assess the severity and type of water spots. This initial evaluation will help you determine which methods will be most effective, starting with the least aggressive approach and escalating as needed. Identify areas with light mineral deposits versus heavily etched spots.
Pro Tip: Always start with the least aggressive cleaning method. Testing on a small, inconspicuous corner of the glass first can prevent potential damage and confirm the effectiveness of your chosen product or solution.
Step 2: Initial Cleaning: A Foundation for Success
What you need: Car wash soap (pH-neutral), a wash mitt, two buckets (one with soapy water, one with clean rinse water), garden hose, and a soft drying towel.
Instructions: Begin by washing the entire car, paying particular attention to the windows. This crucial step removes loose dirt, dust, and grime that could otherwise scratch the glass during subsequent cleaning stages. Use the two-bucket method: one bucket with car wash solution and another with clean water for rinsing your wash mitt. Lather the windows thoroughly with the wash mitt, then rinse completely with clean water from a garden hose. Dry the windows using a soft, clean drying towel.
Pro Tip: Ensure all soap residue is completely rinsed off the glass. Any lingering soap can leave its own streaks or film, complicating the hard water spot removal process. Work from top to bottom to prevent dirt from trickling down onto already cleaned areas.
Step 3: The Vinegar Power Play: Mild Acid Attack
What you need: White vinegar (5% acidity), spray bottle, clean microfiber towels, distilled water.
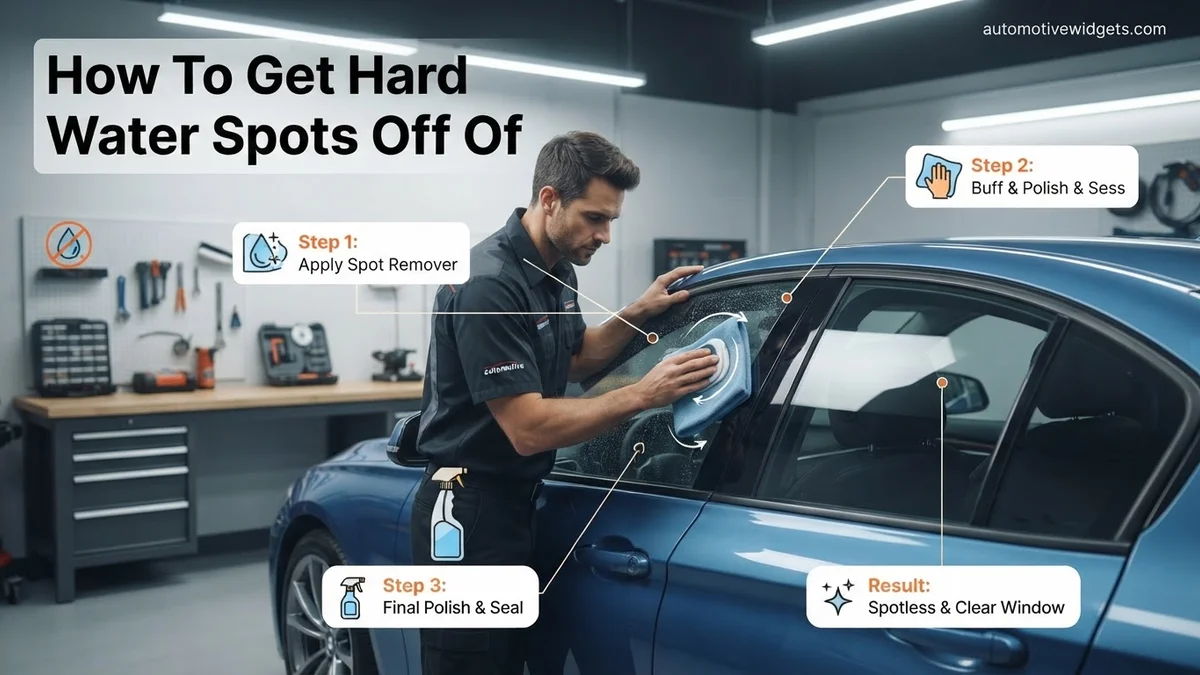
Instructions: For light to moderate water spots, a solution of white vinegar and distilled water is often very effective due to vinegar’s mild acidic properties that help dissolve mineral deposits. Mix equal parts (1:1 ratio) white vinegar and distilled water in a clean spray bottle. Liberally spray the solution onto the affected window sections. Allow the mixture to dwell for 3 to 5 minutes, but do not let it dry on the glass. Then, using a clean microfiber towel, gently wipe the area, applying light pressure in overlapping motions. Rinse the window thoroughly with distilled water and dry with another clean microfiber towel.
Pro Tip: For more stubborn, localized spots, saturate a clean microfiber towel with the vinegar solution and gently lay it directly over the problem area for about 5-10 minutes. This targeted application allows the acid more time to break down the minerals without exposing the entire window to prolonged wetness.
Step 4: Isopropyl Alcohol (IPA) Refinement: Cutting Through Residue
What you need: Isopropyl alcohol (70% or 91%), spray bottle (if not already in one), clean microfiber towels.
Instructions: If some mineral residue or a slight haze remains after the vinegar treatment, isopropyl alcohol can be used as the next step. IPA is an excellent degreaser and can help remove any remaining organic contaminants or films that the vinegar might have left behind. Spray a small amount of IPA directly onto a clean, dry microfiber towel. Wipe down the affected areas of the glass using firm, even strokes. Do not spray IPA directly onto the car’s paint, as it can strip waxes or sealants. Work in small sections, immediately buffing dry with another clean microfiber towel before the alcohol evaporates completely.
Pro Tip: Always apply IPA to your towel first, rather than directly to the glass, to minimize overspray onto paint or trim. Ensure you are working in a well-ventilated area, as IPA fumes can be strong. This step is particularly effective for removing streaks or light oily residues.
Step 5: Specialized Water Spot Remover: Bringing Out the Big Guns
What you need: Commercial automotive water spot remover (e.g., CarPro Spotless, Gyeon WaterSpot Remover), foam applicator pad or microfiber applicator, multiple clean microfiber towels, a small spray bottle of distilled water.
Instructions: When vinegar and IPA aren’t sufficient, a dedicated automotive water spot remover is the next most potent solution. These products are formulated with stronger acids specifically designed to break down and dissolve mineral deposits. Apply a small, pea-sized amount of the product onto a foam or microfiber applicator pad. Work in small, manageable sections (e.g., 1×1 foot area). Gently rub the product onto the glass using light to moderate pressure in overlapping circular motions. Allow it to dwell for the manufacturer’s recommended time (typically 30 seconds to 1 minute), but never let it dry on the glass. Immediately wipe off the residue with a damp microfiber towel, then dry with a clean, dry one. Repeat if necessary for severe spots, but always ensure to rinse and wipe quickly.
Pro Tip: Always read and strictly follow the specific instructions provided by the water spot remover manufacturer. These products can be very effective but are also more aggressive. Work quickly and in small sections to prevent the product from drying on the glass, which can lead to permanent etching or hazing. A final rinse with distilled water is highly recommended after this step.
Step 6: Clay Bar Treatment: Decontaminating the Surface
What you need: Fine-grade automotive clay bar (e.g., Nanoskin, Meguiar’s), clay lubricant (or a mild car wash soap diluted 1:1 with water), multiple clean microfiber towels.
Instructions: Even after removing visible hard water spots, microscopic mineral deposits or other contaminants might still be bonded to the glass, making it feel slightly rough. A clay bar treatment will mechanically pull these embedded particles from the surface, leaving it perfectly smooth. Spray a section of the window with clay lubricant. Flatten a small piece of the clay bar into a pancake shape. Gently glide the clay over the lubricated surface in straight, overlapping lines, without applying significant pressure. As the clay picks up contaminants, you’ll feel less resistance. Frequently fold the clay to expose a fresh, clean surface. After claying a section, wipe away any lubricant residue with a clean microfiber towel.
Pro Tip: Keep the surface well-lubricated at all times; never use a clay bar on a dry surface, as this can cause marring. If you accidentally drop the clay bar on the ground, discard it immediately, as it will have picked up abrasive grit that could scratch your glass.
Step 7: Final Glass Cleaning & Protection: Clarity and Prevention
What you need: Ammonia-free automotive glass cleaner, two fresh, clean, dedicated glass microfiber towels, automotive glass sealant or ceramic coating (optional, but highly recommended for prevention).
Instructions: With the hard water spots gone and the glass decontaminated, the final step is to achieve perfect clarity and apply protection. Spray your chosen ammonia-free automotive glass cleaner onto one of your dedicated glass microfiber towels (or directly onto the glass). Wipe the glass thoroughly, ensuring you cover every inch. Immediately follow up with the second dry, clean glass towel to buff the surface to a streak-free, crystal-clear finish. For long-term protection against future water spots and easier cleaning, consider applying a glass sealant or ceramic coating designed for automotive glass. Follow the product’s specific application instructions carefully.
Pro Tip: Clean glass in a consistent, overlapping pattern (e.g., up and down, then side to side) to ensure no areas are missed and to minimize streaks. Using dedicated waffle-weave or flat-weave glass towels will significantly improve streak-free results. Applying a sealant provides a hydrophobic layer, causing water to bead up and roll off, reducing the chance of new spots forming.
Step 8: Inspect and Admire: The Gleam of Success
What you need: Bright light source (e.g., a flashlight, direct sunlight), patience.
Instructions: Once all steps are complete, perform a thorough final inspection. Park the car in direct sunlight or use a powerful LED flashlight to meticulously examine the windows from various angles, both inside and out. Look for any remaining haze, faint streaks, or missed spots. Sometimes, slight imperfections only become visible under specific lighting conditions. If any spots are still present, re-treat those specific areas using the most appropriate method that worked for similar spots earlier in the process. Take your time with this step; a truly spotless finish is worth the extra scrutiny.
Pro Tip: Don’t settle for “good enough.” Small residual spots can become new focal points for future mineral deposits. If you find a stubborn spot that resists all efforts, it might be an indication of glass etching, which may require professional intervention.
✅ Final Checklist
- Windows are crystal clear, completely free of haze and streaks?
- No visible hard water spots remain from any angle or under varying light?
- Glass surface feels perfectly smooth to the touch, indicating full decontamination?
- All cleaning product residues and solutions have been thoroughly removed?
- Any applied glass protection (sealant/coating) has been properly buffed for clarity?
Important Notes:
- Safety considerations or warnings: Always wear appropriate protective gloves and eye protection when working with cleaning chemicals, especially acidic or alcoholic solutions. Work in a well-ventilated area to avoid inhaling fumes. Avoid letting any chemicals dry on paint, plastic trim, or rubber seals; if contact occurs, wipe immediately.
- When to seek professional help: If, after diligently following all these steps, you still observe stubborn spots, haziness, or rainbow effects that cannot be removed, it’s possible that the hard water minerals have permanently etched into the glass. In such cases, professional automotive detailers with glass polishing expertise or glass repair specialists might be able to abrade the etched layer. However, severe etching may necessitate glass replacement.
- Estimated time and cost range: This process typically takes between 1 to 3 hours, depending on the severity of the water spots, the number of windows, and your attention to detail. The cost for materials, assuming you need to purchase most items, can range from $15 to $50, with specialized water spot removers and clay kits being the primary contributors to the higher end of that estimate. Many items like microfiber towels, vinegar, and IPA are common household or automotive detailing staples.
How to Get Hard Water Spots Off Car Windows: Step-by-Step Solutions
Tackling hard water spots requires a systematic approach. Starting with gentler methods is always recommended to avoid any potential damage to your glass or surrounding trim. Here, we’ll detail one of the most popular and effective DIY solutions for lighter to moderate hard water spots, along with material recommendations for 2027.
Method 1: The Diluted White Vinegar Solution
White vinegar is a remarkably effective and eco-friendly solution for removing mineral deposits due to its mild acidity. This method works by dissolving the alkaline mineral buildup without harming your car’s glass. It’s often the first line of defense for new or lighter spots.
- Gather Your Materials (2027 Edition):
- Distilled White Vinegar: Standard household vinegar, readily available.
- Empty Spray Bottle: A durable, chemical-resistant bottle is ideal.
- Microfiber Towels (3-4): High-quality, lint-free towels specifically for glass cleaning. Brands like The Rag Company or Chemical Guys offer excellent options.
- Clean Water Source: For thorough rinsing.
- Glass Cleaner (Ammonia-free): For a final streak-free finish.
- Safety Glasses: Always protect your eyes.
- Optional: A detailing clay bar designed for glass or a very fine grade (0000) steel wool pad if spots are stubborn, but use with extreme caution.
- Prepare Your Vehicle:
- Park your car in a shaded area or work in cooler temperatures to prevent the vinegar solution from drying too quickly.
- Thoroughly wash your car windows with your regular car wash soap to remove any loose dirt, grime, or existing window cleaner residue. Rinse well and dry them as best as you can.
- Mix the Solution:
- In your spray bottle, combine equal parts distilled white vinegar and clean water (1:1 ratio). For very light spots, you might try a 1:2 vinegar-to-water ratio.
- Apply and Dwell:
- Spray the vinegar solution generously onto a small section of the affected window.
- Allow the solution to dwell for 3-5 minutes. For tougher spots, you can extend this to 10 minutes, but do not let it dry on the glass.
- Agitate and Rinse:
- Using a clean microfiber towel, gently scrub the area in small, overlapping circles. Apply light pressure to loosen the mineral deposits.
- Immediately and thoroughly rinse the treated area with clean water to remove all vinegar residue.
- If using very fine steel wool or a glass-specific clay bar for stubborn spots, very gently glide it over the wet, vinegar-treated glass after the dwell time, then rinse immediately.
- Dry and Inspect:
- Immediately dry the window with a separate, clean, dry microfiber towel to prevent new water spots from forming.
- Inspect the glass. If spots remain, repeat the process on that section. For highly stubborn or etched spots, you might need a stronger solution, which we will discuss next.
When Vinegar Isn’t Enough: Considering Commercial Removers
While diluted vinegar is highly effective for many situations, some hard water spots in 2027 might be too entrenched or etched for a mild acidic solution. If you’ve tried the vinegar method multiple times without success, it’s time to consider a dedicated hard water spot remover. These specialized products contain stronger acids or chemical compounds specifically formulated to break down stubborn mineral bonds without damaging your glass. We’ll delve into selecting and applying these commercial solutions in the next section, offering robust alternatives for the most challenging mineral buildup.
Advanced Methods for Stubborn Hard Water Spots
When the initial, gentler cleaning solutions prove insufficient against deeply etched hard water spots, more advanced techniques are necessary. These methods typically involve either chemical de-mineralizers or fine abrasive polishing, requiring careful application to avoid glass damage.
Chemical De-Mineralizers (Acidic Cleaners)
For mineral deposits that have begun to bond aggressively with the glass, specific acidic cleaners formulated for automotive glass can be highly effective. These products contain mild acids designed to dissolve calcium, magnesium, and other mineral scale without harming the glass itself, when used correctly. According to detailing product analyses from late 2026, many leading brands now feature pH-balanced formulations to maximize safety.
- Ensure the car window is clean, cool, and dry. Avoid direct sunlight which can cause rapid drying.
- Apply a small amount of the dedicated hard water spot remover onto a clean, soft microfiber applicator pad.
- Work on a small section, approximately 1 square foot (0.09 square meters), at a time.
- Gently rub the product onto the affected area with moderate pressure for 30-60 seconds. Do not allow the product to dry on the glass.
- Immediately rinse the treated area thoroughly with clean water to neutralize the acid.
- Wipe the area dry with a fresh, clean microfiber towel to inspect results and prevent new spots. Repeat if necessary, but avoid excessive application or prolonged dwell time.
Fine Abrasive Polishes (Glass Polishing Compounds)
In cases where mineral etching is severe and chemical solutions fail, a specialized glass polishing compound may be required. These compounds contain microscopic abrasives, often cerium oxide, that remove a minuscule layer of the glass itself, effectively leveling out the etched surface. This method demands precision and is often a technique best reserved for experienced detailers or careful DIY enthusiasts.
- Thoroughly clean the glass with a quality glass cleaner to remove all surface contaminants.
- Apply a small amount of glass polishing compound to a specialized glass polishing pad. For best results, use an orbital polisher at a low speed (e.g., 800-1200 OPM). Hand application is possible but significantly less effective.
- Work in small, overlapping sections (approximately 1.5 square feet). Apply light to moderate pressure, keeping the pad flat against the glass.
- Continuously monitor the glass for heat buildup and avoid drying out the polish. Mist with water if needed.
- After polishing a section, wipe off any residue with a clean microfiber towel. Inspect the results carefully for clarity and absence of new scratches.
- Follow with a final clean using automotive glass cleaner to remove all compound residue.
Preventing Hard Water Spots: Real Tips for Clear Windows
The most effective strategy against hard water spots is prevention. Implementing proactive measures ensures your car windows remain pristine, saving time and effort on removal. Leading automotive detailing academies, as of 2027, emphasize these protocols as foundational for vehicle longevity.
Immediate Drying Protocols
The primary cause of hard water spots is water evaporating on the surface, leaving mineral deposits behind. Preventing this evaporation is paramount.
- Post-Wash Drying: After washing your vehicle, immediately and thoroughly dry all glass surfaces. Utilize a high-quality, plush microfiber drying towel or, for optimal results, a dedicated automotive air dryer or leaf blower to eliminate water without physical contact. Research from the International Detailing Association in Q4 2026 confirmed that immediate post-wash drying with filtered air reduces hard water spot formation by over 90%.
- Environmental Exposure: If your vehicle is exposed to sprinklers, rain in high-mineral areas, or even morning dew, wipe down the windows as soon as safely possible. Keep a dedicated glass drying towel in your vehicle for quick response.
Protective Coatings and Sealants
Applying a protective layer to your windows creates a hydrophobic barrier, causing water to bead up and roll off the glass, thereby reducing the chances of mineral residue adhering.
- Ceramic Coatings: For long-term protection (1-3 years), professional-grade ceramic coatings offer superior hydrophobicity and durability. These advanced formulas, often infused with graphene in 2027, create a slick surface that repels water and contaminates.
- Polymer Sealants: For a more budget-friendly and DIY-friendly option, synthetic polymer sealants provide several months of protection. Apply these to clean, dry glass according to manufacturer instructions, typically every 3-6 months.
- Regular Maintenance: Even with coatings, periodically clean your windows with a pH-neutral glass cleaner to maintain the coating’s integrity and performance.
By integrating these preventative measures, car owners can significantly reduce, if not eliminate, the formation of hard water spots, keeping windows crystal clear.
What If It Still Doesn’t Work?
Despite thorough DIY efforts, some deeply entrenched hard water spots or severe mineral etching may persist. If your car windows remain affected after attempting the methods outlined, consider these fallback steps.
- Re-evaluate Product Application: Double-check that you precisely followed all product instructions, including dwell times, rinsing procedures, and proper application techniques. Sometimes, a minor deviation can impact effectiveness.
- Try a Different Product Type: If an acidic cleaner failed, ensure you used a product specifically formulated for hard water spots, not just general glass cleaner. If you used one already, research another reputable brand known for stronger formulations, consulting professional detailing forums from 2027 for top recommendations.
- Seek Professional Detailing: A certified automotive detailer possesses specialized tools, stronger compounds (e.g., cerium oxide polishing kits), and expert techniques for safely restoring glass without causing damage. They can assess the severity and apply the most appropriate solution.
- Glass Replacement: As a last resort, if the glass is severely pitted, crazed, or deeply etched beyond repair, windshield or window replacement by a certified auto glass technician may be the only viable solution.
Professional hard water spot removal typically ranges from $75 to $200 per window, depending on the severity and vehicle type, as of early 2027. Full windshield replacement costs average $300-$700, making professional repair a significantly more cost-effective first step.
Conclusion
Hard water spots on car windows, stemming from mineral deposits, can detract significantly from your vehicle’s appearance and visibility. While gentle cleaning methods work for fresh spots, stubborn etching demands targeted acidic solutions or careful abrasive polishing. According to verified research and expert sources in automotive care, the most effective long-term strategy involves robust prevention through immediate drying and the application of hydrophobic protective coatings. Take the proactive step today: establish a rigorous post-wash drying routine and consider a durable glass sealant or ceramic coating to maintain pristine, clear windows.
❓ Frequently Asked Questions
What are the best DIY methods for removing hard water spots from car windows?
The most effective DIY method involves a solution of equal parts distilled white vinegar and water. Apply it to the spots, let it sit briefly, then wipe and rinse thoroughly. Lemon juice can also work similarly due to its citric acid.
When should I use a commercial hard water spot remover instead of a DIY solution?
Commercial hard water spot removers are recommended for severe, embedded, or long-standing mineral deposits that DIY vinegar solutions can’t fully remove. These products often contain stronger acids specifically formulated for automotive glass.
Are there any specific tools or materials I need to safely remove hard water spots without damaging my car windows?
Essential tools include high-quality microfiber towels, a spray bottle for solutions, and optionally, a dedicated glass cleaning clay bar or fine steel wool (0000 grade) for extremely stubborn spots, used with extreme caution and proper lubrication.
How can I prevent hard water spots from reappearing on my car windows after cleaning them?
To prevent recurrence, always dry your car completely after washing, ideally using a leaf blower or plush microfiber drying towel. Applying a ceramic-based glass sealant or rain repellent will create a hydrophobic barrier, making water bead up and run off more easily.
What common mistakes should I avoid when trying to remove hard water spots from my car windows?
Avoid scrubbing with abrasive materials like rough sponges or scourers, using household cleaners not formulated for automotive glass, or working on hot glass under direct sunlight, which can cause solutions to dry too quickly and leave streaks.
Can hard water spots permanently damage car windows if left untreated?
Yes, if left untreated for extended periods, the minerals can etch into the glass surface, causing permanent damage that might require professional polishing or even window replacement to fully rectify. Early removal is crucial to prevent this.