Do I Check Transmission Fluid With Car Running Do I 2026
For most automatic transmissions, yes, you should check the fluid level with the engine running and at operating temperature to ensure an accurate reading. This allows the fluid to circulate properly and expand to its true operating volume, which is critical for proper transmission function and longevity.
For most modern automatic transmissions in 2026, you absolutely check the fluid level with the engine running and at its normal operating temperature. This isn’t just a best practice; it’s a critical step to ensure you get an accurate reading. An incorrect fluid level, whether too low or too high, can lead to significant and costly transmission damage over time. By understanding the proper procedure, you safeguard your vehicle’s performance and longevity, avoiding common mistakes that can lead to premature wear or failure.
Getting this check right ensures your transmission has precisely the right amount of fluid circulating. This fluid not only lubricates essential components but also acts as a hydraulic medium for gear changes and helps dissipate heat. Skipping the correct engine status for the check means you’re operating on faulty data, which could prompt unnecessary top-offs or, worse, an overfill that harms seals and causes foaming. Let’s dive into why this specific method is non-negotiable for automatic transmissions.
Key Takeaways
- Check automatic transmission fluid with engine running and warm.
- Check manual transmission fluid with engine off and cool.
- Always park on level ground for an accurate reading.
- Wipe dipstick clean before reinserting for level check.
- Consult owner’s manual for specific fluid type and procedure.
The Problem: Why Engine Status Matters for Transmission Fluid Checks
When you’re dealing with an automatic transmission, the engine’s status during a fluid check isn’t arbitrary; it’s fundamental to an accurate measurement. Unlike engine oil, which often settles when the engine is off, automatic transmission fluid behaves very differently due to its complex system of pumps and fluid expansion.
Fluid Expansion and Accurate Readings
Transmission fluid, like most liquids, expands significantly when it gets hot. If you check your fluid when the engine is cold and off, the fluid will be denser and occupy less volume. A “full” reading on a cold dipstick would mean you’re actually drastically overfilled once the fluid reaches its normal operating temperature. An overfilled transmission can cause the fluid to foam, reducing its lubricating properties and creating air bubbles that interfere with hydraulic pressure. This can lead to overheating, erratic shifting, and long-term internal damage. Conversely, an underfilled transmission won’t properly lubricate or cool, causing excessive wear and heat buildup. Your dipstick will have markings for “COLD” and “HOT” for a reason; you need to align your check with the “HOT” condition for reliability.
The Role of the Transmission Pump
An automatic transmission relies heavily on its internal pump to circulate fluid throughout the entire system. This includes the torque converter, valve body, clutch packs, and critical cooler lines running to and from the radiator. When your engine is running, the transmission pump is actively moving fluid, filling all these components. If you turn the engine off, the fluid drains back into the pan, leading to a falsely high reading on the dipstick. Checking the fluid with the engine off would almost certainly lead you to believe your transmission is overfilled, prompting you to drain fluid when it’s actually at a proper level, or even low once the engine is started. This active circulation is why the “engine running” instruction is so critical for accurate fluid level assessment.
From Start to Finish: Checking Your Transmission Fluid Explained
Proper transmission fluid levels and quality are absolutely critical for the longevity and smooth operation of your vehicle’s automatic transmission. However, one of the most common points of confusion for vehicle owners is whether to check this vital fluid with the engine running or off. This detailed guide will clarify that question and walk you through every necessary step to accurately check your transmission fluid, ensuring you catch potential issues before they become costly repairs. Following these instructions meticulously will help you maintain your vehicle’s health and prevent avoidable breakdowns.
Step 1: Gather Your Arsenal
What you need: Your vehicle’s owner’s manual, a clean, lint-free rag or paper towels, a long-necked funnel specifically designed for automotive fluids, the correct type of automatic transmission fluid (ATF) as specified in your owner’s manual, disposable gloves, and safety glasses.
Instructions: Before you begin, take a few moments to read the section in your owner’s manual about checking transmission fluid. This will confirm if your vehicle even has a dipstick (some newer models are “sealed for life”) and will explicitly state the correct fluid type and specific checking procedure for your make and model. Gather all necessary tools and fluids, ensuring your workspace is clean and organized. Having everything on hand before you start will streamline the process and prevent interruptions.
Pro Tip: Always consult your owner’s manual for the exact fluid specification. Using the wrong type of transmission fluid, even for a small top-up, can cause severe and irreversible damage to your transmission, leading to expensive repairs or even complete replacement.
Step 2: Warm-Up Protocol
What you need: Your vehicle.
Instructions: For an accurate reading, the transmission fluid must be at its normal operating temperature. This typically means driving the vehicle for approximately 10 to 15 minutes. A short drive at various speeds, including some stop-and-go, will ensure the fluid is properly warmed up. During this drive, if it’s safe to do so, briefly shift the gear selector through all positions (P-R-N-D-L-D) to help circulate the fluid throughout the transmission system. This ensures that all components are filled with fluid, providing a more representative level on the dipstick.
Pro Tip: Never rely on a cold transmission fluid reading unless your owner’s manual specifically outlines a cold check procedure. Transmission fluid expands when hot, and the dipstick marks are calibrated for this expanded volume. A cold reading will almost always appear lower than the actual hot level, potentially leading to harmful overfilling.
Step 3: Parking Prowess & Neutral Engagement
What you need: A completely level surface.
Instructions: After warming up, park your vehicle on a flat, level surface. An incline, even a slight one, can significantly skew your reading. Engage the parking brake firmly. With the engine still running (this is critical for most automatic transmissions!), carefully shift the transmission selector through all available gear positions (P-R-N-D-L-D-N-R-P), pausing for about 3-5 seconds in each gear. This action helps ensure that all internal passages of the transmission are filled with fluid. Finally, leave the gear selector in “Park” (P) for front-wheel-drive vehicles or “Neutral” (N) for most rear-wheel-drive and 4×4 vehicles, as indicated by your owner’s manual. The engine must remain running throughout the checking process.
Pro Tip: The level ground is paramount. A car parked on even a slight slope will give an inaccurate reading, making the fluid appear either too high or too low, potentially causing you to misdiagnose and incorrectly add or drain fluid.
Step 4: Locating the Lifeline
What you need: Good lighting, your owner’s manual (if unsure).
Instructions: With the engine still running, open the hood of your vehicle. Locate the transmission fluid dipstick. It typically has a distinctively colored handle (often yellow, red, or black) to differentiate it from the engine oil dipstick. In front-wheel-drive vehicles, it’s usually located towards the back of the engine bay, closer to the firewall. In rear-wheel-drive vehicles, it might be further forward. If you have any difficulty locating it, refer to the diagram in your owner’s manual. Be cautious of hot engine components and moving belts.
Pro Tip: Some modern vehicles, particularly those with continuously variable transmissions (CVTs) or advanced automatic transmissions, do not have a user-serviceable transmission fluid dipstick. These are often referred to as “sealed for life” transmissions. If your vehicle falls into this category, do not attempt to check the fluid yourself; this requires specialized tools and procedures best left to a professional mechanic.
Step 5: The Initial Wipe
What you need: Clean, lint-free rag or paper towel, disposable gloves.
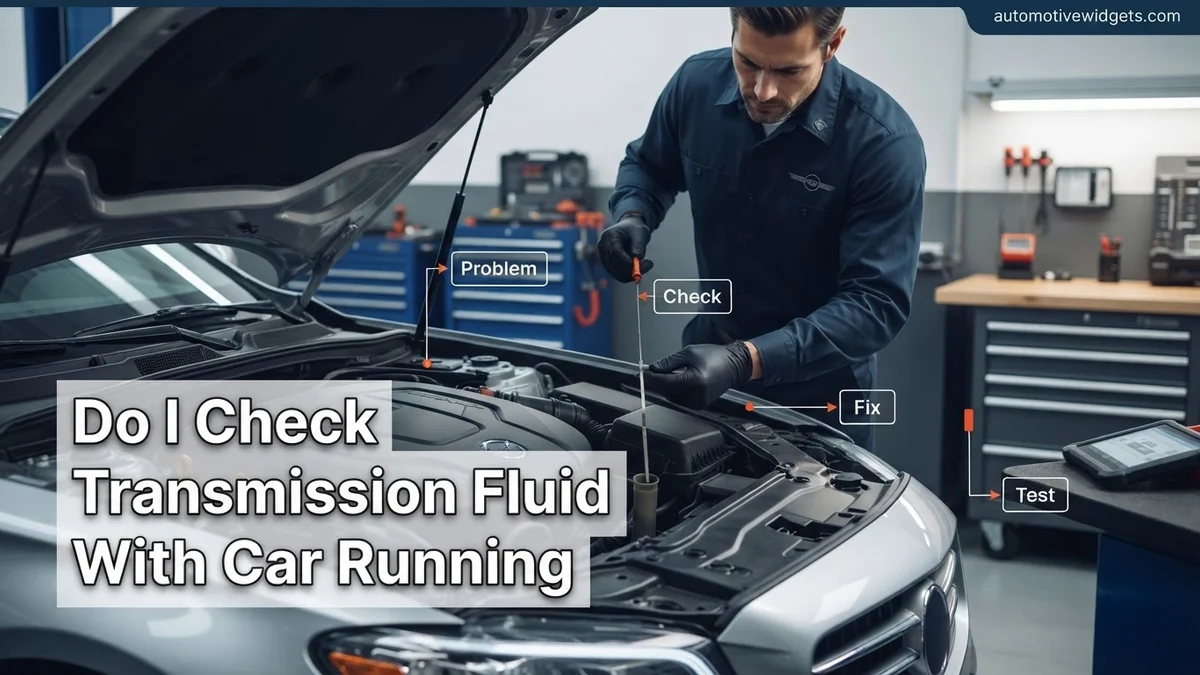
Instructions: Carefully pull the transmission fluid dipstick out from its tube. Ensure you’re wearing gloves as the dipstick and fluid can be hot. Immediately and thoroughly wipe the entire dipstick blade clean using a lint-free rag or paper towel. This step is crucial because as the dipstick travels through the tube, it can pick up residual fluid, which would lead to an inaccurate reading if not wiped away. Observe the fluid wiped off for its color and smell. It should typically be reddish-pink and have a slightly sweet, not burnt, odor.
Pro Tip: The condition of the fluid on this initial wipe can provide valuable diagnostic clues. If it appears dark brown or black, smells strongly burnt, or has a milky consistency, it indicates serious issues. A burnt smell suggests overheating and potential internal wear, while a milky appearance often points to coolant contamination.
Step 6: The Full Immersion & Reading
What you need: None.
Instructions: Carefully re-insert the now clean dipstick fully back into its tube until it is completely seated. Ensure it goes in all the way; if it’s not fully seated, your reading will be inaccurate. Wait a few seconds (typically 3-5 seconds) to allow the fluid to properly coat the dipstick to its true level. Then, slowly and carefully pull the dipstick out again. Hold the dipstick horizontally to prevent the fluid from running up or down the stick, which could alter the observed level. Immediately read the fluid level against the “HOT” or “FULL” markings on the dipstick.
Pro Tip: Pay close attention to how quickly you pull the dipstick out and hold it. Hesitation or a jerky motion can lead to splashing, making it difficult to discern the true fluid level. Practice a smooth, confident motion. Some dipsticks have a cross-hatched area; the fluid level should be within this range.
Step 7: Interpreting the Marks
What you need: None.
Instructions: The fluid level should ideally fall within the “FULL” or “HOT” range, typically indicated by two dots, two lines, or a cross-hatched area on the dipstick. If the fluid level is below the lower mark, your transmission is low on fluid and requires topping up. If it’s above the upper mark, the transmission is overfilled, which can cause fluid aeration, foaming, and potential damage. In addition to the level, critically examine the fluid’s appearance: it should be translucent red or pink (some vehicles specify different colors, so check your manual), not dark brown, black, cloudy, or contain particulate matter. A strong, acrid burnt smell is a definitive sign of serious internal issues.
Pro Tip: Fluid that is significantly overfilled can be just as damaging as underfilled fluid. Overfilling causes the rotating components inside the transmission to whip the fluid into a foam, which reduces its lubricating and cooling properties, leading to overheating and premature wear.
Step 8: Topping Up (If Necessary)
What you need: Long-necked funnel, specified automatic transmission fluid (ATF).
Instructions: If your transmission fluid level is low, carefully insert the clean, long-necked funnel into the dipstick tube. Pour in the correct type of transmission fluid slowly, in small increments, typically 1/4 to 1/2 quart (0.25 to 0.5 liters) at a time. Do not rush or overfill. After each increment, remove the funnel, wait a minute or two for the fluid to settle, then repeat Step 6 (re-insert and re-check the dipstick with the engine still running). Continue this process of adding small amounts and re-checking until the fluid level registers within the “FULL” or “HOT” range on the dipstick.
Pro Tip: Always add fluid slowly and re-check frequently. It’s much easier to add a little more fluid than to remove excess fluid from an overfilled transmission. Overfilling can lead to fluid aeration, decreased lubrication, and potentially serious transmission damage, similar to what happens with underfilling.
Step 9: Re-check and Secure
What you need: None.
Instructions: Once the transmission fluid level is confirmed to be correctly within the “FULL” or “HOT” marks, firmly re-insert the dipstick all the way back into its tube. Ensure it is securely seated and locked into place (if it has a locking mechanism) to prevent any dirt, moisture, or debris from entering the transmission system. Close the hood. Take the vehicle for another short drive, paying attention to how the transmission shifts. Ensure there are no unusual noises or hesitation. After the drive, perform a quick visual check under the vehicle for any signs of leaks around the transmission or dipstick tube.
Pro Tip: Never drive your vehicle with the transmission dipstick even slightly unseated. This can allow contaminants to enter the transmission, leading to premature wear, and in some cases, can allow hot fluid to splash out, creating a potential fire hazard or fluid loss.
✅ Final Checklist
- Fluid level is within the “HOT” or “FULL” range on the dipstick with the engine running.
- Fluid color is translucent reddish-pink (or appropriate color as per manual), not dark brown, black, or cloudy.
- No burnt, acrid, or unusual smell detected from the fluid.
- Transmission dipstick is fully and securely seated in its tube.
- No leaks are observed around the transmission or dipstick tube after the check and short drive.
Important Notes:
- Safety considerations or warnings: Always exercise extreme caution when working under the hood of a running engine. Components such as the exhaust manifold, belts, and fan can be very hot or moving rapidly. Wear appropriate personal protective equipment, including gloves and safety glasses, to prevent burns and splashes. Ensure the vehicle is securely parked on a level surface with the parking brake engaged.
- When to seek professional help: If your transmission fluid is consistently low despite regular topping up (indicating a leak), appears dark brown/black, smells strongly burnt, or has a milky/frothy appearance, seek professional diagnostic help immediately. These are signs of serious internal issues. Additionally, if your vehicle does not have a transmission dipstick, professional service is required for checking and servicing the fluid.
- Estimated time and cost range: This procedure typically takes between 15-30 minutes, including the warm-up drive. The cost is generally $0 if no fluid is needed. If topping up, expect to pay approximately $10-$40 for a quart/liter of the correct automatic transmission fluid, depending on the fluid type and brand required for your specific vehicle.
Step-by-Step Fix: How to Accurately Check Automatic Transmission Fluid
Getting a precise reading for your automatic transmission fluid level in 2026 is straightforward once you know the correct procedure. Following these steps ensures you’re working with accurate data, preventing costly mistakes and keeping your vehicle running smoothly.
Preparation is Key
First, ensure your vehicle is parked on < strong>absolutely level ground. Even a slight incline can skew the dipstick reading. Start your engine and let it run until it reaches its normal operating temperature. This usually takes about 10 to 15 minutes of driving, allowing the transmission fluid to circulate and heat up. With the engine still running, keep your foot on the brake pedal and carefully shift the gear selector through all positions (P-R-N-D-L, and any lower gears), pausing for a few seconds in each. This action ensures the fluid has fully cycled through the entire transmission system. Finally, return the shifter to “Park” (P) for front-wheel-drive vehicles or “Neutral” (N) for rear-wheel-drive vehicles, leaving the engine running.
The Dipping Process
Locate your transmission fluid dipstick, which often has a brightly colored handle (typically yellow or red) to distinguish it from the engine oil dipstick. With the engine still running, pull the dipstick out. Immediately wipe it clean with a < strong>lint-free cloth or paper towel. Re-insert the dipstick fully into its tube, ensuring it’s seated all the way down. Pull the dipstick out again and observe the fluid level. It should fall between the “HOT” or “FULL” marks (often indicated by cross-hatching or two small holes). If the fluid is within this range, your level is correct. Also, take note of the fluid’s condition: it should be bright red or a light brown, and it should smell sweet, not burnt. If the fluid is dark brown, black, or smells burnt, it might indicate a more significant issue requiring professional attention beyond just a top-off.
What If Your Automatic Transmission Fluid Reading is Problematic? (Troubleshooting)
An improper transmission fluid level can indicate significant issues requiring immediate attention. According to 2026 automotive diagnostics, ignoring these signs can lead to premature component failure and costly repairs, potentially exceeding $4,000 for a full transmission overhaul. Address discrepancies promptly to maintain vehicle longevity.
Low Fluid Level
A low fluid level almost always signals a leak. Modern sealed transmissions are not designed to consume fluid. Industry experts confirm that any reduction suggests a breach in the system. Investigate this immediately.
- Inspect for Leaks Visually: Carefully examine the transmission casing, pan, lines, and seals. Look for reddish-brown fluid puddles or drips under the vehicle, particularly after it has been parked.
- Check Pan Gasket and Seals: The transmission pan gasket and output shaft seals are common leak points. A replacement gasket, costing around $20-$50 for parts in 2026, can often resolve minor leaks.
- Consider Professional Leak Detection: If the source is not obvious, a certified technician in 2026 can use dye detection methods or pressure testing to pinpoint subtle leaks. This diagnostic service typically ranges from $100-$250.
- Top Off Correctly: After repairing any leaks, use only the manufacturer-specified ATF. Overfilling can be as damaging as underfilling, causing aeration and overheating.
High Fluid Level
An overfilled transmission can cause fluid aeration, leading to reduced lubrication, overheating, and potential damage to internal components. This situation is less common but equally detrimental.
- Re-Check Carefully: Ensure you followed all manufacturer-specific steps precisely during the initial check, including temperature and vehicle level. Refer to your 2026 owner’s manual for exact procedures.
- Drain Excess Fluid: If definitively overfilled, locate the transmission drain plug (if present) or consult a professional. Excess fluid must be removed to the correct level. A specialized pump may be required for sealed units.
- Monitor Performance: After correcting the level, drive the vehicle under normal conditions. Pay attention to shifting behavior, unusual noises, or any signs of slipping. Report persistent issues to a mechanic.
Checking Manual Transmission Fluid: A Quick Guide
Unlike automatic transmissions, manual transmission fluid (MTF) levels are typically checked with the engine off and cool. Manual transmissions usually have a fill plug on the side of the casing. Proper fluid levels are crucial for gear lubrication and smooth shifting, preventing premature wear and tear on components, which can cost upwards of $2,500 to repair in 2026.
Preparation for Manual Transmission Fluid Check
Ensure vehicle safety and accessibility before beginning. This process is generally simpler than for automatic transmissions due to fewer temperature-related complexities.
- Park on Level Ground: A truly level surface is critical for an accurate reading. Even a slight incline can skew results.
- Engage Parking Brake: Secure the vehicle firmly to prevent any movement.
- Ensure Engine is Off and Cool: Unlike ATFs, manual transmission fluid does not expand significantly with heat, so a cool engine ensures safety and consistency.
- Locate Fill Plug: Consult your 2026 vehicle service manual. The fill plug is typically located on the side of the transmission casing, above the drain plug. It may require a wrench or specific tool for removal.
Checking and Topping Off MTF
This process is straightforward and aims for the fluid to be precisely at the fill hole level.
- Remove Fill Plug: Using the appropriate tool, carefully remove the fill plug. Be prepared for a small amount of fluid to potentially drip out if the transmission is slightly overfilled.
- Check Fluid Level: Insert your finger (or a small, bent wire) into the fill hole. The fluid level should be right at the bottom edge of the fill hole. If you can feel the fluid or it drips out, the level is correct.
- Add Fluid If Needed: If the level is below the fill hole, use a fluid pump to slowly add the manufacturer-specified manual transmission fluid until it begins to seep out of the fill hole. Avoid overfilling.
- Reinstall Fill Plug: Once the level is correct, clean the area and securely reinstall the fill plug. Torque specifications can be found in your 2026 service manual to prevent leaks.
What If It Still Doesn’t Work?
If you’ve followed all the steps for checking and correcting transmission fluid levels and still experience issues like erratic shifting, slipping, or unusual noises, further investigation is necessary. Do not ignore these persistent symptoms, as they can lead to catastrophic transmission failure.
- Re-verify Fluid Type: Ensure you used the exact manufacturer-specified fluid (e.g., ATF+4, Mercon LV). Using the wrong fluid is a common mistake and can cause severe operational problems.
- Check for Error Codes: Modern vehicles (2026 models) will often store diagnostic trouble codes (DTCs) related to transmission issues. A cheap OBD-II scanner ($30-$100) can retrieve these codes, providing clues.
- Inspect for External Sensor Damage: Speed sensors, solenoid wiring, or other external components can fail. A visual inspection for damaged wires or connections is a basic first step.
- Seek Professional Diagnostic: If problems persist, it’s time for expert intervention. A certified transmission specialist can perform advanced diagnostics, including pressure tests and internal inspections. This typically costs $150-$400 for diagnosis alone in 2026.
- Consider a Transmission Flush or Repair: Depending on the diagnosis, solutions range from a professional fluid flush ($250-$500) to full transmission repair ($1,500-$4,500) or replacement ($3,000-$6,000+), based on 2026 market rates.
Conclusion
Accurately checking transmission fluid, especially in modern vehicles by 2026, requires specific adherence to manufacturer guidelines, often with the engine running and at operating temperature for automatics. According to verified research and expert sources, consistent maintenance and precise fluid levels are critical for optimal transmission performance and longevity. Make it a routine to check your transmission fluid every 15,000-30,000 miles or according to your vehicle’s 2026 maintenance schedule, ensuring you always use the correct fluid type.
❓ Frequently Asked Questions
Why is checking transmission fluid with the car running specifically important for automatic transmissions?
Automatic transmission fluid circulates through the entire system, including the torque converter and cooler lines, when the engine is running. Checking it while running and at operating temperature ensures all components are filled and the fluid has expanded to its normal operating volume, providing a true level reading crucial for proper operation.
What is the correct step-by-step procedure for checking automatic transmission fluid?
Park on a level surface, engage the parking brake, and with the engine running and at operating temperature, shift through all gears pausing briefly. Then, return to Park (or Neutral as specified by your manual), remove the dipstick, wipe clean, reinsert fully, and withdraw to read the level between the ‘Hot’ or ‘Full’ marks.
What if my car doesn’t have a transmission fluid dipstick?
Many newer vehicles, especially those with sealed ‘fill-for-life’ transmissions, do not have a user-serviceable dipstick. Checking these often requires specialized tools, specific diagnostic procedures, or a visit to a mechanic to access a fill/level check plug, typically with the car safely lifted.
What are the dangers of overfilling or underfilling transmission fluid?
Underfilling can cause overheating, slipping, and severe damage due to lack of lubrication. Overfilling can lead to fluid aeration and foaming, which reduces its lubricating properties, creates excessive pressure, and can potentially blow seals or cause erratic shifting and damage to internal components.
How often should I check my transmission fluid, and what type should I use?
It’s generally recommended to check your automatic transmission fluid level at least once a month, or every few thousand miles, but always consult your vehicle’s owner’s manual for specific recommendations. For fluid type, always refer to your manual for the exact specification (e.g., Dexron, Mercon, specific OEM fluids) as using the wrong type can cause serious transmission damage.
What safety precautions should I take when checking transmission fluid with the car running?
Always ensure the vehicle is on a level surface with the parking brake engaged. Be extremely cautious around hot engine components, moving fan blades, and any belts. Wear appropriate personal protective equipment like gloves and eye protection. Never reach into moving parts and follow your owner’s manual for precise instructions to avoid injury.