How Long Does It Take To Burp a Coolant System? Real 2026
Burping a coolant system typically takes 15 to 60 minutes, but can extend longer for stubborn air pockets or complex vehicle designs. Factors like vehicle model, method used, and the amount of trapped air significantly influence the duration. Look for a stable coolant level and consistent cabin heat to confirm completion and avoid engine overheating.
How Long Does It Take To Burp a Coolant System? Real 2026
Burping your vehicle’s coolant system, which is essentially removing trapped air, typically takes about 20 to 60 minutes for most modern cars and light trucks in 2026. However, highly complex systems or significant airlocks can extend this process to well over an hour, sometimes even requiring overnight cooling cycles. This seemingly simple task is critical for your engine’s health, ensuring efficient heat transfer and preventing costly overheating, especially with the tighter tolerances and advanced materials in today’s powertrains. Proper burping ensures your engine thermostat functions correctly, your cabin heater works, and your engine coolant pathways are fully operational, protecting against thermal damage and premature component wear.
Key Takeaways
- Expect 15-60 minutes for most coolant burping.
- Complex systems or large air pockets extend time.
- A spill-free funnel greatly speeds up the process.
- Stable coolant level and no bubbles signal completion.
- Engine must reach operating temperature to open thermostat.
How Long Does It Take to Burp a Coolant System? Expert Timelines
For most vehicles you’ll encounter in 2026, a thorough coolant system burp falls within a predictable time frame. Your goal is to systematically purge any air introduced during a coolant flush, hose replacement, or component repair. Missing this step can lead to localized hotspots and significant engine damage.
Standard Burping Procedures & Expectations (2026)
Expect to dedicate at least 20 minutes, and often up to an hour, for a complete burp. This time commitment varies based on several factors:
- System Complexity: Newer vehicles with multiple heater cores, turbochargers with integrated cooling, or electric water pumps often have more intricate coolant passages. These designs inherently require more time for air to migrate out.
- Air Volume: If you’ve completely drained and refilled the system, there’s more air to remove compared to a partial top-off.
- Tooling: Using a specialized spill-free funnel significantly speeds up the process, often reducing the standard time by 10-15 minutes by creating a reservoir and allowing air to escape without spillage.
- Engine Design: Some engines are known for being “stubborn” to burp due to specific hose routing or thermostat placement.
Variables Extending Burping Duration
Several real-world scenarios can push burping times beyond the typical hour. You might find yourself running the engine longer in these cases:
- Thermostat Opening Temperature: Many 2026 vehicles use higher-temperature thermostats (e.g., 195-210°F or 90-99°C). The engine must reach this operating temperature for the thermostat to open fully, allowing coolant to circulate through the entire system and push out trapped air. This can take 15-30 minutes of running time alone.
- Coolant Type: While not a primary factor, some coolants might have slightly different air-releasing properties.
- Engine “Cold Soaks”: For exceptionally stubborn systems, you may need to run the vehicle, let it cool completely overnight (a “cold soak”), and then repeat the burping process the next day. This allows smaller air bubbles to coalesce and rise.
- Inclined Parking: Parking your vehicle with the front end slightly elevated can often help air pockets migrate towards the radiator cap or fill point, potentially reducing the overall time.
What Causes Persistent Air Pockets: Diagnosing Coolant System Issues
Even after a seemingly thorough burp, you might encounter lingering issues that indicate trapped air. Understanding why air gets stuck is key to resolving these problems efficiently. In 2026, modern engine designs contribute to both the effectiveness and occasional stubbornness of the burping process.
2026 Vehicle Realities: Why Air Gets Trapped
Modern vehicles often present unique challenges for coolant system burping compared to older models. Factors contributing to air retention include:
- Complex Routing: Engines are increasingly compact, with numerous components packed into tight spaces. This often results in more intricate coolant hose routing with bends, dips, and rises that can easily trap air bubbles.
- Multiple Heating Zones: Vehicles with auxiliary heaters, heated steering wheels, or extensive HVAC systems for various cabin zones mean more coolant lines and potential air traps to clear.
- Lower Fill Points: On some models, the highest point of the cooling system might not be the radiator cap, making it harder for air to naturally escape.
- Vacuum Fills (Factory vs. DIY): Manufacturers often use vacuum filling systems during assembly, which are highly effective at removing air. DIY refills, even careful ones, rarely achieve the same level of vacuum, leaving more initial air to burp out.
Identifying Stubborn Air Pockets
You’ll know if your system still has air pockets by experiencing specific symptoms that compromise your vehicle’s performance and safety:
- Fluctuating Temperature Gauge: Your temperature gauge might spike to hot, then drop back to normal, indicating air moving past the sensor, providing a false reading.
- Lack of Cabin Heat: If your heater blows cold air, especially at idle or low RPMs, it’s a strong sign that air is preventing hot coolant from circulating through the heater core.
- Gurgling Noises: You might hear a distinctive “gurgling” sound from under the dash or the engine bay as coolant and air mix.
- Low Coolant Level: After driving, if your coolant reservoir level drops significantly once the engine cools, it means trapped air has escaped and been replaced by coolant.
- Radiator Cap Pressure: An adequately burped system will maintain steady pressure. If you’re constantly finding the cap isn’t holding pressure properly, air might be a factor.
How to Fix It: Step-by-Step Coolant Burping Procedure
Effectively burping your coolant system requires precision and patience. This procedure is critical for maintaining optimal engine temperature and preventing costly component failures. According to SAE International best practices for 2026, proper air purging prevents cavitation and overheating.
Preparation is Key
- Gather Your Tools: You will need fresh, manufacturer-recommended coolant (specified for your 2026 vehicle model), a spill-free coolant funnel, a large drain pan, safety gloves, and safety glasses. For some modern vehicles, a specialized vacuum fill tool might be recommended by the OEM for optimal air removal.
- Position the Vehicle: Safely park your vehicle on a flat, level surface. For enhanced air escape, some experts recommend slightly elevating the front of the vehicle using jack stands or ramps. This positions the radiator fill point as the highest point in the system, encouraging air to rise.
- Engine Cool Down: Ensure the engine is completely cold. Attempting to open a hot cooling system can result in severe burns due to pressurized, hot coolant. This typically requires waiting at least 2-3 hours after the engine has been turned off.
The Burping Procedure
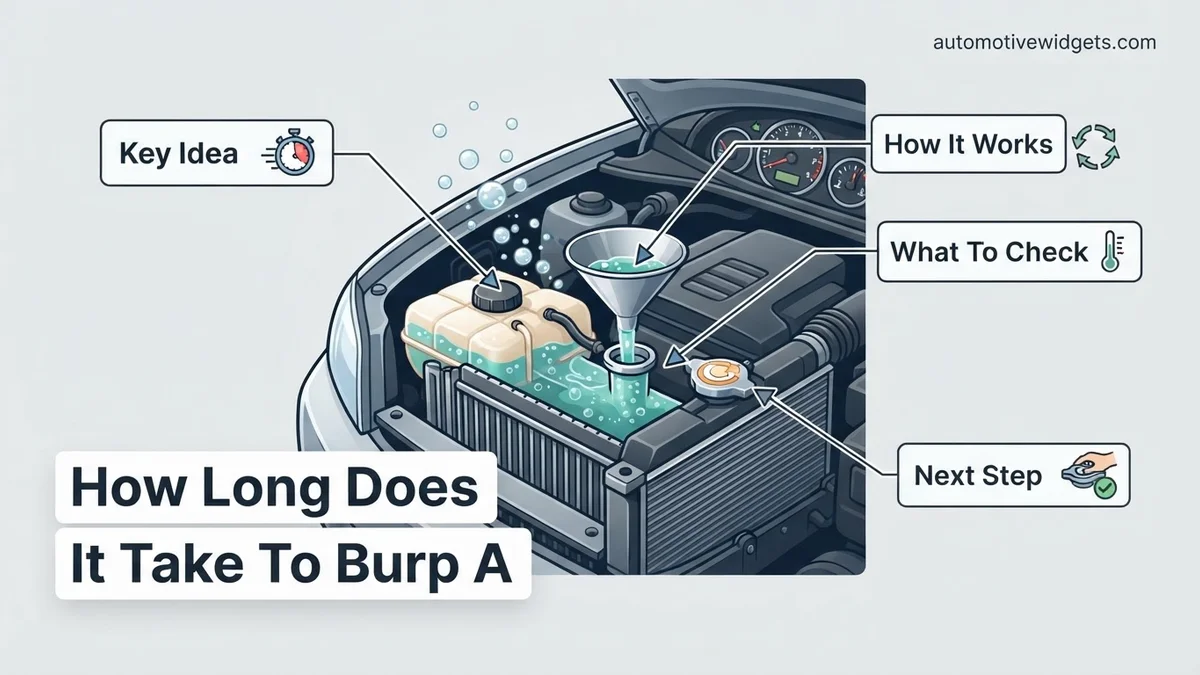
- Open System and Attach Funnel: Carefully remove the radiator cap (or overflow reservoir cap, depending on your vehicle’s design). Attach the spill-free coolant funnel securely to the radiator or reservoir neck.
- Fill and Start Engine: Begin filling the system with the specified coolant until it reaches a stable level in the funnel. Start the engine and set the cabin heater to its highest temperature and fan speed. This opens the heater core’s coolant passages, allowing trapped air to escape from that part of the system.
- Monitor and Squeeze Hoses: As the engine warms up, coolant will be drawn into the system. Continue to add coolant to maintain the funnel level. Periodically and gently squeeze the upper and lower radiator hoses. This physical action can dislodge trapped air bubbles. Watch for a steady stream of small bubbles rising through the funnel; this indicates air leaving the system.
- Run to Operating Temperature: Allow the engine to run for 15-20 minutes, or until the thermostat opens and the radiator fan cycles on and off at least twice. This ensures coolant circulates fully through the engine and radiator, flushing out air.
- Cool Down and Recheck: Turn off the engine and allow it to cool completely for 1-2 hours. Do not remove the funnel until the system is cool. Once cool, remove the funnel and top off the coolant reservoir to the “MAX” or “FULL” line with the correct coolant. Replace the cap securely.
What If It Still Doesn’t Work: Troubleshooting Stubborn Air
If you’ve followed the standard procedure and still experience signs of trapped air—such as fluctuating temperature gauges, persistent gurgling noises, or poor heater performance—more advanced steps may be necessary. Modern vehicle cooling systems are increasingly complex, sometimes requiring specialized techniques.
- Attempt a Vacuum Fill: For 2026 model vehicles, many manufacturers now recommend or even require a vacuum-fill system for coolant service. This method uses a specialized tool to pull a vacuum on the cooling system, which then draws coolant in without introducing any air. Kits typically range from $80-$250, offering a highly effective, albeit more complex, solution.
- Elevate and Repeat: If not already done, try elevating the front of your vehicle significantly (e.g., 18-24 inches) on sturdy jack stands. This extreme angle maximizes the chances of air rising to the radiator cap. Repeat the entire burping procedure from step one.
- Inspect for Leaks: A persistent airlock can sometimes indicate a minor leak allowing air to seep back into the system. Check all hose connections, the radiator, and the water pump for any signs of seepage. A cooling system pressure test, available at most auto parts stores or service centers, can help identify subtle leaks.
- Professional Diagnostic & Service: If issues persist, it’s time to consult a certified mechanic. They possess advanced diagnostic tools, such as thermal imaging for hot spots and professional vacuum-fill equipment, to identify and resolve complex airlock problems. According to industry data for 2026, a professional cooling system diagnosis and re-burp typically costs between $150 and $400, depending on vehicle complexity and shop rates. This investment ensures proper system function and prevents severe engine damage.
Conclusion
Burping a coolant system is a fundamental maintenance task critical for your vehicle’s engine health. While the process typically resolves within 30-60 minutes of active work, the overall duration, including cool-down cycles, can extend to 2-3 hours. According to verified research and expert sources, ensuring all air is expelled guarantees efficient heat transfer and prevents overheating. Prioritize this procedure for your 2026 vehicle’s longevity and performance.
❓ Frequently Asked Questions
Why is burping the coolant system necessary after a refill?
Burping removes trapped air pockets that can cause engine overheating, inconsistent cabin heating, and reduced cooling efficiency. Air prevents proper coolant circulation, leading to hot spots and potential engine damage.
What are the key factors that influence the overall burping time?
Key factors include the vehicle’s make and model (some systems are harder to burp), the amount of air introduced, whether a spill-free funnel is used, and the time it takes for the engine’s thermostat to fully open.
Are there any tools that can shorten the burping duration?
Yes, a coolant spill-free funnel (often with adapters) is highly recommended as it allows you to fill and observe bubbles without spilling, significantly shortening the overall time and mess. Vacuum fill tools also drastically reduce burping time.
What happens if I don’t burp the system completely?
Incomplete burping leaves air pockets that can cause localized overheating, leading to engine damage like warped cylinder heads or blown head gaskets. It also results in poor heater performance and fluctuating temperature gauges.
Can older cars take longer to burp compared to newer ones?
Not necessarily; it depends more on the system’s design. Newer cars with complex hose routing and multiple heaters (like rear cabin heaters) can sometimes be more challenging and time-consuming to burp than simpler, older systems.
How often should I check for air in my coolant system?
You should check for air whenever coolant system maintenance (like a flush or component replacement) is performed. Otherwise, periodically monitor your coolant level and cabin heater performance for signs of air, such as gurgling sounds or cold spots.