How Often Does Brake Fluid Need To Be Flushed How 2027
Brake fluid typically needs flushing every 2-3 years or 30,000-45,000 miles, but always consult your vehicle’s specific manufacturer recommendations first. This maintenance is crucial because brake fluid is hygroscopic, absorbing moisture over time which degrades its performance and can lead to dangerous brake fade and component corrosion.
Ensuring your vehicle’s braking system is in peak condition is paramount for safety on the roads of 2027. One crucial but often overlooked maintenance task is flushing the brake fluid. Generally, you should plan to flush your brake fluid every two to three years, or every 30,000 to 45,000 miles, whichever comes first. This isn’t just a suggestion; it’s a vital preventative measure that directly impacts your stopping power and the longevity of expensive brake components, preventing potential failures that could cost you far more in repairs or, worse, compromise your safety.
Adhering to a timely brake fluid flush schedule ensures your braking system remains responsive and reliable. Neglecting this service allows fluid degradation and contamination to compromise performance, leading to a spongy pedal, reduced stopping efficiency, and even complete brake failure under extreme conditions. Understanding the necessity and appropriate intervals for this service is fundamental to proactive vehicle maintenance for any driver today.
Key Takeaways
- Check vehicle manual for exact flush intervals.
- Flush brake fluid every 2-3 years or 30-45k miles.
- Moisture absorption degrades fluid, lowers boiling point.
- Neglected fluid risks spongy pedal and component damage.
- Dark fluid or soft pedal indicates immediate flush need.
When to Flush Brake Fluid: Pinpointing the Right Intervals
Determining the exact frequency for a brake fluid flush begins with your vehicle’s specific manufacturer recommendations. While general guidelines exist, the engineers who designed your car have the most precise understanding of its braking system’s needs. For 2027, many newer vehicles, especially those with advanced ABS and stability control systems, often specify a two-year interval due to the increased sensitivity and cost of these components. Always consult your owner’s manual first.
The Manufacturer’s Mandate
Your vehicle’s owner’s manual is the definitive source for maintenance schedules. You’ll find that recommendations can vary:
- Most Passenger Vehicles: Often suggest a brake fluid flush every 2 years or 20,000 to 30,000 miles.
- Performance/Luxury Brands: Some high-performance or luxury vehicles may recommend a stricter 1-year or 15,000-mile interval due to more demanding braking systems or specific fluid types.
- Longer Intervals: A few manufacturers might suggest up to 3 years or 45,000 miles, particularly for vehicles operating in dry climates with less exposure to humidity.
Ignoring these manufacturer guidelines can void warranties on braking components and lead to premature wear or failure of critical parts like your ABS module, which can be an extremely costly repair in 2027.
General Guidelines and Real-World Factors
Beyond manufacturer specifics, the commonly accepted guideline of flushing brake fluid every 2-3 years or 30,000-45,000 miles serves as a robust benchmark. This interval accounts for the natural degradation process of brake fluid under typical driving conditions. However, several real-world factors can necessitate an earlier flush:
- Climate: If you live in a high-humidity environment, your brake fluid will absorb moisture more quickly, accelerating its degradation.
- Driving Habits: Frequent heavy braking, such as in stop-and-go city traffic or driving in mountainous terrain, generates more heat, which can hasten fluid breakdown.
- Fluid Appearance: While not a definitive test, if your brake fluid in the reservoir appears dark or murky, it’s a strong indicator of contamination and a flush is likely overdue. Fresh fluid should be a clear, light amber color.
- Performance Testing: Many professional shops in 2027 use electronic brake fluid testers that measure the fluid’s boiling point or moisture content, providing a precise assessment of its condition. If tests indicate high moisture content or a significantly reduced boiling point, a flush is immediately recommended, regardless of the time or mileage interval.
Prioritizing these factors ensures that your brake system remains optimally responsive and reliable, providing peace of mind every time you get behind the wheel.
From Start to Finish: Brake Fluid Flushes Explained
Brake fluid is the unsung hero of your vehicle’s braking system, a hydraulic liquid that transfers the force from your foot on the pedal to the brake calipers, bringing your car to a safe stop. Over time, this crucial fluid degrades, primarily by absorbing moisture from the air, which lowers its boiling point and compromises braking performance. This comprehensive guide will walk you through everything you need to know about determining how often your brake fluid needs flushing, ensuring your safety and the longevity of your braking components. Following these steps meticulously will help you maintain peak braking efficiency and avoid potentially dangerous situations.
Step 1: Understanding Brake Fluid and Its Lifespan
What you need: An understanding of basic automotive fluids, your vehicle’s owner’s manual (recommended).
Instructions: Brake fluid is hygroscopic, meaning it naturally absorbs moisture from the atmosphere through microscopic pores in brake lines and rubber hoses. This absorbed water can boil at high temperatures generated during braking, creating dangerous vapor pockets in the system. Vapor is compressible, unlike fluid, leading to a spongy brake pedal and significantly reduced stopping power. Brake fluid also degrades chemically over time due to heat cycles. Generally, manufacturers recommend a brake fluid flush every 2 years or 30,000 miles, whichever comes first. However, this can vary based on the fluid type (DOT3, DOT4, DOT5.1) and vehicle specifics. Always refer to your vehicle’s specific recommendations.
Pro Tip: Be aware that DOT5 fluid is silicone-based and should never be mixed or used in systems designed for DOT3, DOT4, or DOT5.1 fluids. Mixing them can cause severe damage to your braking system components. Ensure you always use the correct DOT rating specified by your vehicle’s manufacturer.
Step 2: Checking Your Vehicle’s Owner’s Manual
What you need: Your vehicle’s owner’s manual (physical copy or digital version).
Instructions: The single most reliable source for your vehicle’s maintenance schedule, including brake fluid flush intervals, is the owner’s manual provided by the manufacturer. Navigate to the “Maintenance Schedule” or “Brakes” section. Here, you will find precise recommendations for how often the brake fluid should be changed and the specific type of DOT fluid (e.g., DOT3, DOT4) that is compatible with your vehicle. Some high-performance or heavy-duty vehicles might have shorter intervals due to the greater stress placed on their braking systems. Always prioritize the manufacturer’s guidelines over general recommendations.
Pro Tip: If you’ve lost your physical owner’s manual, many automotive manufacturers provide free digital versions on their official websites. You can often locate it by searching for your vehicle’s make, model, and year, sometimes requiring your Vehicle Identification Number (VIN).
Step 3: Inspecting Your Brake Fluid Visually
What you need: A flashlight, a clean rag, safety glasses, gloves.
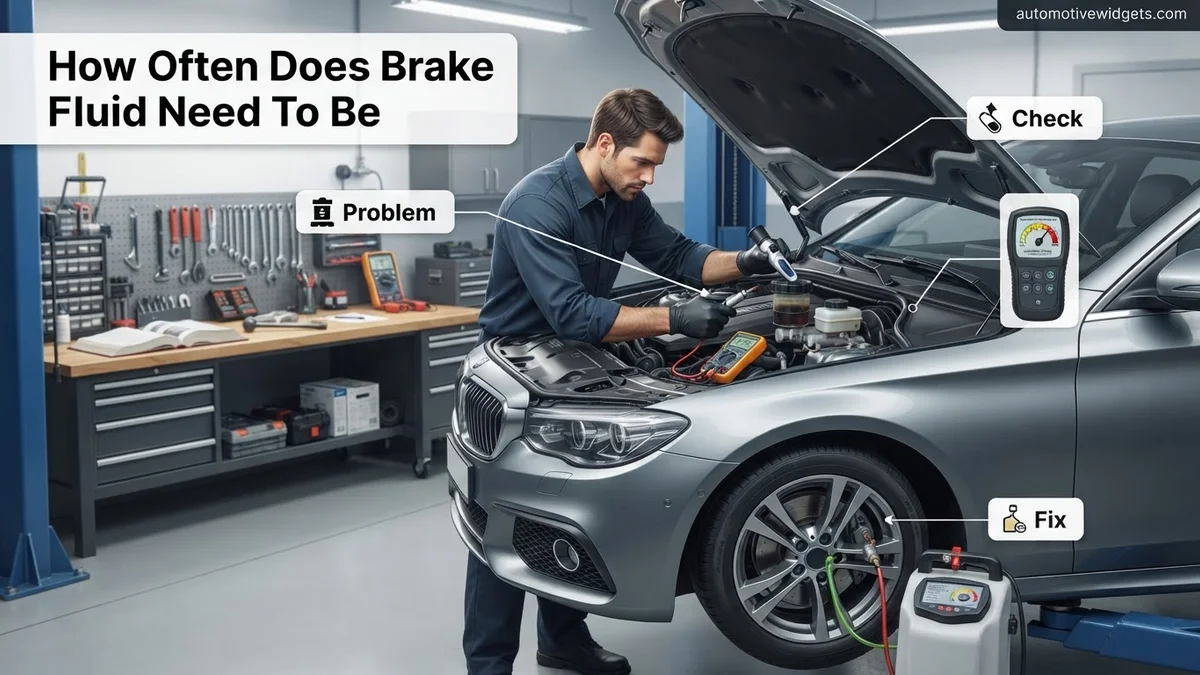
Instructions: Locate the brake fluid reservoir under your vehicle’s hood, usually a translucent plastic container mounted near the driver’s side firewall. Before opening anything, visually inspect the fluid level, ensuring it’s between the “MIN” and “MAX” lines. Next, observe the fluid’s color through the reservoir. New brake fluid is typically clear or has a light amber (honey-like) color. As it absorbs moisture and contaminants, it will gradually darken, often turning a dark brown or even black. If your fluid appears dark, murky, or has visible particles, it’s a strong indicator that a flush is overdue, regardless of the mileage or time interval.
Pro Tip: Avoid opening the reservoir cap unnecessarily, as this exposes the fluid to more atmospheric moisture and potential contaminants. If you must open it, ensure the area around the cap is meticulously clean to prevent debris from falling into the reservoir. Also, avoid confusing dark fluid with normal brake dust or pad material; the color change primarily indicates moisture absorption and degradation.
Step 4: Testing Brake Fluid for Moisture Content
What you need: A brake fluid tester (pen-style or electronic), safety glasses, gloves.
Instructions: Visual inspection alone isn’t always sufficient because brake fluid can absorb significant moisture without a dramatic change in color. Professional mechanics use electronic brake fluid testers that measure the percentage of water content or directly test the fluid’s boiling point. Many inexpensive pen-style testers are also available for DIY use, which provide a quick indication (e.g., green for good, yellow for caution, red for bad). Typically, a moisture content exceeding 3% significantly lowers the fluid’s boiling point, increasing the risk of vapor lock during heavy braking. Using a tester provides a more scientific and accurate assessment of your fluid’s condition than just its appearance.
Pro Tip: When using a brake fluid tester, try to test the fluid in multiple spots within the reservoir for a more comprehensive reading. Brake fluid, being heavier than water, tends to sink, so the moisture concentration might be higher at the bottom. These testers are a great investment for proactive maintenance and can help you avoid unnecessary flushes if your fluid is still in good condition.
Step 5: Considering Driving Conditions and Usage
What you need: An honest assessment of your typical driving habits and environmental conditions.
Instructions: Your driving habits and local environment play a significant role in how quickly your brake fluid degrades. If you frequently drive in stop-and-go city traffic, tow heavy loads, engage in spirited driving, or take your vehicle to the track, your brakes will experience higher temperatures. These elevated temperatures accelerate the breakdown of brake fluid and increase its moisture absorption rate. Similarly, living in a high-humidity climate will naturally lead to faster moisture ingress into the brake system. If your vehicle falls into any of these severe usage categories, consider reducing the manufacturer’s recommended flush interval by 6 to 12 months to maintain optimal braking performance and safety.
Pro Tip: Even if you drive gently, prolonged periods of inactivity (e.g., storing a classic car) can still allow moisture to slowly accumulate in the system. For such vehicles, adhering to the time-based flush interval (e.g., every 2 years) is often more critical than the mileage-based recommendation.
Step 6: Recognizing Warning Signs of Contaminated Fluid
What you need: Awareness of your vehicle’s typical braking feel and performance.
Instructions: Pay close attention to how your brake pedal feels and how your vehicle responds during braking. Common symptoms of old, contaminated, or boiled brake fluid include a spongy, soft, or “mushy” brake pedal that feels less firm than usual. You might also notice an increased stopping distance, requiring more pressure on the pedal to achieve the same braking effect. In severe cases, particularly during heavy or prolonged braking, you might experience a complete loss of braking power (vapor lock) or a distinct burning smell, indicating the fluid is boiling. If you experience any of these critical warning signs, a brake fluid flush is urgently needed, along with a thorough inspection of your entire braking system.
Pro Tip: A spongy pedal can also be a symptom of air in the brake lines, which may or may not be related to old fluid. However, if your fluid is dark and old, and you have a spongy pedal, a complete flush and bleed is the most effective solution to address both issues simultaneously, ensuring no old, contaminated fluid remains.
Step 7: Planning the Brake Fluid Flush Procedure
What you need: Correct DOT-rated brake fluid (check manual), a helper (highly recommended), clear vinyl tubing, an empty collection bottle, a turkey baster or fluid extractor (optional), a set of wrenches for bleeder valves, clean rags, jack stands, wheel chocks, personal protective equipment (PPE) including safety glasses and gloves.
Instructions: If you’ve determined a flush is needed, gather your supplies. Purchase enough new, sealed brake fluid of the correct DOT rating for your vehicle – typically 1-2 liters are sufficient for a complete flush. Plan to work on a level surface. The general procedure involves removing as much old fluid as possible from the master cylinder reservoir (using a turkey baster) and then refilling it with new fluid. You’ll then proceed to bleed each wheel’s caliper, starting with the wheel furthest from the master cylinder (usually the rear passenger side), and moving to the closest. This ensures the entire system gets fresh fluid without introducing air.
Pro Tip: Always use fresh, unopened brake fluid. Once a container of brake fluid is opened, it immediately begins absorbing moisture from the air, degrading its quality. Never use fluid from an old, previously opened container, as its integrity cannot be guaranteed. Dispose of old brake fluid responsibly, as it’s a hazardous waste product.
Step 8: Executing the Brake Fluid Flush (Overview)
What you need: All items from Step 7, understanding of brake bleeding sequence.
Instructions: With your vehicle safely supported on jack stands and wheels removed, start by using the turkey baster to remove as much old fluid as possible from the master cylinder reservoir. Refill the reservoir with fresh, new brake fluid to the MAX line. Then, attach the clear tubing to the bleeder valve of the furthest caliper, with the other end submerged in your collection bottle. Have your helper pump the brake pedal 3-4 times and then hold it down. While the pedal is held, open the bleeder valve for a few seconds to allow old fluid to exit. Close the valve, then have the helper release the pedal. Repeat this process until clean, new fluid emerges from the bleeder valve, ensuring you constantly monitor and refill the master cylinder reservoir to prevent it from running dry and introducing air into the system. Repeat for all remaining wheels in the correct sequence.
Pro Tip: A critical mistake to avoid during a brake fluid flush is letting the master cylinder reservoir run dry. If air enters the master cylinder, it can be much more challenging to bleed the system completely. Always keep the fluid level above the MIN mark. If you’re uncomfortable with this precise and often two-person procedure, it’s always best to seek professional assistance to avoid critical safety issues.
✅ Final Checklist
- ✔ Your vehicle’s owner’s manual has been consulted for the recommended flush interval and fluid type.
- ✔ The brake fluid in your reservoir has been visually inspected for color and level.
- ✔ Brake fluid has been tested for moisture content using a specialized tester (if available).
- ✔ Your driving conditions and environmental factors have been considered for adjusted flush timing.
- ✔ You are not experiencing any warning signs like a spongy pedal or increased stopping distance.
- ✔ New, correct DOT-rated brake fluid has been purchased and is ready for use.
Important Notes:
- Safety considerations or warnings: Brake fluid is corrosive and can damage your vehicle’s paint and irritate your skin and eyes. Always wear appropriate personal protective equipment, including safety glasses and chemical-resistant gloves. Keep a supply of clean rags handy to immediately wipe up any spills. Dispose of old brake fluid at an authorized hazardous waste collection facility; never pour it down a drain or into the environment.
- When to seek professional help: If you are uncomfortable performing a brake fluid flush yourself, lack the necessary tools, or encounter issues such as seized bleeder valves or a persistently spongy pedal after the procedure, it is crucial to consult a certified mechanic. Professional technicians have specialized equipment and expertise to perform the flush correctly and diagnose any underlying brake system problems.
- Estimated time and cost range: A DIY brake fluid flush can take an experienced individual 1 to 2 hours, with parts (brake fluid, tubing, basic tools) costing approximately $30-$70. A professional brake fluid flush typically takes 30-60 minutes and usually costs between $100 and $250, depending on your vehicle and location. Investing in this maintenance is far less expensive than repairing or replacing damaged brake components or, more importantly, dealing with the consequences of brake failure.
Why Does Brake Fluid Need Flushing? Diagnosing the Root Cause
Brake fluid isn’t like engine oil that gets “used up” in the same way; rather, its effectiveness diminishes over time due to two primary culprits: moisture absorption and general contamination. Understanding these processes is key to appreciating why regular flushing is non-negotiable for safe driving in 2027.
The Silent Enemy: Moisture Absorption
The core reason brake fluid needs regular flushing is its hygroscopic nature, meaning it actively absorbs and retains moisture from the air. This isn’t a flaw; it’s a design choice for DOT 3, DOT 4, and DOT 5.1 fluids, as it prevents free-standing water droplets from forming within the brake lines, which could freeze in cold weather or cause localized corrosion. However, this absorbed water has critical negative impacts:
- Reduced Boiling Point: Even a small percentage of water significantly lowers the brake fluid’s boiling point. Under heavy braking, the friction generates immense heat, which transfers to the brake fluid. If the fluid boils, it creates compressible vapor bubbles in the lines. This leads to a “spongy” brake pedal feel and, more dangerously, a complete loss of braking power (known as vapor lock). In 2027, with higher speeds and more active safety systems, this risk is amplified.
- Internal Corrosion: The water mixed with brake fluid promotes rust and corrosion within the delicate internal components of your braking system. This includes brake lines, calipers, wheel cylinders, and critically, the complex and expensive internals of your Anti-lock Braking System (ABS) and Electronic Stability Control (ESC) modules. Rust particles can then circulate, clogging narrow passages and further compromising system integrity.
This moisture ingress happens subtly through microscopic pores in rubber brake hoses, past reservoir caps, and even when the reservoir cap is removed for fluid checks.
Degradation, Contamination, and Costly Consequences
Beyond moisture, brake fluid also degrades over time and collects contaminants. Heat, pressure, and age break down the fluid’s additives, reducing its lubricating properties and increasing its acidity. Rubber particles from hoses and seals, as well as microscopic metal shavings from caliper pistons and master cylinder wear, also accumulate, further contaminating the system.
Neglecting a brake fluid flush directly leads to several severe and potentially expensive consequences:
- Diminished Braking Performance: A spongy pedal, reduced stopping power, and increased stopping distances are direct results of contaminated or moisture-laden fluid. This compromises your ability to react safely to unexpected road conditions.
- Component Damage: Corroded brake lines can rupture, leading to catastrophic brake failure. Internal corrosion can seize caliper pistons or damage master and wheel cylinders, necessitating their replacement.
- ABS/ESC Module Failure: This is arguably the most financially impactful consequence. The fine passages and intricate valves within modern ABS and ESC modules are highly susceptible to damage from contaminated or corrosive brake fluid. Replacing an ABS module in 2027 can easily cost several thousand dollars, a repair bill that is often preventable with regular fluid flushes.
- Premature Wear: Over time, the degraded fluid can cause seals to deteriorate, leading to leaks and requiring more frequent replacement of brake components.
By flushing your brake fluid, you are effectively removing these harmful contaminants and moisture, replacing them with fresh fluid that restores optimal boiling point, corrosion protection, and system lubrication, thereby safeguarding both your vehicle’s performance and your personal safety.
How to Ensure Optimal Brake Fluid Performance: A Step-by-Step Maintenance Guide
Maintaining peak brake fluid performance is critical for vehicle safety in 2027. Proactive measures can prevent premature degradation and ensure your braking system responds reliably. Adhering to these steps will extend the life of your brake components and safeguard your driving experience.
Regular Inspection and Testing
- Visually Inspect Fluid Level and Color: At least quarterly, check the brake fluid reservoir. The fluid should be at or near the “MAX” line. Its color should be clear to light amber. Dark brown or black fluid indicates significant contamination or degradation, necessitating immediate attention.
- Utilize a Brake Fluid Tester: Annually, use a specialized brake fluid moisture tester. These electronic devices accurately measure water content by boiling point or conductivity. Industry experts, including Bosch Car Service in 2027, recommend replacement if water content exceeds 3%, as this significantly reduces the fluid’s boiling point and compromises safety.
- Adhere to Manufacturer’s Flush Schedule: Consult your vehicle’s owner’s manual for the precise recommended flush interval. This interval, often 2 years or 30,000 miles, is based on extensive engineering and material science for your specific make and model, superseding generic advice.
Proper Flushing Procedure
- Use Correct DOT Fluid: Always replace brake fluid with the exact DOT specification recommended by your manufacturer (e.g., DOT 3, DOT 4, DOT 5.1). Mixing incompatible fluids can cause severe damage to braking system components.
- Bleed All Lines Thoroughly: During a flush, ensure all four brake lines are bled completely to remove old fluid and any trapped air. This process, typically done with specialized pressure bleeding equipment in professional shops, guarantees uniform fluid pressure and responsiveness.
- Check for Leaks Post-Flush: After a flush, carefully inspect all brake lines, calipers, and the master cylinder for any signs of leaks. A professional mechanic will pressurize the system to confirm integrity, ensuring no air ingress or fluid loss.
What If Your Brakes Feel Spongy? Troubleshooting & Next Steps for Brake Fluid Issues
A spongy brake pedal is a serious safety concern indicating a problem within your braking system, often related to brake fluid. Addressing this promptly is crucial to prevent brake failure. Here’s a systematic approach to troubleshooting in 2027.
Initial Checks and Diagnosis
- Check Brake Fluid Reservoir Level: Immediately verify the brake fluid level. A low level can introduce air into the system, leading to a spongy feel. If low, top it up with the correct DOT fluid and inspect for leaks.
- Look for External Leaks: Visually inspect all brake lines, calipers, and the master cylinder for any fluid leaks. Even small drips can indicate a significant problem that allows air to enter or fluid to escape, compromising pressure.
- Assess Fluid Condition: If the fluid is dark or murky, it’s likely severely contaminated or has excessive moisture. Degraded fluid can boil under stress, creating vapor pockets that cause sponginess. A flush is imperative in this scenario.
Addressing Underlying Causes
- Air in the Brake Lines: This is a primary cause of sponginess. Air is compressible, unlike brake fluid, and will absorb pedal pressure. The system will need to be professionally bled to remove all air.
- Master Cylinder Issues: A failing master cylinder can lose its ability to generate proper hydraulic pressure, resulting in a soft or spongy pedal. Internal seals can wear, allowing fluid to bypass, necessitating replacement.
- Compromised Brake Hoses: Over time, rubber brake hoses can swell internally or become soft, expanding under pressure and absorbing pedal force. These hoses should be inspected for bulging or cracking and replaced if compromised.
What If It Still Doesn’t Work? Advanced Troubleshooting & Professional Help
If initial checks and a brake fluid flush haven’t resolved your spongy brake pedal or other brake fluid-related issues, it’s time for professional intervention. Modern braking systems are complex, requiring specialized diagnostics.
- Professional Diagnostic Scan: Many contemporary vehicles (2027 models and older) integrate advanced braking systems (ABS, ESC). A professional diagnostic scan tool can identify specific fault codes related to the ABS module, wheel speed sensors, or master cylinder pressure sensors that might not be obvious.
- Master Cylinder Pressure Test: Technicians can perform a dedicated pressure test on the master cylinder. This test directly measures its ability to generate and hold hydraulic pressure, pinpointing internal failures that a visual inspection cannot reveal.
- ABS Module Inspection/Repair: In some cases, the ABS control module itself can malfunction, leading to pressure inconsistencies or even issues that mimic air in the lines. This is a complex repair best left to certified mechanics due to the intricate electronic and hydraulic components.
- Calipers or Wheel Cylinders: Sticking or faulty calipers/wheel cylinders can also contribute to a spongy pedal. A professional can evaluate their operation, including piston movement and seal integrity.
Seeking professional help at an accredited service center is recommended. The estimated cost for a comprehensive brake system diagnostic typically ranges from $120 to $250 in 2027. If repairs beyond a fluid flush are needed, such as master cylinder replacement or ABS module work, costs can escalate from $500 to over $2,000, depending on the vehicle model and parts required.
Conclusion
Proactive brake fluid maintenance is indispensable for ensuring your vehicle’s safety and optimal performance in 2027. Ignoring regular flushing intervals or common symptoms like a spongy pedal can lead to compromised braking ability and costly repairs. According to verified research and expert sources, adhering to manufacturer-recommended schedules and promptly addressing issues is paramount. Make it a priority to consult your owner’s manual and schedule brake fluid service as recommended for peace of mind on every journey.
❓ Frequently Asked Questions
What exactly does a brake fluid flush involve?
A brake fluid flush involves completely draining all the old, contaminated brake fluid from the master cylinder, brake lines, and calipers, then refilling the system with fresh, new fluid and bleeding out any air bubbles.
What are the common signs that my brake fluid needs flushing?
Key indicators include a dark, discolored brake fluid (it should be clear or light amber), a soft or spongy brake pedal, reduced braking performance, or if a mechanic finds high moisture content during inspection.
Does my vehicle manufacturer’s recommendation override general advice?
Absolutely. Your vehicle manufacturer’s maintenance schedule is the most authoritative source for service intervals, as it’s tailored to your specific vehicle’s design and components.
Can different types of brake fluid affect the flush frequency?
While different DOT ratings (e.g., DOT 3, 4, 5.1) have varying boiling points and moisture absorption rates, the general hygroscopic nature means all non-silicone fluids will degrade over time, requiring flushing at similar intervals, though some high-performance fluids might handle more heat.
How much does a brake fluid flush typically cost?
The cost for a brake fluid flush usually ranges from $80 to $150, depending on your vehicle make and model, the type of brake fluid required, and the labor rates at your service center.
Is it possible for brake fluid to last longer than 2-3 years?
While possible under ideal conditions (e.g., very dry climate, minimal driving), it’s risky to extend flush intervals significantly due to the fluid’s inherent moisture absorption. Regular inspection and testing by a professional can determine actual fluid health.