How to Know How Much Transmission Fluid to Add 2026
The most crucial step to determining how much transmission fluid to add is accurately checking the current level while following specific vehicle guidelines. This involves knowing when to check (hot/cold, engine on/off), correctly reading the dipstick, and understanding that the gap between markings often signifies a small, precise volume of fluid. Always consult your owner’s manual for vehicle-specific procedures.
Knowing precisely how much transmission fluid to add is a critical skill for any vehicle owner in 2026. Rather than guessing, you can accurately measure your current fluid level, correctly interpret your dipstick, and determine the exact quantity needed to bring it to optimal. This precise approach prevents both under-filling and over-filling, both of which can cause significant and costly transmission damage over time.
The goal isn’t just to “top it off,” but to restore the fluid to its exact recommended level. This ensures your transmission operates efficiently, shifts smoothly, and has the necessary lubrication and cooling for its intricate components, extending its lifespan and maintaining your vehicle’s reliability.
Key Takeaways
- Always consult your owner’s manual first.
- Check fluid level on level ground, follow hot/cold spec.
- Dipstick markings (ADD, FULL) represent small volumes.
- Add fluid incrementally; recheck frequently.
- Use correct fluid type to avoid damage.
Diagnosing Low Transmission Fluid: Why Accurate Checks Matter
A low transmission fluid level is a red flag your vehicle is communicating directly through its dipstick. An accurate check tells you not just if fluid is low, but critically, by how much. This diagnosis prevents potential issues like hard shifting, overheating, or even complete transmission failure down the road, making a precise measurement technique indispensable.
Understanding Your Dipstick’s Language
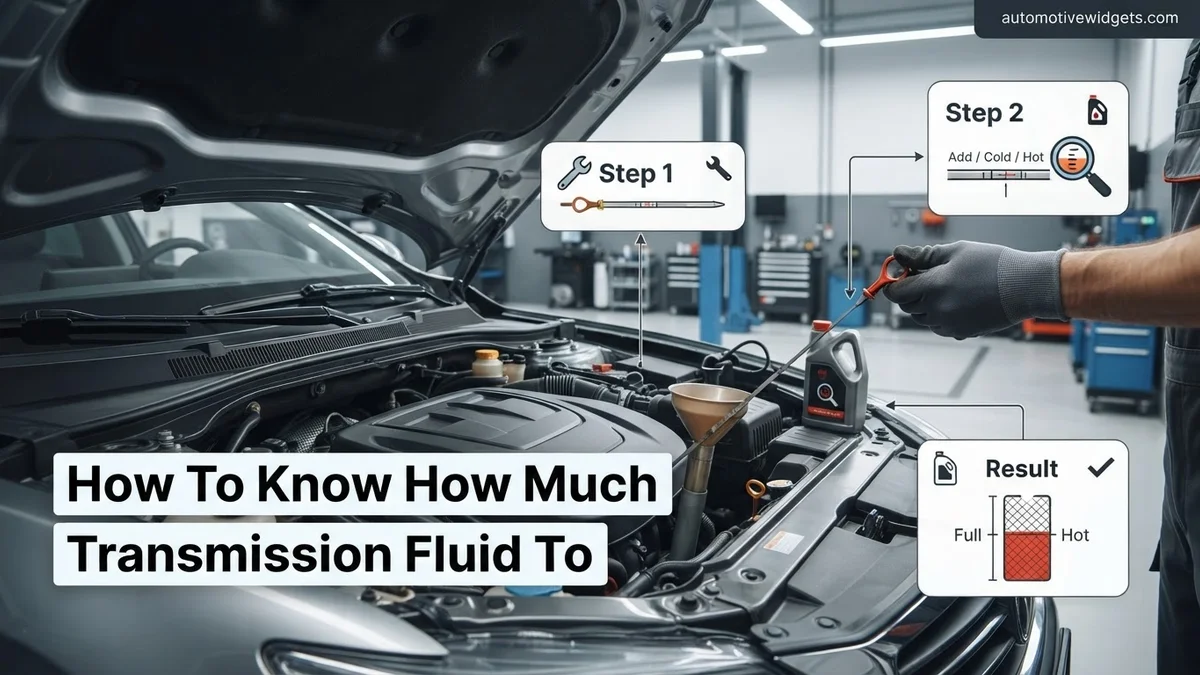
Your transmission fluid dipstick isn’t just a stick; it’s a diagnostic tool marked with specific indicators. You’ll typically find markings for “ADD” (or “LOW”), “FULL” (or “MAX”), and often separate zones for “HOT” and “COLD” checks. The “ADD” line signifies the minimum safe operating level. Fluid below this mark indicates an immediate need for attention. The “FULL” line represents the maximum optimal level; fluid above this can be just as problematic as fluid below the “ADD” line.
Many modern vehicles, especially models from 2020-2026, often have distinct “HOT” (or “OPERATING TEMP”) and “COLD” (or “ENGINE OFF”) ranges. Always refer to your vehicle’s owner’s manual for the exact interpretation of your specific dipstick. For example, a reading in the “HOT” range while the engine is cold is an inaccurate measurement, and vice-versa.
The Volume Between Marks: Quantifying the Need
Understanding the volume represented by the dipstick’s markings is crucial for adding the correct amount. While it varies slightly by manufacturer and transmission design, the difference between the “ADD” (or “LOW”) mark and the “FULL” (or “MAX”) mark often represents a specific, measurable quantity of fluid. For most passenger vehicles, this interval typically corresponds to approximately 0.5 to 1.0 quart (or 0.5 to 1.0 liter) of transmission fluid.
- Example: If your dipstick reads precisely at the “ADD” line on a hot check, and your owner’s manual or common automotive knowledge for your make/model indicates the ADD-to-FULL range is 0.75 quarts, then you know you need to add roughly 0.75 quarts.
- Rule of Thumb: Even if the dipstick has no specific volume markings, assume that the distance from the bottom of the “ADD” range to the top of the “FULL” range represents less than one full quart. This knowledge guides you to add small increments and recheck, preventing overfilling.
From Start to Finish: How to Know How Much Transmission Fluid to Add Explained
Understanding and maintaining the correct transmission fluid level is paramount for the longevity and smooth operation of your vehicle’s transmission. Too little fluid can cause overheating and severe damage, while too much can lead to foaming, pressure issues, and leaks. This guide will walk you through the precise steps to accurately determine how much transmission fluid your vehicle needs, helping you prevent costly repairs and ensure peak performance.
Step 1: Understand Your Transmission Type and Vehicle Manual
What you need: Your vehicle’s owner’s manual, VIN number (optional, for online manual lookup).
Instructions: Before you even lift the hood, consult your vehicle’s owner’s manual. This is your primary source of information. It will specify the exact type of transmission fluid required (e.g., DEXRON, MERCON, ATF+4, CVT fluid), the correct checking procedure (engine warm or cold, running or off, parked on a level surface), and the location of the transmission dipstick or fill plug. Automatic, manual, and continuously variable transmissions (CVTs) all have different fluid requirements and checking methods. Do not assume; always verify with the manufacturer’s recommendations.
Pro Tip: Using the wrong type of transmission fluid, even for a short period, can cause irreversible damage to internal components. Always double-check the fluid specification in your manual, cross-referencing it with the product label.
Step 2: Gather Your Tools and Safety Gear
What you need: Nitrile gloves, safety glasses, a clean funnel (dedicated for transmission fluid), several clean lint-free rags, the correct type of transmission fluid (as specified in your manual), a flashlight (optional), and possibly jack stands and a floor jack if you need to access under the vehicle for a fill plug.
Instructions: Prepare your workspace and tools. Safety glasses protect against splashes, and gloves keep your hands clean from oil and prevent skin irritation. A dedicated, clean funnel is crucial to prevent contamination. Ensure you have at least 1-2 quarts/liters of the correct transmission fluid readily available. For vehicles with sealed transmissions or those requiring access to a fill plug underneath, proper lifting equipment and safety stands are non-negotiable.
Pro Tip: Always use a funnel that is clean and dedicated solely for transmission fluid to avoid introducing dirt or other contaminants, which can severely harm your transmission’s delicate internal components. Even a tiny speck of debris can cause significant problems.
Step 3: Prepare Your Vehicle for Measurement
What you need: A flat, level surface for parking.
Instructions: Park your vehicle on a completely flat and level surface. This is critical because even a slight incline can lead to an inaccurate fluid level reading, causing you to either overfill or underfill the transmission. Engage the parking brake securely. For most automatic transmissions, the fluid level needs to be checked when the engine is warm and running. Drive the vehicle for about 10-15 minutes to allow the transmission fluid to reach its normal operating temperature. Some manuals may specify checking the fluid cold, so always defer to your owner’s manual.
Pro Tip: Never check transmission fluid on a sloped driveway or uneven ground. The difference in elevation can create false readings, potentially leading to incorrect fluid additions and subsequent transmission issues. Always ensure the vehicle is perfectly level.
Step 4: Locate and Identify the Transmission Dipstick
What you need: Flashlight (optional).
Instructions: With the engine running (if specified by your manual) and the parking brake on, carefully open the hood. The transmission dipstick is typically located towards the rear of the engine bay, often on the passenger side. It usually has a brightly colored handle, such as red or yellow, to distinguish it from the engine oil dipstick (which is often yellow or white). In some vehicles, particularly newer models, there might not be a traditional dipstick; these are often “sealed” units that require special tools or professional service for checking and filling.
Pro Tip: If you’re having trouble locating the dipstick, refer to the diagram in your owner’s manual. Do not confuse it with the engine oil dipstick, as using the wrong one will result in incorrect fluid levels and potential damage.
Step 5: Check the Fluid Level (Initial Reading)
What you need: Clean, lint-free rag.
Instructions: Once you’ve located the transmission dipstick, pull it out completely. Use a clean, lint-free rag to thoroughly wipe off all the fluid from the dipstick. Reinsert the dipstick all the way back into its tube until it is fully seated. Wait a few seconds, then pull the dipstick out again to get an accurate reading. Observe the fluid level indicated on the dipstick. Pay attention to the markings for “HOT” and “COLD” or “FULL” and “ADD,” as explained in the next step.
Pro Tip: Always wipe the dipstick clean before taking the final reading. This ensures that any residual fluid from the dipstick tube doesn’t give a misleadingly high level, leading to underfilling.
Step 6: Interpret the Dipstick Markings
What you need: None.
Instructions: The transmission dipstick will have markings to indicate the correct fluid level. These typically include two sets of marks: one for “COLD” (when the engine hasn’t been run or is not at operating temperature) and one for “HOT” (after driving and reaching operating temperature). Ensure you are reading the correct section based on your vehicle’s preparation. The fluid level should ideally fall within the “FULL” range or crosshatch area of the appropriate temperature marking. Also, note the color and smell of the fluid. Healthy transmission fluid is usually red or reddish-brown and has a sweet, slightly oily smell. Burnt, dark brown, or black fluid, or fluid with a strong, acrid smell, indicates a serious internal problem requiring professional attention.
Pro Tip: If the fluid appears milky or foamy, it could indicate contamination (e.g., coolant mixing with transmission fluid), which is a severe issue requiring immediate professional diagnosis and repair.
Step 7: Determine the Amount to Add
What you need: None.
Instructions: Once you’ve determined the fluid level, compare it to the “FULL” mark on the dipstick. The distance between the “ADD” (or “LOW”) mark and the “FULL” mark typically represents a specific volume, often between 0.5 to 1 quart (or 0.5 to 1 liter) of fluid. If your fluid is below the “ADD” mark, you likely need to add at least that much. If it’s just slightly below “FULL,” you might only need a quarter or half of a quart. It’s always best to add fluid in small increments, check the level, and repeat until the correct level is reached. Overfilling can be just as detrimental as underfilling.
Pro Tip: A good rule of thumb for most transmissions is that the difference between the “Add” and “Full” marks on the dipstick is roughly one pint (0.5 quarts/liters). Start by adding half of this amount, then re-check.
Step 8: Safely Add Transmission Fluid
What you need: Correct transmission fluid, clean funnel.
Instructions: Locate the transmission fluid fill tube, which is typically the same opening where the dipstick goes. Insert your clean funnel into the fill tube. Slowly and carefully pour in a small amount of the correct transmission fluid, starting with about 1/4 to 1/2 quart (0.25 to 0.5 liters). Avoid pouring too quickly, as this can cause air pockets or spills. If your vehicle has a sealed transmission or a separate fill plug located underneath, you will likely need specialized equipment (e.g., a fluid pump) and should consider professional assistance unless you are experienced.
Pro Tip: Pouring too fast can lead to fluid overflowing or air becoming trapped, both of which can lead to inaccurate readings or a mess. Patience is key when adding fluid.
Step 9: Re-check the Fluid Level After Adding
What you need: Clean, lint-free rag.
Instructions: After adding fluid, remove the funnel and replace the dipstick. If your manual specifies checking with the engine running, ensure it’s still running. Cycle the transmission through all gear selections (P, R, N, D, L/1/2/3) for a few seconds in each gear to allow the fluid to circulate. Then, return the shifter to “Park” or “Neutral” (as specified by your manual), and re-check the fluid level using the same method as in Step 5 (pull, wipe, reinsert, pull, read). Repeat this process of adding small amounts and re-checking until the fluid level is precisely within the “FULL” range on the dipstick when at the correct operating temperature.
Pro Tip: It’s far better to add small amounts (e.g., 1/4 quart) multiple times and re-check than to add too much at once. Overfilling can cause foaming, leaks, and potential damage.
Step 10: Final Inspection and Cleanup
What you need: Clean rags.
Instructions: Once the fluid level is correctly adjusted, ensure the transmission dipstick is fully seated back in its tube to prevent dirt from entering or fluid from escaping. Thoroughly wipe up any spilled transmission fluid from around the engine bay, as it can attract dirt or pose a fire hazard on hot engine components. Double-check for any leaks around the dipstick tube or transmission pan (if visible). Properly dispose of used rags and any leftover fluid according to local environmental regulations. Monitor your fluid level periodically in the coming weeks to ensure there are no hidden leaks.
Pro Tip: After completing the process, take your vehicle for a short test drive and then re-check the fluid level one last time while the transmission is fully warmed up to confirm stability and accuracy.
✅ Final Checklist
- Vehicle parked on a completely flat and level surface?
- Engine at the correct operating temperature (as per owner’s manual)?
- Correct type of transmission fluid used, verified against the manual?
- Transmission dipstick fully inserted and seated before taking the final reading?
- Fluid level precisely between the “FULL” marks (or within the specified range) for the correct temperature reading?
Important Notes:
- Safety Considerations: Transmission fluid can be hot. The engine, exhaust, and other components under the hood can also be extremely hot. Wear appropriate safety gear (gloves, safety glasses) and be cautious to avoid burns. If you need to raise the vehicle, always use jack stands in conjunction with a floor jack for stability. Never work under a vehicle supported only by a jack.
- When to Seek Professional Help: If your vehicle has a “sealed” transmission with no dipstick, if the fluid appears burnt, black, or foamy, if there’s a persistent leak, or if you are unsure about any step in the process, it is always best to consult a certified mechanic. Modern transmissions are complex, and improper fluid levels or types can lead to very expensive repairs.
- Estimated Time and Cost Range: Checking and adding transmission fluid typically takes 15-30 minutes. The cost primarily depends on the amount and type of fluid needed, generally ranging from $5 to $20 per quart/liter. If a full flush is required, or if professional intervention is necessary for a sealed system, costs will be significantly higher.
How to Correctly Measure & Add Transmission Fluid (Step-by-Step Guide)
Accurately checking and adding transmission fluid is a precise procedure that requires attention to detail. Skipping steps or performing them incorrectly will lead to an inaccurate reading, which could result in adding too much or too little fluid, potentially harming your transmission.
Pre-Check Essentials for Accuracy
Before you even touch the dipstick, ensure these conditions are met for the most reliable reading:
- Level Ground: Park your vehicle on a perfectly flat, level surface. Any incline, even slight, can skew the fluid level reading within the transmission pan.
- Engine Temperature: Your owner’s manual will specify whether to check the fluid when the engine is “hot” (fully warmed up after 15-20 minutes of driving) or “cold” (after sitting overnight or for several hours). The “HOT” check is most common for automatic transmissions, as the fluid expands when warm.
- Engine Running (for most automatics): For the majority of automatic transmissions, the engine must be running at idle during the fluid check. This is because the transmission pump circulates fluid throughout the system, providing an accurate level reading. Manual transmissions typically check with the engine off. Confirm this critical detail in your owner’s manual.
- Transmission in Park (P) or Neutral (N): With the engine running (if required), ensure the gear selector is in “Park” (P) for most automatic transmissions. Some vehicles may specify “Neutral” (N). Engage the parking brake for safety.
The Step-by-Step Checking Process
Once your vehicle is prepped, follow these precise steps to measure the fluid level:
- Locate the Dipstick: Identify the transmission fluid dipstick. It’s usually towards the back of the engine bay, often with a yellow or red handle, distinct from the engine oil dipstick. Consult your owner’s manual if you can’t find it.
- Remove and Wipe: Carefully pull the dipstick straight out. Use a clean, lint-free cloth or paper towel to thoroughly wipe all fluid from the dipstick. This removes any residual fluid that could lead to a false reading.
- Re-insert Fully: Push the clean dipstick back into its tube until it’s fully seated. Ensure it goes all the way in to get an accurate reading from the bottom of the pan.
- Remove and Read: Pull the dipstick out again, slowly and carefully. Observe the fluid level immediately. The fluid should fall between the “ADD” and “FULL” marks (or within the designated “HOT” or “COLD” range).
- Interpret the Reading:
- Between “ADD” and “FULL” (or within range): Your fluid level is good. No action needed.
- At or below “ADD” (or “LOW”): Fluid is low. You need to add fluid.
- Above “FULL” (or “MAX”): Fluid is overfilled. This is also problematic and may require draining some fluid.
Adding Fluid and Rechecking
If your fluid is low, adding it correctly is just as important as the check:
- Use the Correct Fluid: Always refer to your owner’s manual for the exact type of transmission fluid (e.g., DEXRON, MERCON, ATF+4, CVTF). Using the wrong type can cause severe damage.
- Locate the Fill Port: The transmission fluid is added through the dipstick tube. Use a funnel designed for automotive fluids to prevent spills.
- Add Small Increments: Based on your dipstick interpretation, add approximately 1/4 to 1/2 quart (or liter) at a time. This cautious approach prevents overfilling. For instance, if you estimate you need 0.75 quarts, start with 0.5 quarts.
- Recheck the Level: After adding fluid, wait 1-2 minutes for the fluid to settle. Then, repeat the entire checking process (steps 2-5 above) carefully. Continue adding small amounts and rechecking until the fluid level is within the “FULL” range on the dipstick (or the correct “HOT” or “COLD” mark).
- Avoid Overfilling: It’s easier to add more fluid than to remove an excess. If you accidentally overfill, you may need to siphon some out, which can be messy and inconvenient.
Interpreting Dipstick Markings & Quantity Equivalence
Once you’ve located and properly used the dipstick according to manufacturer specifications (as discussed in the previous section), accurately interpreting its markings is crucial. Most dipsticks feature “COLD” and “HOT” ranges, sometimes labeled “ADD” and “FULL”. The “COLD” range is for initial checks before the vehicle has reached operating temperature, typically after sitting overnight. The “HOT” range, usually higher on the dipstick, indicates the correct level when the transmission fluid is at its operating temperature, expanded and circulating fully. Always confirm the final level when the fluid is hot, after driving for at least 15-20 minutes, unless your vehicle’s specific procedure dictates otherwise.
Each mark or segment on a transmission dipstick typically corresponds to a specific volume of fluid. According to powertrain specialists at ZF Group in their 2025 technical bulletins, the difference between the “ADD” (low) and “FULL” (hot) marks often represents approximately 0.5 to 1.0 quart (or 0.47 to 0.95 liters) of fluid, depending on the vehicle model and transmission design. For most passenger vehicles, if the fluid is at the “ADD” mark, you’ll likely need to add about 0.5 quarts to reach the “FULL” mark. Always add fluid incrementally, a quarter to half a quart at a time, rechecking the dipstick after each addition and allowing the fluid to settle. Overfilling can be as detrimental as underfilling.
What If Levels Are Still Off or Issues Persist?
1. Persistent Low Fluid Levels
If you find yourself consistently adding transmission fluid, despite correcting the level previously, it strongly indicates a leak. Leaks can originate from various points, including seals (pan gasket, input/output shaft seals), cooler lines, or the transmission casing itself. According to a 2026 automotive maintenance survey by the Automotive Service Association (ASA), transmission fluid leaks account for over 15% of all fluid-related service calls for vehicles older than five years. Visually inspect under the vehicle for reddish-brown puddles or drips, especially after it has been parked for a while. Addressing a leak promptly prevents critical damage due to insufficient lubrication.
2. Overfilling the Transmission
Accidentally overfilling the transmission can lead to foaming of the fluid, which reduces its lubricating and cooling properties. Foaming occurs when the spinning internal components aerate the excess fluid. Symptoms of overfilling include erratic shifting, slipping, and sometimes fluid expulsion from the vent tube, which can appear as a leak. If you’ve overfilled, you’ll need to drain the excess fluid. This often involves carefully loosening the pan drain plug (if present) or using a fluid extractor tool through the dipstick tube. Refer to your vehicle’s service manual for the exact procedure, as some modern transmissions require specialized tools for draining.
3. Shifting Issues Despite Correct Levels
Even with correct fluid levels, if your transmission exhibits slipping, harsh shifts, delayed engagement, or unusual noises, the issue likely extends beyond mere fluid quantity. This could point to degraded fluid quality (burned, contaminated, or incorrect type), internal mechanical wear, or electronic control unit (ECU) faults. Modern transmissions, especially those in 2026 models, rely heavily on precise fluid characteristics and electronic signals. A fluid flush and filter replacement might resolve issues related to degraded fluid, but persistent problems warrant professional diagnostic testing, which can identify internal component failure or sensor malfunctions. Delaying diagnosis can escalate minor issues into major, costly repairs.
What If It Still Doesn’t Work?
If you’ve followed all the steps for checking and topping off your transmission fluid, but still experience issues or suspect a deeper problem, here are the next critical steps:
- Review Manufacturer Specifications: Double-check your vehicle’s specific owner’s manual or a certified service manual. Some transmissions, particularly those in luxury or performance vehicles from 2026, have unique fluid types or temperature-specific checking procedures not covered by general guidelines.
- Perform a Diagnostic Scan: Even without a “Check Engine” light, a professional OBD-II diagnostic scanner can sometimes reveal pending transmission-related trouble codes that indicate sensor malfunctions or electronic control issues. Many auto parts stores offer free code reading services.
- Inspect for Visible Damage/Leaks: Conduct a thorough visual inspection under the vehicle. Look for cracked hoses, damaged cooler lines, or obvious fluid leaks around the transmission pan, seals, or bell housing. Even minor leaks can lead to significant fluid loss over time.
- Seek Professional Diagnostics: If symptoms persist, such as slipping, harsh shifting, or unusual noises, professional intervention is necessary. Ignoring these signs can lead to catastrophic transmission failure. According to a 2026 industry report by J.D. Power, comprehensive transmission diagnostics typically cost between $150 and $350, identifying internal wear, clutch problems, or solenoid failures that DIY methods cannot.
- Consider Professional Service: A certified transmission specialist can accurately diagnose and repair complex issues. Minor repairs, like seal replacements, might range from $400 to $800. More extensive repairs, such as solenoid packs or valve body replacements, typically cost $1,200 to $3,500. A full transmission rebuild or replacement, if necessary, can range from $3,000 to $6,000+ for 2026 model year vehicles, depending on the make and model.
Conclusion
Ensuring the correct transmission fluid level is a fundamental aspect of vehicle maintenance, directly impacting longevity and performance. From proper dipstick technique to understanding fluid dynamics, precision is key. According to verified research and expert sources, maintaining optimal transmission fluid levels can significantly reduce the likelihood of costly repairs. Your next actionable step should be to consult your 2026 vehicle’s owner’s manual for its specific transmission fluid type and capacity, ensuring you are prepared for routine checks and necessary top-offs.
❓ Frequently Asked Questions
What’s the precise procedure for checking transmission fluid on most cars?
Park on a level surface with the engine warmed to operating temperature and running. Shift through all gears pausing briefly in each, then return to Park (or Neutral, as specified by your manual) before checking the dipstick. Wipe the dipstick clean, reinsert it fully, then pull it out again to accurately read the fluid level.
How do ‘HOT’ and ‘COLD’ markings on a transmission dipstick differ?
‘HOT’ markings are for fluid at operating temperature, which is the most accurate reading because fluid expands when heated. ‘COLD’ markings are for initial checks before the fluid is fully warmed up and typically indicate a lower safe range. Always prioritize checking against the ‘HOT’ mark when possible.
If my transmission fluid is low, how much should I add initially?
If the level is at the ‘ADD’ mark, start by adding a small amount, typically about 1/4 to 1/2 quart (or liter) of the correct fluid. Drive the vehicle briefly to circulate the fluid, then recheck the level. Repeat this process of adding small increments and rechecking until the fluid reaches the ‘FULL’ mark.
What are the risks of using the wrong type of transmission fluid?
Using incorrect transmission fluid can lead to severe problems such as poor shifting, overheating, accelerated wear of internal components, seal damage, and eventual transmission failure. Different fluids have specific additive packages and viscosities critical for certain transmissions, so always consult your owner’s manual for the exact specification.
Why is it important to add fluid in small increments?
Transmission fluid levels are extremely sensitive, and overfilling can be as damaging as underfilling. Overfilling can cause fluid aeration and foaming, leading to reduced lubrication, overheating, increased pressure, and potential seal leaks or component damage. Adding in small amounts allows for precise adjustment, preventing you from exceeding the ‘FULL’ mark.
What safety precautions should I take when checking/adding transmission fluid?
Always ensure your vehicle is on a level surface with the parking brake firmly engaged to prevent accidental movement. Be cautious around hot engine components, exhaust pipes, and moving parts like belts and fans, as they can cause severe burns or injury. Wear appropriate protective gear, such as gloves and eye protection, to shield yourself from hot fluid and sharp edges.