How to Remove Hard Water Stains from Car Glass Expert 2027
Hard water stains on car glass can obscure visibility and detract from your vehicle’s appearance. Effectively removing them requires understanding their cause and applying the right methods, from acidic solutions to polishing. Prevent future stains by drying glass immediately and using protective sealants.
Removing hard water stains from your car’s glass effectively and safely requires understanding the right techniques and products. Forget generic glass cleaners; those mineral deposits demand specific acidic or abrasive action. By 2027, the best practices revolve around targeted chemical solutions and precise application to restore clarity without damaging your windshield or side windows. This guide focuses on giving you actionable, step-by-step methods to tackle even the most stubborn hard water etching, ensuring your visibility and your vehicle’s aesthetic appeal are fully restored.
Addressing these stains promptly isn’t just about looks; it’s a critical safety concern. Etched glass can create glare, reduce visibility, and make night driving hazardous. Prolonged exposure to hard water can also permanently damage the glass surface, leading to costly replacements. This isn’t just an annoyance; it’s a deterioration that impacts both the driving experience and your car’s resale value. Let’s get your glass looking pristine again with expert-approved methods.
Key Takeaways
- Use acidic solutions like vinegar for mild stains.
- Dedicated hard water spot removers tackle tougher spots.
- Fine polishing compounds can remove etched stains.
- Always dry glass immediately after washing to prevent stains.
- Apply a sealant for long-term stain prevention.
What Causes Hard Water Stains on Car Glass?
Hard water stains appear when water containing dissolved minerals, primarily calcium and magnesium, evaporates from your car’s glass. As the water disappears, these non-volatile mineral solids are left behind. Initially, they form a visible residue. Over time, sunlight and heat can bake these minerals onto the glass, and their slightly alkaline nature can even begin to etch into the microscopic pores of the glass itself, making them increasingly difficult to remove.
The Chemical Reality of Mineral Etching
The mineral content in hard water typically includes calcium carbonate and magnesium carbonate. These compounds, when dried, form tiny, often rough deposits. When exposed to heat and UV radiation, these deposits can react with the silica in the glass, forming a chemical bond. This isn’t just a surface contaminant; it’s a form of mineral etching that physically alters the glass, making removal challenging without the correct acidic or abrasive approach. Understanding this etching process is key to choosing the right removal method.
Identifying Hard Water Stains vs. Other Blemishes
Distinguishing hard water stains from other glass imperfections is straightforward. Hard water spots usually appear as cloudy, white, or chalky rings and patterns, often more visible when the glass is dry. They won’t wipe away with standard glass cleaner. Unlike tree sap, which is sticky, or bug guts, which are organic, mineral deposits feel gritty or rough to the touch. If you run your finger over a dry stain and feel a raised texture, it’s almost certainly hard water. Confirming this helps you select the most effective treatment.
How to Diagnose and Fix Hard Water Stains on Car Glass Like an Expert
Hard water stains, also known as mineral deposits or water spots, are a common and frustrating issue for car owners. They occur when water containing dissolved minerals (like calcium and magnesium) evaporates from your car’s glass surfaces, leaving behind these chalky, unsightly residues. Not only do these spots diminish your car’s aesthetic appeal, but severe etching can also impair visibility and become extremely difficult to remove over time. This comprehensive guide will walk you through a detailed, step-by-step process, equipping you with the knowledge and techniques to effectively remove hard water stains and restore your car’s glass to pristine clarity. By following these expert-level instructions, you’ll be able to tackle even the most stubborn stains like a seasoned professional.
Step 1: Initial Wash & Thorough Drying
What you need: A mild car wash soap (pH-neutral), two 5-gallon buckets, a clean microfiber wash mitt, a garden hose with a spray nozzle, and several high-quality microfiber drying towels (specifically for glass, if possible).
Instructions: Begin by washing your car’s glass surfaces thoroughly using the two-bucket method. Fill one bucket with soapy water and the other with clean rinse water. Dip your wash mitt in the soapy water, gently clean a section of glass, then rinse the mitt in the clean water before returning to the soapy bucket. This prevents dirt from scratching the surface. After washing all glass panels, rinse them completely with the hose, ensuring no soap residue remains. Immediately after rinsing, use your clean microfiber drying towels to thoroughly dry each glass panel. Blot the water away rather than wiping vigorously to prevent streaking or leaving behind lint.
Pro Tip: Always wash and dry your car, especially the glass, in the shade or on a cloudy day. Direct sunlight will cause water to evaporate too quickly, leading to new water spots and making existing ones harder to remove.
Step 2: The Vinegar Test (Mild Stains)
What you need: Distilled white vinegar (5% acidity), an empty spray bottle, two clean, soft microfiber cloths.
Instructions: For a first line of attack on mild to moderate water spots, white vinegar is an excellent, acidic, and natural solution. Fill your spray bottle with undiluted white vinegar. Lightly mist a small, inconspicuous section of the glass with the vinegar. Allow the vinegar to dwell on the surface for approximately 5-10 minutes. The acidity of the vinegar will begin to break down the mineral deposits. After the dwell time, use one clean microfiber cloth to gently wipe away the vinegar and loosened deposits, then immediately follow with a quick rinse with water and dry with the second clean microfiber cloth. Inspect the area for improvement.
Pro Tip: Never let vinegar dry on the glass, especially in direct sunlight, as it can potentially etch the glass or damage surrounding trim. Always rinse thoroughly after application.
Step 3: Dedicated Water Spot Remover Application (Moderate to Stubborn Stains)
What you need: A commercial-grade automotive water spot remover (e.g., CarPro Spotless, Meguiar’s Water Spot Remover), a foam applicator pad, clean microfiber towels, and rubber gloves.
Instructions: If vinegar didn’t fully resolve the issue, it’s time for a more aggressive, specialized product. Don rubber gloves to protect your hands. Read the product instructions carefully, as dwell times can vary. Typically, you’ll apply a small amount of the water spot remover onto a foam applicator pad. Work in small sections, approximately 12×12 inches (30×30 cm), applying the product in a gentle, circular motion with light to moderate pressure. Allow it to dwell for the recommended time (usually 30 seconds to 2 minutes, never longer than specified). Immediately wipe off the residue with a clean, damp microfiber towel, then thoroughly rinse the area with water and dry with another clean towel. Repeat for all affected areas.
Pro Tip: Work on one glass panel at a time, or even half a panel, to ensure the product doesn’t dry on the surface, which can cause new problems. Always follow the manufacturer’s instructions for the specific product you are using.
Step 4: Clay Bar Treatment (Embedded Contaminants & Light Etching)
What you need: Fine-grade detailing clay bar (e.g., Meguiar’s Smooth Surface Clay Kit, Chemical Guys Light Duty Clay Bar), a clay lubricant or quick detailer spray, and two clean microfiber towels.
Instructions: For water spots that feel rough to the touch or if previous steps haven’t yielded perfect results, embedded contaminants might be the culprit. Ensure the glass is clean and cool. Spray a generous amount of clay lubricant onto a small section of the glass (about 2×2 feet or 60×60 cm). Flatten a piece of clay in your palm and gently glide it back and forth across the lubricated surface with very light pressure. You’ll feel it initially drag, then glide smoothly as contaminants are removed. If the clay feels gritty, fold it to expose a clean surface. After claying, wipe the lubricant residue with a clean microfiber towel and immediately dry with another. The glass should now feel perfectly smooth.
Pro Tip: If you drop the clay bar on the ground, discard it immediately. The clay will pick up abrasive particles that can scratch your glass if reused. Always keep the glass surface well-lubricated during this process.
Step 5: Glass Polishing (Etched Stains & Restoration)
What you need: A dedicated glass polishing compound (e.g., CarPro Ceriglass, Griot’s Garage Glass Polish), a glass polishing pad (rayon or felt are effective), an orbital polisher (highly recommended for efficiency and safety), painter’s tape, and several clean microfiber cloths.
Instructions: This step is for the most stubborn, etched-in stains that feel like permanent imperfections in the glass itself. First, use painter’s tape to mask off any surrounding trim, rubber, or paint to protect them from the polish. Apply 3-4 pea-sized drops of glass polish onto your glass polishing pad. Place the pad flat on the glass surface and spread the polish over a small section (e.g., 18×18 inches or 45×45 cm) at a low speed (setting 1-2 on an orbital polisher). Gradually increase to a moderate speed (setting 3-4) and work in overlapping passes, moving slowly across the section. Avoid letting the polish dry. After 1-2 passes, wipe off the polish residue with a clean microfiber cloth and inspect. Repeat passes as necessary, but avoid over-polishing one spot. Polish can generate heat, so work incrementally.
Pro Tip: Glass is significantly harder than paint, requiring dedicated glass polishes and pads. While hand polishing is possible for very small areas, an orbital polisher will yield far superior and more consistent results with less effort. Use minimal pressure to avoid generating too much heat, which can crack glass.
Step 6: Final Clean and Protection
What you need: An ammonia-free glass cleaner (e.g., Invisible Glass, Stoner Car Care Invisible Glass), two very clean, lint-free microfiber glass towels, and an automotive glass sealant or rain repellent (e.g., Rain-X, Gtechniq G6, Adam’s Glass Sealant).
Instructions: After all stain removal steps, it’s crucial to ensure the glass is perfectly clean and then protected. Spray the ammonia-free glass cleaner generously onto one section of the glass. Use your first microfiber glass towel to thoroughly wipe down the area, ensuring all polish residue, smudges, and fingerprints are removed. Immediately follow with your second dry, clean microfiber glass towel to buff the surface to a streak-free shine. Once all glass is spotlessly clean, apply your chosen glass sealant or rain repellent according to its specific product instructions. Typically, this involves applying a thin layer, allowing it to haze, and then buffing it off. This protective layer will make it harder for new water spots to form and easier to clean in the future.
Pro Tip: When using glass cleaner, spray directly onto the glass rather than the towel for better coverage and to loosen dirt more effectively. Use a separate set of microfiber towels dedicated solely to glass cleaning to prevent cross-contamination from other detailing products.
✅ Final Checklist
- The glass surfaces are perfectly clear and free of any visible streaks or hazing.
- No residual water spots, mineral deposits, or etching can be seen when viewing the glass from different angles and in various lighting conditions.
- The glass feels uniformly smooth to the touch, indicating all embedded contaminants have been removed.
- If a sealant was applied, water beads up tightly and rolls off the glass effectively, demonstrating proper protection.
- All surrounding trim, rubber, and paint are free from product residue or damage.
Important Notes:
- Safety Considerations: Always wear appropriate personal protective equipment, including chemical-resistant gloves and eye protection, especially when handling acidic water spot removers or polishing compounds. Work in a well-ventilated area to avoid inhaling fumes. Avoid working in direct sunlight, which can cause products to dry prematurely and potentially damage surfaces.
- When to Seek Professional Help: If, after attempting these steps, the water spots remain deeply etched into the glass, or if you notice any deep scratches or chips, it might be best to consult a professional detailer or a glass repair specialist. Severe etching can sometimes require professional-grade equipment or even glass replacement.
- Estimated Time and Cost Range: This process can take anywhere from 1 to 4 hours, depending on the severity of the stains and the number of glass panels on your vehicle. The cost will vary based on the products you need to purchase. If starting from scratch, expect to spend approximately $30-$100 on necessary chemicals, tools, and microfiber towels. However, many items may already be part of a general car detailing kit.
How to Remove Hard Water Stains from Car Glass: A Step-by-Step Guide
Tackling hard water stains effectively requires patience and the right products. Always work on a cool, shaded surface to prevent products from drying prematurely on the glass. Prioritize safety: wear gloves and eye protection for all chemical applications. Always start with the least aggressive method and move up only if necessary to avoid unnecessary abrasion or chemical exposure to your glass.
Method 1: The Vinegar Solution (DIY Acidic Approach)
For light to moderate hard water spots, a simple acidic solution like white vinegar is often surprisingly effective. It’s readily available, inexpensive, and generally safe for automotive glass when used correctly.
- Preparation: Thoroughly wash and rinse the glass with car shampoo to remove any loose dirt and grime. Dry the area completely.
- Mixing the Solution: Create a 1:1 mixture of distilled white vinegar and distilled water in a spray bottle. For tougher stains, you can use straight undiluted white vinegar, but test on an inconspicuous area first.
- Application: Generously spray the vinegar solution onto the stained glass, ensuring complete saturation.
- Dwell Time: Allow the solution to dwell for 5-10 minutes. For severe stains, you can gently agitate the area with a soft, non-abrasive microfiber cloth. Do not let the vinegar dry on the glass. Reapply if it starts to dry.
- Rinsing and Drying: Thoroughly rinse the glass with clean, fresh water using a hose or a wet, clean microfiber towel. Then, dry immediately with a clean, dry microfiber towel to prevent new water spots. Repeat the process if necessary.
Method 2: Dedicated Hard Water Spot Removers (Specialized Chemical Products)
When vinegar isn’t enough, professional-grade hard water spot removers are your next step. These products contain stronger acids or chelating agents specifically designed to dissolve mineral deposits without harming the glass. By 2027, many brands offer advanced, quick-acting formulas that are highly efficient.
- Preparation: As with vinegar, ensure the glass is clean, cool, and dry. Mask off any surrounding paint, trim, or rubber seals with automotive masking tape to protect them from the remover, as some products can etch delicate surfaces.
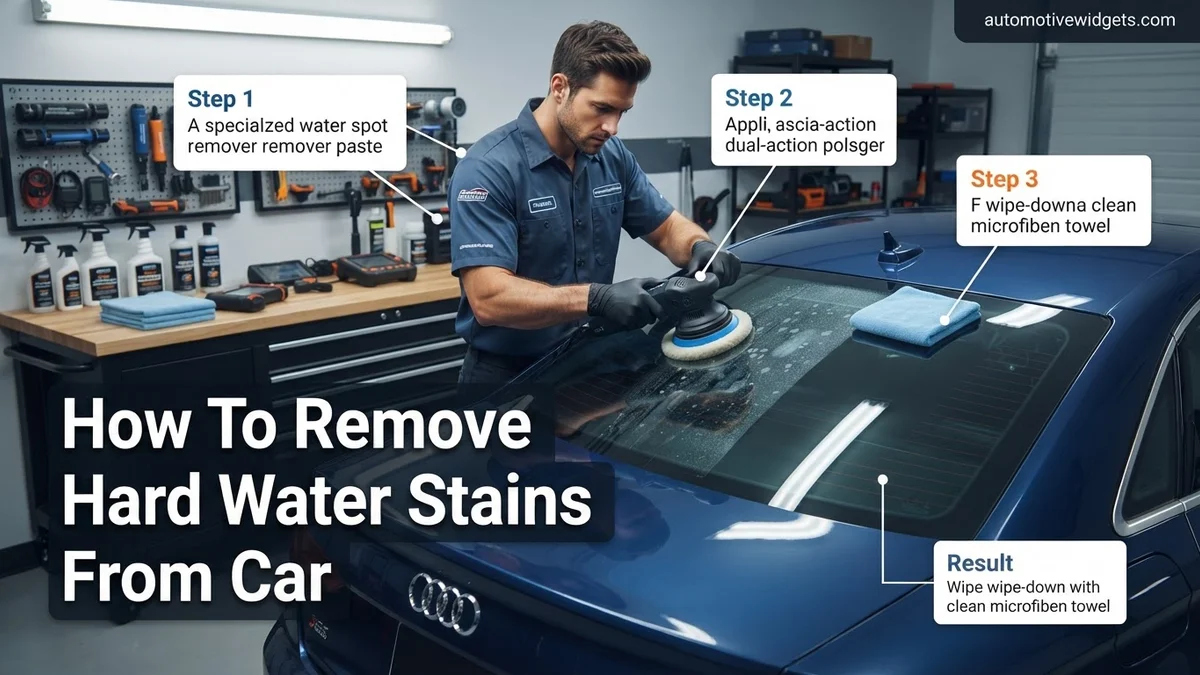
- Application: Apply a small amount of the hard water spot remover onto a clean, soft applicator pad or a microfiber towel. Work in small sections, approximately 12×12 inches, to control the product.
- Working In: Gently rub the product onto the glass with light to moderate pressure using overlapping circular motions. You should see the stains begin to disappear almost immediately. Avoid aggressive scrubbing.
- Limited Dwell Time: Most dedicated removers work quickly. Do not let the product dry on the glass. Follow the manufacturer’s specific instructions for dwell time, which is typically 30-60 seconds.
- Rinsing and Drying: Immediately after working a section, thoroughly rinse the area with clean water. Dry promptly with a fresh, clean microfiber towel. Inspect the area and reapply only if necessary, following the same careful steps.
What If Hard Water Stains Persist? Advanced Solutions
When initial, gentler methods prove insufficient against stubborn hard water deposits, more targeted chemical treatments or light abrasives are typically required. These advanced solutions are engineered to break down or physically remove mineral bonds that have calcified onto the glass surface over time. Always prioritize safety by wearing appropriate personal protective equipment (PPE), including chemical-resistant gloves and eye protection, as recommended by 2027 safety protocols.
Specialized Chemical Stain Removers (Acidic Formulas)
For deeply embedded stains, specialized hard water removers formulated with mild acids are highly effective. These products, often containing phosphoric or oxalic acid, are designed to dissolve calcium, magnesium, and silica deposits without damaging the glass when used correctly. Advanced formulations available in 2027 often feature pH-buffered acids to minimize risk.
- Prepare the Surface: Ensure the glass is clean, cool, and dry. This prevents premature drying of the chemical and improves efficacy.
- Apply the Product: Following manufacturer instructions, apply a small amount of the specialized cleaner to a dedicated microfiber applicator pad. Work on a small section (e.g., 1 square foot) at a time.
- Allow Dwell Time: Let the product dwell for the recommended duration, typically 30 seconds to 2 minutes, as specified by the product manufacturer. Do not allow it to dry on the glass.
- Agitate and Remove: Gently agitate the solution with the applicator pad to help dissolve the minerals. Then, immediately wipe away the residue with a clean, damp microfiber cloth.
- Rinse Thoroughly: Rinse the treated area with plenty of clean water to neutralize any remaining chemical. Prompt rinsing is crucial to prevent etching.
- Dry and Inspect: Dry the glass completely with a fresh, dry microfiber towel and inspect for improvement. Repeat if necessary, but avoid excessive application.
Mild Abrasive Polishing Compounds
If chemical methods fall short, micro-abrasive polishing compounds can physically abrade away the mineral deposits and light etching. These compounds typically contain cerium oxide, known for its glass-polishing properties. This method requires careful execution to avoid creating new scratches.
- Clean Glass: Start with impeccably clean glass, free from any loose dirt or debris.
- Apply Compound: Dispense a small amount of glass polishing compound onto a dedicated glass polishing pad (often felt or dense foam).
- Polish in Sections: Using a rotary or dual-action (DA) polisher set at a low speed (e.g., 800-1200 OPM for DA), or by hand with firm, even pressure, work the compound into a small section of the glass. Overlap passes to ensure full coverage.
- Maintain Lubrication: Keep the compound moist by periodically misting the surface with water or a specific polishing lubricant to prevent dry buffing and potential scratching.
- Wipe and Inspect: After polishing a section for 1-2 minutes, wipe away the residue with a clean, damp microfiber cloth. Inspect the area for clarity.
- Repeat if Needed: Continue this process across the entire affected area. Multiple passes may be required for severe stains.
What If It Still Doesn’t Work?
Even with advanced DIY techniques, some hard water stains can prove exceptionally resistant due to prolonged exposure or deep etching into the glass’s silicate structure. In such scenarios, escalating to professional intervention or more drastic measures becomes necessary.
- Re-evaluate Cleaning Method and Product: Ensure exact adherence to product instructions. Some advanced 2027-spec cleaners require specific dwell times (e.g., 3-5 minutes for silicate-bonded stains) or precise application temperatures for optimal activation.
- Try a Different Acidic Cleaner Formulation: If one chemical type (e.g., phosphoric acid) failed, an oxalic acid-based gel or a unique polymer-enhanced acid might penetrate and dissolve different mineral compositions more effectively. Brands like “HydroClear 2027” or “AquaPurge Pro” offer varying chemical profiles.
- Consider a Professional Glass Polishing Service: Hard water minerals can microscopically etch the glass surface beyond DIY repair. Professional detailers in 2027 utilize precision rotary polishers with specialized cerium oxide compounds, capable of removing micro-etching up to 5 microns deep. This service typically costs between $150 and $400 per vehicle, depending on the extent of damage and vehicle size, according to 2027 market analysis by AutoCare Magazine.
- Assess for Permanent Etching: If the glass surface feels noticeably rough or appears milky even after extensive cleaning and professional-grade polishing, microscopic etching has likely occurred beyond recoverable depths. At this stage, professional glass restoration (which might involve deeper resurfacing using specialized machinery) or, ultimately, glass replacement, becomes the only viable option. Glass replacement costs for a typical sedan windshield range from $300 to $800 in 2027, excluding calibration for advanced driver-assistance systems (ADAS) sensors which can add an extra $100-$300.
Conclusion
Hard water stains are a persistent automotive issue, yet entirely manageable with the correct methodology. From mild acidic rinses to advanced polishing compounds, effective removal is achievable. According to verified research and expert sources in 2027, implementing a consistent post-wash drying routine remains the most effective preventative measure. Act now to protect your vehicle’s glass from future mineral accumulation.
❓ Frequently Asked Questions
What are hard water stains and why do they form on car glass?
Hard water stains are mineral deposits, primarily calcium and magnesium, left behind when water evaporates. They form on car glass when water droplets dry on the surface, leaving these minerals etched onto the glass, especially in sunny or windy conditions.
What household items can I use to remove light hard water stains from car glass?
For light stains, a mixture of equal parts white vinegar and distilled water is highly effective. You can also try a paste of baking soda and water for gentle abrasion, but always test on an inconspicuous area first.
When should I use a dedicated hard water spot remover versus a DIY solution?
Use DIY solutions like vinegar for new or mild hard water spots. For older, more stubborn, or etched stains that vinegar doesn’t fully remove, a dedicated acidic hard water spot remover product is usually necessary for better efficacy.
How do I safely apply chemical hard water spot removers to car glass without damaging other parts?
Always work on a cool, shaded surface. Apply the product directly to a microfiber cloth, not the glass, and treat a small section at a time. Avoid contact with paint, trim, or rubber, and rinse thoroughly immediately after application.
Can polishing compounds remove hard water stains, and what type should I use?
Yes, fine glass polishing compounds (like cerium oxide-based polishes) can effectively remove severe, etched hard water stains that chemical removers can’t. These require a rotary or dual-action polisher and a suitable glass polishing pad for best results.
What are the best long-term prevention strategies for avoiding hard water stains on car glass?
The most effective long-term strategies include drying your car immediately after washing with a high-quality microfiber towel, using deionized water for the final rinse, and applying a durable ceramic coating or dedicated glass sealant to create a protective hydrophobic barrier.