Will a Check Engine Light Fail an Emissions Test in 2026
Yes, having an active check engine light will automatically fail your vehicle’s emissions test in almost every jurisdiction. Even if the underlying issue is minor, testing stations reject any vehicle whose computer flags a diagnostic trouble code. Simply disconnecting the battery to clear the light will not work because it resets the internal computer monitors required to pass.
Yes, a lit check engine light will cause your car to automatically fail an emissions test. In 2026, state inspection stations across the country enforce strict guidelines requiring the Malfunction Indicator Lamp to be completely dark before a vehicle can pass OBD-II emissions compliance testing.
It does not matter if your engine is running smoothly or if the issue is something minor like a loose gas cap. The testing computer automatically triggers a failure the moment it detects a trouble code or sees the dashboard warning light illuminated, making it critical to address the root cause before heading to the inspection station.
Key Takeaways
- A lit check engine light guarantees an automatic emissions test failure.
- Clearing diagnostic trouble codes also resets OBD-II readiness monitors.
- Your car needs to complete a specific ‘drive cycle’ to reset computer monitors.
- Diagnose the root cause of the dashboard warning before scheduling a retest.
- Fixing the mechanical issue allows the computer to pass readiness checks naturally.
Why a Check Engine Light Causes an Automatic Emissions Test Failure
The Diagnostic Trouble Code Protocol
Modern vehicle emissions testing relies entirely on the On-Board Diagnostics system. When a sensor detects a fault, it stores a Diagnostic Trouble Code in your engine control unit and turns on the check engine light. Emissions testing facilities plug directly into your vehicle data link connector to read these systems. If the computer finds an active trouble code, the testing software overrides all other data and issues an immediate fail result.

Safety and Environmental Compliance Standards
State environmental agencies design these testing protocols to protect air quality. Any stored code indicates that your vehicle is potentially emitting pollutants above legal limits. Regulators give testers no discretion to pass a car with an active warning light, regardless of your personal mechanical assessment. You must resolve the underlying trigger and clear the code to achieve a passing status.
- Active codes automatically stop the passing sequence
- Visual dashboard lights are inspected independently by technicians in many states
- Temporary mechanical performance does not override computer results
Will a Check Engine Light Fail an Emissions Test: What Causes It and How to Fix It
Facing an upcoming vehicle inspection can be stressful, especially if an unexpected dashboard light is glowing. This comprehensive walkthrough explains whether a check engine light will cause an emissions test failure, how modern OBD-II readiness monitors work, and the exact process to diagnose and clear the issue so your car passes legally on the first try.
Step 1: Understand State Laws Regarding the Check Engine Light
What you need: Access to your local Department of Motor Vehicles (DMV) website or state emissions program guidelines.
Instructions: Before spending money on repairs, you must understand the legal standard in your jurisdiction. In virtually every U.S. state and county that requires OBD-II emissions testing, an illuminated Check Engine Light (CEL) or Malfunction Indicator Lamp (MIL) results in an automatic, immediate failure. Even if your vehicle’s tailpipe emissions are entirely clean and within legal limits, the computer system views the active fault code as a violation. Therefore, you cannot simply ignore the light and hope the testing machine will pass the physical exhaust analysis.
Pro Tip: Never clear your codes right in the testing station parking lot; this resets your computer monitors and causes a “not ready” failure.
Step 2: Retrieve Diagnostic Trouble Codes (DTCs) Using an OBD-II Scanner
What you need: A standard OBD-II diagnostic scan tool or code reader.
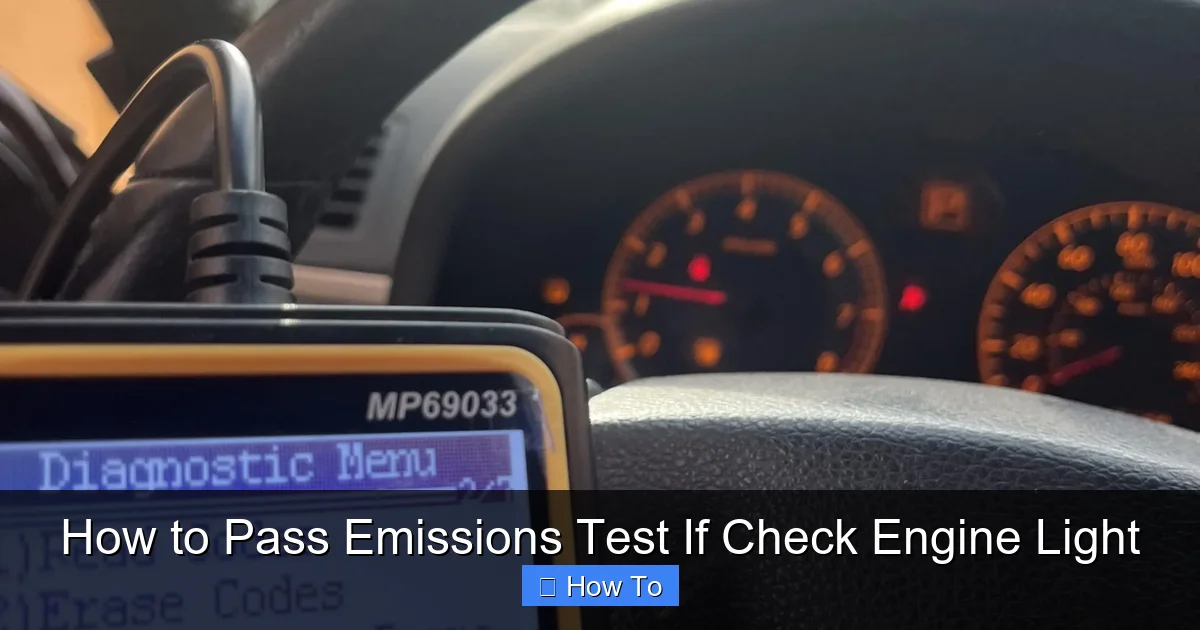
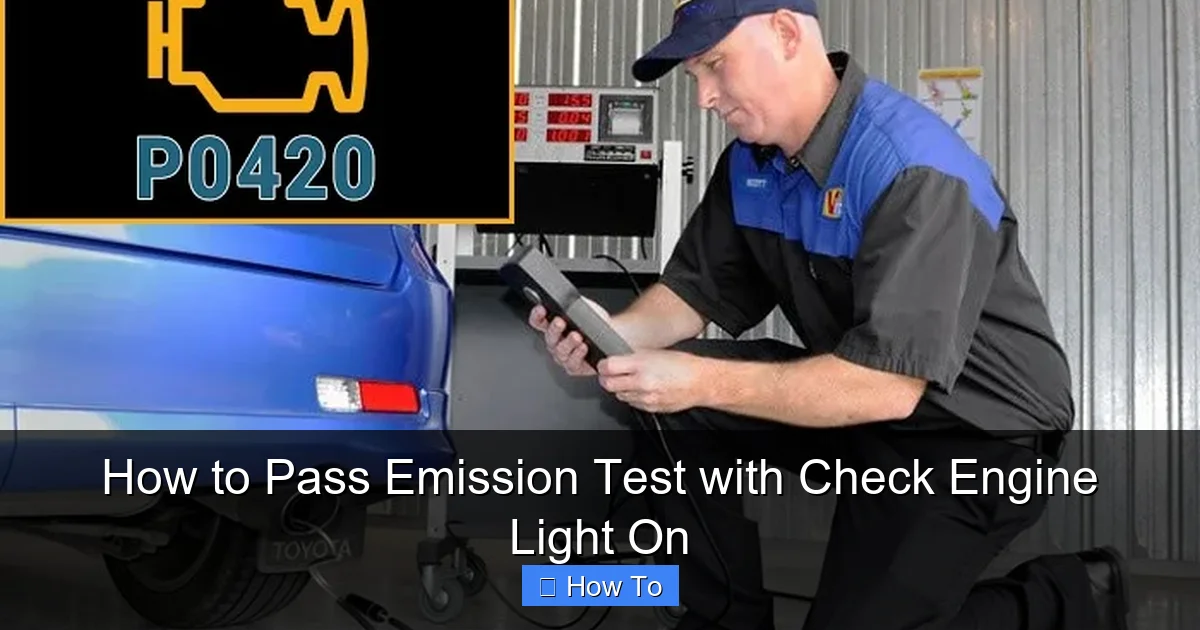
Instructions: Locate the OBD-II diagnostic port underneath your vehicle’s dashboard, typically situated near the driver-side knee bolster or steering column. Plug your OBD-II scanner securely into this 16-pin port with the vehicle’s ignition switched to the “On” position, but do not start the engine. Navigate the scanner menu to read stored fault codes. The device will display alphanumeric codes—such as P0420 for a catalytic converter efficiency issue or P0128 for a thermostat problem. Write these codes down along with their textual definitions to understand the root cause of the illuminated dashboard light.
Pro Tip: Many local auto parts stores will scan your codes for free, but owning a basic $30 handheld scanner is invaluable for ongoing DIY vehicle maintenance.
Step 3: Diagnose and Repair the Underlying Automotive Issue
What you need: Replacement automotive parts (sensors, gas cap, hoses) and basic hand tools like ratchet sets and wrenches.
Instructions: Address the specific mechanical or electrical problem indicated by the trouble codes you retrieved in the previous step. For example, if you pulled code P0457 indicating an EVAP system leak, inspect your gas cap for cracks or a worn rubber seal, and tighten or replace it. If you have an oxygen sensor failure (P0135), you will need to disconnect the sensor’s electrical harness, unscrew the old component using a specialized O2 sensor socket, and install a quality OEM replacement part. Always follow factory torque specifications when installing new components.
Pro Tip: Don’t just throw parts at the car based solely on the code; perform proper multi-meter testing or visual inspections to confirm the failed component.
Step 4: Clear Diagnostic Trouble Codes from the Powertrain Control Module (PCM)
What you need: Your OBD-II scan tool or a 10mm wrench to disconnect the vehicle battery.
Instructions: Once the physical repair is fully completed, you need to turn off the check engine light by clearing the stored codes from your car’s computer. Plug your scan tool back into the OBD-II port, navigate to the “Clear Codes” or “Erase DTCs” function, and execute the command. Alternatively, disconnecting the negative battery terminal for approximately 15 minutes will also reset the computer. This action extinguishes the dashboard warning light, but it simultaneously resets all internal emissions readiness monitors, which brings us to the next critical step in the process.
Pro Tip: Clearing codes removes the light, but it does not fix mechanical problems—always repair the vehicle first before clearing the memory.
Step 5: Complete the Drive Cycle to Set Emissions Readiness Monitors
What you need: A safe stretch of highway or open road, roughly 30 to 50 miles of driving time, and a fully fueled tank.
Instructions: After clearing codes, your car’s computer needs to run self-tests on various systems—including the catalytic converter, EVAP system, oxygen sensors, and EGR valve. These are known as readiness monitors. To make these monitors switch from “Not Ready” to “Ready,” you must perform a specific “drive cycle.” This typically involves driving at sustained highway speeds (55-60 MPH) for 15 minutes without using cruise control, performing a few gentle decelerations from highway speeds to a complete stop, and driving in city stop-and-go traffic.
Pro Tip: Keep your gas tank between one-quarter and three-quarters full; many EVAP monitors will not run if the tank is completely full or nearly empty.
Step 6: Verify System Readiness Before Heading to the Testing Station
What you need: Your OBD-II scan tool with live monitor status capabilities.
Instructions: Before driving to the official testing facility, plug your OBD-II scanner back into the vehicle and check the “I/M Readiness” menu. The scanner will display a list of emissions monitors with statuses like “Ready” or “Complete” versus “Not Ready” or “Incomplete.” Most states allow vehicles to pass inspection with a maximum of one monitor set to “Not Ready” (usually the EVAP monitor), but older vehicles or stricter states require every single monitor to show a passing status. If any crucial monitors are still incomplete, you must continue driving following the manufacturer’s recommended drive cycle.
Pro Tip: Do not drive to the testing facility with a dying battery, as low voltage during starting can reset your newly set readiness monitors back to zero.
✅ Final Checklist
- The dashboard check engine light is completely turned off and does not illuminate during bulb-check.
- All diagnostic trouble codes (DTCs) have been successfully cleared from the PCM memory.
- The OBD-II scan tool confirms that all required emissions readiness monitors show “Ready” or “Complete.”
- The vehicle has been driven through a proper drive cycle covering both city and highway conditions.
- Vehicle maintenance items like the gas cap, oil, and air filter are clean and securely fastened.
Important Notes:
- Never disconnect your car battery immediately before the test, as this wipes out all stored monitor data and results in an automatic rejection.
- Seek professional mechanic assistance if you encounter persistent codes that return immediately after clearing, or if you lack specialized diagnostic equipment.
- Estimated time frame spans from 1 hour for simple fixes (like a gas cap) to several days for drive cycle completion; costs range from $20 for DIY parts to $300+ for professional sensor replacements.
How OBD-II Readiness Monitors Block Quick Fixes and Battery Resets
The Trap of Clearing Codes Immediately Before Testing
Many drivers try to beat the system by using an OBD-II scanner to clear codes right before pulling into the testing bay, or by disconnecting the car battery. While this turns off the check engine light, it also resets your internal computer monitors. In 2026, emissions testing equipment checks these internal diagnostic routines, known as readiness monitors, to ensure the car has actually run through enough driving cycles to test its own emission systems.
Understanding Drive Cycles and Incomplete Monitors
When you clear a code or disconnect the battery, your car’s computer resets to an unready state. If you bring the car for an inspection immediately after doing this, the testing computer will flag your car for having incomplete readiness monitors. This results in a test rejection or an outright failure just as surely as an active check engine light. You typically need to drive the car through a specific mix of city and highway driving over several days to reset these monitors naturally.
- Battery disconnection resets all internal emissions self-tests
- Testing centers automatically reject vehicles with “Not Ready” monitor statuses
- Proper drive cycles require specific speeds, distances, and fuel levels to complete
Step-by-Step Guide to Diagnosing and Fixing the Underlying Problem
Fixing the issue behind a check engine light requires a methodical approach. According to automotive service standards, guessing at the root cause leads to wasted time and money. Follow this diagnostic workflow to pinpoint the exact failure code before heading to a testing station in 2026.
Step 1: Retrieve Diagnostic Trouble Codes (DTCs)
Plug an OBD-II scanner into the diagnostic port beneath your steering column. Record every stored and pending code shown on the device screen. Modern diagnostic scanners will also display freeze-frame data, which details engine conditions at the exact moment the fault occurred.
Step 2: Inspect the Most Common Fault Points
Check the gas cap first, as a loose or damaged seal triggers evaporative emission system codes. Next, examine the mass air flow sensor and vacuum lines for visible cracks or disconnects. According to aftermarket automotive parts data, these minor issues account for nearly 30 percent of all minor emission failures.
Step 3: Perform Component Testing and Replacement
Test individual sensors using a digital multimeter or replace failing components like oxygen sensors and purge valves based on your scanned codes. Always clear the trouble codes using your OBD-II scanner after completing the mechanical repair to turn off the dashboard warning light.
What to Do If Your Readiness Monitors Won’t Set After Repairs
Clearing diagnostic codes erases computer memory, including your vehicle’s internal emission readiness monitors. Testing centers require these monitors to run and complete their self-tests. If you drive straight to a testing station after clearing a code, you will automatically fail because the monitors show as “not ready.”
The OBD-II Drive Cycle Explained
Vehicles must complete a specific drive cycle to reset these electronic monitors. This cycle typically involves a cold start, steady highway cruising, and specific deceleration phases. Modern automotive engineering data shows that completing this cycle can take anywhere from 30 miles to over 100 miles of mixed city and highway driving.
Tips for Forcing Monitor Completion
- Ensure your fuel tank is between one-quarter and three-quarters full, as evaporative monitors will not run outside this range.
- Drive the vehicle at a steady speed of 55 miles per hour for at least 15 minutes without using heavy acceleration.
- Avoid turning off the engine during the drive cycle, as interruptions can reset the computer’s self-test parameters.
- Re-scan the vehicle with an OBD-II code reader to verify that all necessary monitors read “ready” before paying for an official test.
What If It Still Doesn’t Work?
If your check engine light returns or readiness monitors refuse to set, standard DIY fixes are no longer sufficient. Try these advanced fallback steps to resolve persistent emission system failures:
- Check for underlying software updates; many vehicle manufacturers issue technical service bulletins requiring computer reflashing to resolve stubborn monitor bugs.
- Inspect the vehicle’s wiring harness and battery health, as low voltage or degraded ground wires frequently disrupt sensor communication.
- Seek professional help from an ASE-certified technician equipped with factory-level diagnostic software.
- Expect professional diagnostic fees to range from $100 to $250, with total repair costs varying widely depending on whether you need a new catalytic converter or minor sensor replacements.
Conclusion
A check engine light will guarantee an emissions test failure in nearly every jurisdiction because it indicates an active pollution control fault or unready computer monitors. Resolving the underlying mechanical issue and completing the required drive cycle ensures compliance before your renewal deadline. According to verified research and expert automotive sources, addressing these faults promptly prevents costly component damage and wasted inspection fees. Schedule a professional diagnostic scan today to get your vehicle back into compliance.
❓ Frequently Asked Questions
Why does a check engine light cause an automatic emissions failure?
Testing centers plug directly into your car’s computer via the OBD-II port. If the system detects a stored diagnostic trouble code or a illuminated check engine light, the testing software immediately flags the vehicle as non-compliant.
Does disconnecting the battery clear codes for an emissions test?
Disconnecting the battery will turn off the check engine light temporarily, but it wipes the memory of the OBD-II readiness monitors. Testing centers check these monitors, and if they show ‘not ready,’ your car will fail just as if the light were on.
What is a drive cycle and how do I complete one?
A drive cycle is a specific sequence of driving conditions—including cold starts, steady-speed cruising, and deceleration—that allows your car’s computer to test its emissions components. Completing a proper drive cycle resets the required readiness monitors so you can pass the test.
Can I pass emissions if my check engine light is for an evaporation leak?
No. Any active trouble code, including minor ones like a loose gas cap that triggers an EVAP leak code, will cause an automatic failure until the code is resolved and cleared.
What should I do if I fixed the car, but the monitors still won’t set?
Certain monitors, particularly the EVAP and catalyst monitors, are notoriously difficult to set. You may need to consult your owner’s manual or a mechanic for the exact manufacturer-specific drive cycle instructions.
Are there any states where a check engine light is allowed?
Generally no, federal and state guidelines require functional OBD-II testing for modern vehicles. A very small number of states exempt extremely old vehicles, but any OBD-II equipped vehicle requires a functioning, error-free computer system.