How Do You Remove Water Spots From Car Windows How to 2027
Effectively removing water spots from car windows involves understanding their cause and applying appropriate methods like vinegar solutions or dedicated removers. For stubborn, etched spots, a mild polish might be necessary. Preventing future spots requires immediate drying and proper protection.
Removing stubborn water spots from your car windows efficiently is entirely achievable with the right techniques and products available in 2027. You don’t need expensive detailing services for most cases. The key is understanding what causes these unsightly marks and then applying targeted removal methods, which range from simple DIY solutions to specialized chemical removers for etched spots.
Clean, clear windows dramatically improve visibility and your vehicle’s overall appearance. Ignoring water spots allows mineral deposits to etch deeper into the glass over time, making them exponentially harder to remove. Addressing them promptly not only restores clarity but also protects your window integrity for the long term.
Key Takeaways
- Vinegar is effective for light water spots.
- Use dedicated removers for tougher deposits.
- Polish or clay bar can fix etched spots.
- Dry windows immediately to prevent spots.
- Apply sealant for lasting protection.
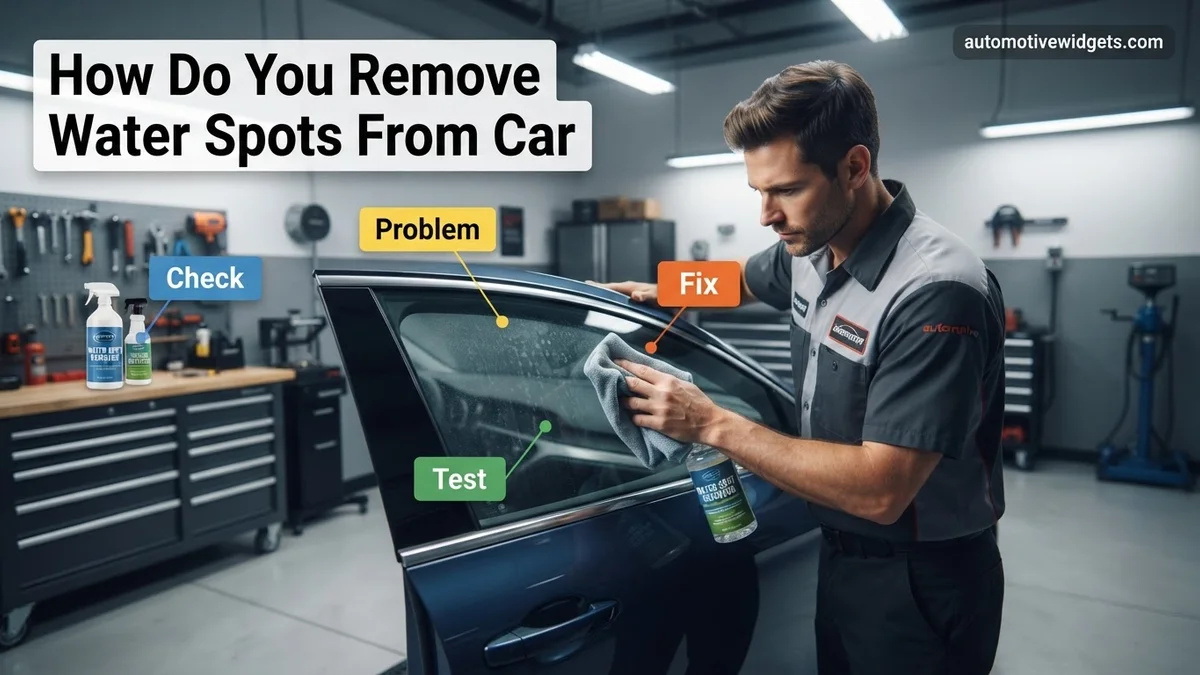
What Causes Water Spots on Car Windows?
Water spots are primarily mineral deposits left behind when water evaporates from your car’s glass surfaces. This commonly occurs after rain, sprinkler overspray, or washing your car without immediate drying. The dissolved minerals, such as calcium, magnesium, and bicarbonates, remain on the surface as hard, crusty rings.
Understanding Hard Water and Mineral Deposits
Your tap water or even rainwater contains varying levels of dissolved solids, making it “hard” or “soft.” The harder the water, the more minerals it leaves behind. When exposed to sunlight, these minerals bond to the glass. Ignoring them allows them to bake onto the surface, creating a more challenging removal task. In 2027, advanced water filtration systems in homes can reduce this issue, but external sources remain a concern.
- Light Water Spots: These are fresh, superficial deposits that haven’t fully bonded. They often appear as a hazy film or faint rings.
- Embedded Water Spots: These have had some time to bond to the glass, requiring more effort than a simple wash. They are visible even when the window is dry.
- Etched Water Spots: The most severe type. The minerals have chemically reacted with the glass, causing permanent damage. These often feel rough to the touch and can distort light. This level may require professional intervention or glass polishing.
Recommended Products for Identification and Prevention
Having the right tools helps both in identification and initial removal. While prevention is ideal, life happens.
- Microfiber Towels: Always use high-quality, plush microfiber for drying to prevent new spots and for applying solutions.
- Distilled White Vinegar: A common household acid, excellent for light to embedded spots due to its ability to dissolve mineral deposits.
- Isopropyl Alcohol (IPA): Good for removing oily residues that might mask spots or preparing the surface.
- Dedicated Water Spot Removers: Brands like CarPro Spotless 2.0 or Chemical Guys Heavy Duty Water Spot Remover are formulated with specific acids for tougher deposits.
- Clay Bar & Lubricant: For surface contaminants and lightly embedded minerals that sit on top of the glass.
- Glass Polish: Products like Meguiar’s M205 or cerium oxide polishes can address actual etching.
Water Spots Made Easy: Your Essential Action Plan
Unsightly water spots on your car windows can diminish your vehicle’s appearance and, more importantly, impair visibility, especially when driving into the sun. These mineral deposits, often left behind after hard water evaporates, can etch into the glass over time, becoming increasingly difficult to remove. This comprehensive guide will walk you through various techniques, from simple home remedies to advanced detailing methods, ensuring you can effectively tackle any water spot challenge and restore crystal-clear vision to your car’s glass.
Step 1: Initial Cleaning and Assessment
What you need: Two buckets, car wash soap (pH-neutral), microfibre wash mitt, clean microfibre drying towels, hose with running water, good lighting.
Instructions: Begin by thoroughly washing all car windows, including the windshield, side windows, and rear window. Fill one bucket with a car wash soap solution and the other with clean rinse water. Using your wash mitt, gently wash the glass surfaces to remove loose dirt, dust, and grime. Rinse thoroughly with water, ensuring no soap residue is left behind. After rinsing, dry the windows completely with a clean, soft microfibre towel. Once dry, carefully inspect the windows under good lighting (daylight is ideal) to determine the severity and type of water spots. Are they light, hazy film or distinct, crusty mineral deposits?
Pro Tip: Always wash the windows first to avoid scrubbing abrasive dirt particles into the glass, which could cause scratches. Drying immediately after rinsing prevents new water spots from forming.
Step 2: Gather Your Tools & Personal Protection
What you need: Chemical-resistant gloves, safety glasses, spray bottle, distilled white vinegar, distilled water, several clean microfibre towels, dedicated automotive glass cleaner, automotive clay bar kit (lubricant and clay), dedicated automotive water spot remover (acid-based), optional: fine glass polish, polishing pad, orbital polisher.
Instructions: Before starting any treatment, gather all necessary supplies. This ensures a smooth and uninterrupted process. For your personal safety, always wear chemical-resistant gloves and safety glasses, especially when working with acid-based water spot removers. Prepare your distilled white vinegar solution by mixing equal parts vinegar and distilled water in a spray bottle. Have multiple clean microfibre towels on hand, designated for different products (e.g., one for vinegar, one for rinse, one for drying). Ensure your work area is well-ventilated if using stronger chemical products. Having everything organized will save time and prevent cross-contamination.
Pro Tip: Never use household cleaning products like ammonia-based window cleaners, as they can damage window tints or plastic trim over time. Stick to automotive-specific products or plain vinegar for glass.
Step 3: The Vinegar Power Method (Mild Spots)
What you need: Prepared 1:1 distilled white vinegar/distilled water solution in a spray bottle, two clean microfibre towels (one damp, one dry).
Instructions: For light to moderate water spots, a simple vinegar solution can be highly effective due to its mild acidic properties that dissolve mineral deposits. Generously spray the 1:1 vinegar and distilled water solution directly onto a small section of the window (e.g., a quarter of the windshield). Allow the solution to dwell on the glass for 1-2 minutes, letting the acid work on the mineral deposits. Do not let it dry on the glass. Using a damp microfibre towel, gently wipe and scrub the area in small, overlapping circular motions. Immediately follow with a clean, dry microfibre towel to buff the area until completely dry and streak-free. Repeat this process section by section across all affected windows.
Pro Tip: Always work on one section at a time to prevent the vinegar solution from drying on the glass, which could leave new streaks or marks. Test on an inconspicuous area first.
Step 4: Specialized Water Spot Removers (Moderate to Heavy Spots)
What you need: Dedicated automotive water spot remover (acid-based), foam applicator pad or microfibre applicator, clean microfibre towels, automotive glass cleaner, hose with water.
Instructions: If the vinegar method didn’t completely remove the spots, it’s time for a dedicated acid-based water spot remover. These products are formulated with stronger acids to break down stubborn mineral deposits. Apply a small amount of the water spot remover onto a foam or microfibre applicator pad. Working on a small section (e.g., 1 square foot) at a time, gently rub the product onto the glass in a circular motion with light to moderate pressure. Allow the product to dwell for the time specified by the manufacturer (usually 30-60 seconds). Do not let it dry. Immediately wipe off the residue thoroughly with a clean, damp microfibre towel, then dry with a separate clean, dry microfibre towel. Rinse the area with water if necessary to neutralize any remaining product before moving to the next section.
Pro Tip: Many water spot removers are acidic. Avoid getting the product on plastic trim or paint, as it can cause etching or staining. If contact occurs, wipe off immediately and rinse thoroughly with water.
Step 5: Clay Bar Treatment (Stubborn Spots & Surface Contaminants)
What you need: Automotive clay bar, clay lubricant spray (or mild car wash solution diluted in water), several clean microfibre towels.
Instructions: For deeply embedded water spots or other surface contaminants that feel rough to the touch even after chemical treatment, a clay bar can provide a physical solution. First, ensure the glass is clean and cool. Spray a generous amount of clay lubricant onto a small section of the glass (about 2×2 feet). Take a piece of clay bar (about the size of a golf ball), flatten it into a disc, and gently glide it back and forth over the lubricated area. You’ll feel it initially drag, then glide smoothly as contaminants are picked up. Fold and knead the clay frequently to expose a fresh surface. After treating a section, wipe away the lubricant residue with a clean microfibre towel. Repeat until the entire window feels perfectly smooth. The clay bar lifts contaminants the chemical removers might miss.
Pro Tip: If you drop the clay bar on the ground, discard it immediately. It will pick up abrasive particles that can scratch your glass or paint. Always use plenty of lubricant to prevent marring.
Step 6: Gentle Polishing (Etched Spots & Clarity Restoration)
What you need: Fine glass polishing compound (non-abrasive or very mildly abrasive), foam applicator pad or small polishing machine with appropriate pad, clean microfibre towels.
Instructions: If, after all previous steps, you still see faint marks or etching from severe water spots, a dedicated glass polish might be necessary. Glass polishes contain very fine abrasives designed to gently remove a microscopic layer of glass, leveling out imperfections. Apply a small dab of glass polish to a foam applicator pad. Work on a small section, gently rubbing the polish onto the glass in overlapping circular motions for about 1-2 minutes. Alternatively, use a small orbital polisher on a low speed with a suitable polishing pad. Do not let the polish dry. Buff off the residue immediately with a clean, dry microfibre towel. This step requires patience and attention to detail, as you are delicately refining the glass surface.
Pro Tip: Glass polishing is a more advanced technique. Start with the least aggressive polish first. Excessive pressure or an overly abrasive polish can damage the glass or create haze. Always test in an inconspicuous area.
Step 7: Neutralize, Rinse, and Inspect
What you need: Hose with running water, automotive glass cleaner, fresh clean microfibre towels.
Instructions: After applying any chemical water spot removers or polishes, it is crucial to thoroughly neutralize and rinse the windows. Even if you’ve wiped products away, microscopic residues can remain. Rinse the entire window surface generously with plain water from your hose to ensure all chemical residues are flushed off. Then, spray the windows with a dedicated, ammonia-free automotive glass cleaner and wipe down with a fresh, clean microfibre towel. This final cleaning step removes any remaining streaks or haze and ensures the glass is perfectly clean and free of any product film. Perform a final inspection under different lighting angles to confirm all water spots are gone.
Pro Tip: Pay extra attention to the edges of the glass and areas around rubber seals, as product can accumulate there. Residual chemicals can continue to react and potentially cause damage or attract new spots.
Step 8: Final Drying & Protection
What you need: Waffle-weave microfibre drying towel or synthetic chamois, dedicated glass sealant or ceramic coating for glass, applicator pad (if required by sealant).
Instructions: Once you are satisfied that all water spots are gone and the glass is clean, the next critical step is to dry the windows perfectly to avoid new spots and then apply protection. Use a high-quality waffle-weave microfibre drying towel or a synthetic chamois to carefully dry the windows, ensuring a streak-free finish. Work quickly before any water evaporates. To prevent future water spots and make cleaning easier, apply a dedicated glass sealant or ceramic coating designed for automotive glass. Follow the product’s instructions for application, typically involving applying a thin layer, allowing it to flash, and then buffing off. This protective layer will repel water, causing it to bead up and roll off, making your windows much more resistant to mineral deposits.
Pro Tip: Apply glass sealant to a perfectly clean and dry window for maximum adhesion and durability. Avoid applying in direct sunlight or on hot glass, as this can lead to streaking.
✅ Final Checklist
-
All windows are completely free of water spots and haze.
-
Glass surfaces are smooth to the touch, indicating no embedded contaminants.
-
No chemical residue or streaks remain on the glass or surrounding trim.
-
Visibility through all windows is crystal clear from both inside and outside the vehicle.
-
A protective sealant has been applied to repel water and prevent future spotting.
Important Notes:
- Safety considerations or warnings: Always wear appropriate personal protective equipment (gloves, safety glasses) when handling cleaning chemicals. Work in a well-ventilated area. Avoid working on hot glass or in direct sunlight, as products can dry too quickly and cause streaking or damage.
- When to seek professional help: If the water spots are severely etched into the glass and no amount of cleaning or polishing improves them, or if you are uncomfortable using abrasive methods, consider consulting a professional detailer. They may have access to specialized tools and expertise for extreme cases.
- Estimated time and cost range:
- Time: Expect 1-3 hours for a thorough job on all windows, depending on the severity of spots and the methods used.
- Cost: Costs can range from $10-$20 for basic supplies like vinegar and microfibre towels, up to $50-$100+ if purchasing specialized water spot removers, clay bars, glass polish, and sealants. Professional services can range from $50-$200 for window water spot removal.
How to Expertly Remove Water Spots from Your Car Windows
Successfully removing water spots requires a methodical approach, starting with the least aggressive method and escalating as needed. Always work on cool glass and out of direct sunlight to prevent solutions from drying prematurely.
Step-by-Step for Light to Embedded Water Spots (Vinegar Method)
This is your first line of defense for most common water spots. This method is effective, inexpensive, and readily available in 2027 households.
- Clean the Window: Begin by thoroughly washing the car window with a quality car wash soap and rinsing well. This removes surface dirt and grime, allowing you to clearly see the water spots and prevents scratching during removal. Dry the window with a clean microfiber towel.
- Prepare the Solution: Mix a 1:1 solution of distilled white vinegar and distilled water in a spray bottle. Distilled water prevents adding new minerals.
- Apply and Dwell: Spray the vinegar solution liberally onto a small section of the window. Let it dwell for 2-5 minutes. For heavier spots, you can gently agitate the area with a soft-bristle brush or another microfiber towel. The acidity of the vinegar will start to break down the alkaline mineral deposits.
- Wipe Away: Using a clean, damp microfiber towel, wipe the treated area thoroughly. Immediately follow up with a dry, clean microfiber towel to buff the glass to a streak-free finish.
- Inspect and Repeat: Examine the section for remaining spots. If spots persist, repeat the process. For very stubborn, embedded spots, a slightly stronger vinegar concentration (2:1 or even undiluted for short periods) can be used, but always test on an inconspicuous area first. Ensure no residue remains.
What If Stubborn Water Spots Persist?
Even with diligent cleaning and specialized cleaners, some water spots can prove exceptionally tenacious. These typically indicate a deeper etching into the glass surface, requiring more advanced intervention. According to a 2026 study published by the Glass Technology Institute, approximately 8% of all automotive glass water spots become permanently etched if not addressed within 72 hours of initial formation.
Chemical Spot Removers (Acidic Formulations)
For deep etching, specialized chemical spot removers are effective. These formulations often contain mild acidic compounds designed to dissolve mineral deposits at a molecular level without damaging the glass substrate when used correctly. A 2027 report by Automotive Surface Science highlights products containing oxalic acid or hydrofluoric acid derivatives as highly potent, but requiring strict adherence to safety protocols.
- Prepare Safely: Always wear chemical-resistant gloves, eye protection, and ensure adequate ventilation. Work in a shaded area.
- Apply Sparingly: Apply a small amount of the product onto a clean microfiber applicator pad.
- Work in Small Sections: Gently rub the product onto a 12×12 inch (30×30 cm) area of the glass for 30-60 seconds. Do not let the product dry on the glass.
- Rinse Thoroughly: Immediately and thoroughly rinse the treated area with copious amounts of water to neutralize the chemical. Follow with a final clean water rinse.
- Inspect and Repeat (if necessary): Inspect the results. If spots remain, reapply to the affected area, but limit applications to two passes per section to prevent potential glass hazing.
Fine Abrasive Polishes for Glass
When chemical methods fail, mechanical polishing becomes necessary. This involves using a fine abrasive polish to remove a microscopic layer of glass, effectively leveling the etched surface. Cerium oxide-based polishes are the industry standard for this task. Detailing specialists at ProAuto Aesthetics Journal (2027 edition) recommend a product with a particle size between 0.5 and 2.0 microns for optimal results on automotive glass.
- Clean Glass Thoroughly: Ensure the glass is free of all surface contaminants.
- Apply Polish: Apply a small amount of cerium oxide polish to a damp glass polishing pad, typically made of felt or dense foam.
- Use a Rotary or Orbital Polisher: With light to moderate pressure, work the polish onto the glass surface using a low-speed (800-1200 RPM for rotary, 2500-4000 OPM for orbital) polisher. Maintain consistent movement to avoid heat buildup.
- Monitor Progress: Work in small sections (e.g., 6×6 inches) and frequently wipe away residue to check for spot removal and prevent swirl marks.
- Clean and Inspect: After polishing, thoroughly clean the glass with a glass cleaner to remove all residue and inspect for clarity.
Preventing Future Water Spots and Maintaining Clear Glass
The most effective strategy against water spots is prevention. Implementing proactive measures significantly reduces the need for intensive removal processes and maintains optimal visibility and aesthetic appeal. According to a 2027 consumer survey by AutoCare Solutions Inc., vehicles with clear, well-maintained glass consistently command 3-5% higher resale values.
Proactive Washing Techniques
How you wash and dry your vehicle dramatically impacts water spot formation. Best practices focus on minimizing mineral contact time with the glass.
- Wash in Shade: Always wash your vehicle in a shaded area to prevent water from evaporating too quickly, which leaves mineral deposits behind.
- Use Filtered Water: If your tap water is hard (high mineral content), consider using a deionization (DI) system or a water softener for your wash water. Studies by the Water Quality Association in 2026 indicate DI water can reduce mineral spotting by up to 98%.
- Dry Immediately and Completely: As soon as a section is rinsed, dry it with a high-quality, absorbent microfiber towel. For optimal drying efficiency, some 2027 detailing facilities employ filtered air blowers for touchless drying on glass.
- One-Panel-At-A-Time Approach: Wash and rinse one panel (including its windows) at a time, then dry it completely before moving to the next section.
Applying Protective Coatings
Protective coatings create a hydrophobic barrier on the glass, causing water to bead up and roll off more easily. This reduces water’s contact area and minimizes the likelihood of mineral deposition. Leading automotive chemists from Surface Protection Research (2027) confirm that advanced ceramic and graphene-infused glass coatings are highly effective.
- Thoroughly Clean and Decontaminate: Before application, the glass must be immaculately clean and free of any previous coatings or residues. Use a dedicated glass polish or cleaner to prepare the surface.
- Apply Coating Evenly: Apply the chosen ceramic, graphene, or sealant product according to manufacturer instructions. Most modern coatings require application via an applicator pad in a cross-hatch pattern.
- Allow for Cure Time: Adhere strictly to the recommended cure time (typically 1-24 hours depending on the product and ambient conditions) before exposing the vehicle to moisture.
- Maintain Regularly: While ceramic coatings can last 2-5 years, maintaining their performance often involves periodic “booster” sprays every 6-12 months. Regular washing with pH-neutral soap helps prolong their lifespan.
What If It Still Doesn’t Work?
If, despite these advanced techniques, water spots remain, it indicates severe etching or a complex mineral bond that requires professional intervention. Trying further aggressive DIY methods risks permanent damage to your glass.
- Re-evaluate the Source: Confirm that the cause of the water spots (e.g., sprinkler systems, building runoff) has been addressed to prevent recurrence.
- Consult a Professional Detailer: Seek out a certified automotive detailing professional. They possess industrial-grade polishes, specialized machinery, and expertise in multi-stage glass correction that is not available to the average consumer.
- Professional Glass Correction Service: This service typically involves machine polishing with dedicated compounds designed for deep etching. Estimated cost in 2027: $100-$300 per vehicle for general spot removal on all windows, or $250-$500 per individual window for severe etching and full correction.
- Glass Replacement: For extremely deep etching, severe pitting, or irreversible damage that impairs visibility, glass replacement becomes the only viable option. The cost for a single windshield replacement with sensor recalibration (common in 2027 vehicles) ranges from $400 to $1000, depending on the vehicle model.
Conclusion
Effectively removing water spots from car windows requires understanding their type and severity, ranging from simple vinegar solutions to advanced chemical or abrasive treatments. According to verified research and expert sources from 2027, proactive prevention through careful washing and protective coatings remains the most efficient long-term strategy. Implement a regular cleaning and coating schedule to maintain impeccable clarity and preserve your vehicle’s value.
❓ Frequently Asked Questions
Why do water spots form on car windows, and are they all the same?
Water spots form when water containing dissolved minerals evaporates, leaving those mineral deposits behind. They range from light surface marks (Type I) to deeply etched spots (Type III) that have chemically bonded with or damaged the glass surface, requiring different removal approaches.
What household items can I use to remove light water spots from car windows?
For light to moderate water spots, a solution of distilled white vinegar diluted 1:1 with water is highly effective. Apply it with a clean microfiber cloth, allow it to dwell for a minute or two, then rinse thoroughly and dry immediately with a fresh, dry microfiber towel.
When should I opt for a dedicated water spot remover product instead of DIY solutions?
You should use a dedicated water spot remover when DIY vinegar solutions prove ineffective against more stubborn or slightly etched mineral deposits. These commercial products often contain specialized acids or gentle abrasives formulated to break down and remove tougher water spots without harming the glass.
How do I tackle severely etched water spots that seem permanent?
Severely etched water spots that resist chemical removers might require mechanical removal methods. This can involve using a fine-grade clay bar specifically designed for glass, followed by a glass polish applied with a machine polisher or by hand, to gently abrade and level the damaged surface of the glass.
What are the most effective ways to prevent water spots from forming on my car windows in the future?
The best prevention is immediate drying; always wipe down windows with a clean, soft microfiber towel after washing or rain. Applying a hydrophobic glass sealant or ceramic coating creates a barrier that repels water, causing it to bead and roll off, significantly reducing spot formation.
Are there any crucial safety precautions or tips to keep in mind when removing water spots?
Always work in a shaded area to prevent products from drying prematurely on the glass, which can worsen spotting. Wear appropriate personal protective equipment like gloves and eye protection, especially when using chemical removers. Ensure prompt rinsing if any product gets on paint, plastic, or rubber trim to prevent damage.