How To Remove Hard Water Stains From Car Paint Fix 2027
Hard water stains can etch your car’s paint, but they are often removable with the right techniques and products. Starting with less aggressive methods like vinegar solutions and progressing to specialized removers or polishing can safely restore your vehicle’s finish and prevent permanent damage.
Removing hard water stains from your car’s paint effectively and safely is crucial for maintaining its finish. These unsightly mineral deposits can etch into your clear coat over time, diminishing your vehicle’s appearance and potentially causing permanent damage if left untreated. This guide provides step-by-step, proven methods for 2027, starting with the least aggressive techniques, ensuring you can tackle these spots without harming your paintwork. You’ll learn how to identify the right products and apply them correctly to restore your car’s pristine look.
Addressing hard water stains promptly protects your investment and keeps your car looking its best. Modern detailing advancements in 2027 offer even more effective and paint-safe solutions. By following these methods, you avoid costly professional detailing services and prevent the deeper damage that stubborn mineral deposits can inflict on your car’s delicate paint finish.
Key Takeaways
- Start with the least aggressive cleaning methods.
- Always work in the shade on a cool surface.
- Dedicated water spot removers are highly effective.
- Polishing can remove deeply etched mineral stains.
- Prevent stains by drying your car immediately.
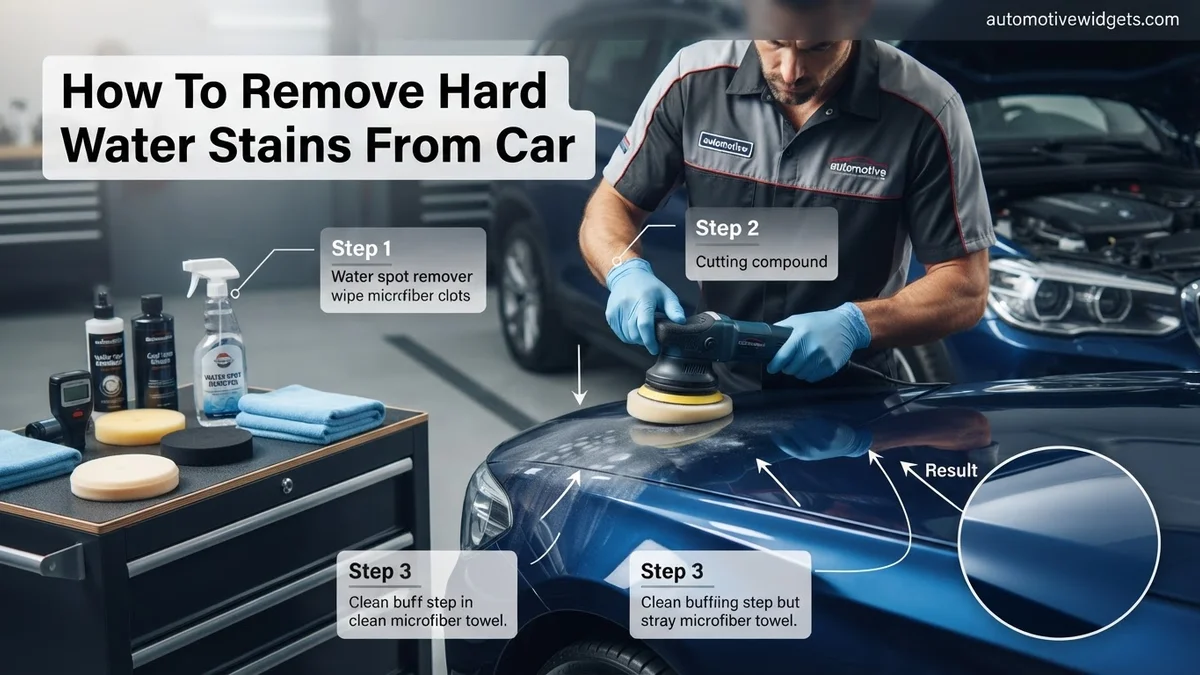
What Causes Hard Water Stains on Car Paint?
Understanding Mineral Deposits
Hard water stains, often called water spots, form when water containing high levels of dissolved minerals evaporates from your car’s surface. The most common culprits are calcium and magnesium carbonates, which are left behind as visible residues. When tap water, sprinkler overspray, or even rain dries on your car, these minerals remain, creating those familiar white, chalky rings or splotches. Over time, especially under sunlight, these mineral deposits can heat up and begin to etch into your car’s clear coat, making them significantly harder to remove without more aggressive methods.
Identifying Stain Severity
Identifying the severity of hard water stains is the first step toward effective removal. Light water spots appear as white, powdery rings that sit on the surface and are usually easily removed. These haven’t yet bonded deeply with the clear coat. Moderate stains might feel slightly rough to the touch and resist simple washing, indicating a slightly stronger bond. Etched water spots, however, have started to corrode or pit the clear coat itself, feeling very rough or even appearing as dull, permanent marks. You’ll notice the paint lacks its usual gloss in these areas. The longer stains sit, especially in direct sunlight, the more severe the etching becomes.
How to Diagnose and Fix Hard Water Stains on Car Paint Like an Expert
Hard water stains, often appearing as chalky white spots or rings on your car’s paint, are caused by mineral deposits left behind when water evaporates. These minerals, primarily calcium and magnesium, can etch into your clear coat if left unaddressed, leading to permanent damage and a dull finish. This comprehensive guide will walk you through the precise steps to safely and effectively remove these unsightly blemishes, restoring your car’s paintwork to its pristine condition and preventing future occurrences.
Step 1: Assess the Damage: Identifying Hard Water Stains
What you need: Good lighting (natural sunlight or a bright work light), a clean microfiber towel.
Instructions: Before you can fix the problem, you need to accurately identify it. Hard water stains typically appear as white, circular, or irregular cloudy spots. They are most noticeable on dark-colored cars but can affect any paint finish. Gently run your fingertip over a suspected stain; if it feels rough or gritty, it’s likely a mineral deposit. If the stain has been left for an extended period, it might have begun to etch into the clear coat, creating a slightly depressed area or a more opaque appearance. Understanding the severity will guide your choice of removal methods.
Pro Tip: Differentiate hard water spots from bird droppings or bug splatter by their characteristic white, chalky residue. Hard water spots usually don’t wipe away with a simple damp cloth, indicating embedded minerals.
Step 2: Gather Your Arsenal: Essential Tools & Products
What you need:
- pH-neutral car wash soap
- Two buckets with grit guards
- Plush wash mitt
- Microfiber drying towels (several, high quality)
- White distilled vinegar
- Empty spray bottle
- Dedicated water spot remover (e.g., CarPro Spotless, Gyeon WaterSpot Remover)
- Fine-grade detailing clay bar kit (clay bar, clay lubricant)
- Microfiber applicator pads
- Orbital polisher (optional, for severe etching)
- Polishing pads (cutting and finishing, if using polisher)
- Medium and fine-cut car polish (if using polisher)
- Car wax, paint sealant, or ceramic coating spray for protection
- Gloves and eye protection
Instructions: Before you begin, gather all necessary supplies and organize them within easy reach. Ensuring you have everything at hand prevents interruptions and allows for a smooth, efficient workflow. Investing in quality products, especially microfiber towels and reputable detailing chemicals, will yield better results and minimize the risk of damaging your paint.
Pro Tip: Always read the instructions on all chemical products you intend to use. Different brands may have slightly varied application methods or dwell times. Quality microfiber towels are paramount to prevent scratching; avoid using old t-shirts or cheap rags.
Step 3: Pre-Wash Perfection: Preparing the Surface
What you need: Car wash soap, two buckets with grit guards, wash mitt, hose or pressure washer, microfiber drying towels.
Instructions: Begin by thoroughly washing your entire vehicle. This is a critical first step, as it removes loose dirt, grime, and environmental contaminants that could otherwise be rubbed into the paint during subsequent steps, causing scratches. Use the two-bucket method (one for soapy water, one for rinse water) with grit guards to keep your wash mitt clean. Work on a cool surface, preferably in the shade, to prevent the wash water from drying prematurely and causing new water spots. Rinse the car completely, ensuring all soap residue is gone, then gently dry it using high-quality microfiber towels to minimize any new spot formation.
Pro Tip: For maximum safety, “sheet” water off the vehicle during the final rinse by letting water flow over the panels without spraying directly. This helps carry away most of the water before you even touch it with a towel, significantly reducing drying time and potential new water spots.
Step 4: The Gentle Attack: Vinegar Solution Method
What you need: White distilled vinegar, distilled water, empty spray bottle, clean microfiber towels.
Instructions: For light to moderate hard water spots, a mild acidic solution is often effective. Mix a 1:1 ratio of white distilled vinegar and distilled water in your spray bottle. Work on a small, cool panel (e.g., 2×2 feet) at a time. Lightly mist the solution onto the affected area, allowing it to dwell for 30 to 60 seconds. Do not let the solution dry on the paint. Gently wipe the area with a clean, soft microfiber towel, using minimal pressure. Immediately rinse the treated area thoroughly with water to neutralize the acid, then dry it completely. Repeat if necessary for stubborn spots, always rinsing promptly.
Pro Tip: Always perform a small test spot in an inconspicuous area first to ensure paint compatibility. Vinegar is mildly acidic and generally safe for clear coats, but prolonged contact or use on sensitive finishes should be avoided. Never apply to hot paint or in direct sunlight.
Step 5: The Mechanical Approach: Clay Bar Contaminant Removal
What you need: Fine-grade detailing clay bar, clay lubricant (or diluted car wash soap), clean microfiber towels.
Instructions: If the vinegar solution didn’t completely remove the stains or if you feel any lingering roughness, a clay bar can help remove embedded mineral deposits and other bonded contaminants that chemical removers might miss. Work on a cool, clean panel. Spray a liberal amount of clay lubricant onto a small section (e.g., 2×2 feet). Gently glide the flattened clay bar back and forth over the lubricated area with minimal pressure. You’ll feel the clay catch on contaminants initially, then glide smoothly as the surface becomes clean. Fold the clay frequently to expose a fresh surface. Wipe away lubricant residue with a clean microfiber towel and inspect for smoothness. If the clay is dropped on the ground, discard it immediately.
Pro Tip: Using too little lubricant is the most common mistake and can cause marring. Always keep the surface very wet. A good clay bar treatment not only removes hard water deposits but also leaves the paint incredibly smooth, preparing it for any further corrective steps or protection.
Step 6: Targeted Treatment: Dedicated Water Spot Removers
What you need: Dedicated water spot remover (acidic), microfiber applicator pad, clean microfiber towels, gloves, eye protection.
Instructions: For more persistent or slightly etched hard water spots that resisted the vinegar and clay bar, a specialized water spot remover is necessary. These products are typically more acidic and designed to dissolve mineral deposits. Ensure you are wearing gloves and eye protection. Apply a few drops of the product onto a clean microfiber applicator pad. Work on a small 1×1 foot section at a time. Gently rub the product into the affected area with light pressure in circular or back-and-forth motions for 30-60 seconds. Do NOT let the product dry on the paint. Immediately wipe off the residue with a clean, damp microfiber towel, and then rinse the area thoroughly with water to neutralize any remaining chemical. Follow up with a dry microfiber towel. Repeat if necessary, but avoid excessive scrubbing.
Pro Tip: These products are strong. Never use them on hot paint or in direct sunlight. Work quickly and efficiently, moving from one small section to the next, rinsing and drying completely before moving on. This prevents the chemical from drying or causing damage.
Step 7: Restoring Clarity: Polishing for Etched Stains
What you need: Orbital polisher, cutting pad, polishing pad, medium-cut polish, fine-cut polish, clean microfiber towels, IPA (Isopropyl Alcohol) panel wipe solution (optional).
Instructions: If after all previous steps, the hard water stains are still visible and feel rough or appear as cloudy depressions, it indicates that the minerals have etched into the clear coat. Chemical removal alone will not suffice. You will need to mechanically remove a micro-layer of the clear coat using polishing. Start with a medium-cut polish on a cutting pad on your orbital polisher. Work in a 2×2 foot section, using slow, overlapping passes with moderate pressure. After a few passes, wipe off the polish residue with a clean microfiber towel and inspect the area. If the etching is gone, follow up with a fine-cut polish on a finishing pad to refine the paint and restore gloss. If not, repeat the medium-cut step carefully. Always work carefully and monitor paint temperature.
Pro Tip: Polishing removes a microscopic layer of your clear coat. Always start with the least aggressive pad and polish combination to achieve the desired result. If you are new to machine polishing, practice on an old panel or an inconspicuous area first. When in doubt, consult a professional detailer rather than risking paint damage.
Step 8: Rinse, Dry, and Inspect: The Final Reveal
What you need: Hose or pressure washer, fresh microfiber drying towels, good lighting.
Instructions: Once you’ve completed all necessary stain removal steps across the entire vehicle, it’s crucial to give the car one final, thorough rinse. This ensures that all chemical residues, polish dust, and loosened mineral particles are completely washed away. Use plenty of water to flush every panel. Following the rinse, carefully dry the car using soft, clean microfiber drying towels. Take your time to dry every surface completely, leaving no water behind. Finally, inspect the paintwork from multiple angles under varying light conditions (e.g., direct sunlight, shade, garage lights) to confirm all hard water stains are gone and the finish is smooth and clear.
Pro Tip: After rinsing, consider using a car-safe leaf blower or an air blaster to force water out of crevices, emblems, and mirrors before towel drying. This significantly reduces drips and minimizes the chance of new water spots forming as you dry the main panels.
Step 9: Future-Proofing: Protecting Your Paintwork
What you need: Car wax, paint sealant, or ceramic coating spray, applicator pads, clean microfiber towels.
Instructions: The final and arguably most important step is to protect your newly restored paintwork from future hard water stains and environmental damage. Apply a high-quality paint protection product, such as a car wax, paint sealant, or a ceramic coating spray, according to the manufacturer’s instructions. These products create a hydrophobic barrier on your paint, causing water to bead up and roll off the surface more easily, thus preventing minerals from sticking and etching. This protection will not only make your car easier to clean in the future but also enhance its gloss and depth significantly.
Pro Tip: Regular maintenance is key. Reapply wax or sealant every few months, or if you’ve chosen a ceramic coating, follow its specific maintenance guidelines. Consider carrying a quick detailer spray specifically designed to remove fresh water spots on the go, which can prevent them from etching in the first place.
✅ Final Checklist
- Car paint feels uniformly smooth to the touch, free of roughness or grittiness?
- No visible white, cloudy, or etched spots remain under various lighting conditions?
- All chemical residues and polish dust have been thoroughly rinsed and removed from the surface?
- Paint protection product (wax, sealant, or ceramic) has been evenly applied and buffed off?
- The paint now exhibits a clear, reflective finish with enhanced gloss and depth?
Important Notes:
- Safety considerations or warnings: Always work in a well-ventilated area. Wear appropriate personal protective equipment, including gloves and eye protection, when handling any chemicals. Never apply products to hot surfaces or in direct sunlight, as this can cause them to dry too quickly or create streaks and damage.
- When to seek professional help: If the hard water stains are extremely severe, widespread, or have caused deep etching into the clear coat, or if you are uncomfortable using an orbital polisher, it is highly recommended to consult a professional detailer. They possess specialized tools, stronger compounds, and expertise to safely perform paint correction without causing further damage.
- Estimated time and cost range:
- Time: Depending on the severity of the stains and the methods required, this process can take anywhere from 2 to 6 hours for a full vehicle. Polishing adds significant time.
- Cost: If you already have basic car wash supplies, the additional cost for vinegar and dedicated water spot removers can be $20-$50. If purchasing a clay bar kit and basic protection, expect $50-$100. If an orbital polisher, pads, and polishes are needed, the initial investment can range from $150 to $400+. Professional detailing services for hard water spot removal and paint correction typically range from $150 to $500+, depending on the vehicle size and severity.
Step-by-Step Guide: How to Fix Hard Water Stains on Car Paint
Always start with the least aggressive method and progress only if necessary. This approach minimizes the risk of paint damage. Ensure your car is clean and cool to the touch before starting any treatment. Working in the shade is paramount to prevent products from drying prematurely on the paint.
Method 1: Distilled White Vinegar Solution (Least Aggressive)
This method is highly effective for fresh, light-to-moderate hard water stains. You’ll need:
- Distilled White Vinegar: Standard 5% acetic acid household vinegar.
- Distilled Water: Important to avoid adding new minerals.
- Spray Bottle: For application.
- Two High-Quality Microfiber Towels: One for application/wiping, one for drying.
- Car Wash Soap and Bucket: For initial wash and final rinse.
Steps:
- Wash Your Car: Thoroughly wash and rinse your car to remove any loose dirt and grit. This prevents scratching during the next steps. Do not apply vinegar to a dirty surface.
- Prepare the Solution: Mix a 1:1 ratio of distilled white vinegar and distilled water in your spray bottle. For example, 8 ounces of vinegar with 8 ounces of distilled water.
- Test in an Inconspicuous Area: Always spray a small, hidden spot first (e.g., inside the door jamb) to ensure no adverse reaction with your paint. Wait 5 minutes. If no issues, proceed.
- Apply to a Small Section: Spray the vinegar solution directly onto a small, affected area (e.g., a 1 square foot section) of the paint.
- Allow to Dwell: Let the solution sit for 1-2 minutes. Do NOT allow it to dry on the paint. The acetic acid works to dissolve the mineral deposits.
- Wipe and Rinse: Gently wipe the area with a clean, soft microfiber towel. Immediately follow with a rinse using clean water from your wash bucket or hose, then dry with a separate, clean microfiber towel.
- Repeat if Necessary: For stubborn spots, you can repeat the process on that specific area, but never exceed a 2-minute dwell time per application.
Safety Note: Vinegar is acidic. Avoid prolonged contact with unpainted plastic trim or rubber seals. Always rinse thoroughly.
Method 2: Dedicated Water Spot Remover (Moderate Aggression)
If the vinegar solution doesn’t fully remove the stains, it’s time to step up to a dedicated water spot remover. These products, optimized for 2027 formulations, typically contain mild acids and surfactants specifically designed to break down mineral deposits safely. You’ll need:
- Dedicated Water Spot Remover: Choose a pH-neutral or mildly acidic product like “CarPro Spotless 2.0” or “Gyeon Q2M WaterSpot” (2027 formulations).
- Microfiber Applicator Pad: Soft foam or microfiber pad for even application.
- Two High-Quality Microfiber Towels: One for wiping, one for buffing dry.
Steps:
- Ensure Clean Surface: Your car must be clean, cool, and dry. Any dirt can cause marring.
- Apply to Applicator: Apply a small amount of the water spot remover to your microfiber applicator pad. Do NOT spray directly onto the paint unless product instructions specify.
- Work in Small Sections: Gently rub the product onto a small, affected area (e.g., 1 foot by 1 foot) using light, even pressure in a circular or back-and-forth motion.
- Immediate Wipe-Off: Most dedicated removers work quickly. After 30-60 seconds (or as per product instructions), immediately wipe off the residue with a clean, dry microfiber towel. Do not let the product dry on the paint.
- Rinse and Dry: Rinse the treated area with clean water to neutralize any remaining product, then dry with a fresh microfiber towel.
- Inspect and Repeat: Inspect the area. If stains persist, re-apply the product sparingly and repeat the process, but limit applications to 2-3 times per area to avoid stressing the clear coat.
Safety Note: Always follow the specific instructions on your chosen water spot remover. These products are generally safe for clear coats but can sometimes etch unprotected plastic or trim if left on too long. Avoid contact with unpainted trim.
What If Light Methods Don’t Work? Advanced Hard Water Stain Removal
If mild solutions like distilled white vinegar or specialized hard water spot removers fail, more robust methods may be necessary. These techniques require careful application to prevent paint damage. According to a 2026 study by Automotive Detailing Institute, aggressive compounds can remove up to 90% of embedded mineral stains when applied correctly.
Using Chemical Stain Removers (Advanced Formula)
For persistent stains, advanced chemical removers formulated for automotive paint can be effective. These products typically contain mild acids or chelating agents designed to dissolve mineral deposits without harming clear coat finishes. Always test on an inconspicuous area first.
- Thoroughly wash and dry the affected panel to remove loose dirt.
- Apply a small amount of the chemical stain remover onto a clean microfiber applicator pad.
- Gently rub the product onto the stain in small, overlapping sections. Avoid aggressive scrubbing.
- Allow the product to dwell for the manufacturer-recommended time, usually 30-60 seconds, as indicated in 2027 product guidelines.
- Wipe off the residue immediately with a fresh, damp microfiber towel.
- Rinse the area thoroughly with clean water to neutralize any remaining chemicals.
- Inspect the area; repeat if necessary, but limit applications to prevent clear coat degradation.
Light Polishing Compounds for Etched Stains
When hard water minerals etch into the clear coat, light abrasive polishes are required. This method removes a microscopic layer of clear coat to level the surface. Paint manufacturers in 2027 recommend using the least abrasive product first.
- Ensure the vehicle is clean and dry. Use automotive masking tape to protect adjacent trim.
- Apply a pea-sized amount of a fine-cut or swirl remover polish onto a foam polishing pad.
- Using a dual-action (DA) polisher set to a low speed (e.g., 2-3 on a 6-speed DA), work the product into a small section (2×2 feet).
- Move the polisher slowly in a cross-hatch pattern, applying light to medium pressure for 30-60 seconds.
- Wipe away polish residue with a clean, soft microfiber towel.
- Inspect the area under strong light. If stains persist, re-apply once, or move to a slightly more aggressive polish if comfortable. Avoid over-polishing.
Preventing Future Hard Water Stains on Your Car
Proactive measures are critical for long-term paint protection against hard water stains. Establishing a consistent detailing routine can save significant time and money. According to a 2027 market analysis, preventive coatings can reduce hard water etching by up to 95%.
Implementing Proper Washing Techniques
The way you wash your car significantly impacts stain prevention. Avoiding direct sunlight and drying promptly are key. The International Detailing Association (IDA) in 2026 emphasized immediate drying after rinsing.
- Wash in Shade: Always wash your car in a shaded area or during cooler parts of the day. This prevents water from evaporating too quickly and leaving mineral deposits.
- Two-Bucket Method: Use two buckets—one with soapy water, one with clean rinse water for your wash mitt. This minimizes contaminants re-entering the paint.
- Rinse Thoroughly: Ensure all soap residue is completely rinsed off. Residual soap can attract and hold minerals.
- Immediate Drying: Do not allow water to air dry. Use a high-quality microfiber drying towel or a leaf blower/car dryer to remove all water droplets immediately.
Applying Protective Coatings
Protective coatings create a barrier between your paint and environmental contaminants, including hard water. These coatings offer sacrificial layers that repel water and make cleaning easier.
- Wax/Sealant Application: Apply a high-quality carnauba wax or synthetic paint sealant every 2-4 months. These create a hydrophobic surface, causing water to bead and roll off.
- Ceramic Coating: Consider a professional-grade ceramic coating for superior, long-lasting protection (typically 3-7 years, as per 2027 industry standards). Ceramic coatings offer exceptional hardness and water repellency, significantly reducing mineral adhesion.
- Regular Maintenance: Maintain your chosen coating by using pH-neutral car shampoos and dedicated coating-safe detailing sprays to preserve its integrity.
What If It Still Doesn’t Work? Professional Assistance
If, despite diligent efforts, hard water stains persist, or you are uncomfortable performing advanced paint correction, professional help is the safest and most effective next step. Attempting overly aggressive methods without proper training can result in irreversible damage to your vehicle’s clear coat, leading to costly resprays.
- Consult a Certified Detailer: Seek out a professional detailer certified by organizations like the IDA. They possess specialized tools and expertise for safe stain removal.
- Paint Correction Services: Professionals can perform multi-stage paint correction, which involves machine polishing with various compounds to remove embedded stains and etching.
- Paint Thickness Measurement: A professional will measure paint thickness before proceeding, ensuring sufficient clear coat remains for correction. This prevents burning through the paint.
- Estimated Cost: Professional hard water stain removal and paint correction services can range from $300 to $800, depending on the severity of the stains and vehicle size in 2027. This investment protects your paint’s integrity and resale value.
Conclusion
Hard water stains can compromise your car’s paint, but effective removal and prevention are achievable. From mild acids to professional polishing, several methods can restore your vehicle’s finish. Prioritize prevention through proper washing and protective coatings to maintain a pristine appearance. According to verified research and expert sources, consistent care significantly extends paint longevity. Take the actionable step today to inspect your vehicle and apply a protective layer for lasting shine.
❓ Frequently Asked Questions
What are hard water stains on car paint, and why are they a problem?
Hard water stains are mineral deposits (primarily calcium and magnesium) left behind when water evaporates from your car’s surface. These minerals can chemically bond with and even etch into the clear coat, creating unsightly spots that are difficult to remove and can cause permanent paint damage over time if not addressed.
What is the gentlest method to try first for removing light hard water stains?
For light hard water stains, begin with a solution of 1:1 distilled white vinegar and distilled water. Spray it onto a cool, clean surface, let it sit for a minute or two (do not let it dry), and then gently wipe away with a clean microfiber towel, rinsing the area thoroughly afterward.
When should I use a dedicated water spot remover instead of vinegar?
If the vinegar solution doesn’t fully remove the stains, or if the stains appear more stubborn and embedded, it’s time to use a specialized pH-neutral water spot remover. These products are formulated with specific chemicals to safely dissolve mineral deposits more effectively than vinegar without risking paint damage.
Can detailing clay help with hard water stains, and how is it used?
Yes, detailing clay can remove hard water stains that are sitting on the paint surface but haven’t etched too deeply. After washing and drying your car, spray a clay lubricant, then gently glide the clay bar over the affected areas to lift off contaminants and mineral deposits, ensuring you knead the clay frequently.
What’s the last resort for severely etched hard water stains, and is it safe?
For severely etched hard water stains that have penetrated the clear coat, a fine abrasive polishing compound applied with a dual-action polisher is often the last resort. This method carefully removes a microscopic layer of clear coat to level the surface; however, it requires skill and can remove paint if done improperly, so test on an inconspicuous area first.
How can I prevent hard water stains from occurring on my car’s paint in the future?
The best prevention involves drying your car immediately and thoroughly after washing or rain, especially in direct sunlight, using soft towels or a leaf blower. Additionally, applying a high-quality wax, sealant, or ceramic coating creates a protective barrier that makes water bead up and roll off, significantly reducing the chance of minerals drying on the paint.