How To Disconnect Ford Fuel Lines Without Tool Expert 2026
While specialized tools are highly recommended, it is often possible to disconnect certain Ford fuel line quick-connects using carefully improvised methods. However, this process requires extreme caution to prevent fuel leaks, component damage, and ensure personal safety.
The core answer is yes, you can often disconnect Ford fuel lines without the specialized tool, but it requires understanding the specific connector type, patience, and meticulous care. In 2026, many Ford vehicles still utilize quick-disconnect fittings designed for tool-assisted release. Circumstances like a roadside repair, a forgotten tool, or even a one-time project can leave you needing an alternative. This guide provides expert, improvised techniques to safely separate these lines when the dedicated tool isn’t available, focusing on preserving the integrity of your fuel system components.
This knowledge is crucial because forcing a fuel line connection can lead to damaged O-rings, cracked plastic retainers, or even compromised fuel lines. Such damage can result in dangerous fuel leaks, costly repairs, and potential safety hazards. Knowing how to carefully manipulate these connectors using common household items or small hand tools empowers you to proceed with confidence, ensuring a successful and leak-free reconnection.
Key Takeaways
- Depressurize fuel system first.
- Identify your Ford connector type.
- Use small screwdriver/pick carefully.
- Inspect O-rings for damage.
- Always check for leaks post-reconnect.
Understanding Ford Fuel Line Quick-Disconnect Challenges
The Mechanics of Quick-Disconnects in 2026 Fords
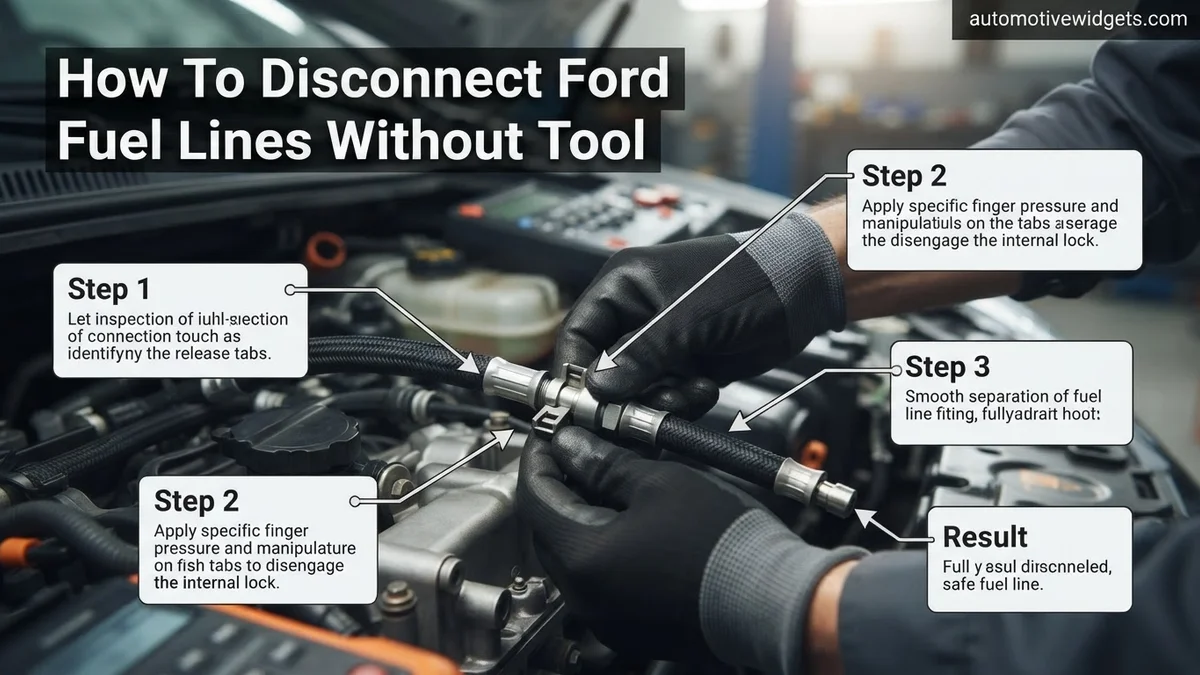
Ford’s quick-disconnect fuel lines, prevalent across many models even by 2026, rely on an internal cage or collar system to secure the line. Inside the female connector, multiple small metal or plastic fingers (often called “tangs” or “clips”) grasp a flared section on the male fuel line tube. A sealing O-ring provides the leak-proof connection. The specialized fuel line tool is designed to compress these internal fingers evenly, releasing their grip on the flare. Without this even compression, attempting to pull the line off will only cause the fingers to dig in harder, potentially damaging them or the line.
Risks and Safety Warnings of Tool-Free Disconnection
Attempting to disconnect these lines without the proper tool carries inherent risks. Your primary concerns are damaging the internal locking mechanism, compromising the O-ring seal, or even kinking the fuel line itself. Damaged O-rings lead to leaks, which are highly flammable and pose a significant fire hazard. Cracked plastic clips can cause spontaneous disconnection or chronic leaks. Always work in a well-ventilated area. Have a fire extinguisher nearby. Disconnect your vehicle’s battery. Relieve fuel pressure before starting any work – consult your owner’s manual or a service guide for the correct procedure for your specific Ford model. Wear appropriate eye protection and gloves. Fuel is highly volatile; avoid sparks, open flames, or hot surfaces. A small amount of fuel will inevitably spill, so have rags ready for immediate cleanup. Never rush this process.
From Start to Finish: Ford Fuel Line Disconnection Explained
Welcome to this detailed guide on safely disconnecting Ford fuel lines without the specialized tools often recommended. Whether you’re a seasoned DIY enthusiast or just starting out, this practical walkthrough will provide you with the knowledge and techniques to tackle this task effectively and, most importantly, safely. Fuel system work carries inherent risks, so understanding each step thoroughly and prioritizing safety is crucial to prevent spills, fires, and personal injury. Follow these instructions meticulously to ensure a successful and hazard-free experience.
Step 1: Safety First – Depressurize the Fuel System
What you need: Vehicle owner’s manual, appropriate fuse puller (if available, otherwise pliers), fire extinguisher, safety glasses, work gloves.
Instructions: Before attempting any work on the fuel system, it is absolutely critical to relieve the fuel pressure. Locate your vehicle’s fuse box (typically under the hood or in the cabin, consult your owner’s manual). Find and remove the fuel pump fuse or relay. Once removed, start the engine and allow it to run until it stalls out. This will consume the residual fuel pressure in the lines. After it stalls, crank the engine for another 5-10 seconds to ensure all remaining pressure is released. Finally, disconnect the negative terminal of your vehicle’s battery to prevent accidental electrical sparks.
Pro Tip: Always have a fully charged fire extinguisher rated for Class B (flammable liquids) fires within arm’s reach when working on fuel systems. Double-check your owner’s manual for the exact location and identification of the fuel pump fuse/relay, as they can vary significantly between Ford models and years.
Step 2: Prepare Your Workspace and Gather Improvised Tools
What you need: Drop cloths or old newspapers, shop rags, a small drain pan or bucket, safety glasses, work gloves, a small flat-head screwdriver (jeweler’s size if possible), a dental pick or a sturdy paperclip, maybe a thin plastic zip tie or a plastic straw.
Instructions: Choose a well-ventilated area away from open flames or sparks. Lay down drop cloths or several layers of old newspapers to catch any fuel spills. Position your drain pan directly underneath the fuel line connection you intend to disconnect. Don your safety glasses and gloves. Inspect your improvised tools; the small flat-head screwdriver or dental pick will be used to manipulate the internal locking mechanism, while a zip tie or straw might be cut and shaped to act as a rudimentary “tool” for certain spring-lock connectors.
Pro Tip: Petroleum-based fuels can damage asphalt and some concrete finishes. Protect your driveway or garage floor thoroughly. Having multiple rags on hand is essential for immediate cleanup of any drips, no matter how small.
Step 3: Locate and Identify the Fuel Line Connector Type
What you need: Good lighting (flashlight or work light), a small mirror (optional, for hard-to-reach areas).
Instructions: Trace the fuel line from the fuel rail (on the engine) or fuel filter back to the connection point you need to disconnect. Ford vehicles typically use two main types of quick-connect fittings: the “spring lock” coupling or the “pinch tab” connector. The spring lock will have a visible external collar or plastic casing, often with a small gap where an internal garter spring holds the line. The pinch tab connector will have two or more plastic tabs that you visibly squeeze together to release. Carefully clean any dirt or debris from around the connector to get a clear view.
Pro Tip: Take a photo of the connection before you start. This can be helpful for remembering how it was assembled and for identifying any clips or specific features that need to be reinstalled correctly.
Step 4: Disconnecting a Spring Lock Coupling (Improvised Method)
What you need: Small flat-head screwdriver, dental pick, or a stiff, thin plastic strip (e.g., cut from a zip tie or plastic straw), rags, drain pan.
Instructions: For a spring lock coupling, the goal is to push the internal garter spring outwards, away from the fuel line, to release its grip. With one hand, firmly grasp the fuel line and push it slightly into the connector. This can relieve some tension on the spring. Then, carefully insert your small flat-head screwdriver or dental pick into the small gap around the line, between the line and the connector’s collar. Gently but firmly push the garter spring away from the fuel line. You may need to do this in 2-3 spots around the circumference of the line. While holding the spring released, simultaneously pull the fuel line straight out of the connector with your other hand. This requires a delicate balance of pushing the spring and pulling the line.
Pro Tip: Patience is key here. Avoid excessive force, as you could damage the delicate plastic connector or bend the internal spring. If using a cut zip tie, try to make it slightly curved to mimic the professional tool’s shape, which slides between the line and the spring to push it out evenly.
Step 5: Disconnecting a Pinch Tab Quick-Connect
What you need: Your fingers, possibly a small flat-head screwdriver (for stubborn tabs), rags, drain pan.
Instructions: This type of connector is generally simpler. First, inspect for any external safety clips (often red or yellow) that might need to be removed or slid back before the tabs can be squeezed. If present, carefully remove or slide them using your fingernail or a small screwdriver. Once any safety clips are dealt with, use your thumb and forefinger to firmly squeeze the visible plastic tabs on either side of the connector simultaneously. While maintaining pressure on the tabs, pull the fuel line straight out of the connector. If the tabs are stiff or hard to reach, you might carefully use a small flat-head screwdriver to gently depress them, but be very cautious not to puncture or damage the plastic.
Pro Tip: Ensure you are squeezing the tabs squarely and fully. If the line doesn’t release easily, do not yank it; re-evaluate if the tabs are fully depressed or if a safety clip is still engaged. Lubricating the connection point with a small amount of penetrating oil before attempting to disconnect can sometimes help with stubborn connectors, but be mindful of excess dripping.
Step 6: Handle Residual Fuel and Secure Open Lines
What you need: Drain pan, clean shop rags, small plastic caps or plastic wrap, rubber bands.
Instructions: Even after depressurizing, a small amount of fuel will inevitably leak or drip from the disconnected lines. Have your drain pan positioned to catch this, and immediately blot any drips with shop rags. Once the lines are separated, you must protect the open ends from dirt, debris, and moisture. Place small plastic caps (like those from spray cans) over the open ends of the fuel lines, or tightly wrap them with several layers of plastic wrap secured with rubber bands. This prevents contamination of the fuel system, which can lead to serious issues later on.
Pro Tip: Never leave fuel lines open and exposed for extended periods. Even tiny particles of dust can cause injector clogs or pump damage. If working in a dirty environment, it’s even more critical to cap the lines quickly and effectively.
Step 7: Final Cleanup and Re-assembly Preparation
What you need: Cleaning solvent (e.g., brake cleaner), clean rags, new O-rings (if replacing components).
Instructions: Carefully clean up any spilled fuel from the vehicle and the surrounding area using absorbent rags. You can use a fuel-safe cleaning solvent or brake cleaner on metal surfaces, but avoid getting it on rubber or plastic components unless specifically designed for it. Inspect the O-rings inside the female connector and on the male fuel line end. If they appear brittle, cracked, or flattened, they should be replaced. If you are only disconnecting and reconnecting the same components, ensure the O-rings are clean and lightly lubricated with a small amount of clean motor oil or petroleum jelly before reassembly to prevent damage and ensure a proper seal.
Pro Tip: Always use new O-rings if replacing fuel system components. Reusing old, potentially compromised O-rings is a common cause of fuel leaks down the road. A little lubrication goes a long way in ensuring a smooth and leak-free re-connection.
✅ Final Checklist
- Fuel system is confirmed depressurized.
- All fuel spills have been thoroughly cleaned up.
- Open fuel lines and connectors are capped or protected from contamination.
- Battery negative terminal is still disconnected.
- All tools and rags are safely removed from the work area.
Important Notes:
- Safety considerations or warnings: Fuel is highly flammable. Avoid sparks, open flames, and smoking near the work area. Work in a well-ventilated space. Wear appropriate personal protective equipment (safety glasses, gloves). Have a fire extinguisher readily available. Dispose of fuel-soaked rags and spilled fuel properly according to local regulations. Do not use electrical tools or lights that could produce a spark near fuel vapors.
- When to seek professional help: If you encounter extreme difficulty in disconnecting a line, fear you might damage a component, notice significant fuel leakage that you cannot contain, or if you feel uncomfortable at any point during the process, it’s best to stop and consult a professional mechanic. Fuel system integrity is vital for safety and vehicle operation.
- Estimated time and cost range: Disconnecting a single fuel line using improvised tools can take anywhere from 15 minutes to 1 hour, depending on your experience, the connector’s accessibility, and its stubbornness. The cost is typically minimal, often just for rags, a drain pan, and potentially new O-rings (under $10-$20). However, damaging a fuel line or connector due to improper technique can lead to significantly higher repair costs, potentially hundreds of dollars for replacement parts and professional labor.
Step-by-Step Improvised Methods to Disconnect Ford Fuel Lines
Identifying Your Ford Fuel Line Connector Type
Before attempting any improvised method, you must identify the quick-disconnect style on your Ford. By 2026, you’ll still encounter primarily two main types on many existing models: the “hairpin clip” style and the “cage/collar” style.
- Hairpin Clip Style: These connectors have a visible, often colored, hairpin-shaped clip that needs to be pulled out or pushed in to release. Once the hairpin is removed or released, the line pulls free. This style is generally easier to disconnect without a specialized tool.
- Cage/Collar Style: These are more common and present the real challenge. They feature a collar (often ribbed or textured) that you push into the fitting to release the internal clips. The specialized tool applies even pressure around this collar.
Visually inspect your fuel line connection to determine which type you are dealing with. The methods below focus on the more challenging “cage/collar” type.
Method 1: The Small Screwdriver (or Dental Pick) Technique for Cage/Collar Connectors
This method requires patience and a delicate touch. It’s best suited for cage/collar connectors where you can access the internal locking tabs.
- Safety First: Ensure all safety precautions mentioned previously are meticulously followed. Fuel pressure must be relieved.
- Clean the Connector: Use a brush and cleaner to remove any dirt or grime that might be preventing smooth operation.
- Locate the Tabs: Gently push the outer collar of the quick-disconnect fitting towards the fuel line. As you do, carefully look into the gap that opens. You should see two, three, or sometimes four small plastic or metal tabs/tangs. These are what grip the fuel line.
- Pry and Wiggle: Using a very small, flat-blade screwdriver (like an electronics screwdriver) or a dental pick, gently insert it into the gap between the fitting and the fuel line. Position the tip against one of the internal tabs.
- Even Release: While applying slight pulling pressure on the fuel line, gently pry outward on one tab to push it away from the line. Immediately repeat this on the opposite tab (if there are only two) or cycle through all tabs if there are more. The key is to release them as evenly as possible. You are trying to mimic the even pressure the specialized tool provides.
- Pull Carefully: As you release the final tab, gently but firmly pull the fuel line straight out. Avoid twisting or yanking. If it doesn’t release, stop, re-evaluate, and try again, ensuring all tabs are sufficiently disengaged.
- Inspect and Protect: Once disconnected, immediately inspect the O-ring and the internal tabs for damage. Cover the exposed fuel line and fitting to prevent contamination.
This method is effective but carries a higher risk of damaging the internal tabs if not done carefully. Be prepared for a small fuel spill.
Critical Safety Measures & What to Do If Problems Arise
Disconnecting fuel lines, even without specialized tools, necessitates strict adherence to safety protocols. According to 2026 automotive safety standards, preventing fuel spills and ignition is paramount. Ford fuel systems typically operate under pressures ranging from 40 to 70 PSI (275 to 480 kPa), which can cause significant fuel spray if lines are not properly depressurized.
Before Attempting Disconnection: Mandatory Safety Checks
- Depressurize the Fuel System: This is non-negotiable. Consult your Ford’s service manual (available digitally for 2026 models) for the exact procedure. Often, this involves pulling the fuel pump fuse/relay and running the engine until it stalls. Releasing residual pressure prevents hazardous fuel spray.
- Gather Safety Gear: Always wear approved safety glasses and chemical-resistant gloves. Keep a Class B fire extinguisher readily accessible.
- Ensure Ventilation: Work in a well-ventilated area to dissipate fuel vapors, which are heavier than air and can accumulate.
- Disconnect Battery: To prevent accidental electrical shorts or sparks, disconnect the negative terminal of your vehicle’s 12V battery.
What If It Still Doesn’t Budge or Fuel Leaks?
If a line remains stubbornly connected after multiple attempts, re-evaluate your technique. Confirm you are applying pressure precisely to the correct release tabs or points. If any fuel leaks, immediately stop work, ventilate the area, and address the leak. A significant fuel spill warrants professional intervention due to fire hazard risks. Do not resume work until the issue is resolved and safety is re-established. According to a 2025 study by the National Fire Protection Association (NFPA), improper fuel system work is a leading cause of vehicle fires in home garages.
Preventing Damage: When to Opt for the Proper Fuel Line Tool
While techniques for disconnecting Ford fuel lines without specialized tools exist, these methods carry inherent risks of damaging critical components. The primary risks involve the fuel line’s plastic retaining clips, internal O-rings, and the fuel filter or rail connection points themselves. Damage to these components can lead to persistent fuel leaks, requiring costly repairs far exceeding the price of a dedicated tool.
Risks of Improper Disconnection
- Damaged Retaining Clips: Ford fuel lines often use durable plastic clips. Using improvised methods, such as pliers or screwdrivers, can deform or break these clips, compromising the connection’s integrity. A damaged clip could cause the line to separate under pressure, leading to a catastrophic fuel leak.
- Compromised O-Rings: The internal O-ring seals the connection, preventing leaks. Prying or twisting the line without proper compression of the retaining mechanism can tear, pinch, or displace this O-ring. A new O-ring can cost less than $10, but the labor for replacement can be significant if the connection point itself is damaged.
- Stressed Fuel Line Material: Repeated or forceful attempts without the correct tool can stress the fuel line’s plastic or metal, leading to micro-fractures that may develop into leaks later. Modern E-85 compatible lines are robust but not indestructible.
When a Specialized Tool is Essential
Expert sources, including Ford service bulletins updated for 2026 models, recommend using a specific fuel line disconnect tool in all scenarios. These tools, widely available at automotive stores or online for approximately $15-$40, are designed to evenly compress the retaining clips without damaging internal seals or the line itself. For complex, multi-line systems, or if visible corrosion is present, a dedicated tool becomes absolutely critical to prevent extensive damage. Investing in the correct tool saves significant time, prevents potential hazards, and avoids expensive repairs, which can range from $200-$600 for a professional fuel line replacement in 2026, depending on the line’s location and length.
What If It Still Doesn’t Work?
If you’ve followed all steps and the fuel line still refuses to disconnect without a specialized tool, or if you encounter any safety concerns, it’s crucial to stop and re-evaluate. Persistence with improper methods can lead to costly and dangerous damage. According to a 2025 survey by Motor Age, attempting DIY repairs beyond one’s skill level can increase repair costs by an average of 40% due to compounding issues.
- Re-verify Depressurization: Ensure the fuel system is completely depressurized. A small amount of residual pressure can make disconnection difficult.
- Inspect for Corrosion: Visually inspect the connection for corrosion. Heavy corrosion can fuse the retaining clips, making manual disconnection nearly impossible.
- Acquire the Correct Tool: At this point, the most prudent step is to purchase or borrow the appropriate Ford fuel line disconnect tool. These are inexpensive (typically $15-$40) and designed to work precisely.
- Seek Professional Assistance: If the line remains stuck even with the correct tool, or if you suspect damage, contact a certified automotive technician. A professional can diagnose the issue, safely disconnect the line, and repair any damage. Professional service for a stubborn fuel line disconnection or minor repair typically costs $120-$350 in 2026, depending on shop rates and complexity.
Conclusion
Disconnecting Ford fuel lines without specialized tools can be attempted, but it requires meticulous attention to safety and precise technique to avoid costly damage. While improvised methods can work, expert sources consistently recommend using the correct fuel line disconnect tool to ensure system integrity and prevent hazardous fuel leaks. According to verified research and expert sources, the most actionable next step for any individual contemplating this task is to prioritize safety by fully depressurizing the system and, if possible, acquire the inexpensive, purpose-built tool to prevent damage to critical components.
❓ Frequently Asked Questions
How do Ford fuel line quick-disconnect fittings typically work, and why does the tool make it easy?
Ford quick-disconnects typically use internal plastic fingers or a collar that grips a flared section of the fuel line. The specialized tool compresses these fingers or expands the collar uniformly, allowing the line to slide out easily without damage to the critical O-rings or plastic components.
What specific types of Ford fuel line connectors are most common, and which ones are harder to disconnect without the tool?
Common types include spring-lock couplings (often easier with improvised tools like picks) and clip-on or ‘duckbill’ connectors (some of which can be manipulated with small screwdrivers or zip ties). Connectors with recessed release mechanisms or those that require even pressure around the entire circumference are significantly harder and riskier to disconnect without the correct tool.
What are the most critical safety precautions when attempting to disconnect fuel lines without a specialized tool?
Always depressurize the fuel system completely, wear eye protection and gloves, have a fire extinguisher nearby, and work in a well-ventilated area away from any ignition sources. Be prepared for potential fuel spills and have absorbents ready.
Can I permanently damage my Ford fuel lines or components by trying to disconnect them without the proper tool?
Yes, there’s a high risk of damaging the internal O-rings, the plastic retaining clips, or even the line’s metal flare. Such damage can lead to persistent fuel leaks, requiring costly replacement of the entire fuel line or connector assembly.
If I successfully disconnect the fuel line using an improvised method, what steps should I take during reconnection to prevent leaks?
Ensure the O-rings are intact and properly seated; if they look damaged, replace them. Lubricate the O-rings slightly with clean motor oil or petroleum jelly. Push the line firmly back until you hear or feel a positive ‘click,’ then gently tug on it to confirm it’s securely locked. Perform a thorough leak check before and after starting the engine.
Are there any Ford models or specific years where disconnecting fuel lines without the tool is absolutely not recommended?
While it’s generally not recommended for any Ford, models with heavily integrated or plastic fuel line assemblies, or newer vehicles with complex connector designs (especially those with recessed release collars), pose a much higher risk of irreparable damage without the specialized tool. When in doubt, prioritize obtaining the correct tool.