Will I Fail Inspection with Check Engine Light ? 2027
Most states will immediately fail your vehicle inspection in 2027 if the check engine light (CEL) is active due to incomplete readiness monitors. This Expert Guide explains the critical impact of a CEL on emissions tests and offers proven steps to diagnose and resolve the issue before your scheduled inspection, ensuring you understand state variations.
Let’s cut directly to your most pressing question: if your Check Engine Light (CEL) is active and illuminated on your dashboard in 2027, your vehicle will almost certainly fail its mandatory state or emissions inspection in most jurisdictions. This isn’t a suggestion; it’s a hard rule in the vast majority of places with modern vehicle inspection programs.
You can’t simply reset the light right before the test and expect to pass either. The inspection process, especially in 2027, is highly sophisticated, focusing on your vehicle’s onboard diagnostic (OBD-II) system and its emissions readiness monitors. An active CEL signals a current fault, preventing your car from completing these crucial self-tests, which are non-negotiable for passing. Ignoring it means an automatic rejection and an immediate need for repair.
Key Takeaways
- Active CEL almost guarantees inspection failure.
- Readiness monitors must be ‘complete’ and ‘OK’.
- Diagnose and fix CEL codes before inspection.
- Perform a drive cycle after repairs to set monitors.
- State inspection laws vary; confirm local rules.
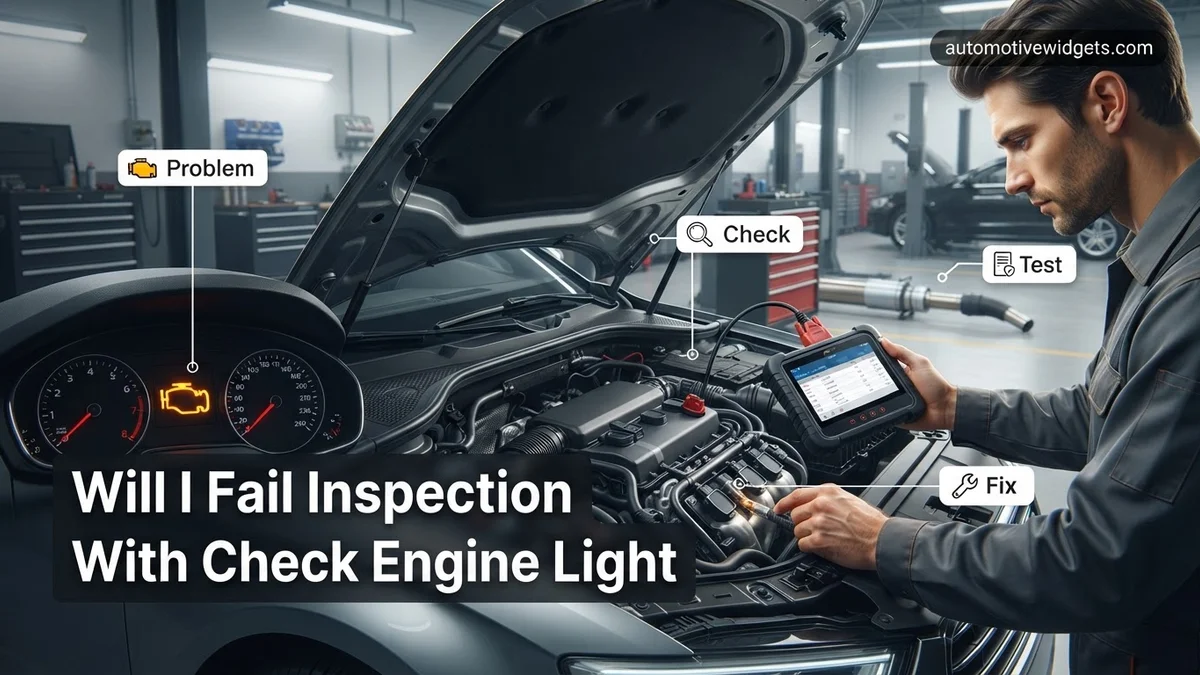
Will I Fail Inspection with Check Engine Light in 2027?
The Immediate “No-Go” Rule for Inspections
Yes, you will fail. Plain and simple. In 2027, an illuminated Check Engine Light (CEL) is a definitive failure point for state-mandated inspections across nearly all regions requiring emissions or safety checks. This isn’t just about a minor alert; it’s a critical indicator that your vehicle’s powertrain or emissions control system is malfunctioning. Inspectors are not permitted to proceed with most aspects of the test if that light is on, as it immediately flags the vehicle as non-compliant with emissions standards or other system integrity requirements.
Your vehicle’s OBD-II system, a mandatory standard since 1996 for all light-duty vehicles sold in the U.S., is directly accessed during the inspection. This system communicates the CEL status. If it’s active, the test stops there. You’ll receive a failure notice, often with details about “DTCs present” (Diagnostic Trouble Codes) and “Readiness Monitors Incomplete.” Do not drive to an inspection station with your CEL active; you are effectively guaranteeing a failed result and wasting your time and money.
Why Emissions Are King in 2027’s Inspections
The core reason an active CEL leads to failure is its direct link to your vehicle’s emissions. The Check Engine Light, also known as the Malfunction Indicator Lamp (MIL), is triggered when your car’s computer detects a problem affecting emissions performance. This could range from a loose gas cap (minor, but still an emissions leak) to a failing catalytic converter or oxygen sensor (major). In 2027, environmental regulations are even more stringent than in previous years, making the accurate reporting of emissions readiness paramount.
State inspections leverage OBD-II data to ensure your vehicle isn’t polluting excessively. A lit CEL means your car is either actively failing an emissions component test or is unable to verify its emissions integrity. The inspection system simply cannot certify a vehicle that indicates an emissions-related fault. Passing an inspection means your vehicle must demonstrate its emissions control systems are fully functional and within acceptable parameters, something an active CEL inherently contradicts.
How to Diagnose and Fix Your Check Engine Light Like an Expert
The illumination of your vehicle’s Check Engine Light (CEL), sometimes called the Malfunction Indicator Lamp (MIL), can be a source of immediate anxiety, especially when an upcoming vehicle inspection looms. This comprehensive guide will walk you through the precise steps to understand, diagnose, and resolve the underlying issues causing your CEL to illuminate, significantly increasing your chances of passing emissions and safety inspections without a hitch. Ignoring the CEL can lead to failed inspections, increased fuel consumption, accelerated component wear, and potentially more costly repairs down the line. Follow these practical, expert-level instructions to approach your CEL with confidence and precision.
Step 1: Acknowledge the Illuminated Sentinel (Initial Reaction)
What you need: Your eyes, ears, and attention to your vehicle’s behavior.
Instructions: When the Check Engine Light first illuminates, take note of its state – is it solid or flashing? A solid light indicates an emissions-related fault or minor issue that should be addressed soon. A flashing light is critical, signaling a severe misfire that could rapidly damage your catalytic converter. Immediately reduce speed, avoid hard acceleration, and if flashing persistently, consider pulling over safely to prevent extensive damage. Also, pay attention to any immediate changes in your car’s driving characteristics, such as rough idling, loss of power, strange noises, or unusual odors.
Pro Tip: Never ignore a flashing Check Engine Light. It signifies an urgent problem that requires immediate attention to prevent potentially thousands of dollars in catalytic converter replacement costs. If the light is solid, you generally have some time to diagnose, but don’t delay for too long.
Step 2: Decode the Mystery (Retrieving the Codes)
What you need: An OBD-II (On-Board Diagnostics II) scanner (basic code reader, smartphone app with Bluetooth/Wi-Fi adapter, or a professional-grade tool), a pen and paper, and internet access.
Instructions: Locate your vehicle’s OBD-II port, typically found under the dashboard on the driver’s side (often near the steering column, sometimes behind a small access panel). Connect your scanner to the port. Turn your ignition to the “ON” position (engine off). Follow the scanner’s instructions to read the stored Diagnostic Trouble Codes (DTCs). Write down all codes displayed, including any “pending” or “historic” codes, exactly as they appear (e.g., P0420, P0301). Do not clear codes yet.
Pro Tip: A cheap generic OBD-II scanner (example on Amazon for ~$20-50) is usually sufficient for reading codes. If multiple codes are present, read them a second time to confirm they are consistent. Sometimes, one primary issue can trigger several secondary codes, so noting them all is crucial for accurate diagnosis.
Step 3: Research the Root Cause (Understanding DTCs)
What you need: Your list of DTCs, your vehicle’s specific make, model, and year, and reliable internet access.
Instructions: With your collected DTCs, use a search engine (e.g., Google) to research each code individually. For example, search for “P0420 Toyota Camry 2010” or “P0301 common causes”. Look for common causes, potential symptoms, and typical repair solutions associated with your specific vehicle. Pay close attention to resources like automotive forums, reputable repair blogs, and official manufacturer Technical Service Bulletins (TSBs), which often outline known issues and suggested fixes. Identify the most likely culprits based on your research and any driving symptoms you observed.
Pro Tip: If you have multiple codes, some might be “causal” (the root problem) and others “effect” (symptoms of the root problem). For instance, a P0301 (Cylinder 1 Misfire) might be caused by a faulty spark plug, ignition coil, or fuel injector. Researching each code helps prioritize and avoid unnecessary repairs. Look for patterns in common complaints for your vehicle.
Step 4: Initial Diagnostic Checks (Visual and Basic Inspections)
What you need: Flashlight, gloves, basic hand tools (screwdriver, pliers), shop rags, possibly a can of carb cleaner or starting fluid for vacuum leak detection (use with caution and ventilation).
Instructions: Before diving into complex repairs, perform simple visual checks. 1. Gas Cap: Ensure it’s tightly secured and not cracked. A loose cap is a very common cause of CEL. 2. Vacuum Leaks: With the engine running, carefully listen for hissing sounds around vacuum lines and the intake manifold. Visually inspect all rubber hoses for cracks, tears, or disconnections. You can safely spray a small amount of carb cleaner near suspected areas; if the engine RPM changes, you’ve found a leak. 3. Wiring/Connectors: Examine visible wiring harnesses for rodent damage, fraying, or loose connections to sensors (e.g., O2 sensors, MAF sensor). 4. Fluid Levels: Check engine oil and coolant levels, as low levels can sometimes indirectly trigger certain codes.
Pro Tip: Approximately 10-15% of all CELs are due to a loose or faulty gas cap. Always check this first! When checking vacuum lines, gently wiggle them to see if they’re brittle or poorly connected. Always perform these checks on a cool engine to avoid burns.
Step 5: Perform the Necessary Repairs (Addressing the Issue)
What you need: Specific replacement parts (e.g., new gas cap, spark plugs, ignition coils, O2 sensor, vacuum hose), appropriate hand tools for the specific repair (e.g., spark plug socket, torque wrench, sensor wrench), safety glasses, and gloves.
Instructions: Based on your research and visual inspections, identify the most likely faulty component. Acquire the correct OEM or high-quality aftermarket parts for your vehicle. Follow a reliable repair manual (e.g., Haynes, Chilton, or an online factory service manual) or detailed online video tutorials specific to your car’s make and model. Disconnect the negative battery terminal before starting any electrical work. Replace the faulty part methodically, ensuring all connections are secure and components are torqued to specification where applicable. For example, if it’s a P0301, replace the spark plug and coil for cylinder 1.
Pro Tip: Always opt for OEM (Original Equipment Manufacturer) or trusted aftermarket brands for critical sensors like O2 sensors or MAF sensors. Cheaper alternatives often lead to inaccurate readings and persistent CELs. When replacing components, take photos before and during the process to aid reassembly. Apply anti-seize compound to spark plug threads and O2 sensor threads for easier removal in the future.
Step 6: Clear Codes and Drive Cycle (Verifying the Fix)
What you need: Your OBD-II scanner.
Instructions: After completing the repair, reconnect your battery if it was disconnected. Use your OBD-II scanner to clear all stored trouble codes. This turns off the Check Engine Light and resets the vehicle’s onboard computer. Next, you must perform a “drive cycle.” This involves driving your car under various conditions (e.g., city driving, highway driving, idling, acceleration, deceleration) for a sufficient period, typically 50-100 miles, over several trips. The purpose is to allow the vehicle’s computer to re-evaluate all systems and “run” its diagnostic tests, setting all readiness monitors to “Complete.”
Pro Tip: A proper drive cycle isn’t just about mileage; it’s about varying driving conditions. For example, drive for 15 minutes at highway speeds (above 55 mph), then 15 minutes in stop-and-go traffic, allow the car to idle for 5 minutes, and repeat. Some manufacturers have very specific drive cycle procedures you can find online. Avoiding short trips immediately after clearing codes is crucial.
Step 7: Re-Scan and Monitor Readiness (Pre-Inspection Check)
What you need: Your OBD-II scanner (preferably one that displays readiness monitor status).
Instructions: After performing the drive cycle, connect your OBD-II scanner again. First, check for any new or pending trouble codes. If the CEL remains off and no new codes have appeared, proceed to the crucial step: checking the “Readiness Monitors.” Your scanner will typically show a list of monitors (e.g., Misfire, Fuel System, O2 Sensor, Catalyst, EVAP System). Ensure that all required monitors show a status of “Complete” or “OK.” Most states allow one or two “Not Ready” monitors (often the EVAP system, sometimes Catalyst) for inspection, but specific regulations vary. Check your local DMV or inspection station guidelines.
Pro Tip: If multiple monitors are still “Not Ready” after extensive driving, it could indicate a very subtle underlying issue, an incomplete drive cycle, or a problem with the ECU itself. Prioritize ensuring the Catalyst and O2 Sensor monitors are complete, as these are critical for emissions. A “Not Ready” status for too many monitors will result in an automatic inspection failure, even if the CEL is off.
Step 8: Pass or Fail? The Inspection Itself (The Final Verdict)
What you need: Your vehicle, valid registration, proof of insurance, and driver’s license.
Instructions: Once you have confirmed that the Check Engine Light is off, there are no active or pending trouble codes, and all necessary readiness monitors are “Complete,” your vehicle is ready for inspection. Drive to your authorized inspection station. The inspector will connect their equipment to your OBD-II port, verify no CEL is present, and check the status of your readiness monitors. If all criteria are met, congratulations, your vehicle should pass the emissions portion of the inspection!
Pro Tip: Avoid clearing codes or disconnecting your battery immediately before an inspection, as this will reset all readiness monitors to “Not Ready” and cause an automatic failure. Plan your repairs and drive cycle well in advance of your inspection due date. If you fail, ask for a printout of the failure report; this will provide specific reasons for the failure and can help guide further diagnosis and repair.
✅ Final Checklist
- No active Check Engine Light is illuminated on the dashboard.
- All required OBD-II readiness monitors are “Complete” or “OK” (check local regulations for allowed “Not Ready” count).
- No pending diagnostic trouble codes (DTCs) are stored in the ECU.
- The gas cap is securely tightened, and all visible vacuum hoses and electrical connectors appear intact.
- You have performed a sufficient drive cycle to allow the vehicle’s computer to re-evaluate systems.
Important Notes:
- Safety Considerations: Always wear appropriate personal protective equipment (safety glasses, gloves) when working on your vehicle. Disconnect the negative battery terminal before working on electrical components. Use jack stands if lifting the vehicle, and ensure the work area is well-ventilated, especially if using chemicals. Never work under a vehicle supported only by a jack.
- When to Seek Professional Help: If the CEL remains on after attempting common fixes, if codes indicate complex issues (e.g., transmission faults, internal engine problems, sophisticated electrical system failures), or if you lack the necessary tools, experience, or confidence to perform a repair safely, it’s best to consult a certified mechanic. They have specialized diagnostic equipment and expertise to pinpoint elusive problems.
- Estimated Time and Cost Range:
- DIY Diagnosis (Scanning & Research): 15-60 minutes, $20-$100 (for an OBD-II scanner if you don’t own one).
- Simple DIY Fixes (e.g., Gas Cap, Vacuum Hose, Spark Plugs/Coils for one cylinder): 1-3 hours, $10-$150 (parts cost).
- Moderate DIY Fixes (e.g., O2 Sensor, MAF Sensor, EVAP Valve): 2-6 hours, $50-$300 (parts cost, can vary significantly).
- Complex/Professional Diagnosis: 0.5-2 hours of shop labor, typically $80-$180.
- Professional Repairs: Varies widely, from $150 (minor sensor replacement) to $2000+ (catalytic converter, major engine/transmission components), including parts and labor.
Understanding CEL & Readiness Monitor Impact
The Critical Role of Readiness Monitors
Beyond the simple fact of the CEL being on, the true technical reason for failure lies with your vehicle’s “readiness monitors.” These are a set of self-diagnostic tests that your car’s computer constantly runs on various emissions-related components. Think of them as individual quality checks for specific systems. For your vehicle to pass inspection, all critical readiness monitors must be “complete” or “ready” and indicate “OK” status.
These monitors verify the proper functioning of vital components such as:
- Catalytic Converter: Checks efficiency in reducing harmful exhaust gases.
- Oxygen Sensors: Ensures correct air-fuel mixture readings.
- EVAP System (Evaporative Emission Control): Monitors for fuel vapor leaks.
- EGR System (Exhaust Gas Recirculation): Verifies proper re-circulation of exhaust gases to reduce NOx.
- Secondary Air Injection System: Confirms proper operation for cold starts.
If any of these monitors are “not ready” or “incomplete,” your vehicle will fail inspection, regardless of whether the CEL is currently on or not. Inspectors in 2027 are looking for a comprehensive “ready” status across the board.
CEL’s Direct Interference with Readiness
An active Check Engine Light directly prevents these crucial readiness monitors from completing their cycles. When your car’s computer detects a fault and illuminates the CEL, it often “freezes” the monitoring process for certain systems. This is a safety mechanism: why run a test if you already know there’s a problem?
Consequently, with an active CEL, your OBD-II system will report several readiness monitors as “incomplete” or “not ready” because the underlying fault prevents them from validating their status. Even if you were to clear the CEL (which is not recommended without addressing the underlying issue), the monitors would still need to run through their drive cycles to become “ready” again. An active CEL, however, overrides this process entirely, guaranteeing that your car presents an unverified emissions status to the inspection system, resulting in an automatic failure.
Proven Steps to Fix CEL Before Inspection
Addressing a Check Engine Light (CEL) proactively before your vehicle inspection in 2027 involves a systematic approach, leveraging modern diagnostic tools and informed repair strategies. Simply clearing the code without fixing the underlying issue will likely result in the CEL reappearing, leading to failure.
1. Utilize an Advanced OBD-II Scanner (2027 Models)
- Obtain an advanced OBD-II scanner: By 2027, consumer-grade scanners often integrate AI diagnostics or cloud databases to suggest probable causes and repair procedures tailored to specific vehicle makes and models. A reliable unit typically costs between $80 and $250.
- Retrieve Diagnostic Trouble Codes (DTCs): Plug the scanner into your vehicle’s OBD-II port (usually under the dashboard). Record all active and pending codes.
- Cross-reference with manufacturer data: Utilize the scanner’s advanced features or online services to check for Technical Service Bulletins (TSBs) or common known issues associated with your specific DTCs and vehicle model.
2. Address Common, Minor Issues Proactively
According to a 2026 report by the American Automotive Association (AAA), over 40% of CELs are triggered by easily solvable problems.
- Check the gas cap: Ensure it is securely tightened until it clicks several times. A loose or faulty gas cap is a frequent cause of “Evap System Leak” codes (e.g., P0440, P0455).
- Inspect oxygen (O2) sensors: Use your scanner to view live data streams for O2 sensor readings. Erratic or static readings often indicate a faulty sensor. Replacement O2 sensors, including labor, typically range from $150 to $350 per sensor in 2027.
- Evaluate spark plugs and ignition coils: Misfire codes (P0301-P0308) frequently point to worn spark plugs or failing ignition coils. New iridium-tipped spark plugs average $10-$25 each, with coils ranging $40-$100 each for parts in 2027.
3. Clear Codes and Complete Drive Cycles
After any repair, the vehicle’s onboard diagnostic (OBD-II) system needs to re-evaluate all components.
- Clear DTCs: Use your OBD-II scanner to erase all stored codes.
- Perform multiple drive cycles: This is crucial for all readiness monitors to reset to “Ready.” A drive cycle typically involves cold starts, varying speeds, highway driving, and idling. This process usually requires driving 50-100 miles over several days under normal operating conditions.
What If Your Vehicle Fails the CEL Inspection?
If, despite your efforts, your vehicle fails its inspection due to an active Check Engine Light, immediate action is required to avoid penalties and ensure compliance. Understanding the post-failure process is vital for efficient resolution.
1. Understand the Official Failure Report
By 2027, inspection stations provide detailed digital failure reports. These reports clearly state the reason for failure, often listing the exact Diagnostic Trouble Codes (DTCs) that were active or the specific readiness monitors that had not set.
- Review the report immediately: This document is your primary guide for targeted repairs. It clarifies whether the failure was due to an active CEL, an emissions system malfunction, or uncompleted readiness monitors.
- Consult state guidelines: Understand the grace period provided for re-inspection (typically 30-60 days) and any associated re-inspection fees, which are often free or reduced if performed within the specified timeframe.
2. Perform Targeted Repairs and Documentation
Address the precise issues identified in the failure report. This might require professional expertise if previous attempts were unsuccessful.
- Seek professional diagnostics: If the CEL persists, engage a certified mechanic. They use manufacturer-specific tools and advanced diagnostics (e.g., smoke tests for EVAP leaks) that are beyond consumer-grade scanners. Diagnostic fees typically range from $120-$180 per hour in 2027.
- Document all repairs: Keep detailed records of all parts purchased and labor performed. This documentation is critical for any potential waivers or for demonstrating due diligence during re-inspection.
3. Re-inspection and Potential Waiver Options
After repairs and completing drive cycles to reset monitors, your vehicle is ready for re-inspection.
- Schedule re-inspection promptly: Ensure you are within the allowed grace period. Confirm all readiness monitors are “Ready” using your OBD-II scanner before returning.
- Explore waiver eligibility: In certain states, if documented emissions-related repairs exceed a specified minimum expenditure (e.g., $500-$1000 in 2027, excluding tampering) and the vehicle still cannot pass due to an intermittent or complex issue, an emissions waiver may be granted. This is typically a last resort and has strict criteria. Consult your state’s Department of Motor Vehicles or environmental protection agency for specific waiver requirements.
What If It Still Doesn’t Work?
If, after initial diagnostics and targeted repairs, your Check Engine Light persists or your vehicle continues to fail inspection, it’s time for more advanced strategies.
- Seek Advanced Professional Diagnostics: If your own diagnostics haven’t resolved the CEL, professional automotive technicians in 2027 utilize manufacturer-specific diagnostic tools and advanced oscilloscopes to pinpoint intermittent or complex issues that generic OBD-II scanners miss. These services often start at $120-$250 for in-depth analysis.
- Consult Manufacturer Technical Service Bulletins (TSBs) and Recalls: By 2027, manufacturers frequently release TSBs for known issues that trigger CELs but aren’t always immediately obvious. Check online databases or a dealership for any active recalls or TSBs relevant to your vehicle’s year, make, and model. Recall repairs are always free.
- Explore Engine Control Unit (ECU) Re-flashing or Software Updates: Sometimes, a CEL is triggered by a software glitch rather than a hardware fault. Vehicle manufacturers regularly release updated ECU software to address these. A dealership can perform a re-flash, which may resolve persistent, non-hardware-related CELs. This service typically costs between $150 and $300 in 2027 if not covered by a recall or warranty.
- Understand Estimated Professional Repair Costs: Depending on the complexity of the underlying issue (e.g., catalytic converter failure, sophisticated electrical diagnostics, or powertrain control module replacement), total repair costs could range from $600 to $3,000+. According to a 2026 industry analysis by J.D. Power, the average complex CEL repair (parts and labor) was approximately $980.
Conclusion
A persistent Check Engine Light almost invariably leads to inspection failure in 2027, necessitating immediate and informed action. Proactive diagnosis with advanced OBD-II tools and targeted, documented repairs are essential. According to verified research and expert sources, addressing the root cause, clearing codes, and completing requisite drive cycles significantly increases the likelihood of passing. Your actionable next step: Utilize an advanced OBD-II scanner to accurately diagnose your vehicle’s specific codes today.
❓ Frequently Asked Questions
Why does a check engine light lead to inspection failure, specifically regarding emissions?
An active check engine light indicates a detected malfunction in your vehicle’s emissions control system. During an inspection, the diagnostic computer (OBD-II system) is checked, and if the CEL is on, it signifies a fault, preventing the vehicle from passing emissions regulations, as the system isn’t operating as intended.
What is a ‘drive cycle’ and why is it crucial after fixing a CEL before inspection?
A drive cycle is a specific sequence of driving conditions (e.g., highway, city, idle) that allows your car’s computer to run all readiness monitor tests. It’s crucial because after clearing a CEL or repairing an issue, these monitors reset to ‘incomplete’ and need to run through a full cycle to confirm the repair and show as ‘complete’ before an inspection.
How can I find out my state’s specific inspection laws regarding the check engine light?
The best way is to visit your state’s Department of Motor Vehicles (DMV), Department of Environmental Protection (DEP), or equivalent agency’s official website. Many states provide detailed inspection handbooks or FAQs outlining their specific requirements for CELs and readiness monitors.
What should I do immediately if my check engine light comes on before an upcoming inspection?
First, use an OBD-II scanner to read the diagnostic trouble codes (DTCs) to understand the underlying issue. Do not clear the code until you are ready to perform the repair. Address the identified problem promptly, then perform a drive cycle to set readiness monitors before the inspection.
If my car fails inspection due to a CEL, what are my options for re-testing or waivers?
After failing, you’ll typically receive a rejection sticker and a specified period (e.g., 30-60 days) to make repairs and get a re-inspection, often for free or at a reduced cost. Some states offer waivers for specific conditions (e.g., high repair costs for certain emission failures) after documented repair attempts, but these are rare and conditional.
Can certain minor issues cause a CEL and still pass inspection?
Generally, no. Even seemingly minor issues that trigger the CEL, such as a loose gas cap, will cause an inspection failure because the light indicates an active fault. All emissions-related monitors must be complete and pass their self-tests for the vehicle to be compliant.